Introduction
Managing event RSVPs is a common challenge for event organizers, and providing instant confirmation tickets enhances the attendee experience while keeping you organized. In this tutorial, you’ll learn how to build an automated event ticketing system using Xano for backend logic and DocuGenerate for PDF generation. We’ll be working with Xano’s Events template from their marketplace, which provides a ready-to-use event management system with RSVP capabilities.
By the end of this tutorial, your system will automatically generate personalized PDF tickets when someone RSVPs to an event, complete with event details and attendee information. This automated approach eliminates manual ticket creation and ensures consistent, professional-looking tickets for all your events. The workflow you’ll create follows this process:
- An attendee fills out an RSVP form for an event through a demo application.
- The RSVP data is stored in your Xano database.
- A database trigger detects the new RSVP record.
- The trigger fetches the event details and generates a PDF ticket using DocuGenerate.
- The generated ticket is ready for distribution to the attendee.
The system can handle multiple events simultaneously, making it suitable for organizations managing several concurrent events.
Installing the Xano Events Template
Xano’s marketplace provides pre-built templates that you can install directly into your workspace. The Events template provides a complete event management system designed for collecting and managing event RSVPs. It includes functionality for posting new events with banner images, descriptions, and dates, as well as collecting RSVP information such as attendee names and email addresses.
To get started, navigate to the Marketplace page in your workspace and look for the Events template within Starter templates.
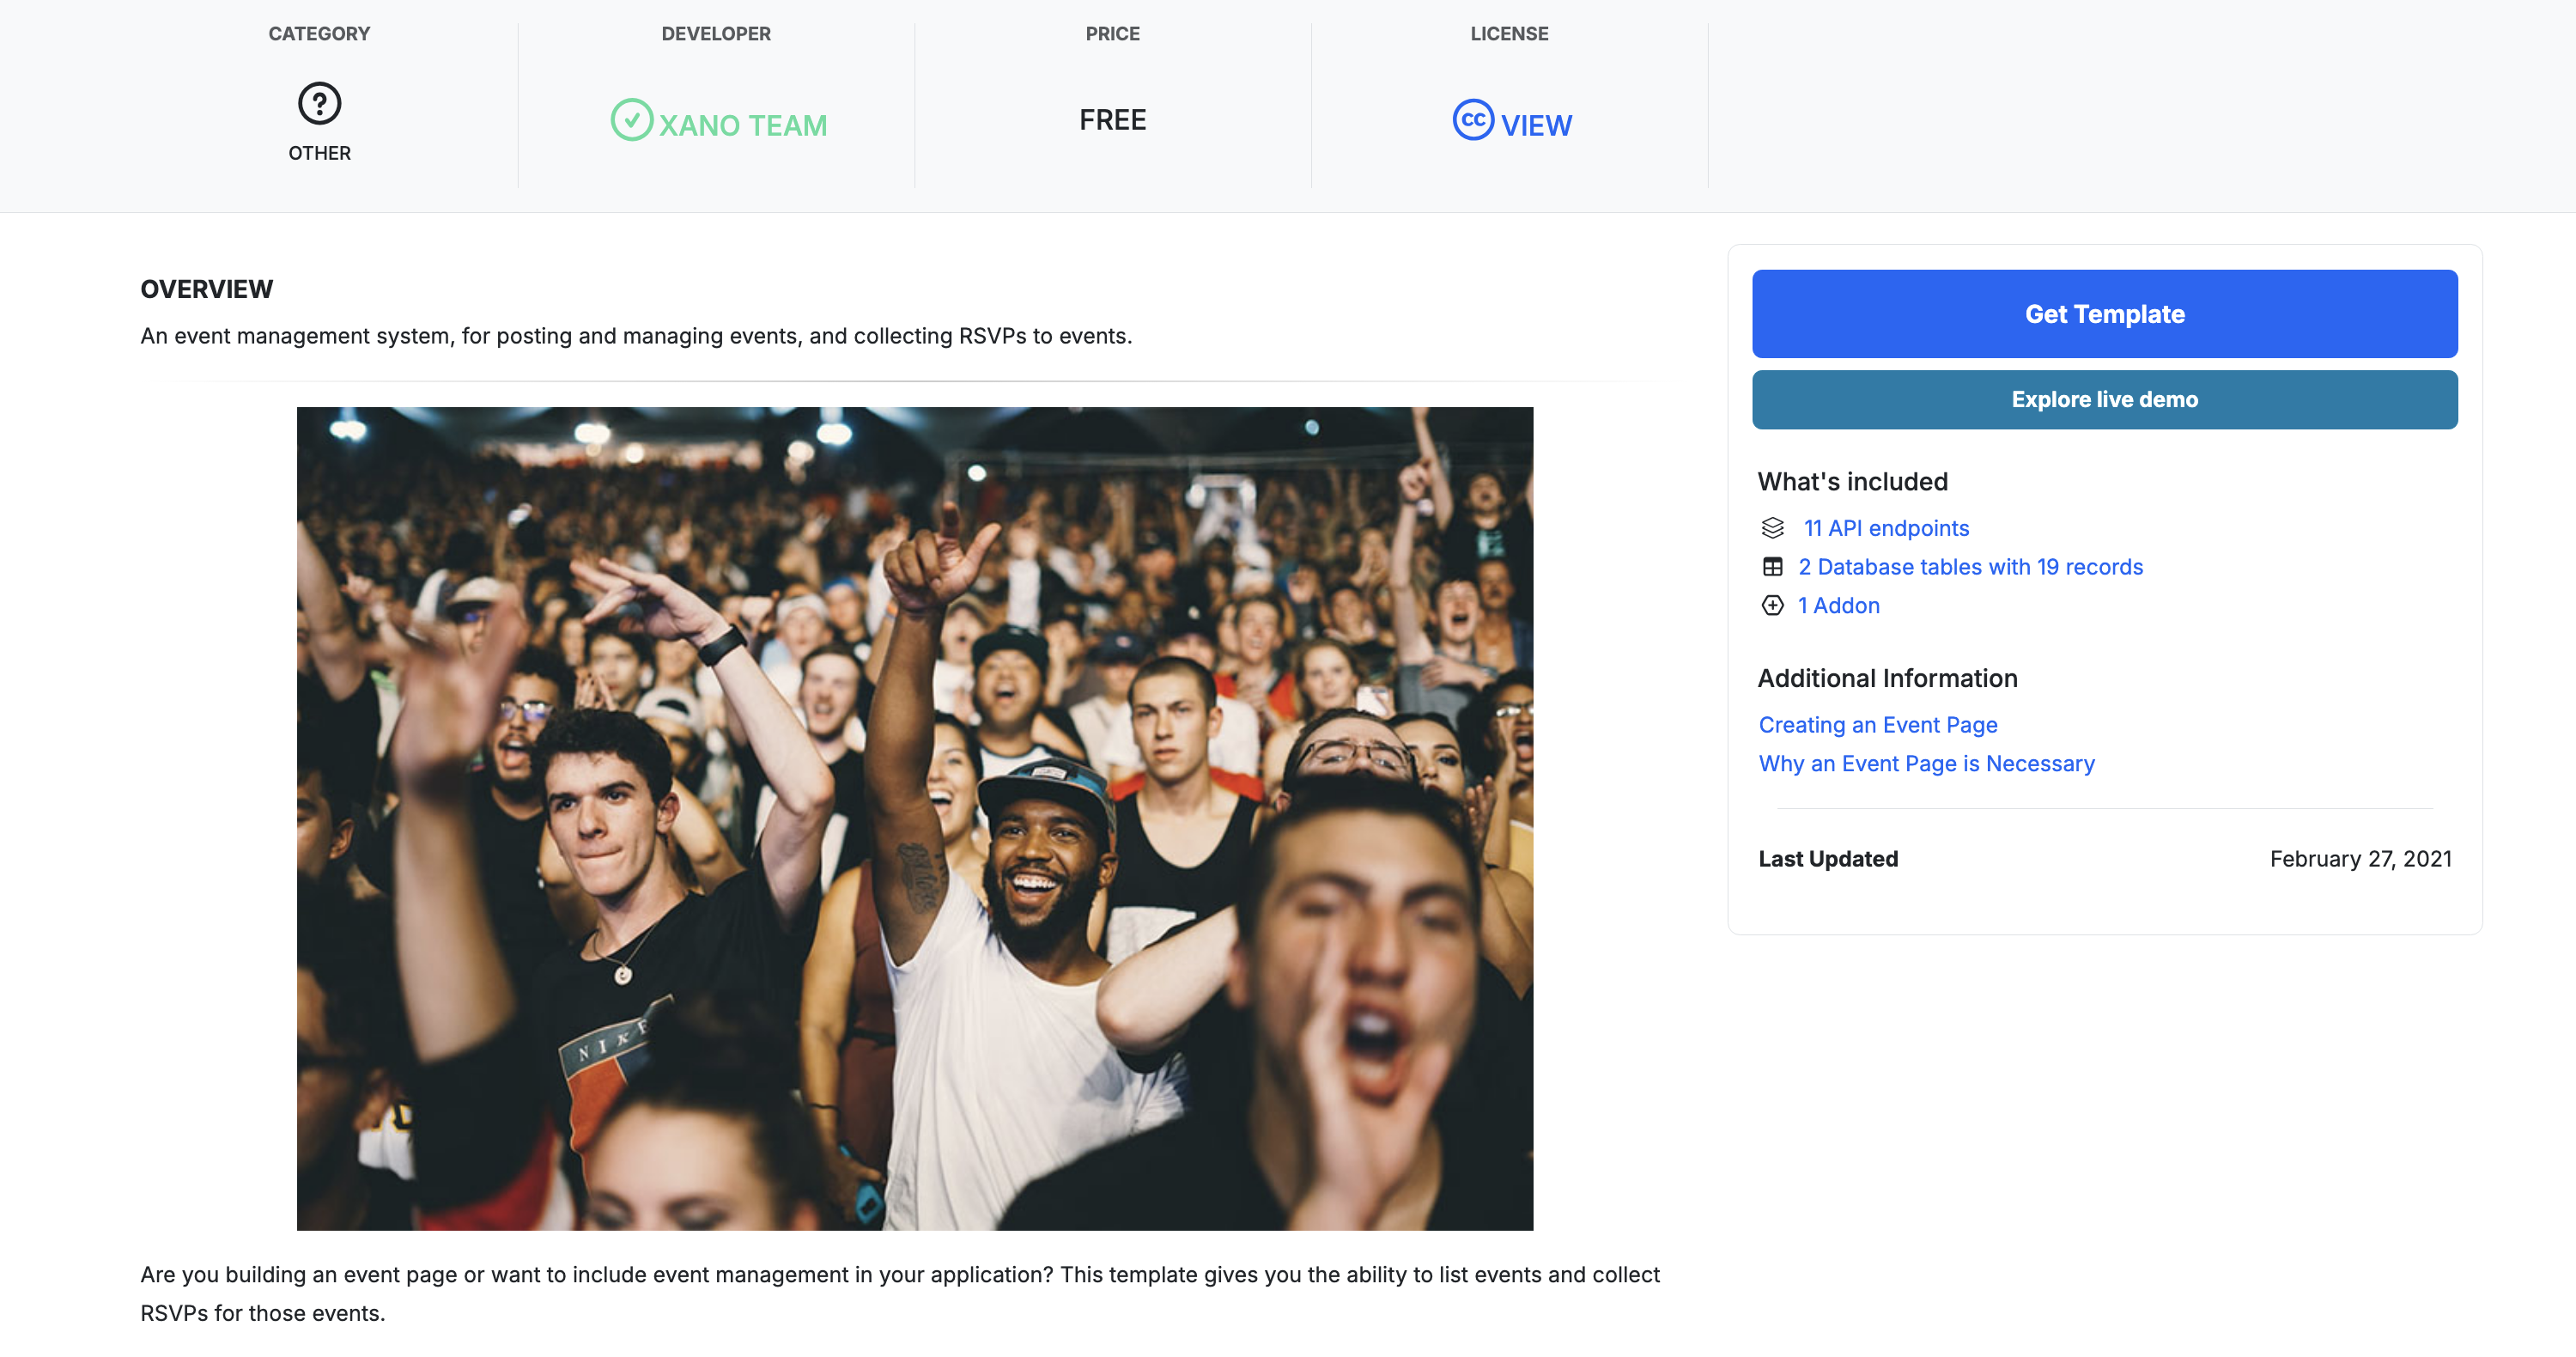
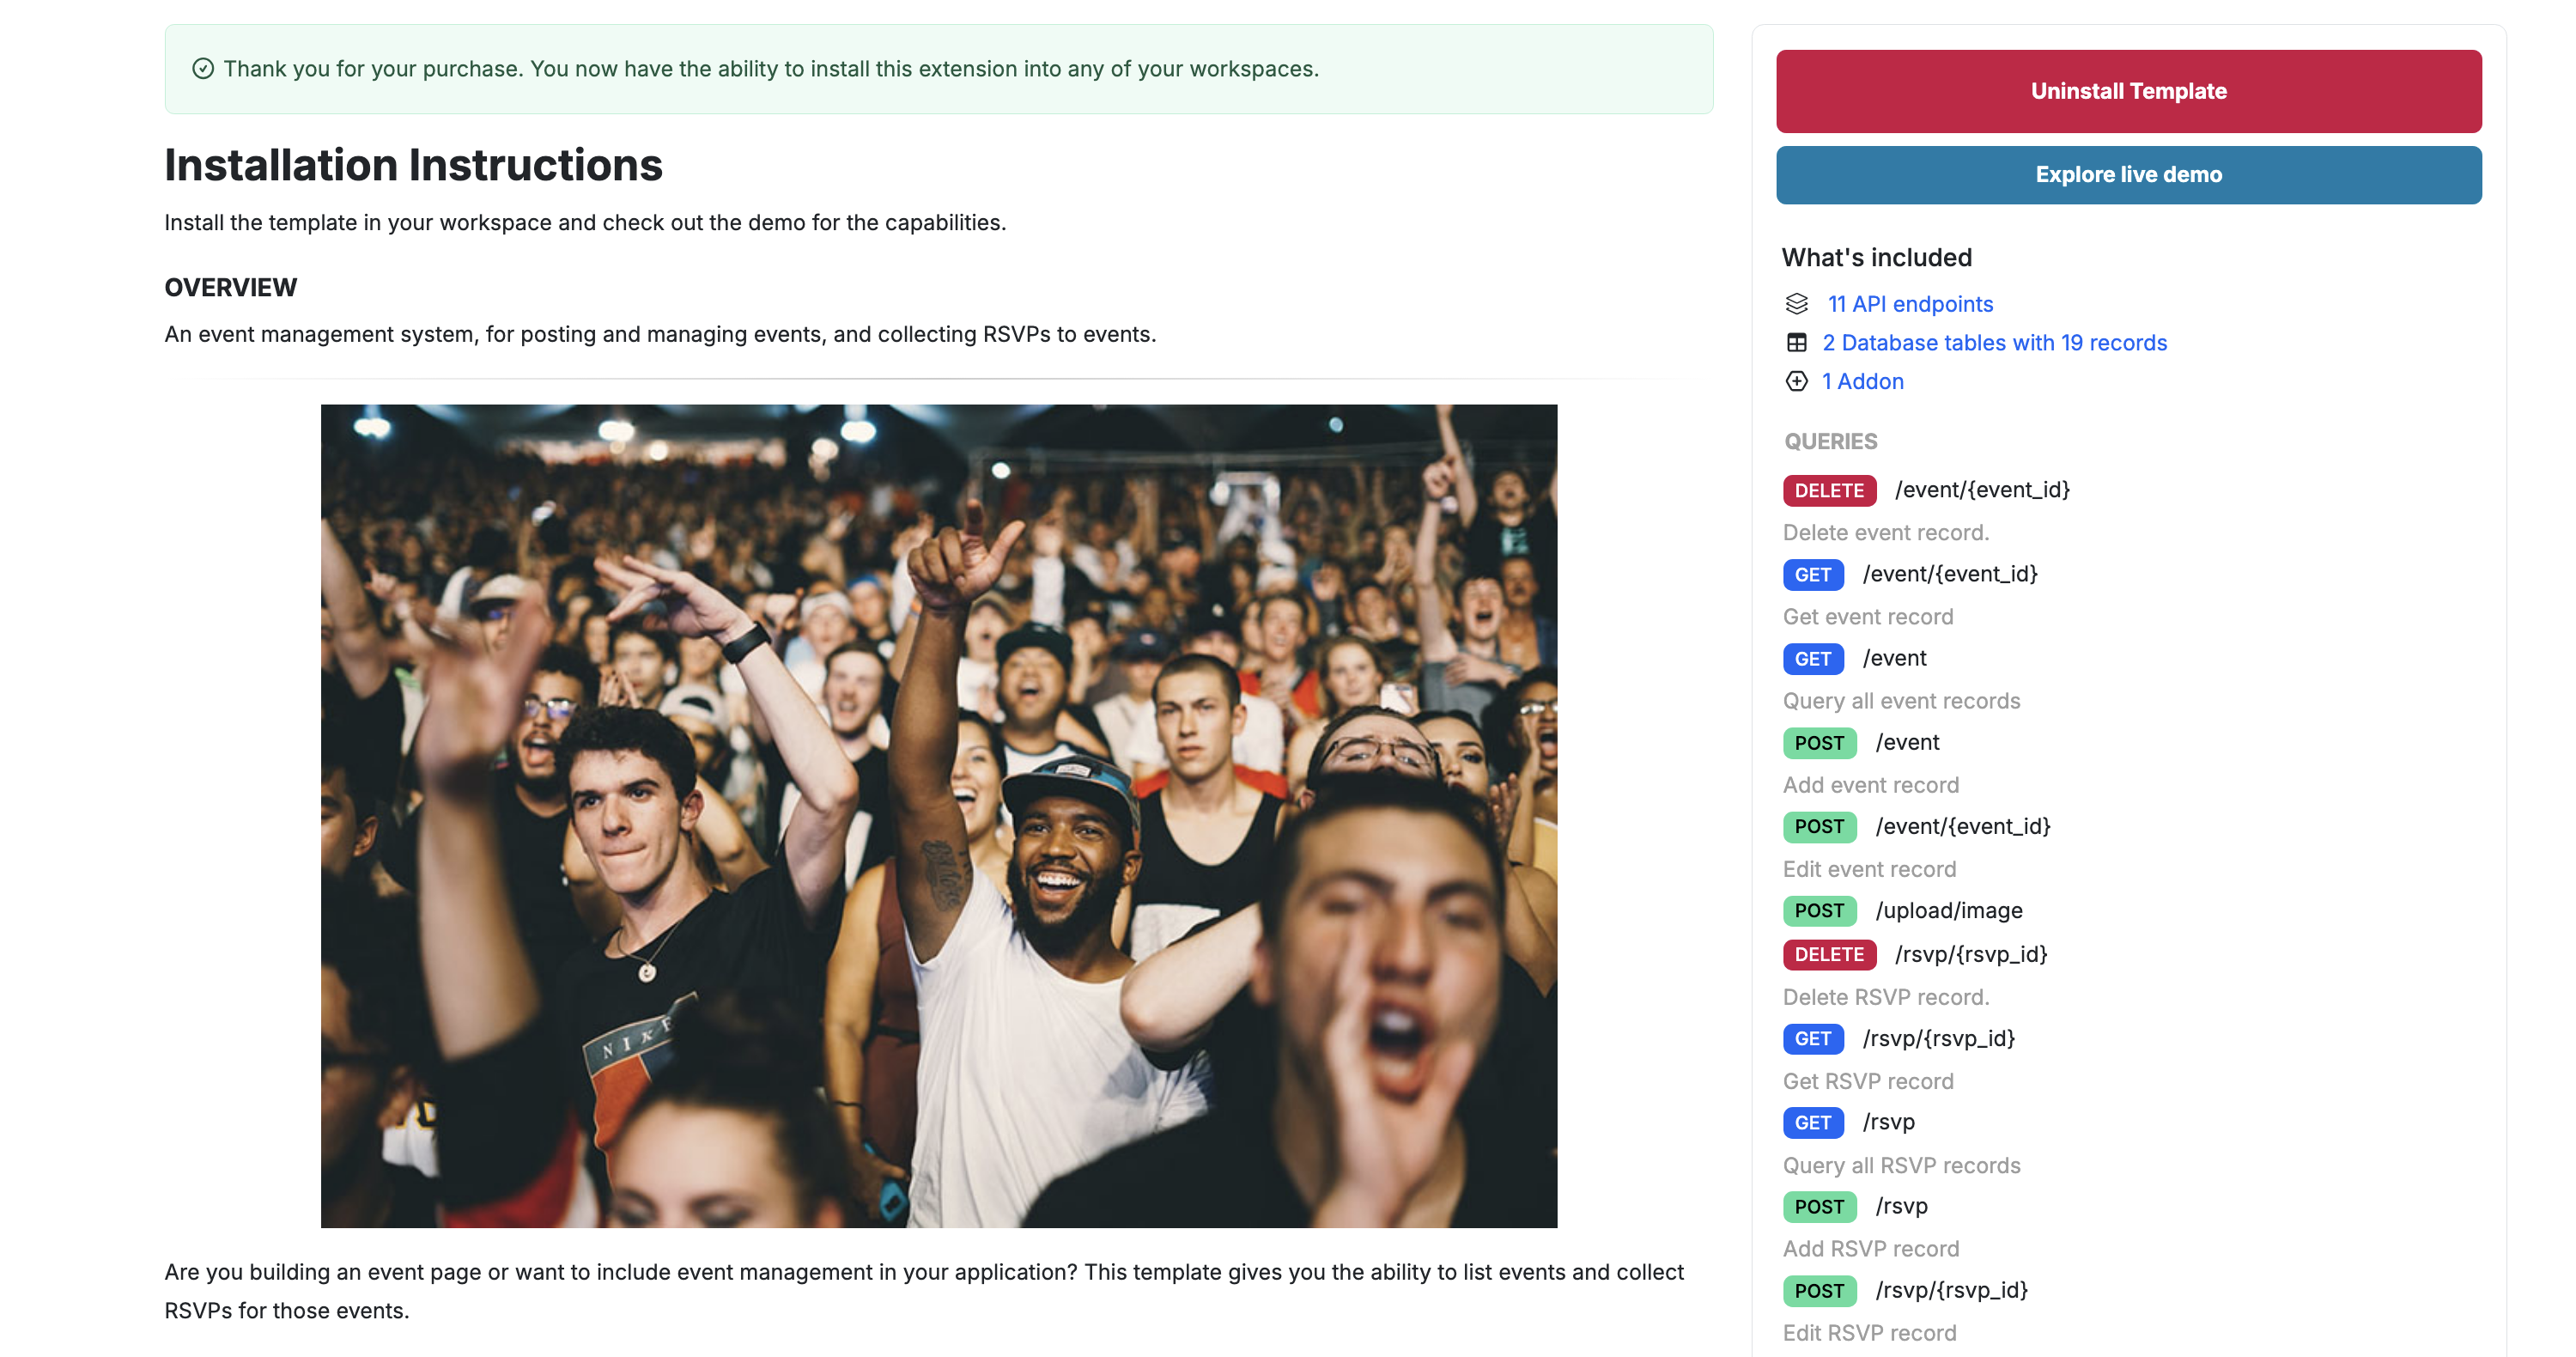
Click on Get Template to install the template in your workspace. You should see the success message confirming that the template is now available in your workspace.
Once you install the template, you’ll find the following components added to your workspace.
Database Tables
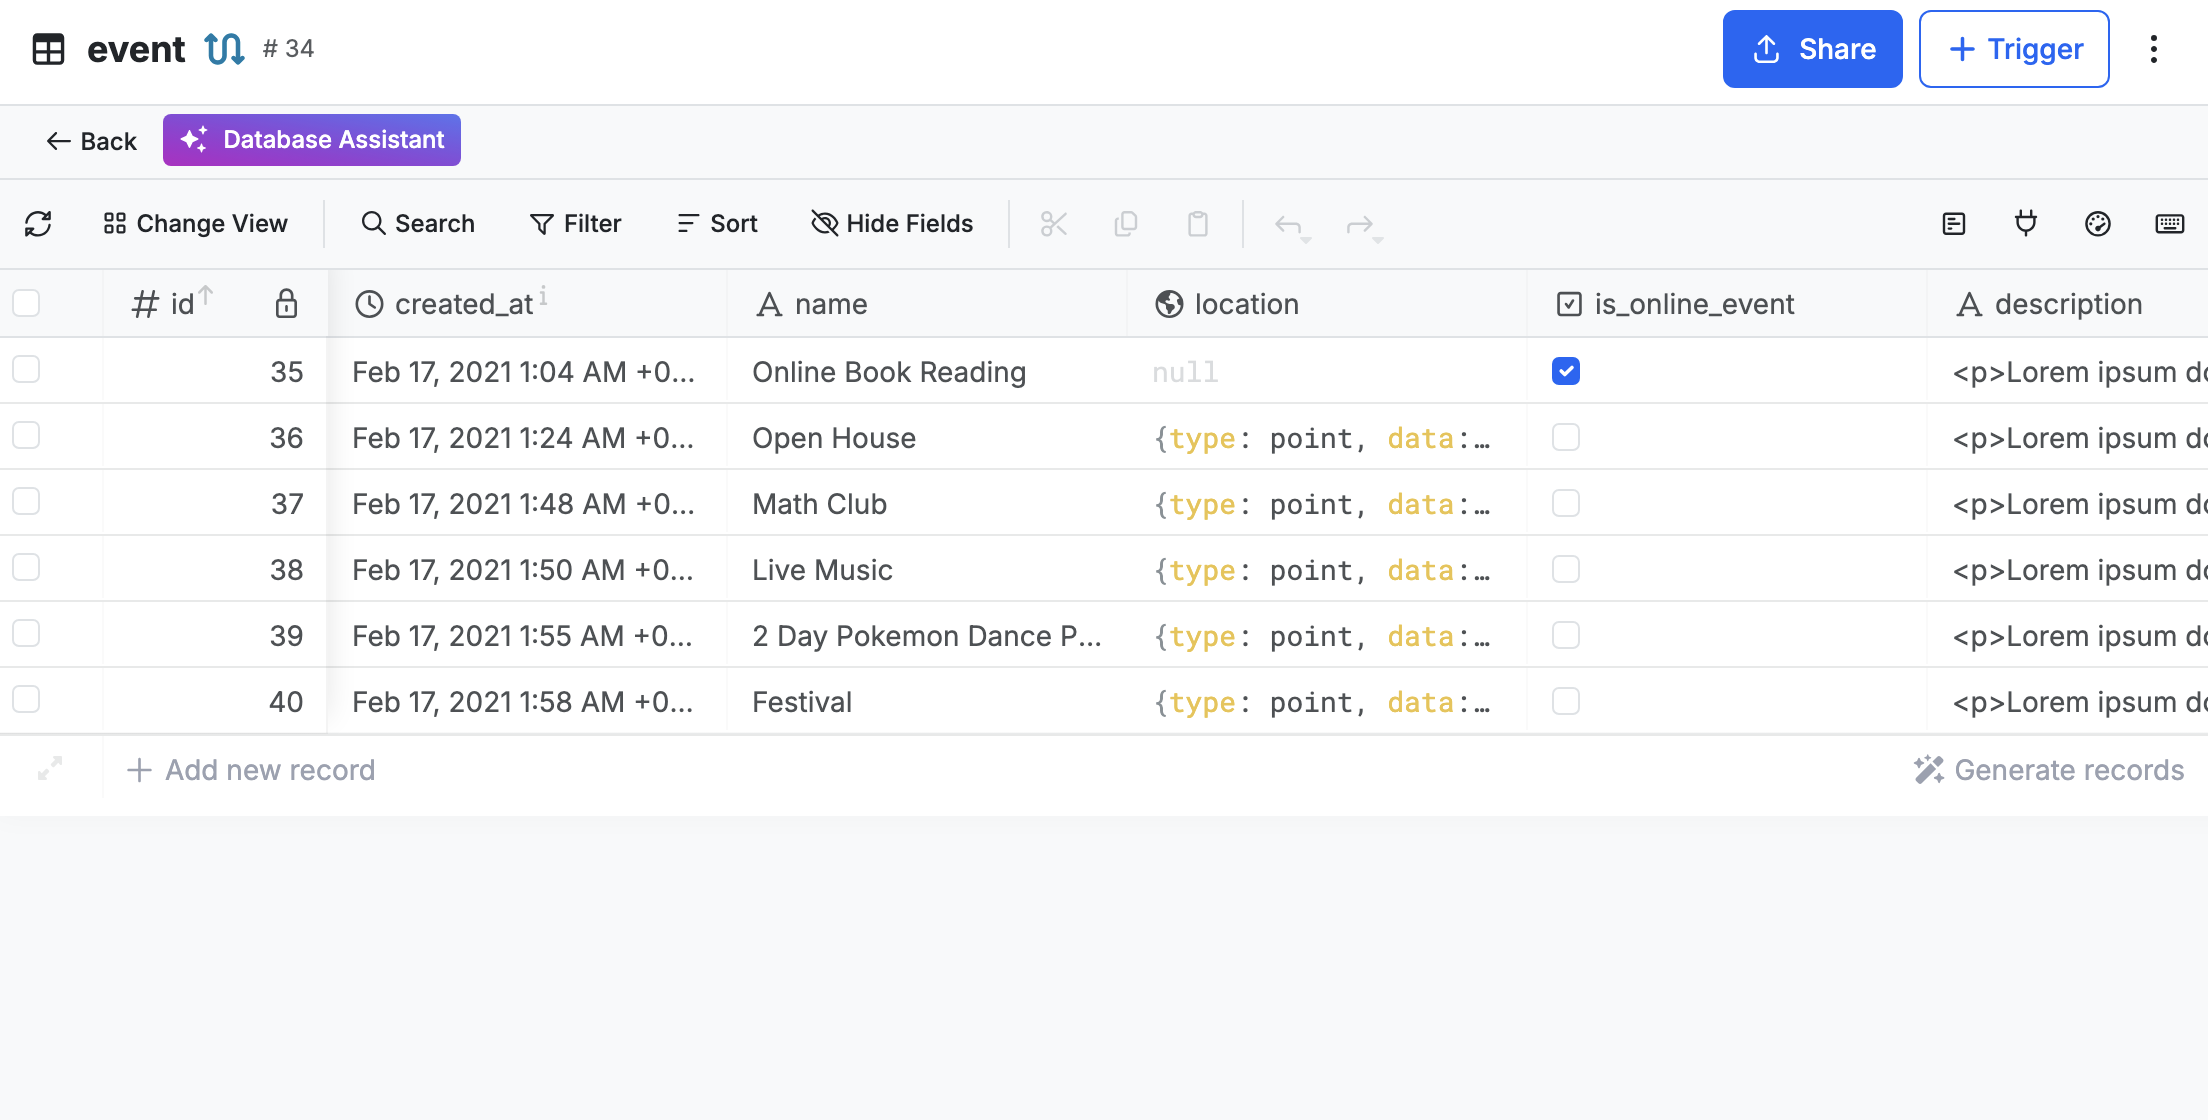
event: Stores event information including name, description, cover photo, start date, and end date. The template includes 6 sample event records.RSVP: Stores attendee responses with name, email, and a reference to the event. The template includes 13 sample RSVP records.

API Endpoints
The template creates an Events API Group with endpoints for managing both events and RSVPs. These endpoints handle all CRUD operations (Create, Read, Update, Delete) for your event data. You can view these endpoints in the events API Group within your Xano workspace, where you’ll also find a Copy base URL button that will be useful when connecting to the demo application.

Add-ons
The template includes an rsvp_count add-on that automatically calculates the number of RSVPs for each event, making it easy to track attendance.
Exploring the Demo Application
After installation, click Explore live demo to see the Events template in action. Xano provides the backend infrastructure, but you need a frontend application to interact with your API. The demo app built by Xano allows you to test the full functionality.
To connect the demo app with your Xano backend, you’ll need to provide your API URL. Find this by navigating to the events API Group in your workspace and clicking Copy base URL. Paste this URL into the demo app’s configuration field.

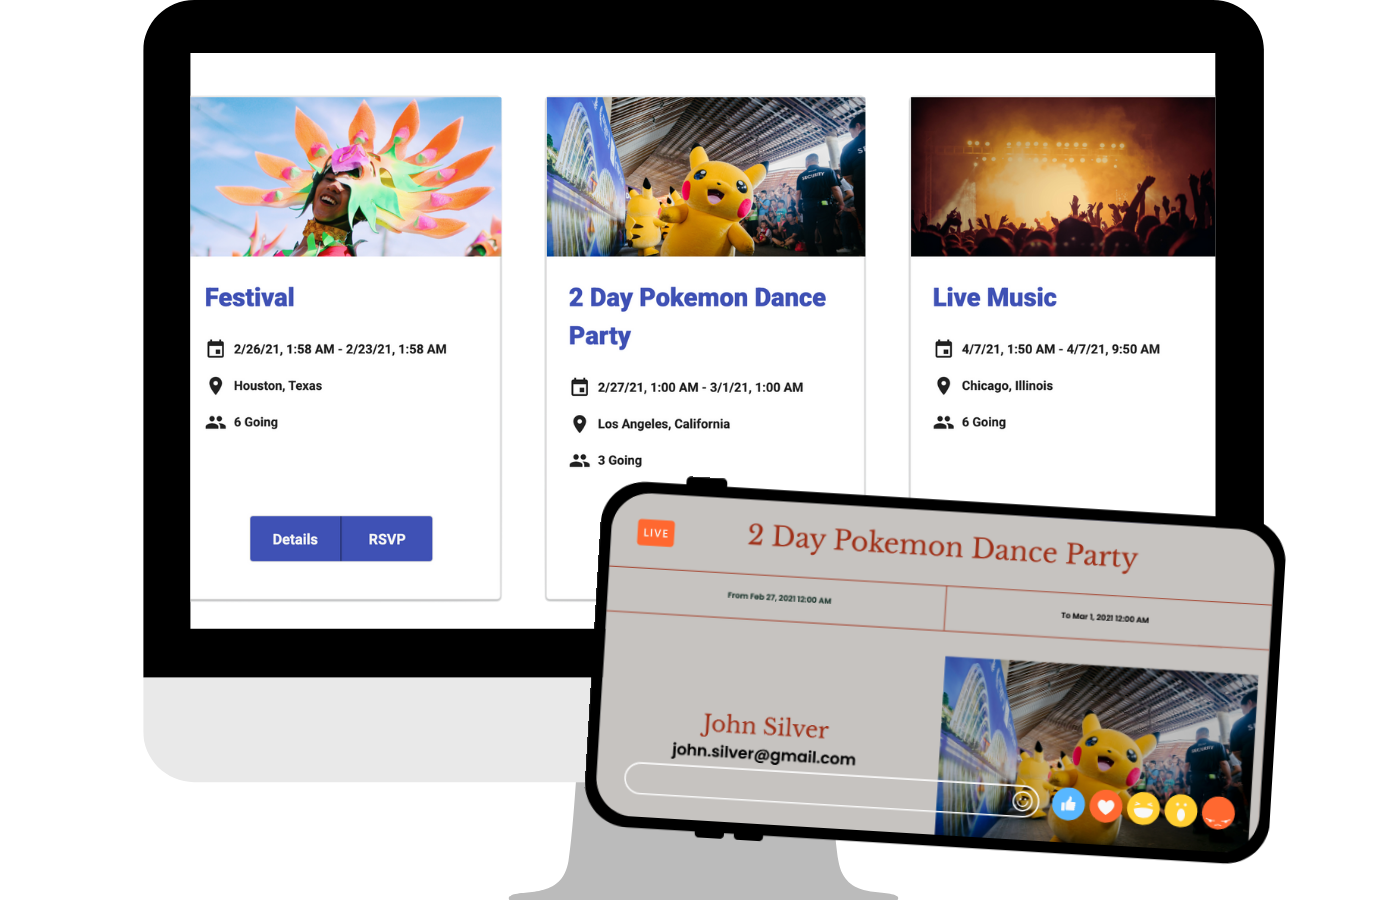
The demo app provides several key features: viewing all events in a card layout with infinite scroll, searching for events by name, creating new events with cover photos and descriptions, viewing complete event details, and submitting RSVPs with name and email. The app is fully functional and demonstrates how the API endpoints work together to create a cohesive event management system.
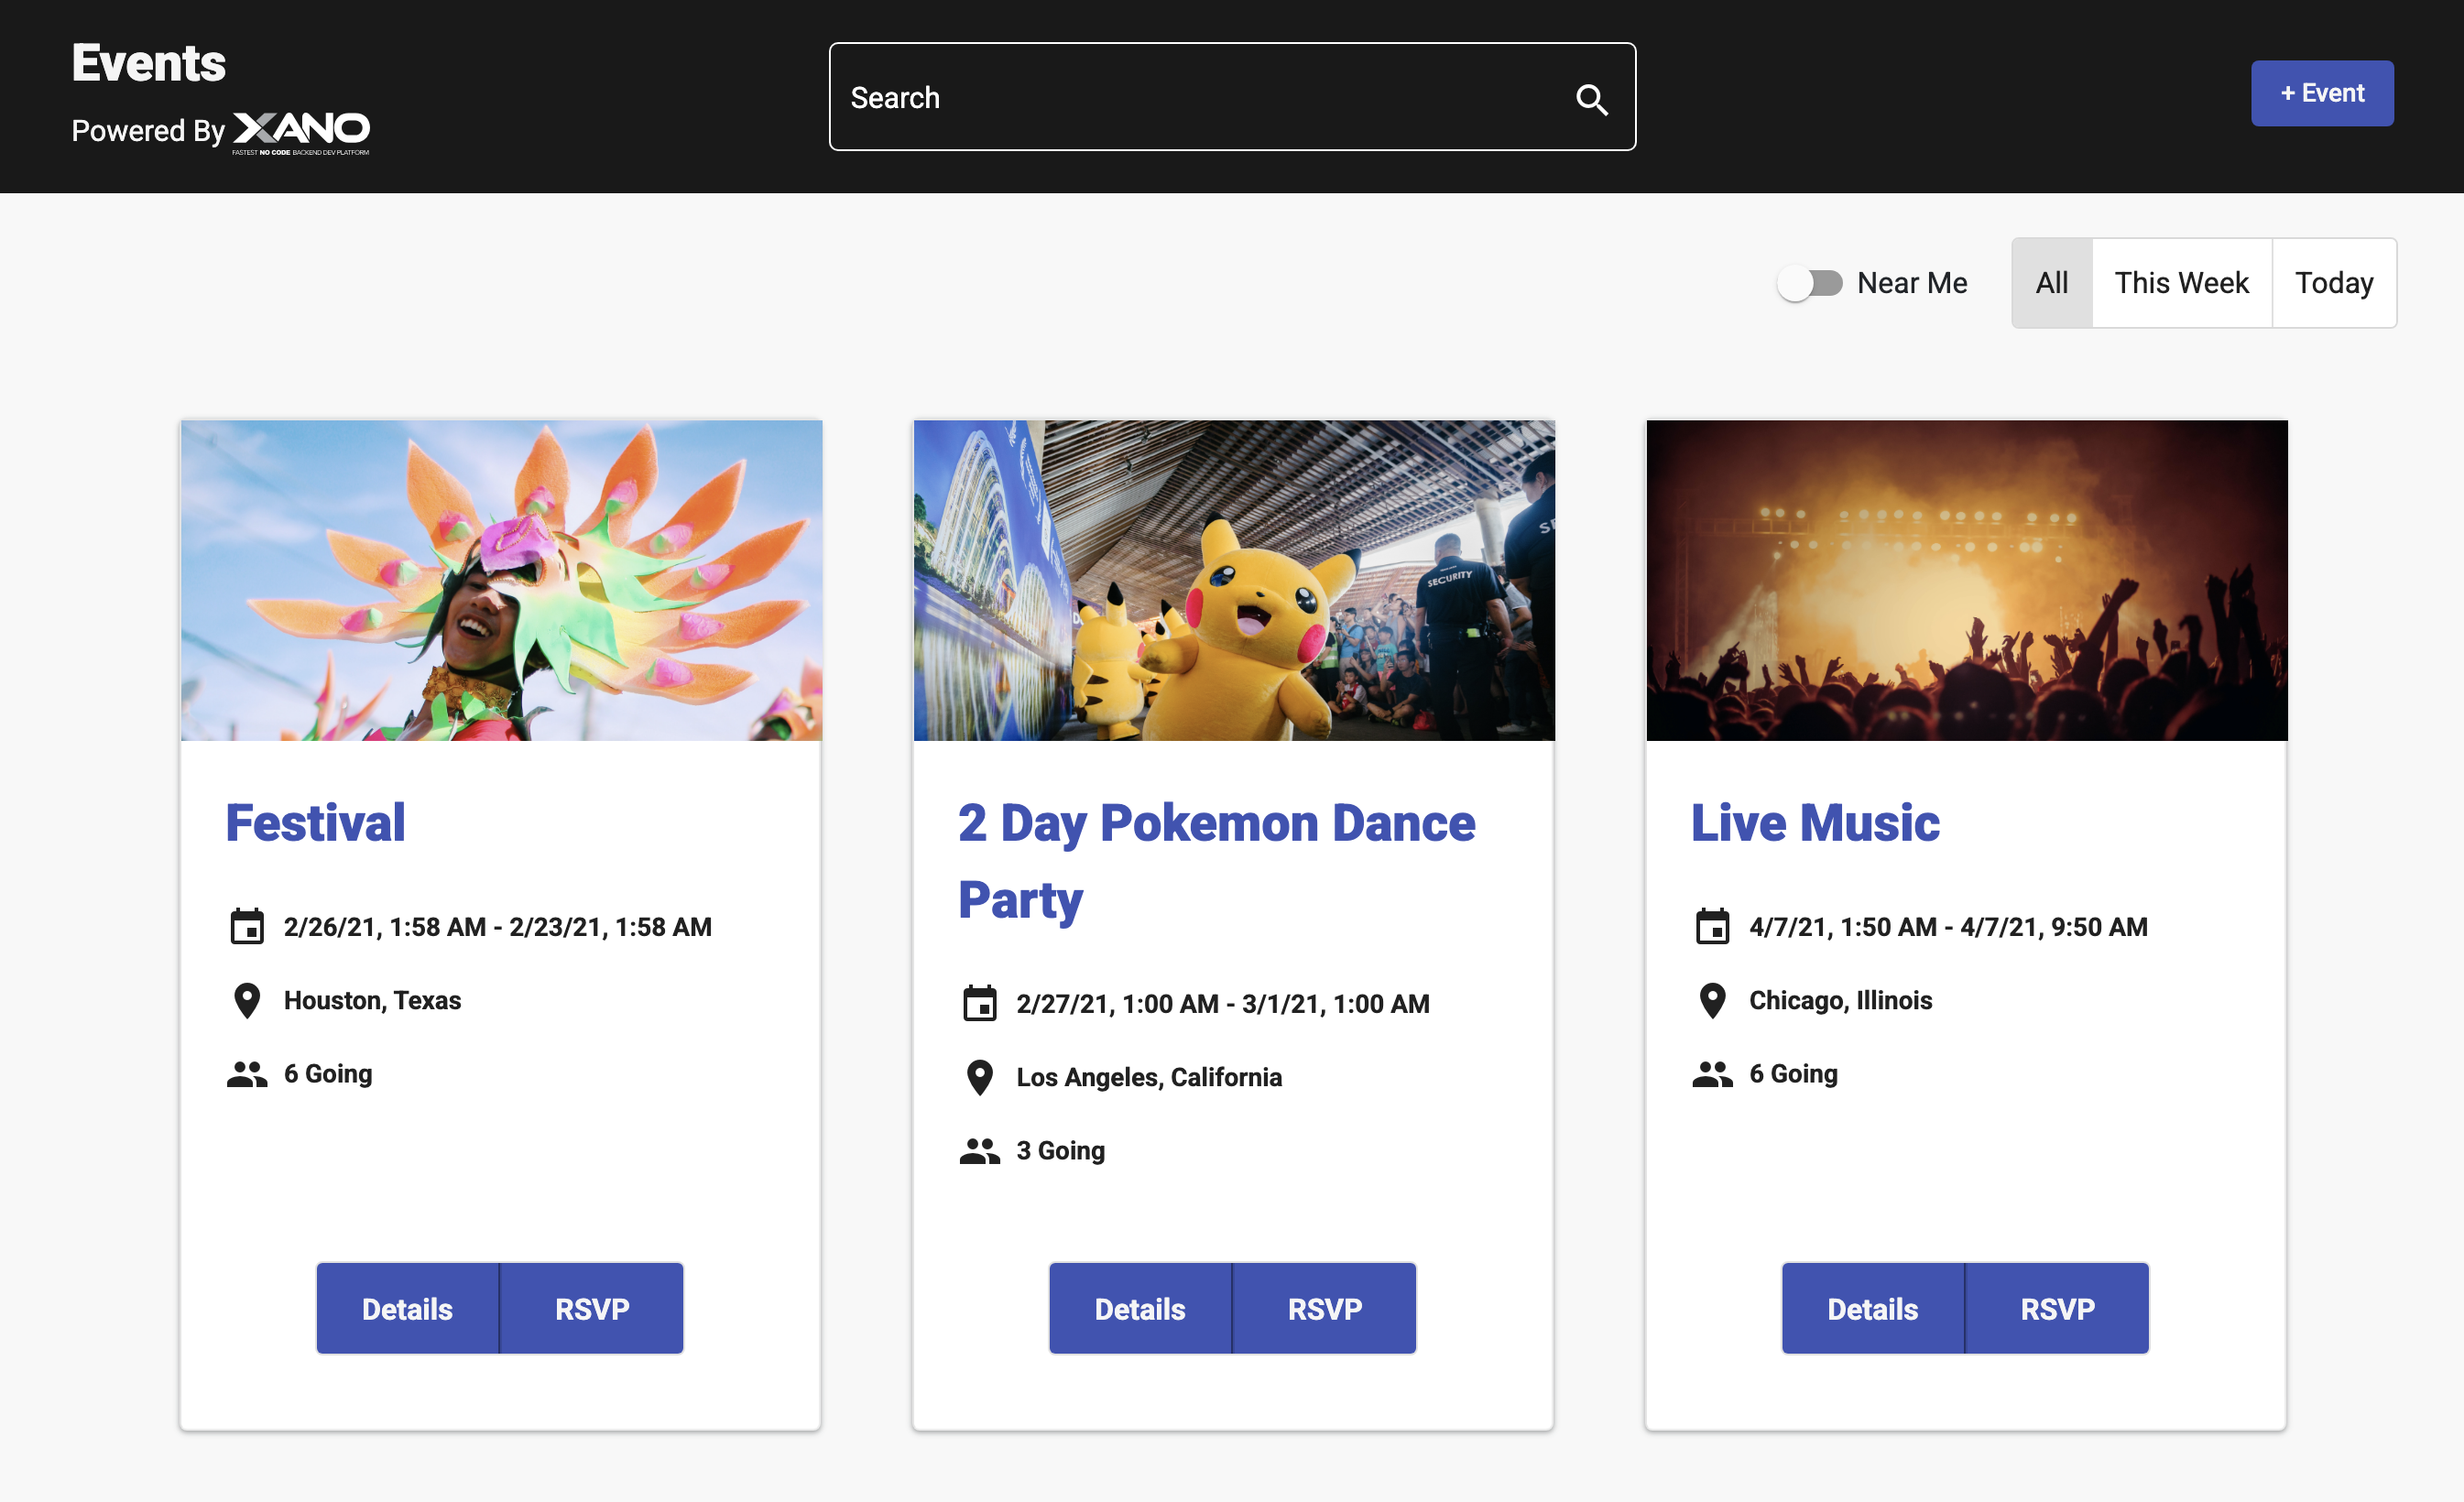
The events displayed in the demo app correspond directly to the records in your event database table, which were pre-populated when you installed the template.
Understanding the RSVP Flow
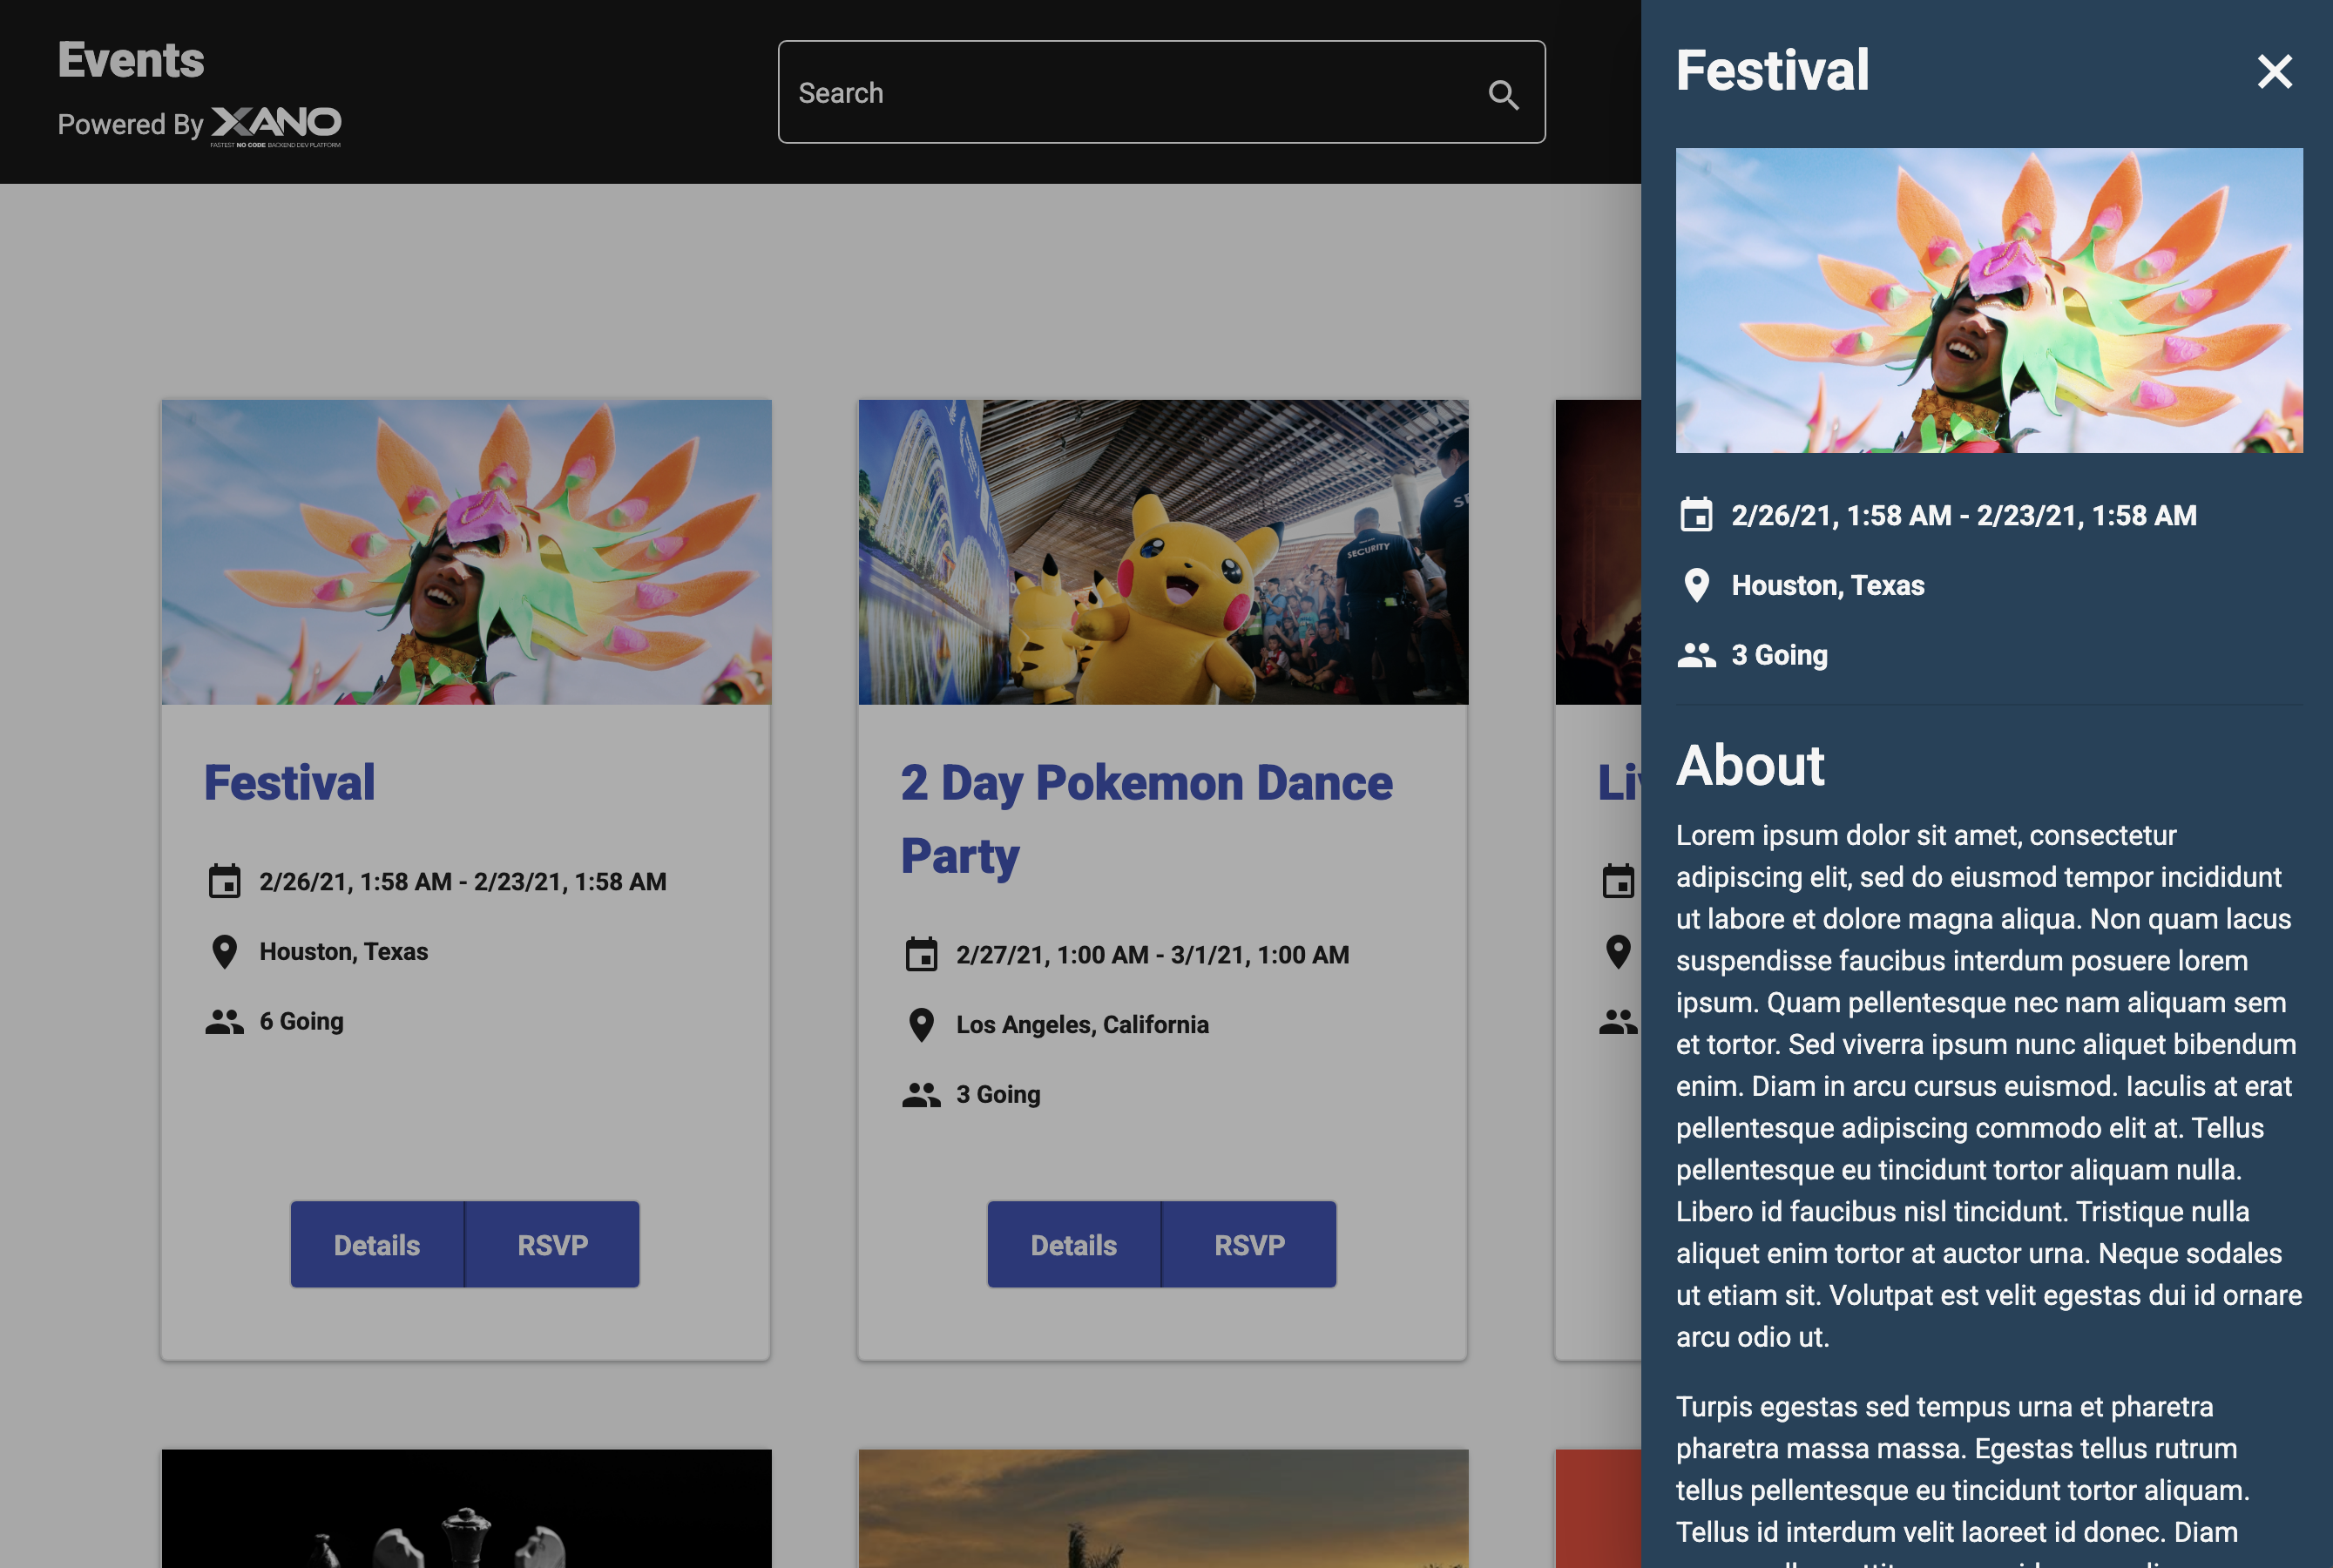
Click on any event to view its details. You’ll see information about the event along with a Details button for more information and an RSVP button for submitting your attendance.
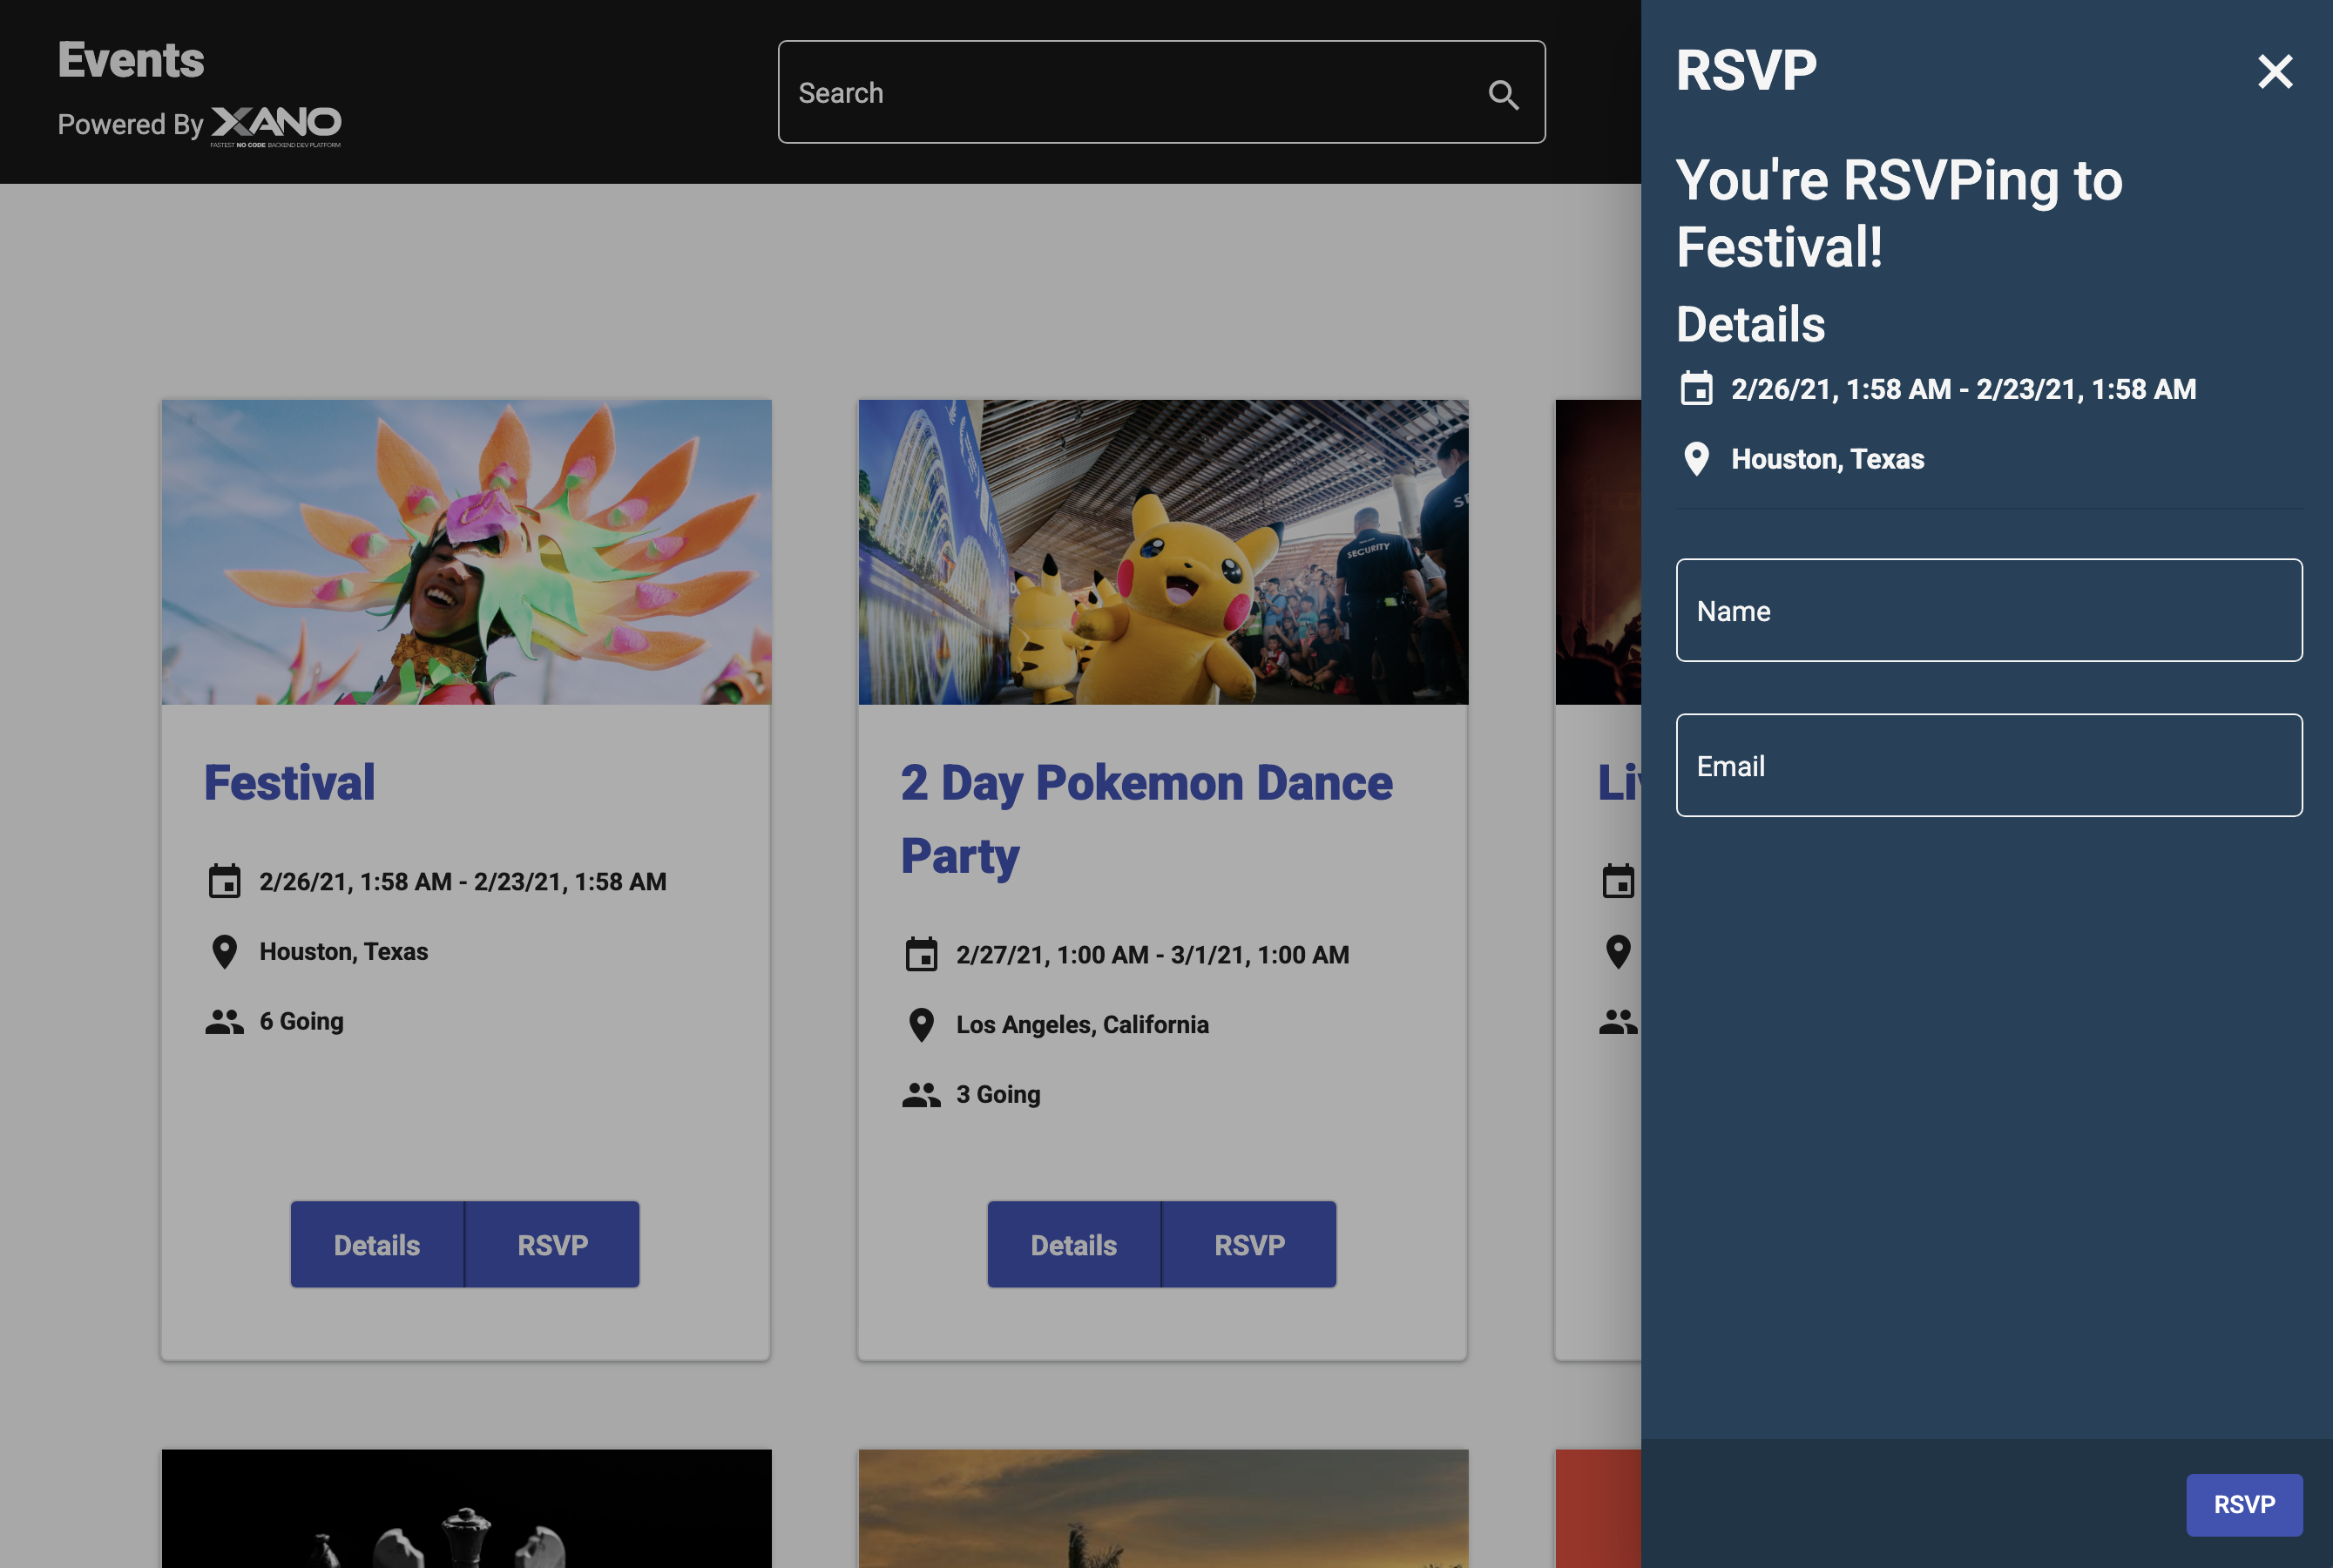
The RSVP form is intentionally simple, requesting only a name and email address. This minimal approach reduces friction and encourages more RSVPs. When someone submits this form, a new record is created in the RSVP database table.
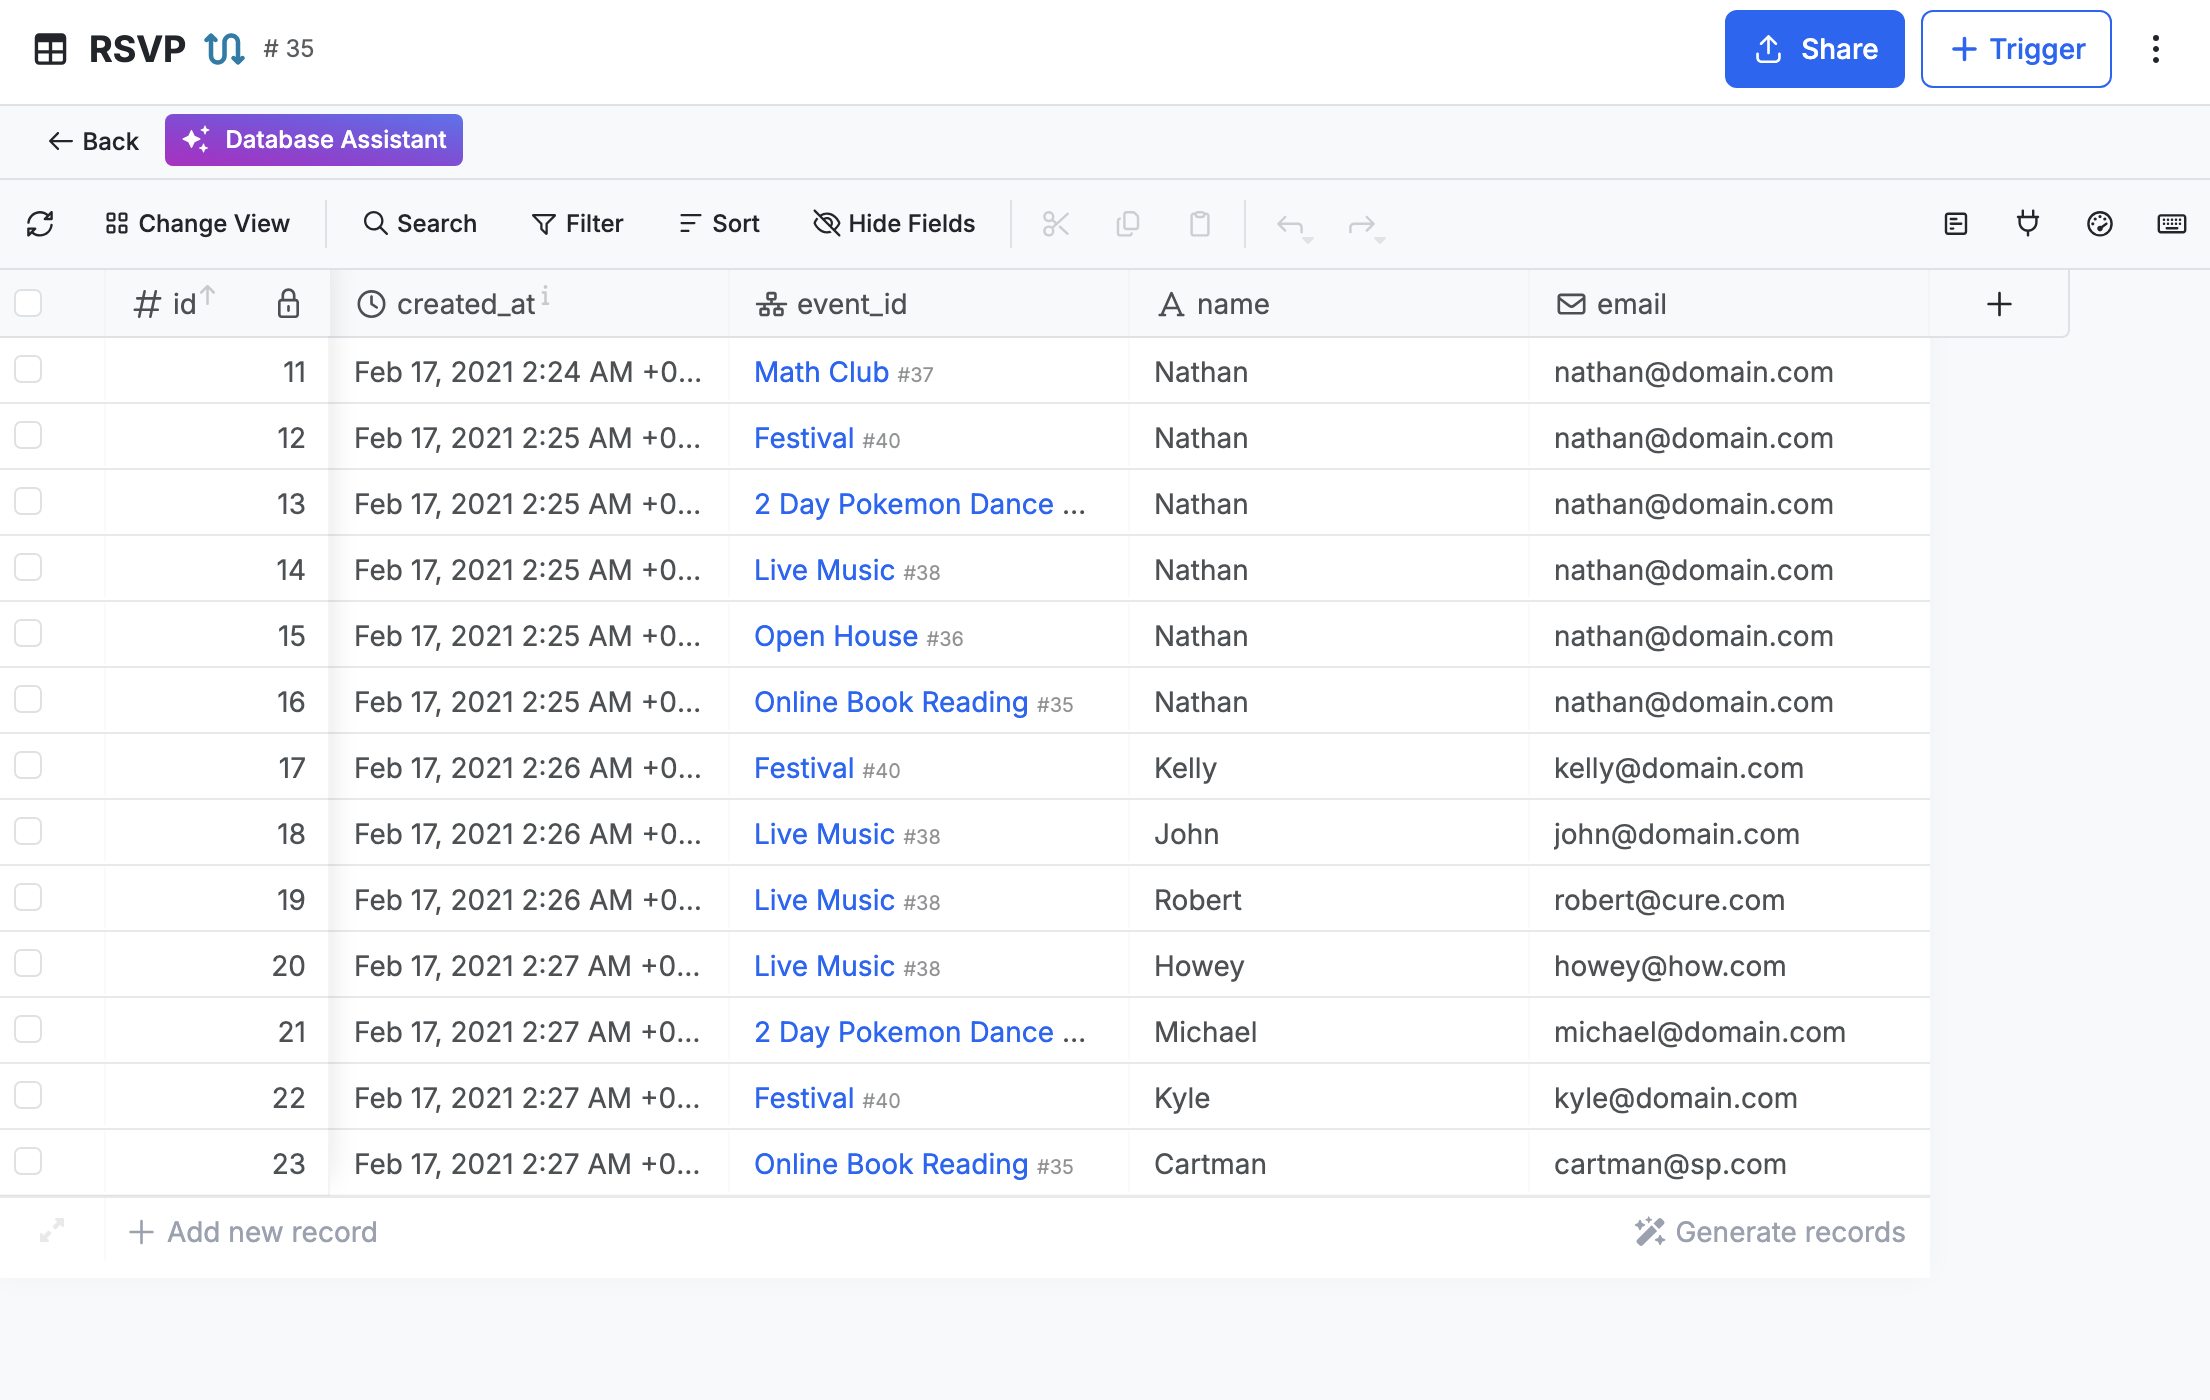
You can view all RSVP records in your Xano workspace by navigating to the RSVP database table, which shows the pre-filled sample data from the template installation.
Now that you understand how the Events template works, let’s enhance it by automatically generating PDF tickets when someone RSVPs to an event.
Creating the Database Trigger
Triggers in Xano allow you to execute custom workflows when specific database events occur. We’ll create a trigger that fires whenever a new RSVP record is inserted into the database. This trigger will handle all the logic for generating and potentially distributing event tickets. Note that database triggers are a premium feature in Xano and are not available on the free plan.
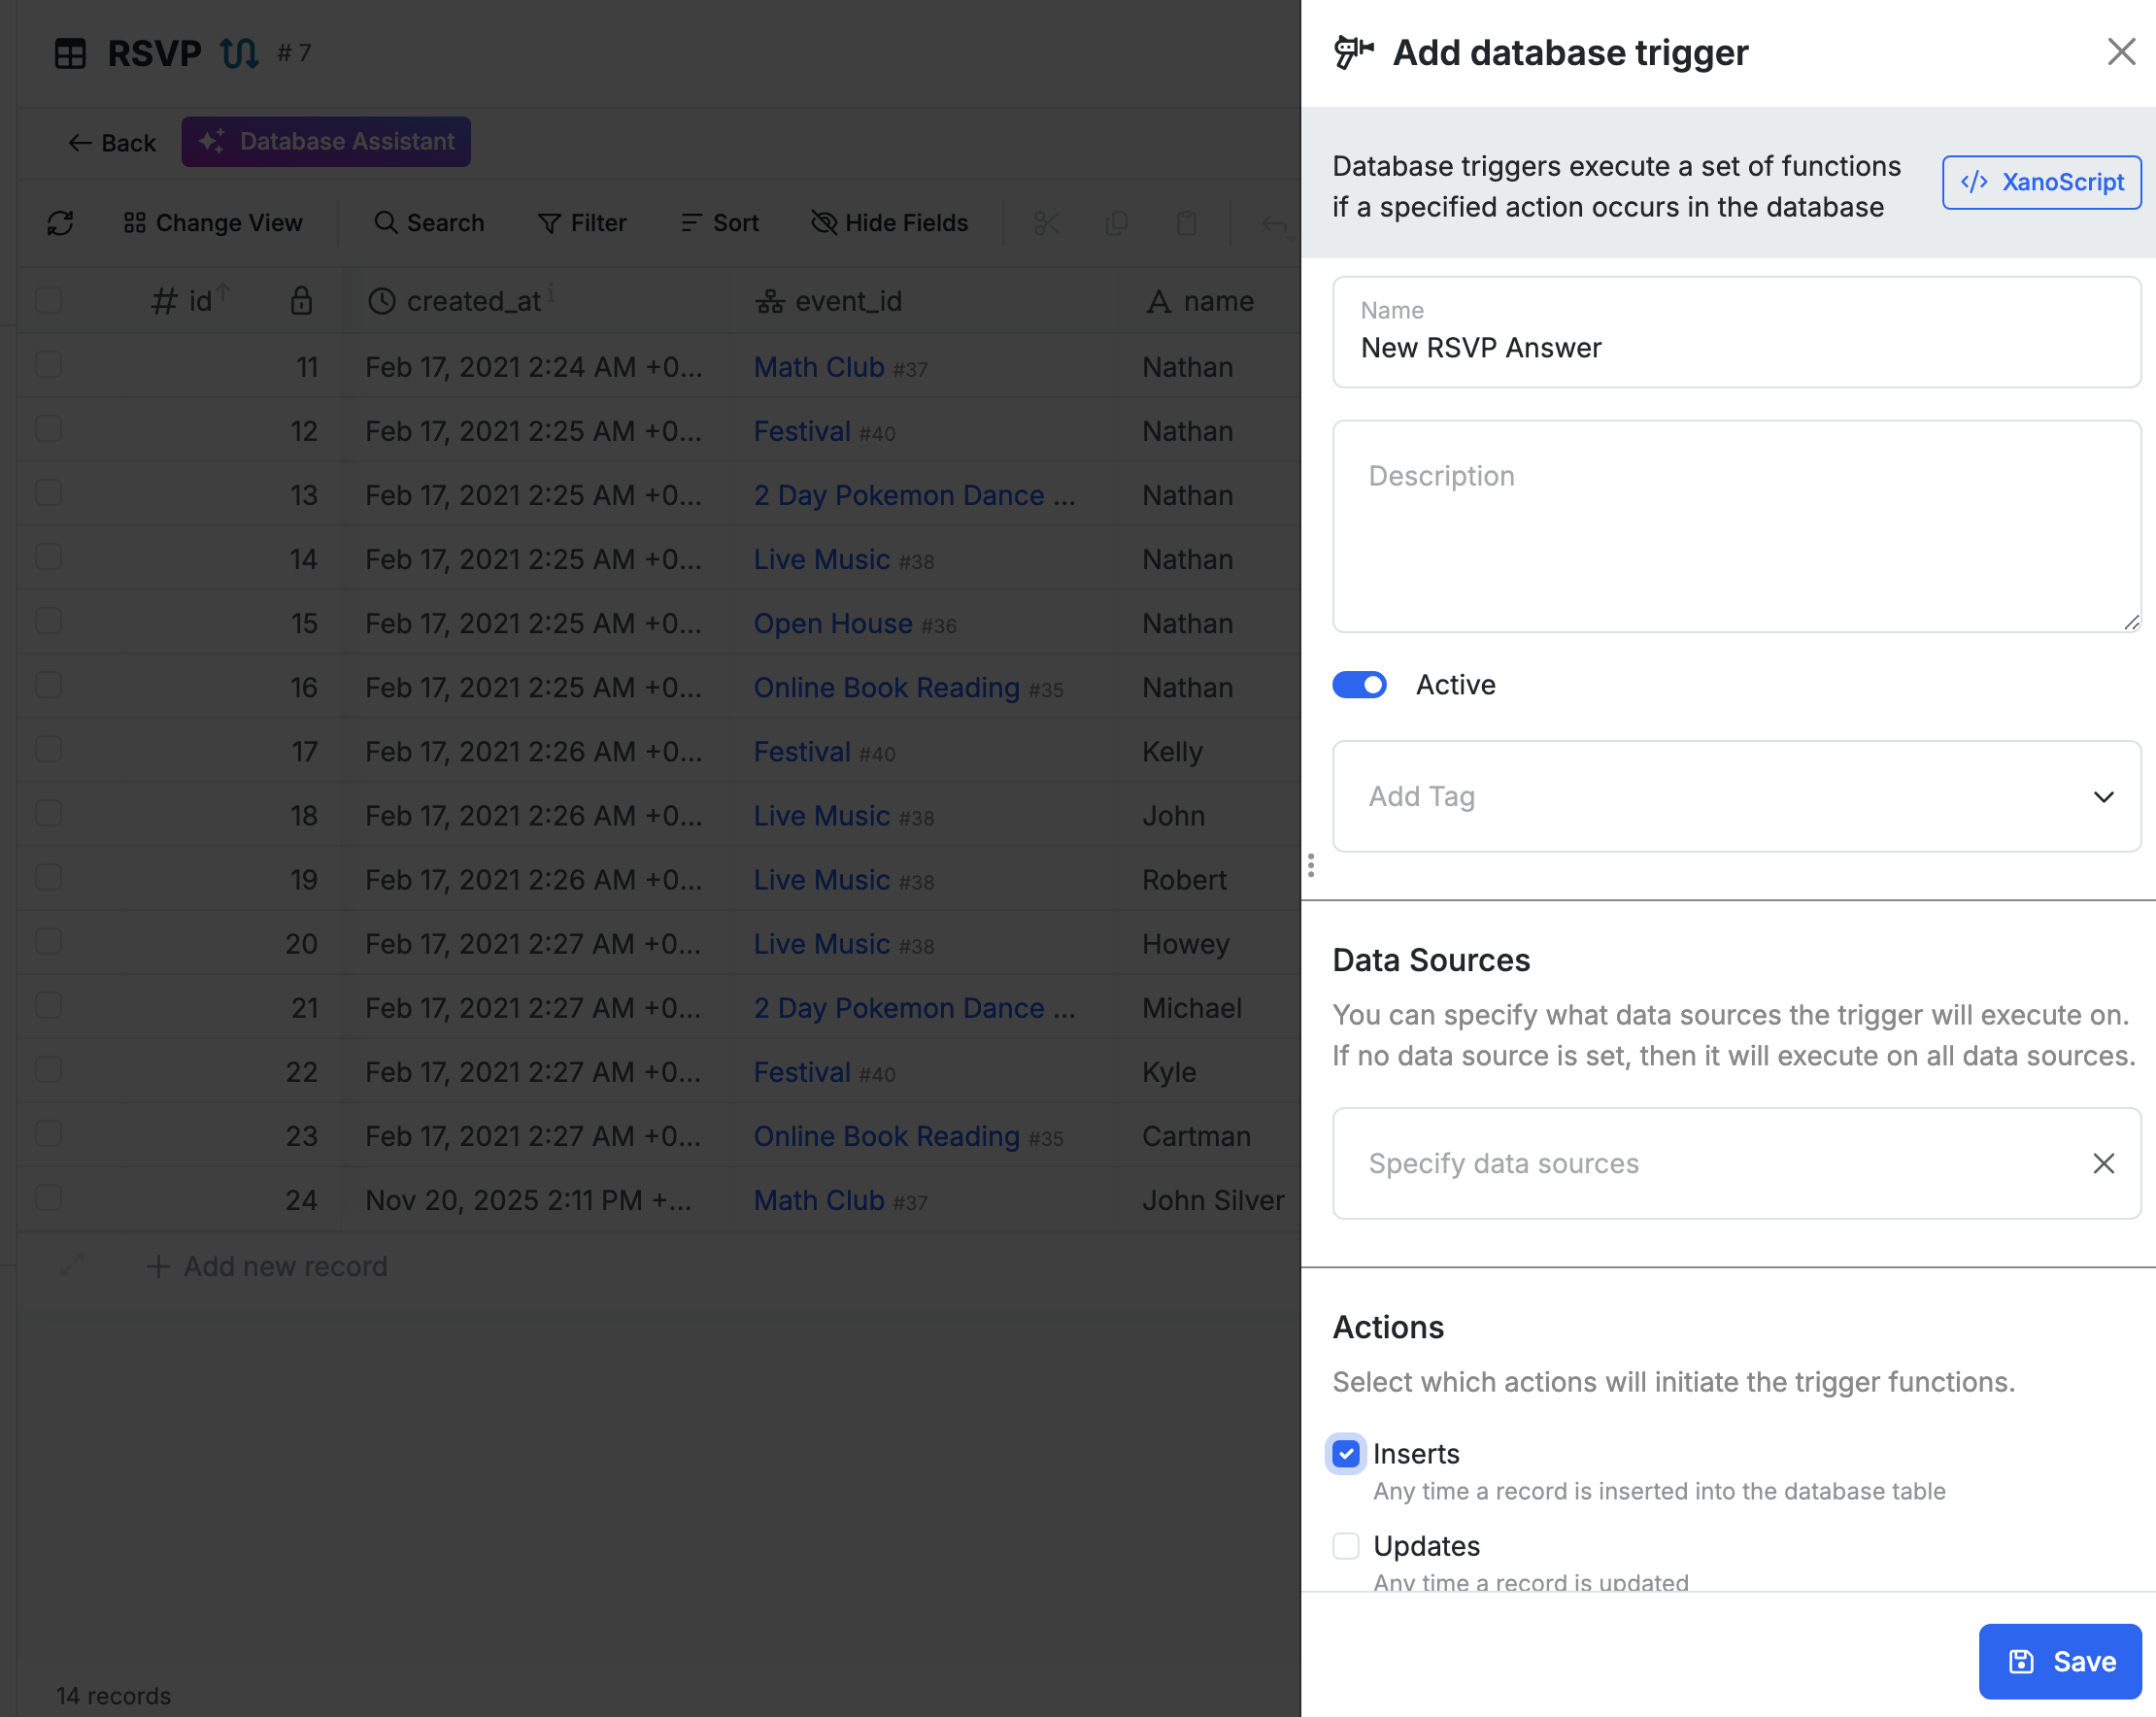
To create a trigger, navigate to the RSVP table in your database view and click + Trigger, then select + Add database trigger and continue. Configure your trigger with the following settings:
- Name: Enter “New RSVP Answer” for example
- Data Sources: Leave empty (this means the trigger executes for all data sources)
- Actions: Select only Inserts (the trigger should only fire when new RSVP records are created, not when they’re updated or deleted)
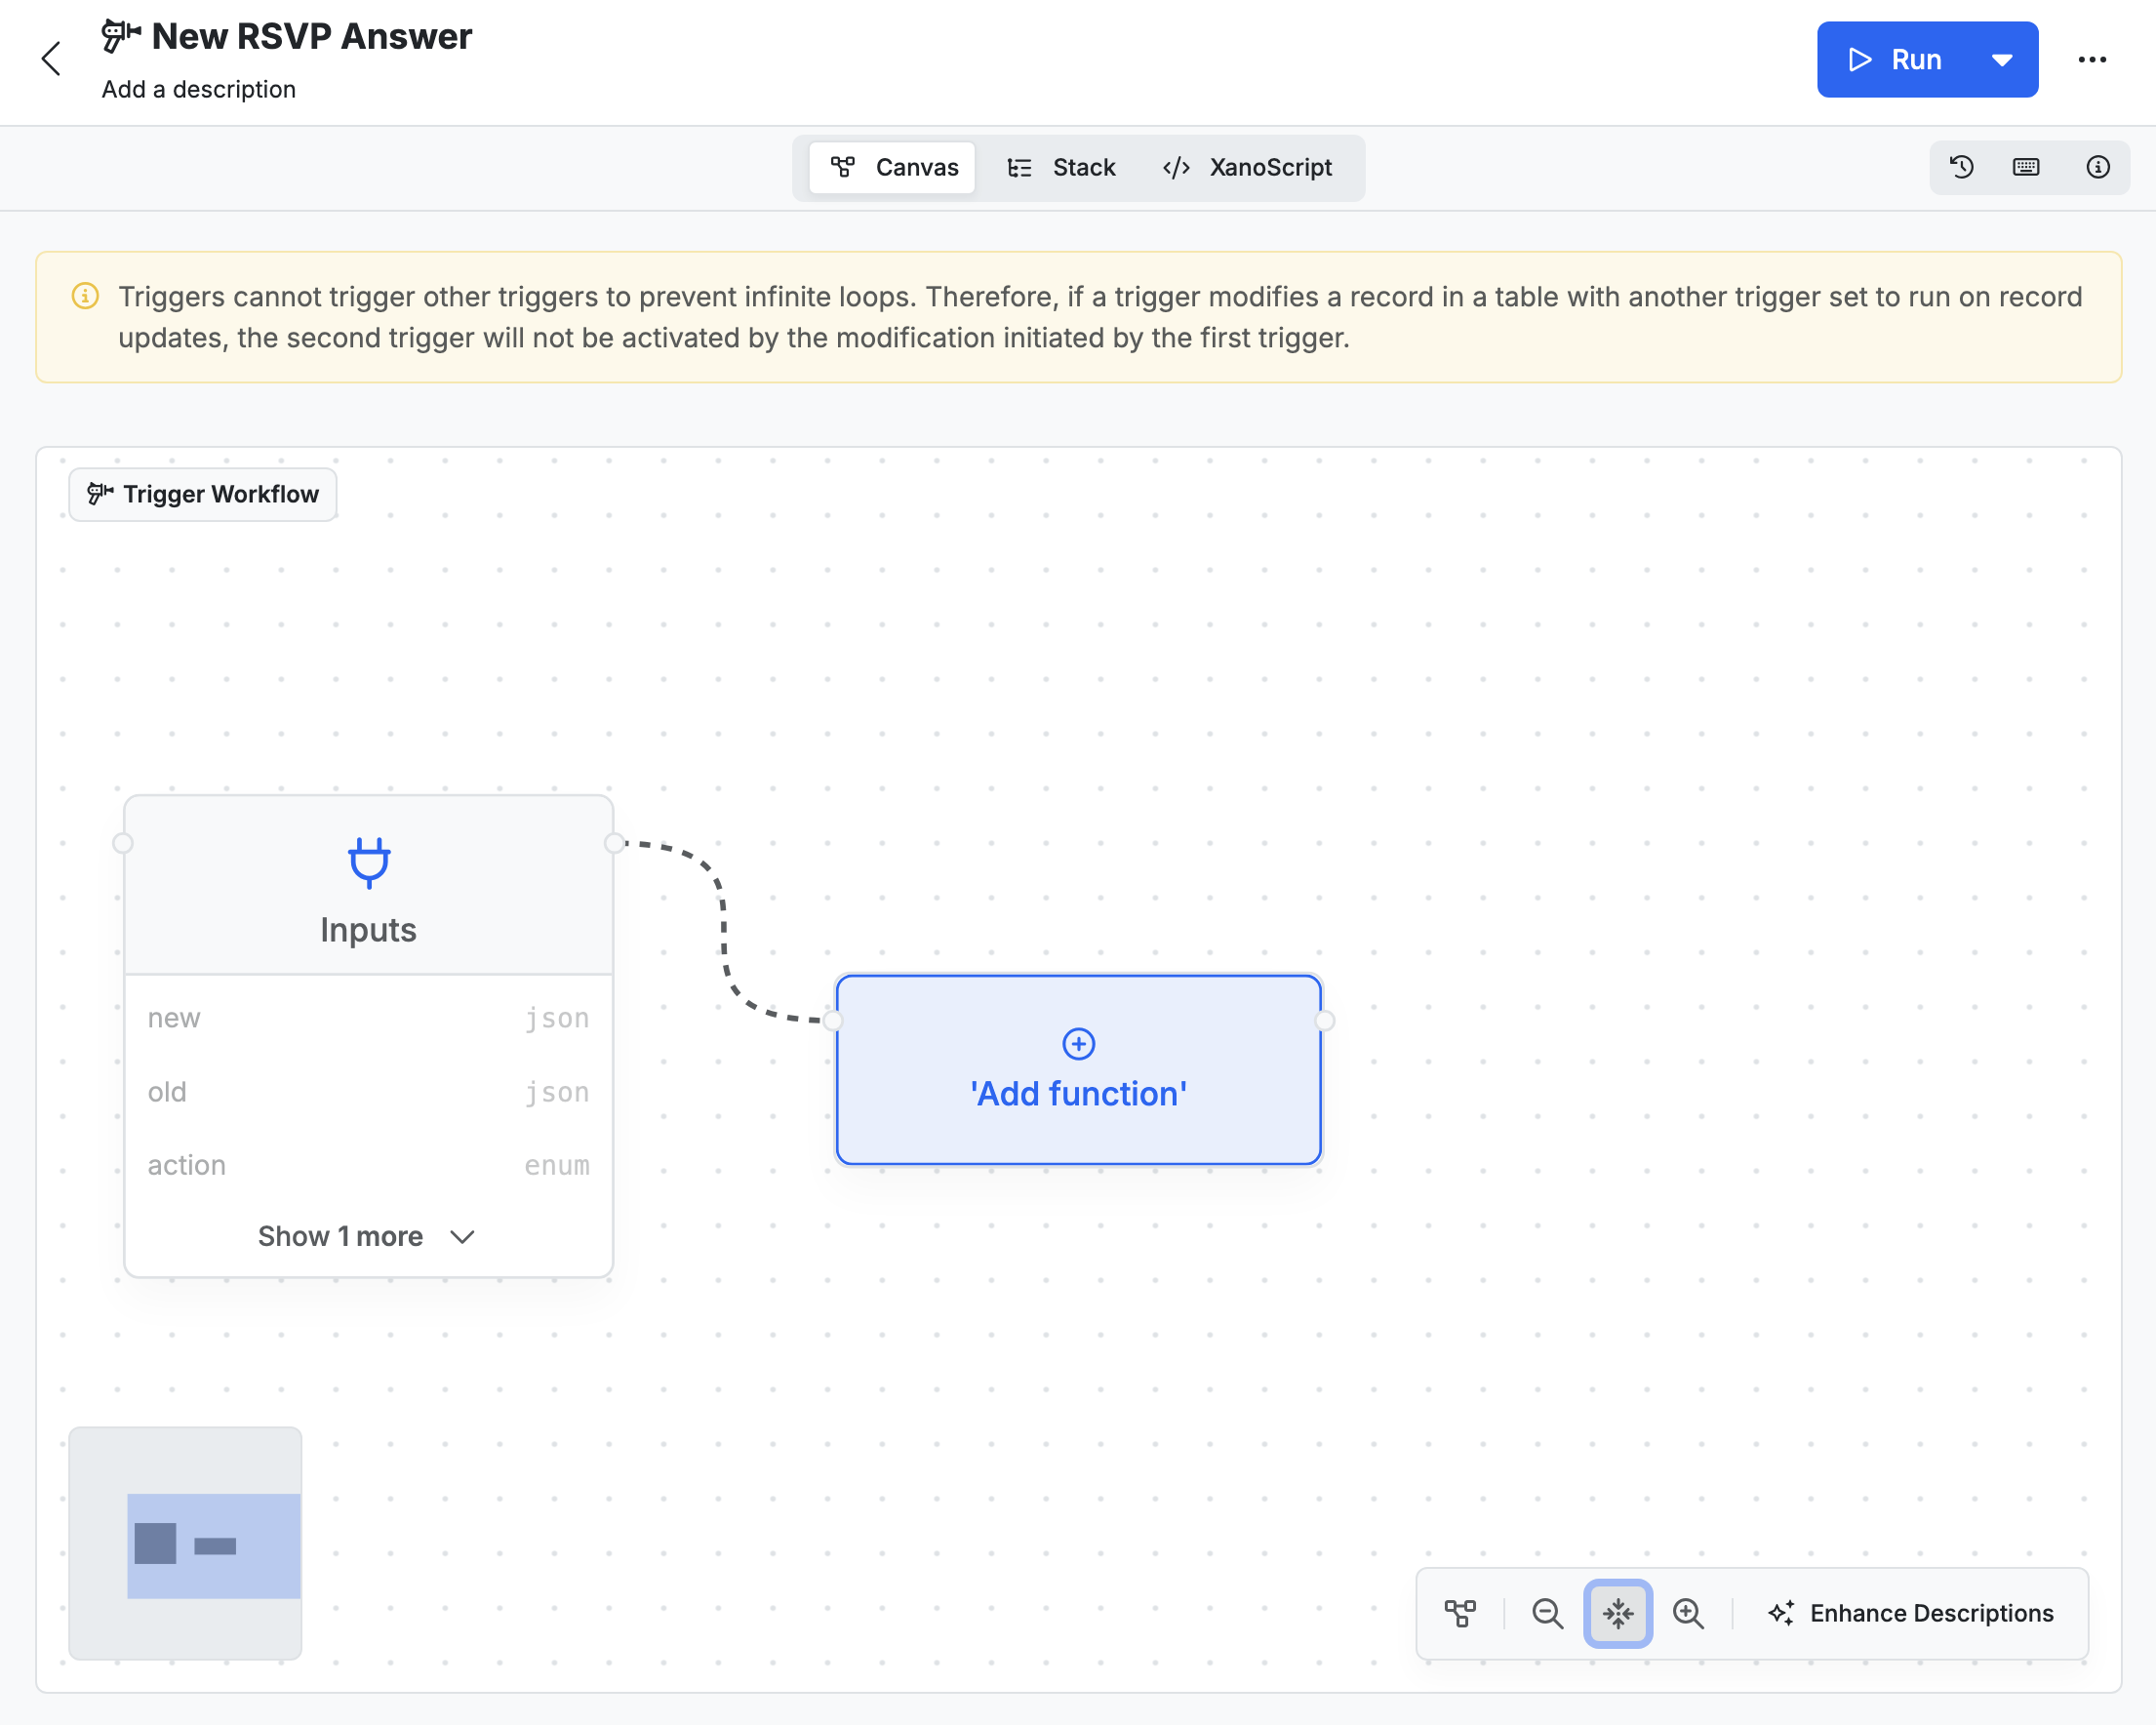
After creating the trigger, you’ll see a basic workflow containing only an Inputs function, which receives data about the new RSVP record whenever the trigger fires. You’ll build upon this foundation by adding functions that fetch event data and generate tickets.
Installing the DocuGenerate Snippet
To enable PDF generation capabilities in your Xano workspace, you need to install the DocuGenerate snippet from the Xano marketplace. Snippets are pre-built functions that extend Xano’s capabilities by integrating with external services.
Click Add to your Xano Account and follow the installation steps. Log in to your Xano account, select the instance where you want to add the snippet, and click Add to Instance. After confirming, you’ll be able to install the snippet directly to your workspace by selecting it from a list of available workspaces.
Once installed, the DocuGenerate snippet provides a Generate Document function that you can use in any workflow. This function connects to the DocuGenerate API to create documents from templates.
Configuring Your API Key
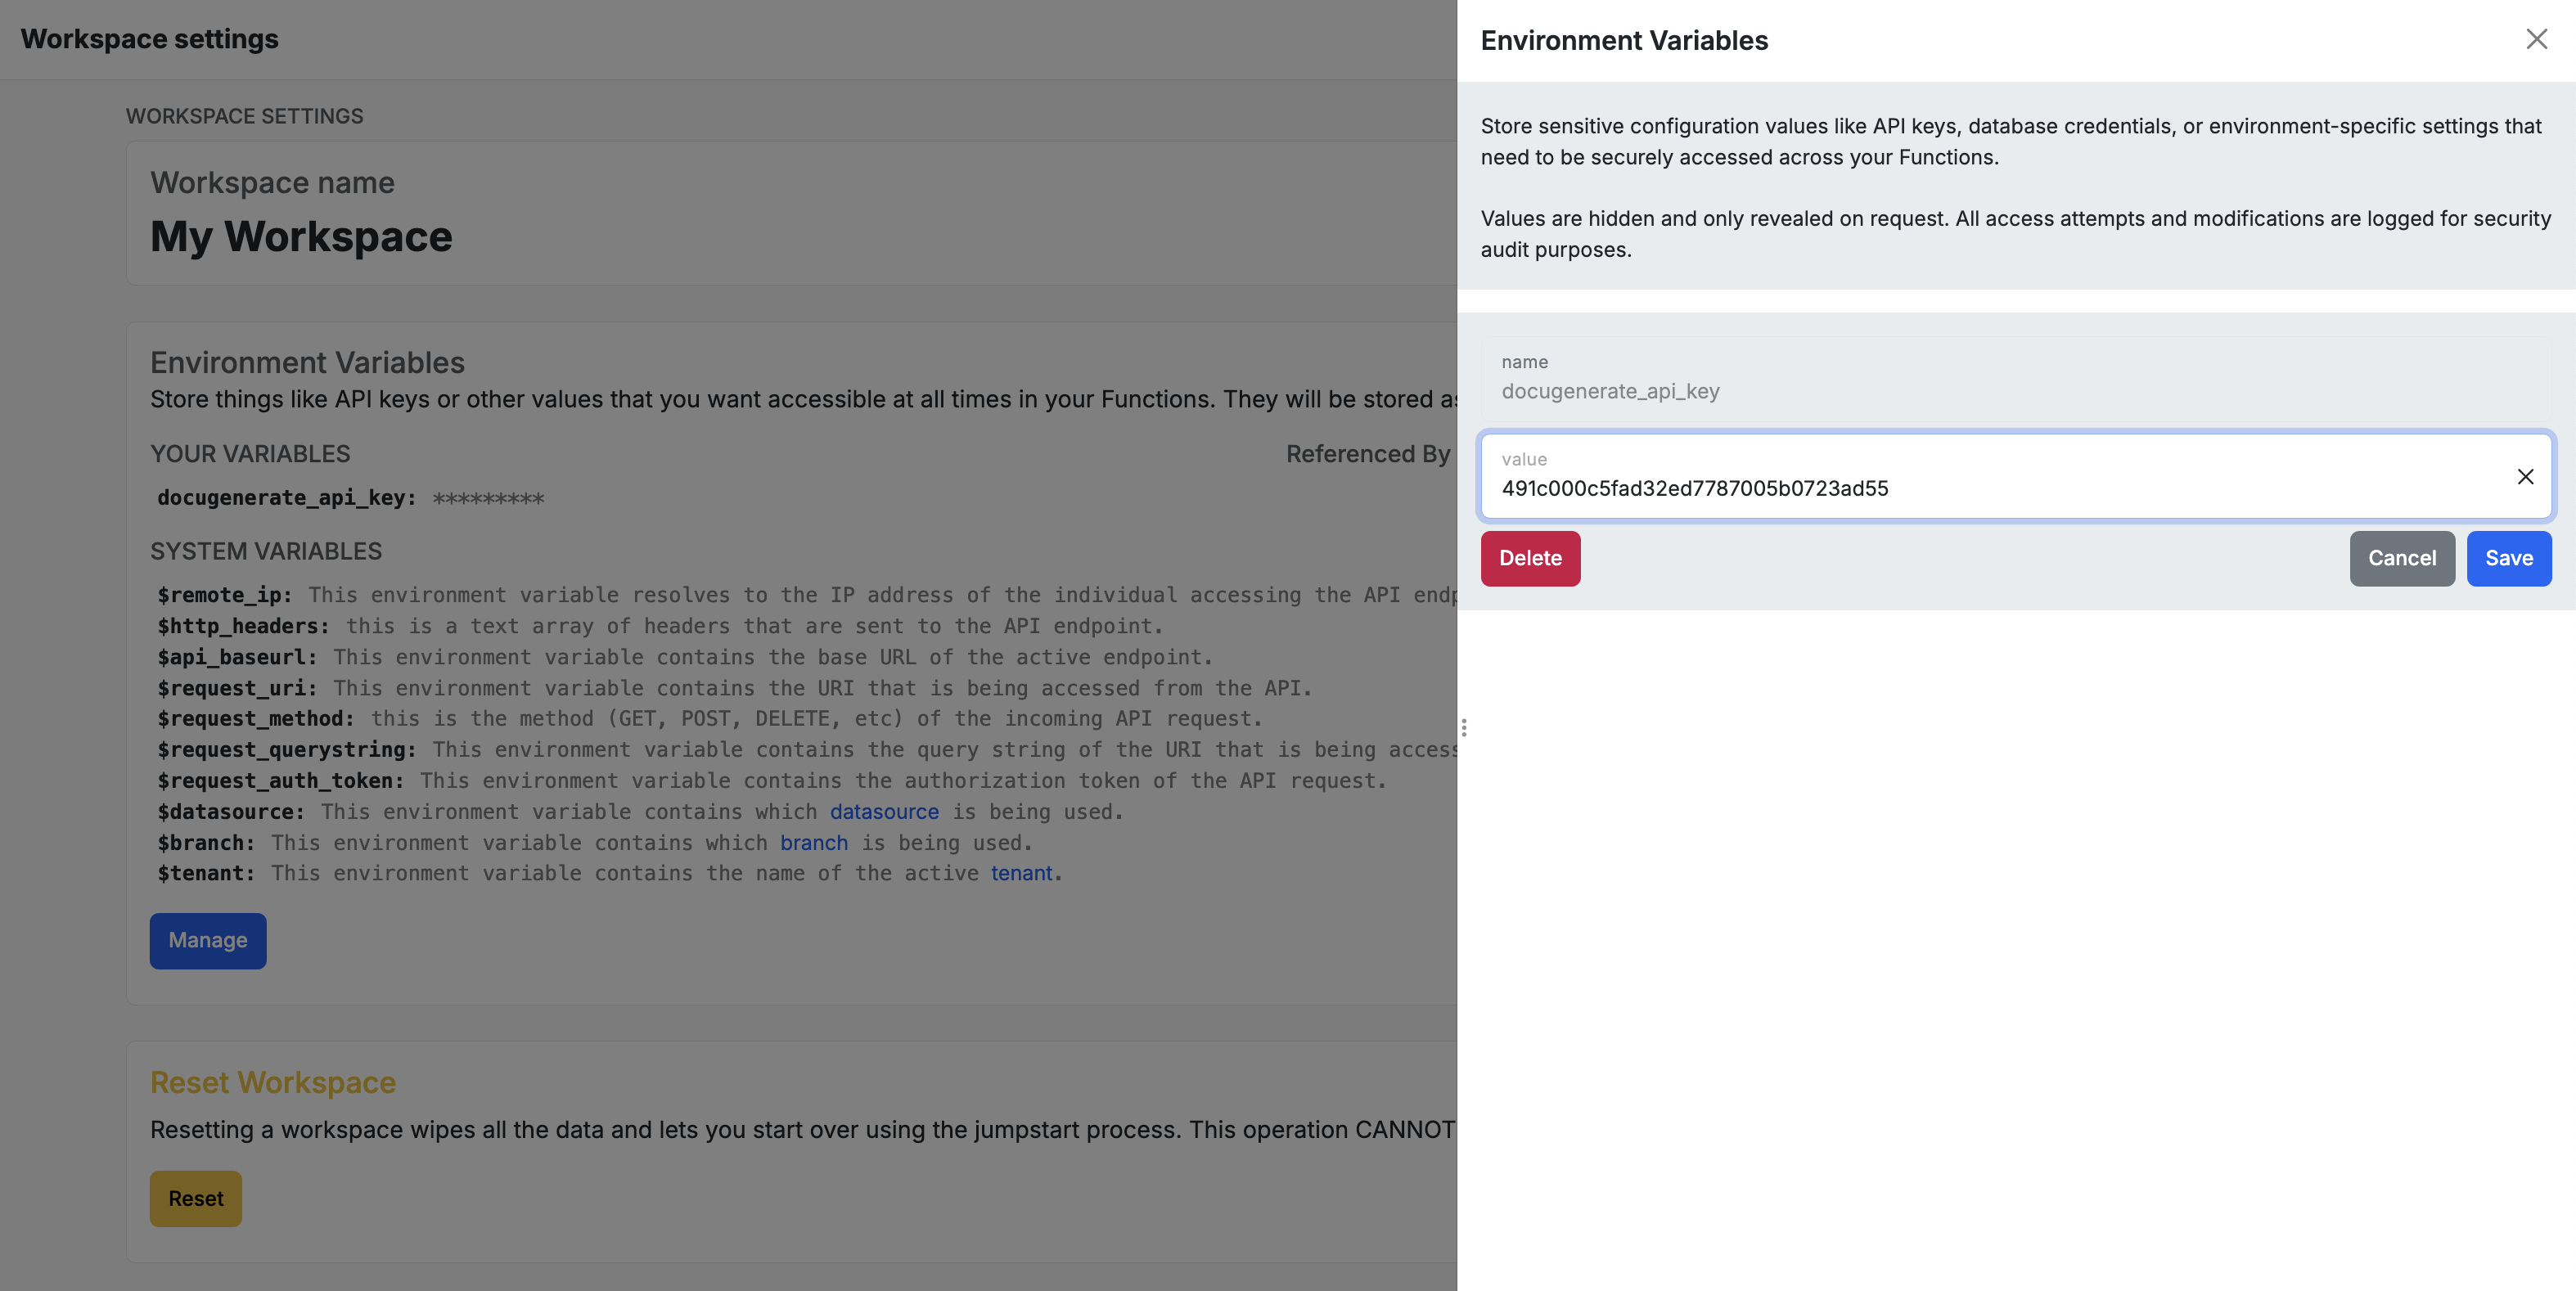
Before you can use the DocuGenerate snippet, you need to configure your API Key in the workspace settings. Navigate to your workspace settings in Xano and find the Environment Variables section. Click on the Manage button, then enter your API Key in the docugenerate_api_key variable. Don’t forget to click Save for the changes to apply.
Creating the RSVP Event Ticket Template
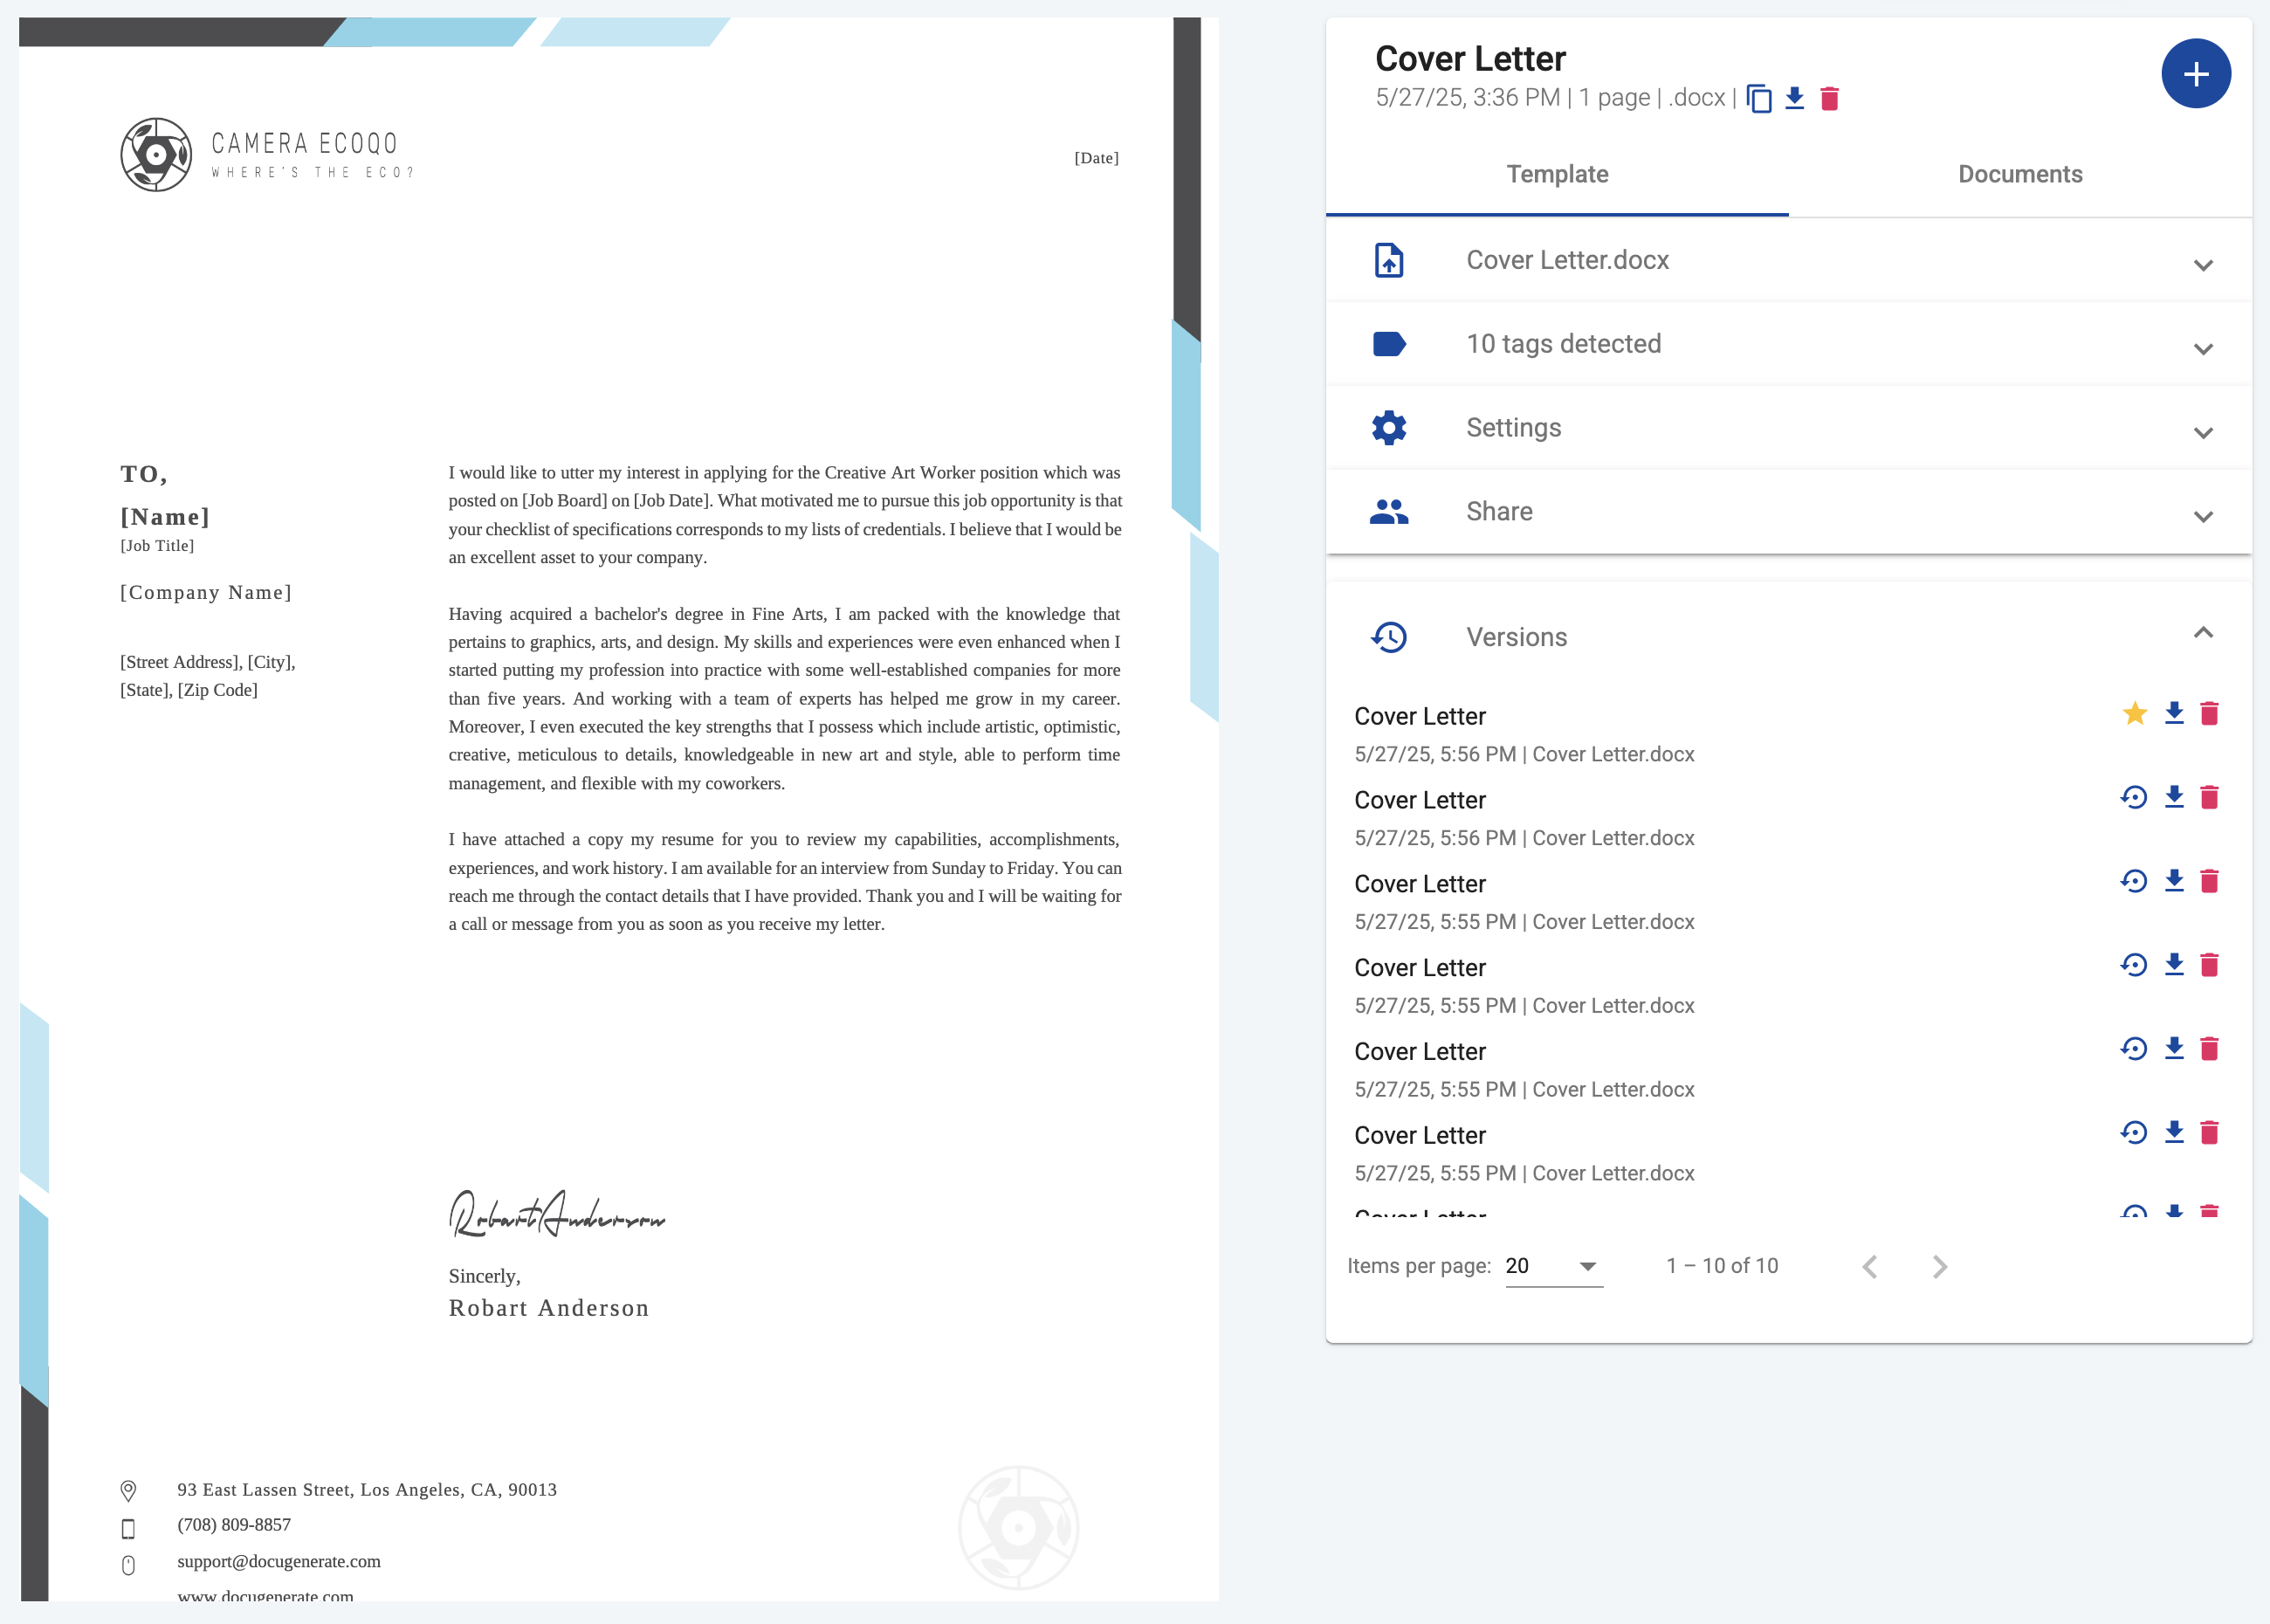
Next, you’ll need to create a Word template for your event tickets in DocuGenerate. The template should include merge tags for all the data points you want to display on the ticket. For this tutorial, we’ll use the following merge tags:
[event_name]: The name of the event[start_at]: The event start date and time[end_at]: The event end date and time[event_photo]: The event’s cover photo[rsvp_name]: The attendee’s name[rsvp_email]: The attendee’s email address
Create a new template in DocuGenerate and upload your Word document. Make sure to enable the enhanced syntax for this template, which allows you to use advanced features like the image resizing filter. Note that when using enhanced syntax, merge tag names cannot contain whitespace characters, which is why we use underscores instead of spaces.

You can download the template used in this tutorial and customize it for your own events. Once your template is created, copy its template ID from the DocuGenerate interface, as you’ll need this when configuring the Generate Document function in Xano later on.
Building the Trigger Workflow
Now that your trigger is created and DocuGenerate is installed, you’re ready to build the workflow that generates tickets. This workflow will fetch the event details for the RSVP and use that data to generate a personalized PDF ticket.
Configuring Document Generation
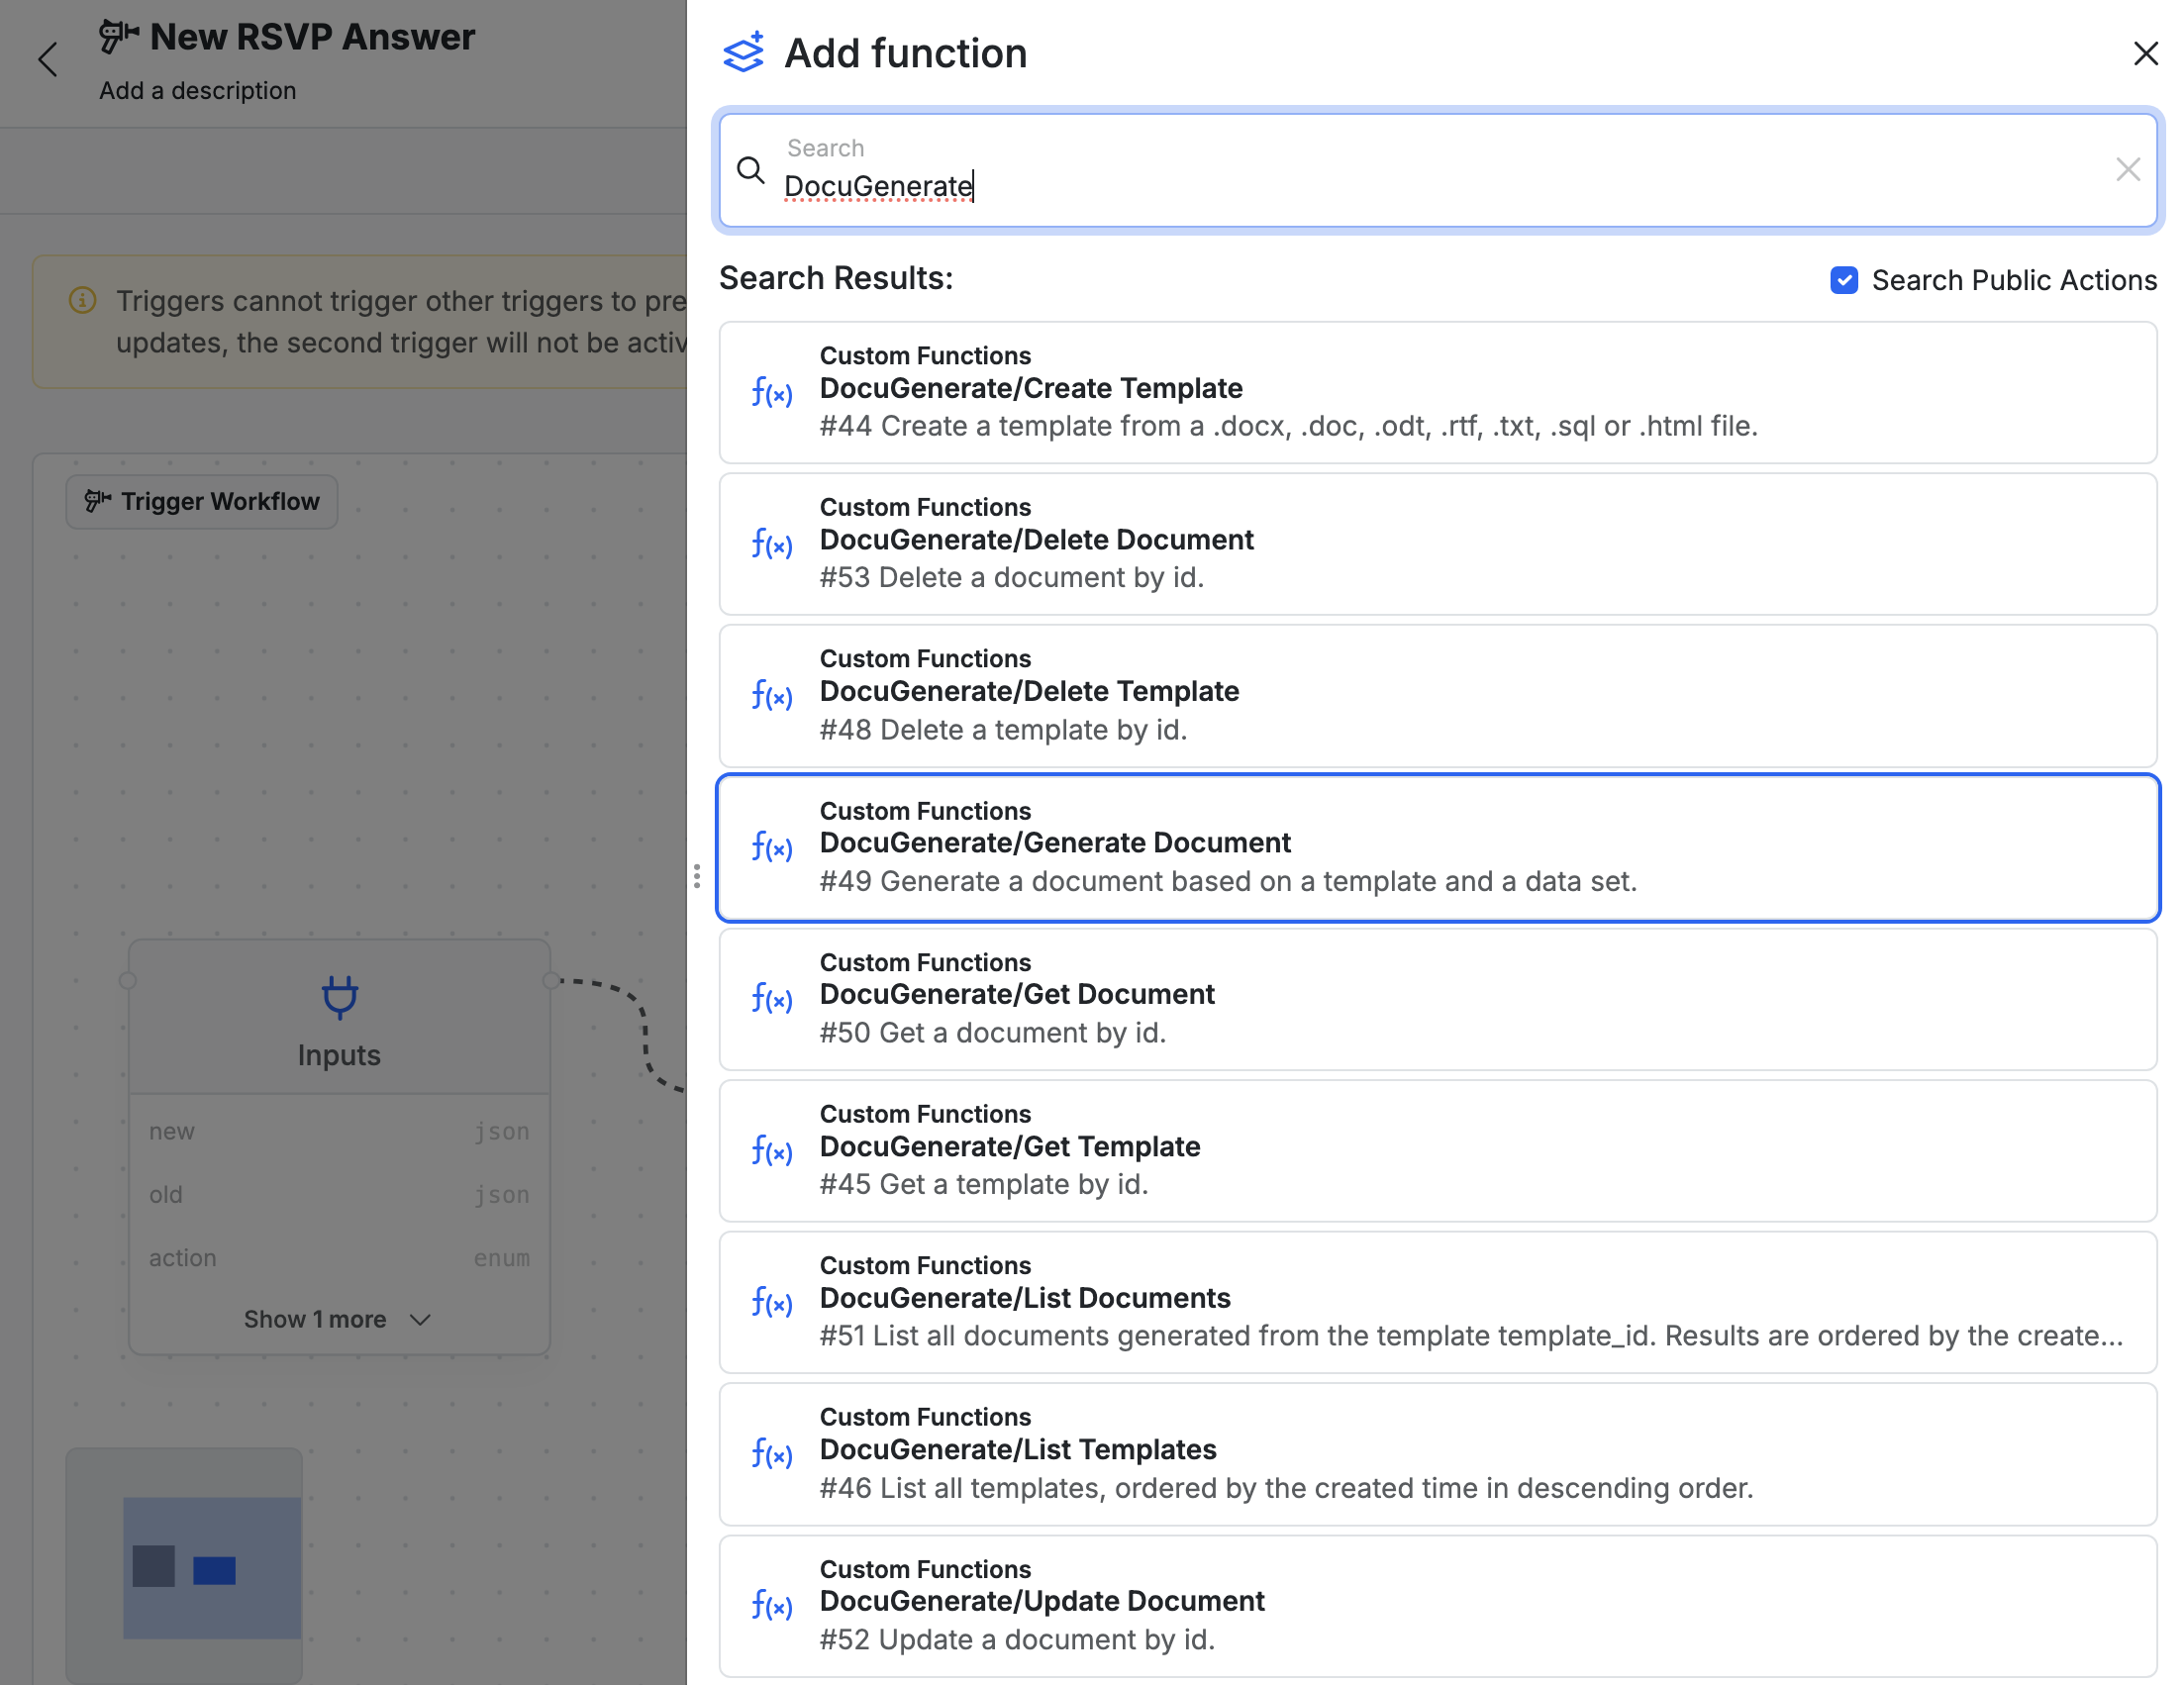
To add the Generate Document function to your workflow, click on Add function, search for “DocuGenerate” in the function library. Then select DocuGenerate/Generate Document from the results.
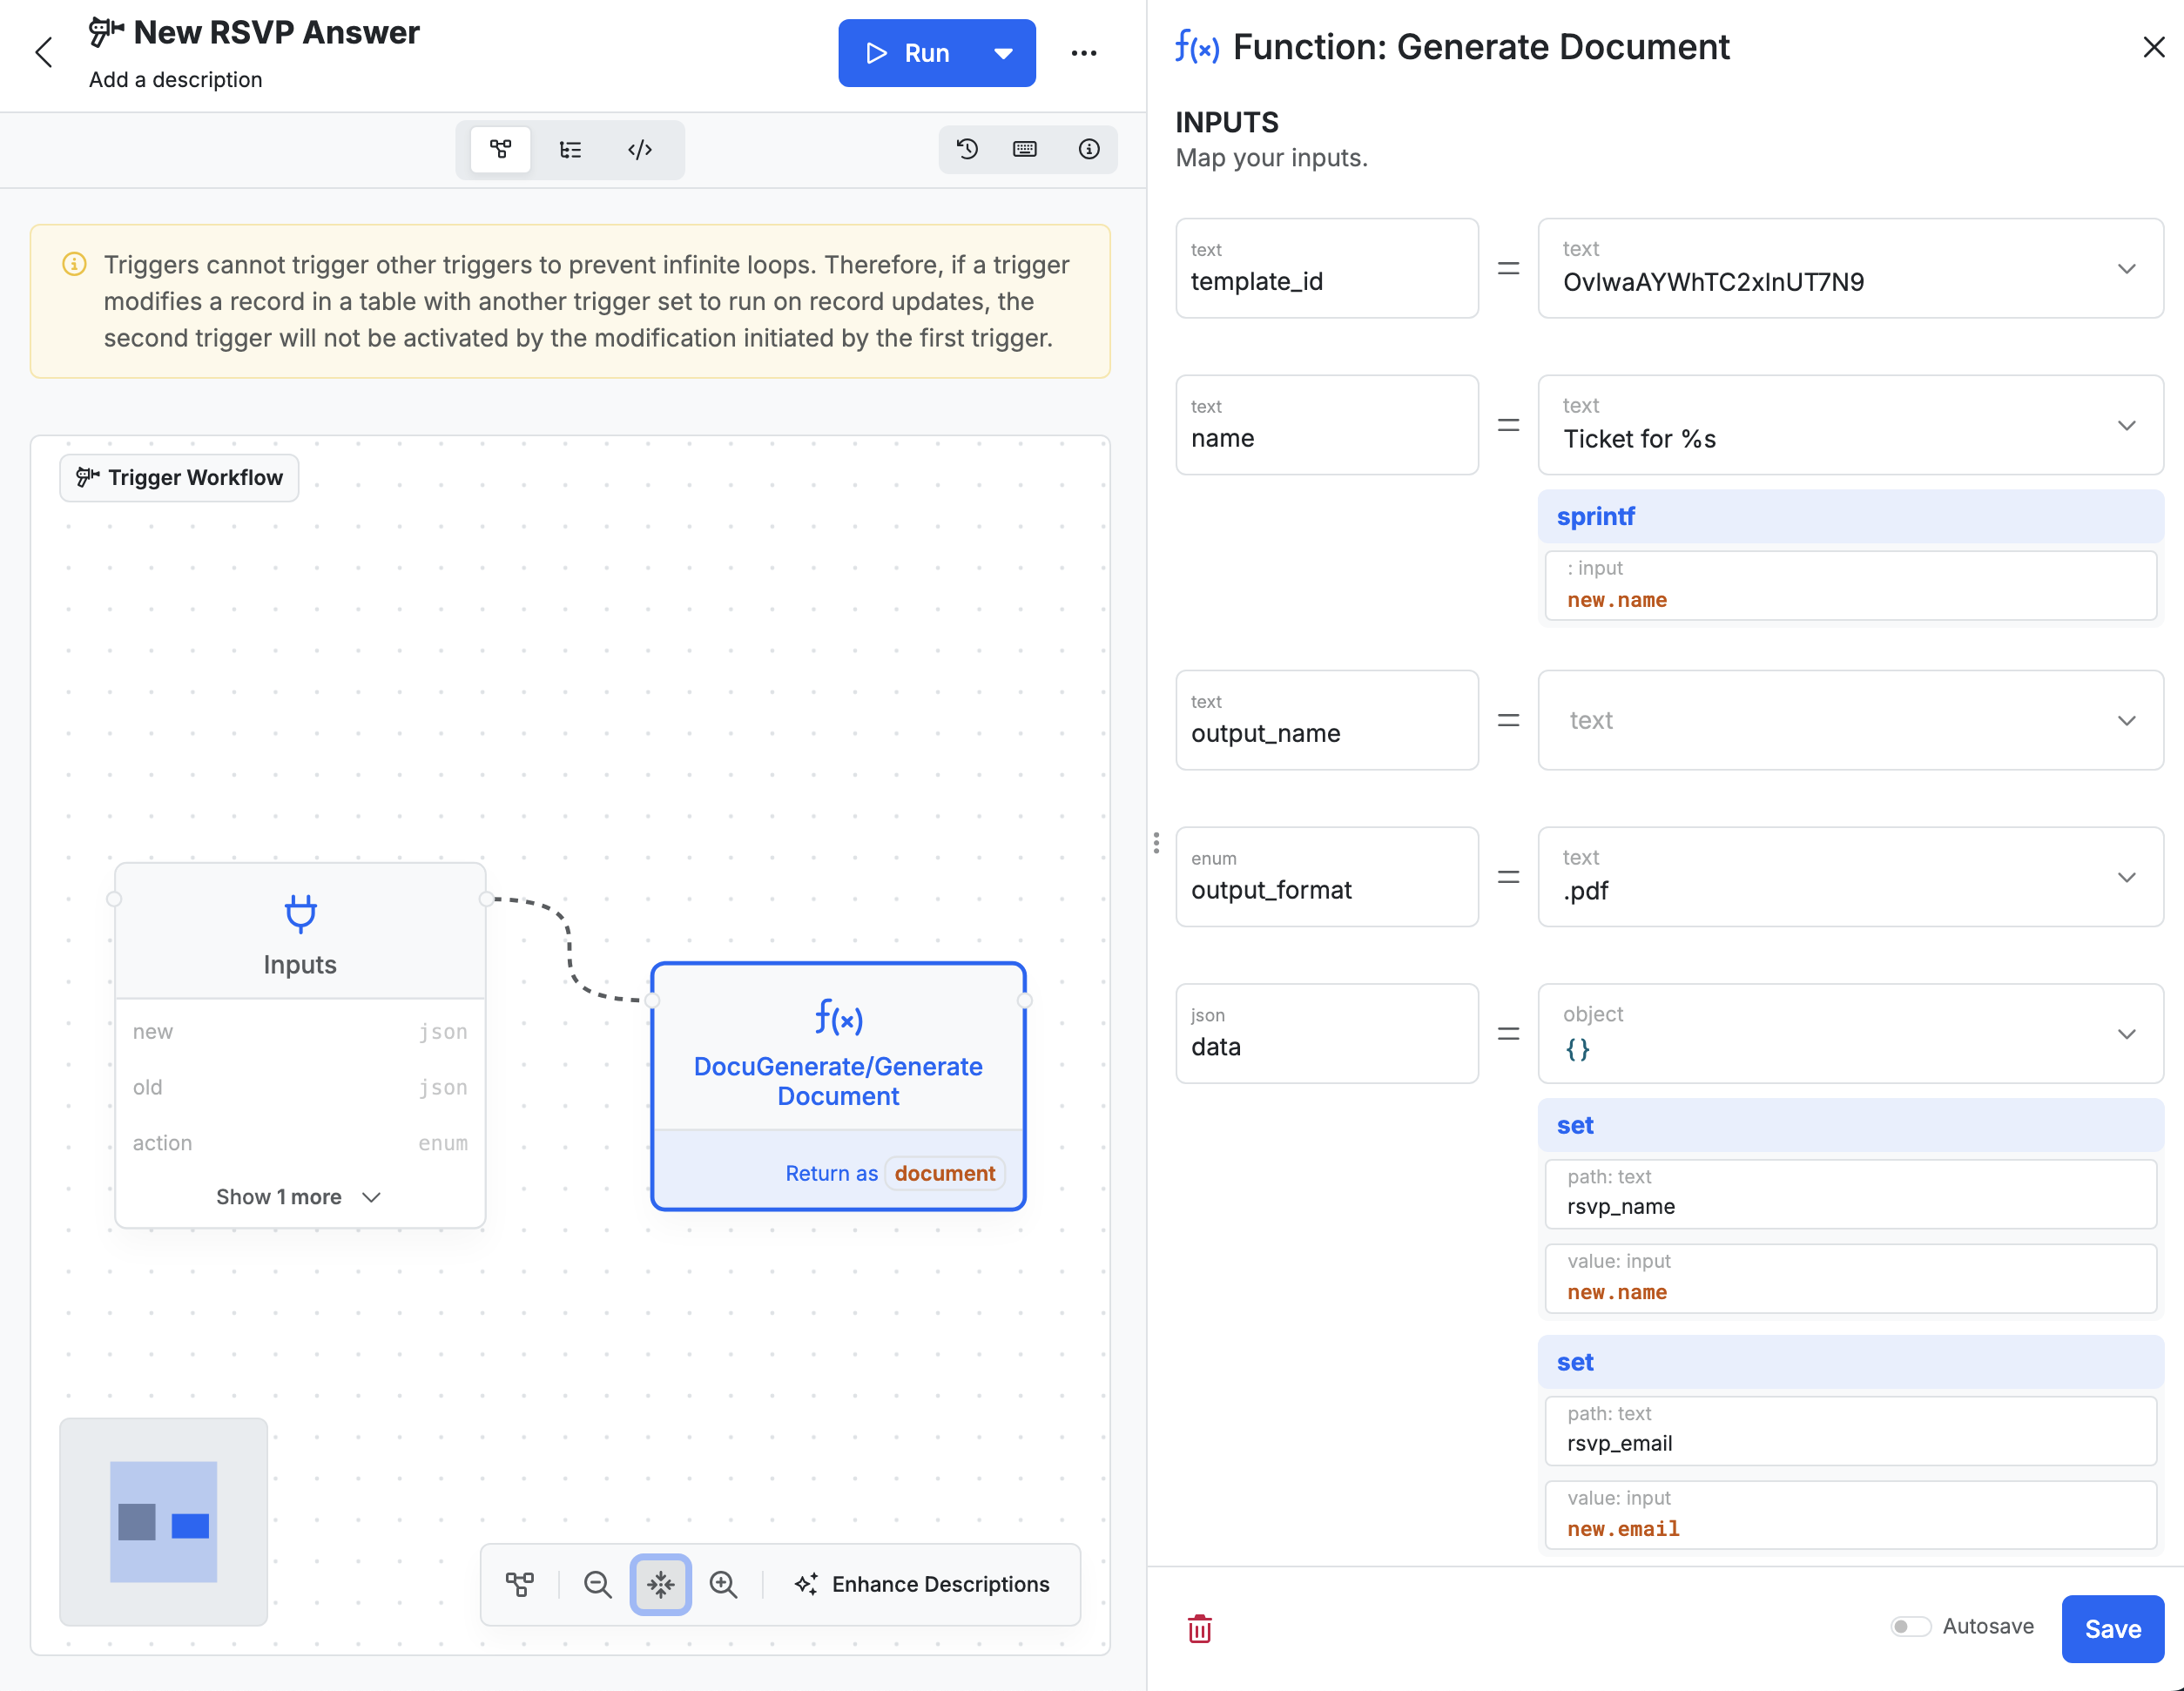
The Generate Document function requires several input fields:
- template_id: Paste the template ID from your RSVP Event Ticket template
- name: Set this to a dynamic value like
Ticket for %s using the sprintf function to include the attendee’s name from new.name - output_format: Set to
.pdf to generate PDF tickets - data: For the
data parameter, start by selecting the object type, then use the set filter multiple times to add key-value pairs. This object will contain the merge tag values for your template: - rsvp_name: Set to
new.name from the RSVP record - rsvp_email: Set to
new.email from the RSVP record
With this configuration, the ticket will only be populated with the person’s data. We need to also include the event data on the ticket.
Fetching Event Data
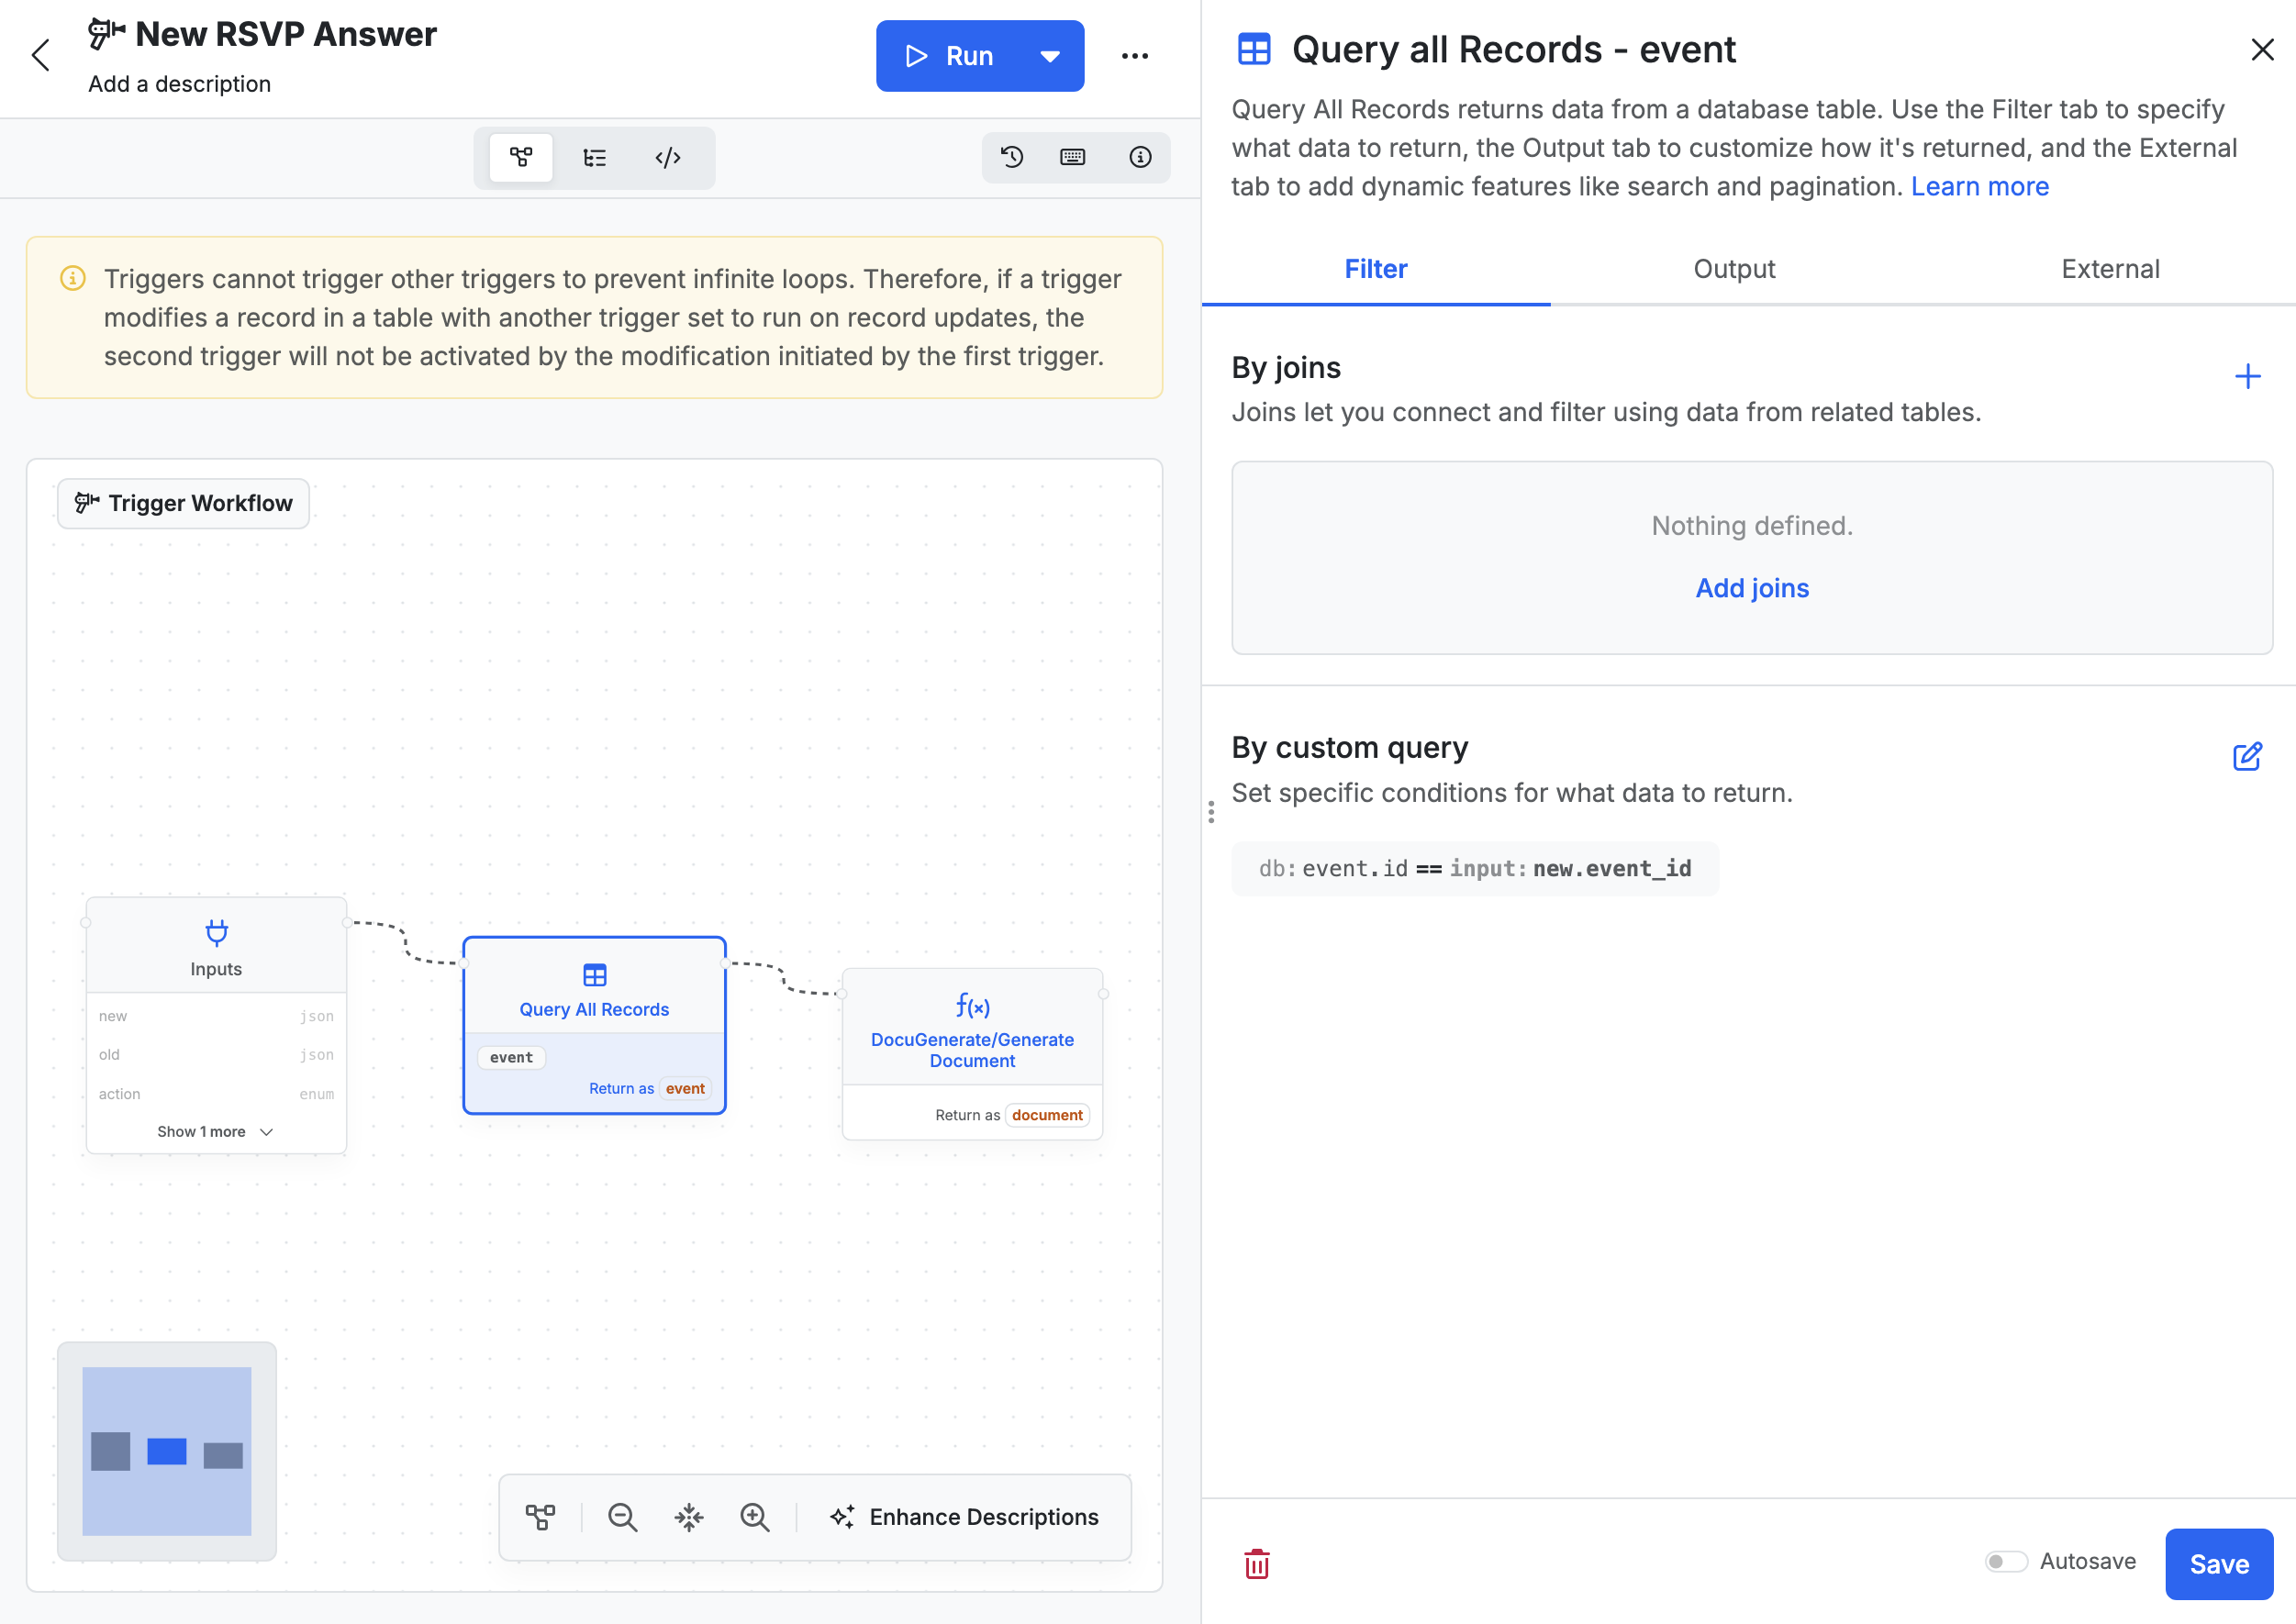
The RSVP record contains an event_id field that references the associated event. You need to fetch the complete event details before generating the ticket. Add a Query all Records function to your trigger workflow before Generate Document and configure it to query the event table.
To fetch only the specific event for this RSVP, add a filter using a custom query: db:event.id==input:new.event_id. This condition matches the event ID from the database with the event ID in the new RSVP record. In the Return settings, change the return type to single instead of the default list, since you’re only expecting one event record. Finally, set the Return as value to event so you can reference this data later in the workflow.
Adding Event Data to the Ticket
With the event data fetched in the event variable, we need to go back to configuring the Generate Document function and add the following mappings to the data input:
- event_name: Set to
event.name from the event record you fetched earlier - start_at: Set to
event.start_at formatted using the format_timestamp filter with the format M j, Y h:i A to display dates like “Oct 31, 2023 12:00 AM” - end_at: Set to
event.end_at also formatted as M j, Y h:i A - event_photo: Set to
event.cover_photo.url to include the event’s cover image in the ticket
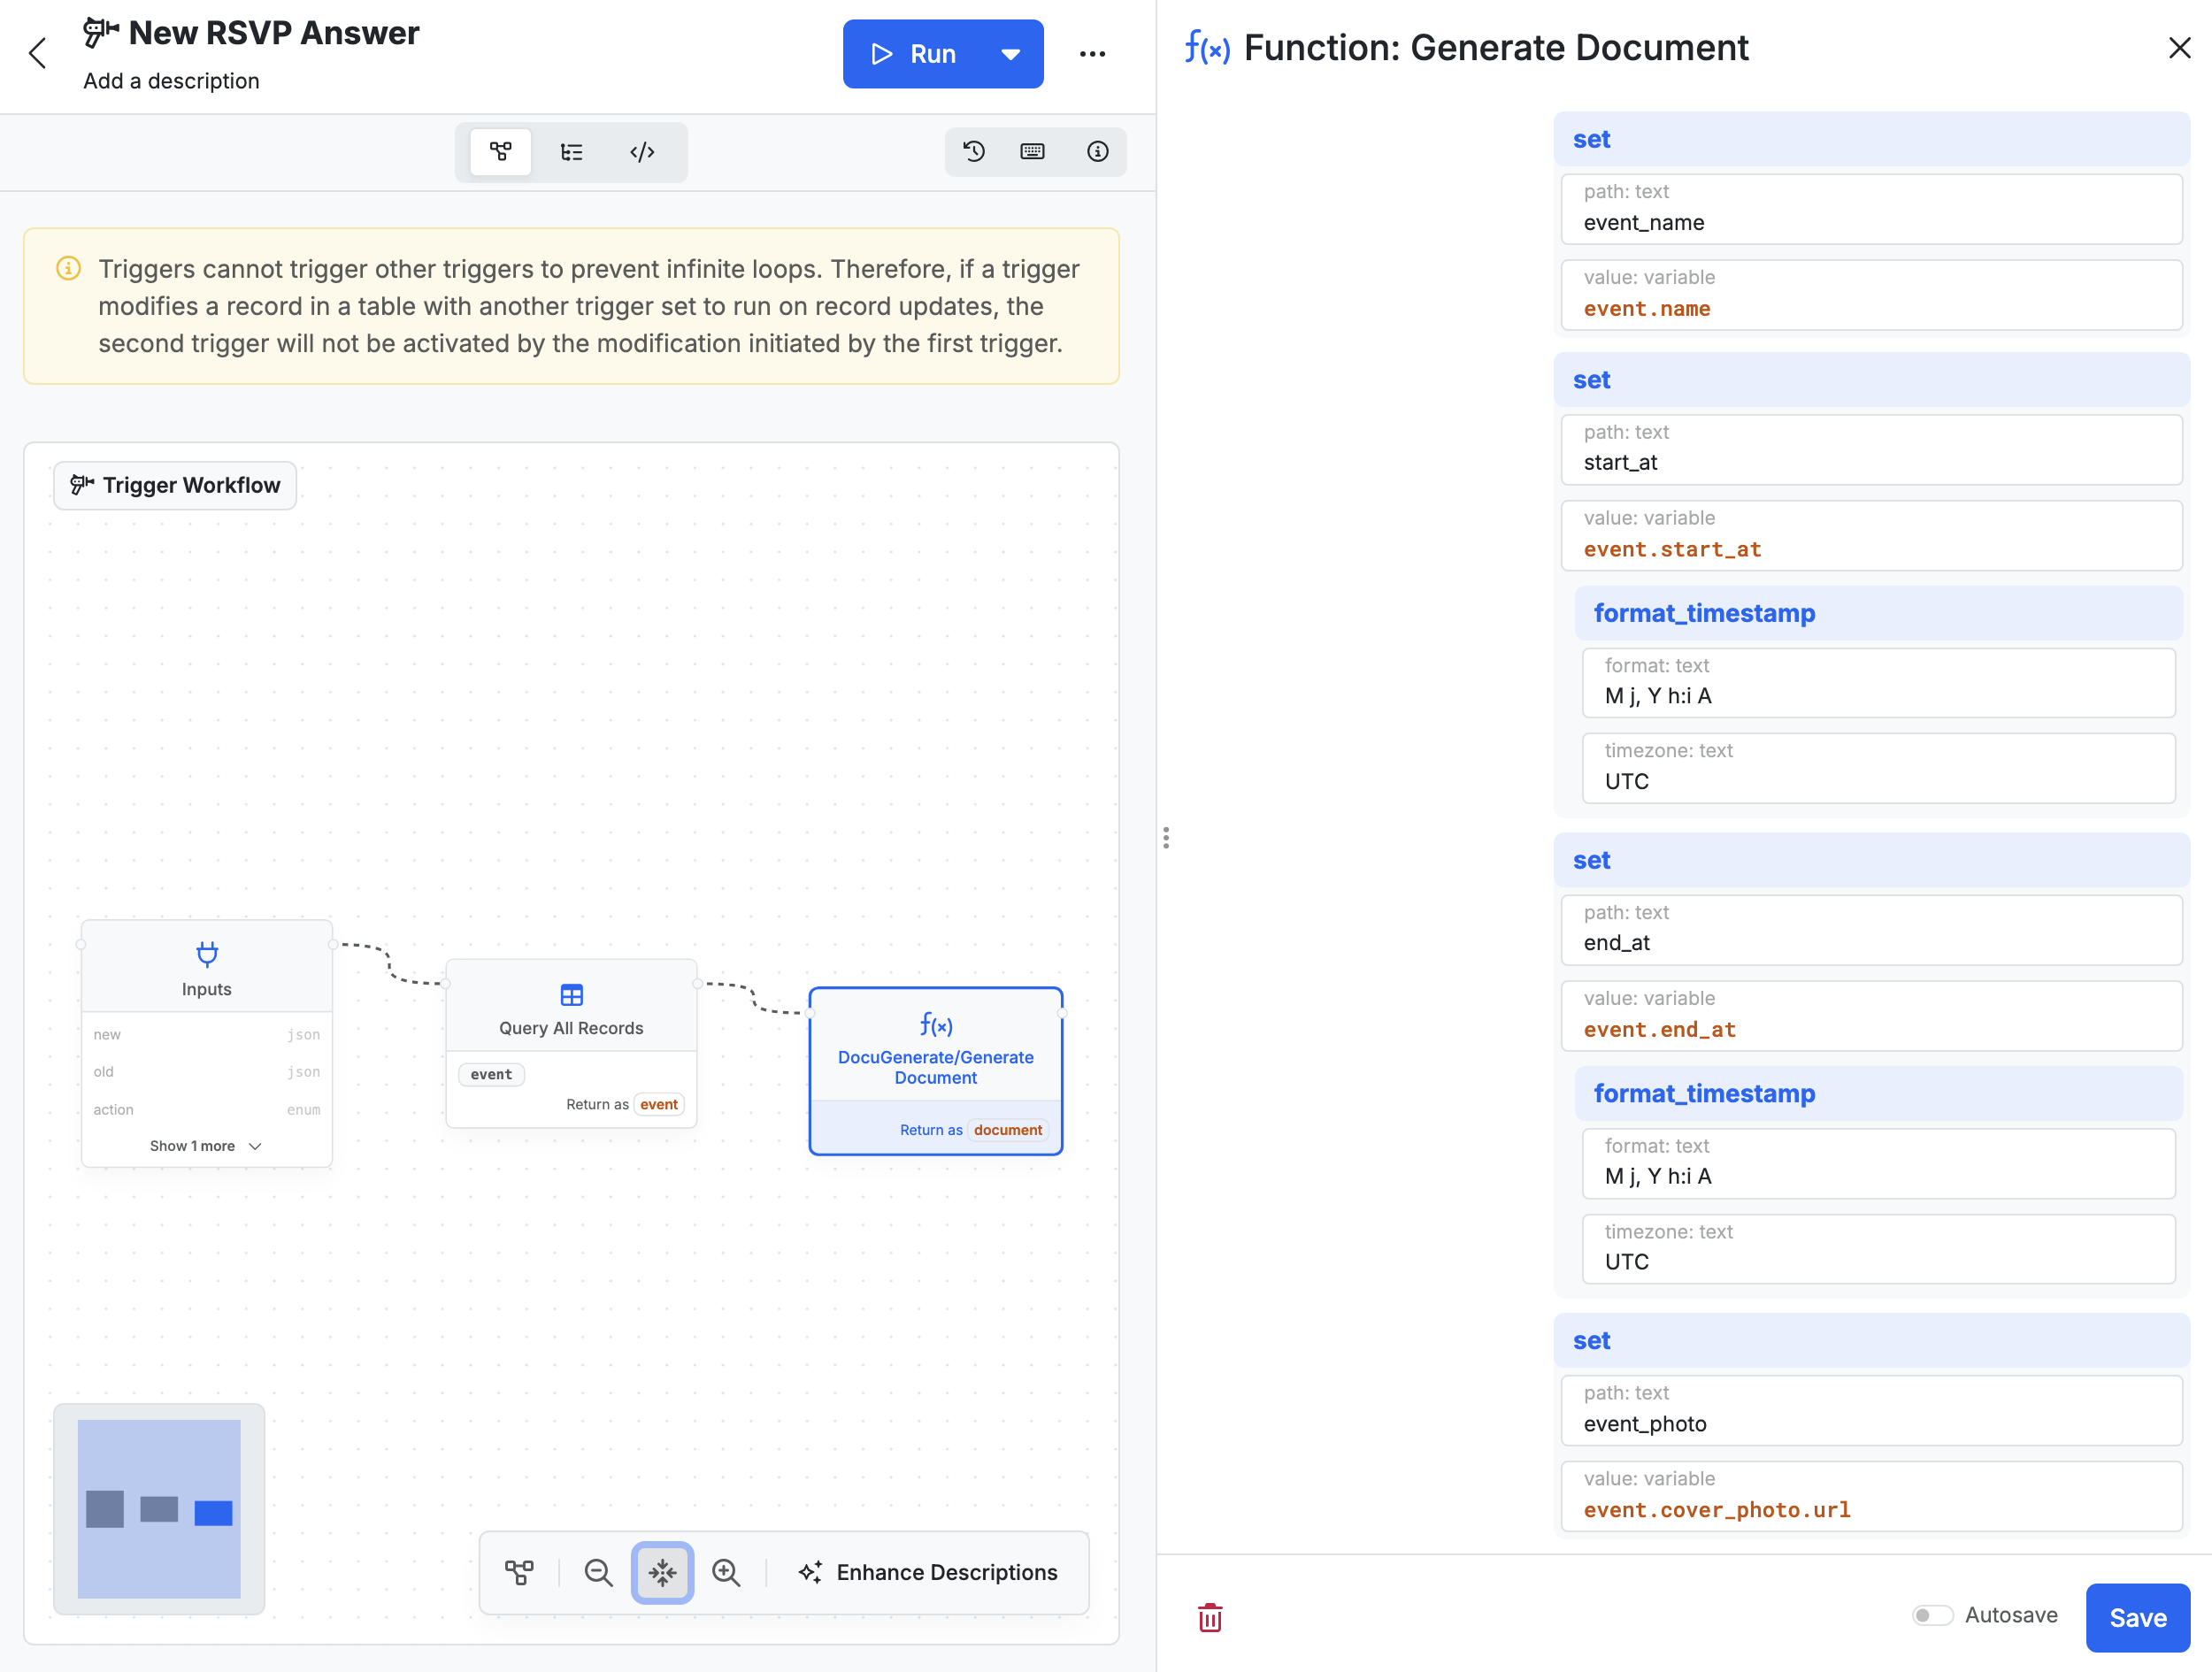
The format_timestamp filter is particularly useful here because it transforms Xano’s timestamp format into a human-readable format that looks professional on your tickets.
Testing The Workflow End-to-End
With your trigger workflow complete, it’s time to test the entire system. Navigate back to the demo application and submit a new RSVP for any event. When you submit the form, the trigger executes automatically in the background.
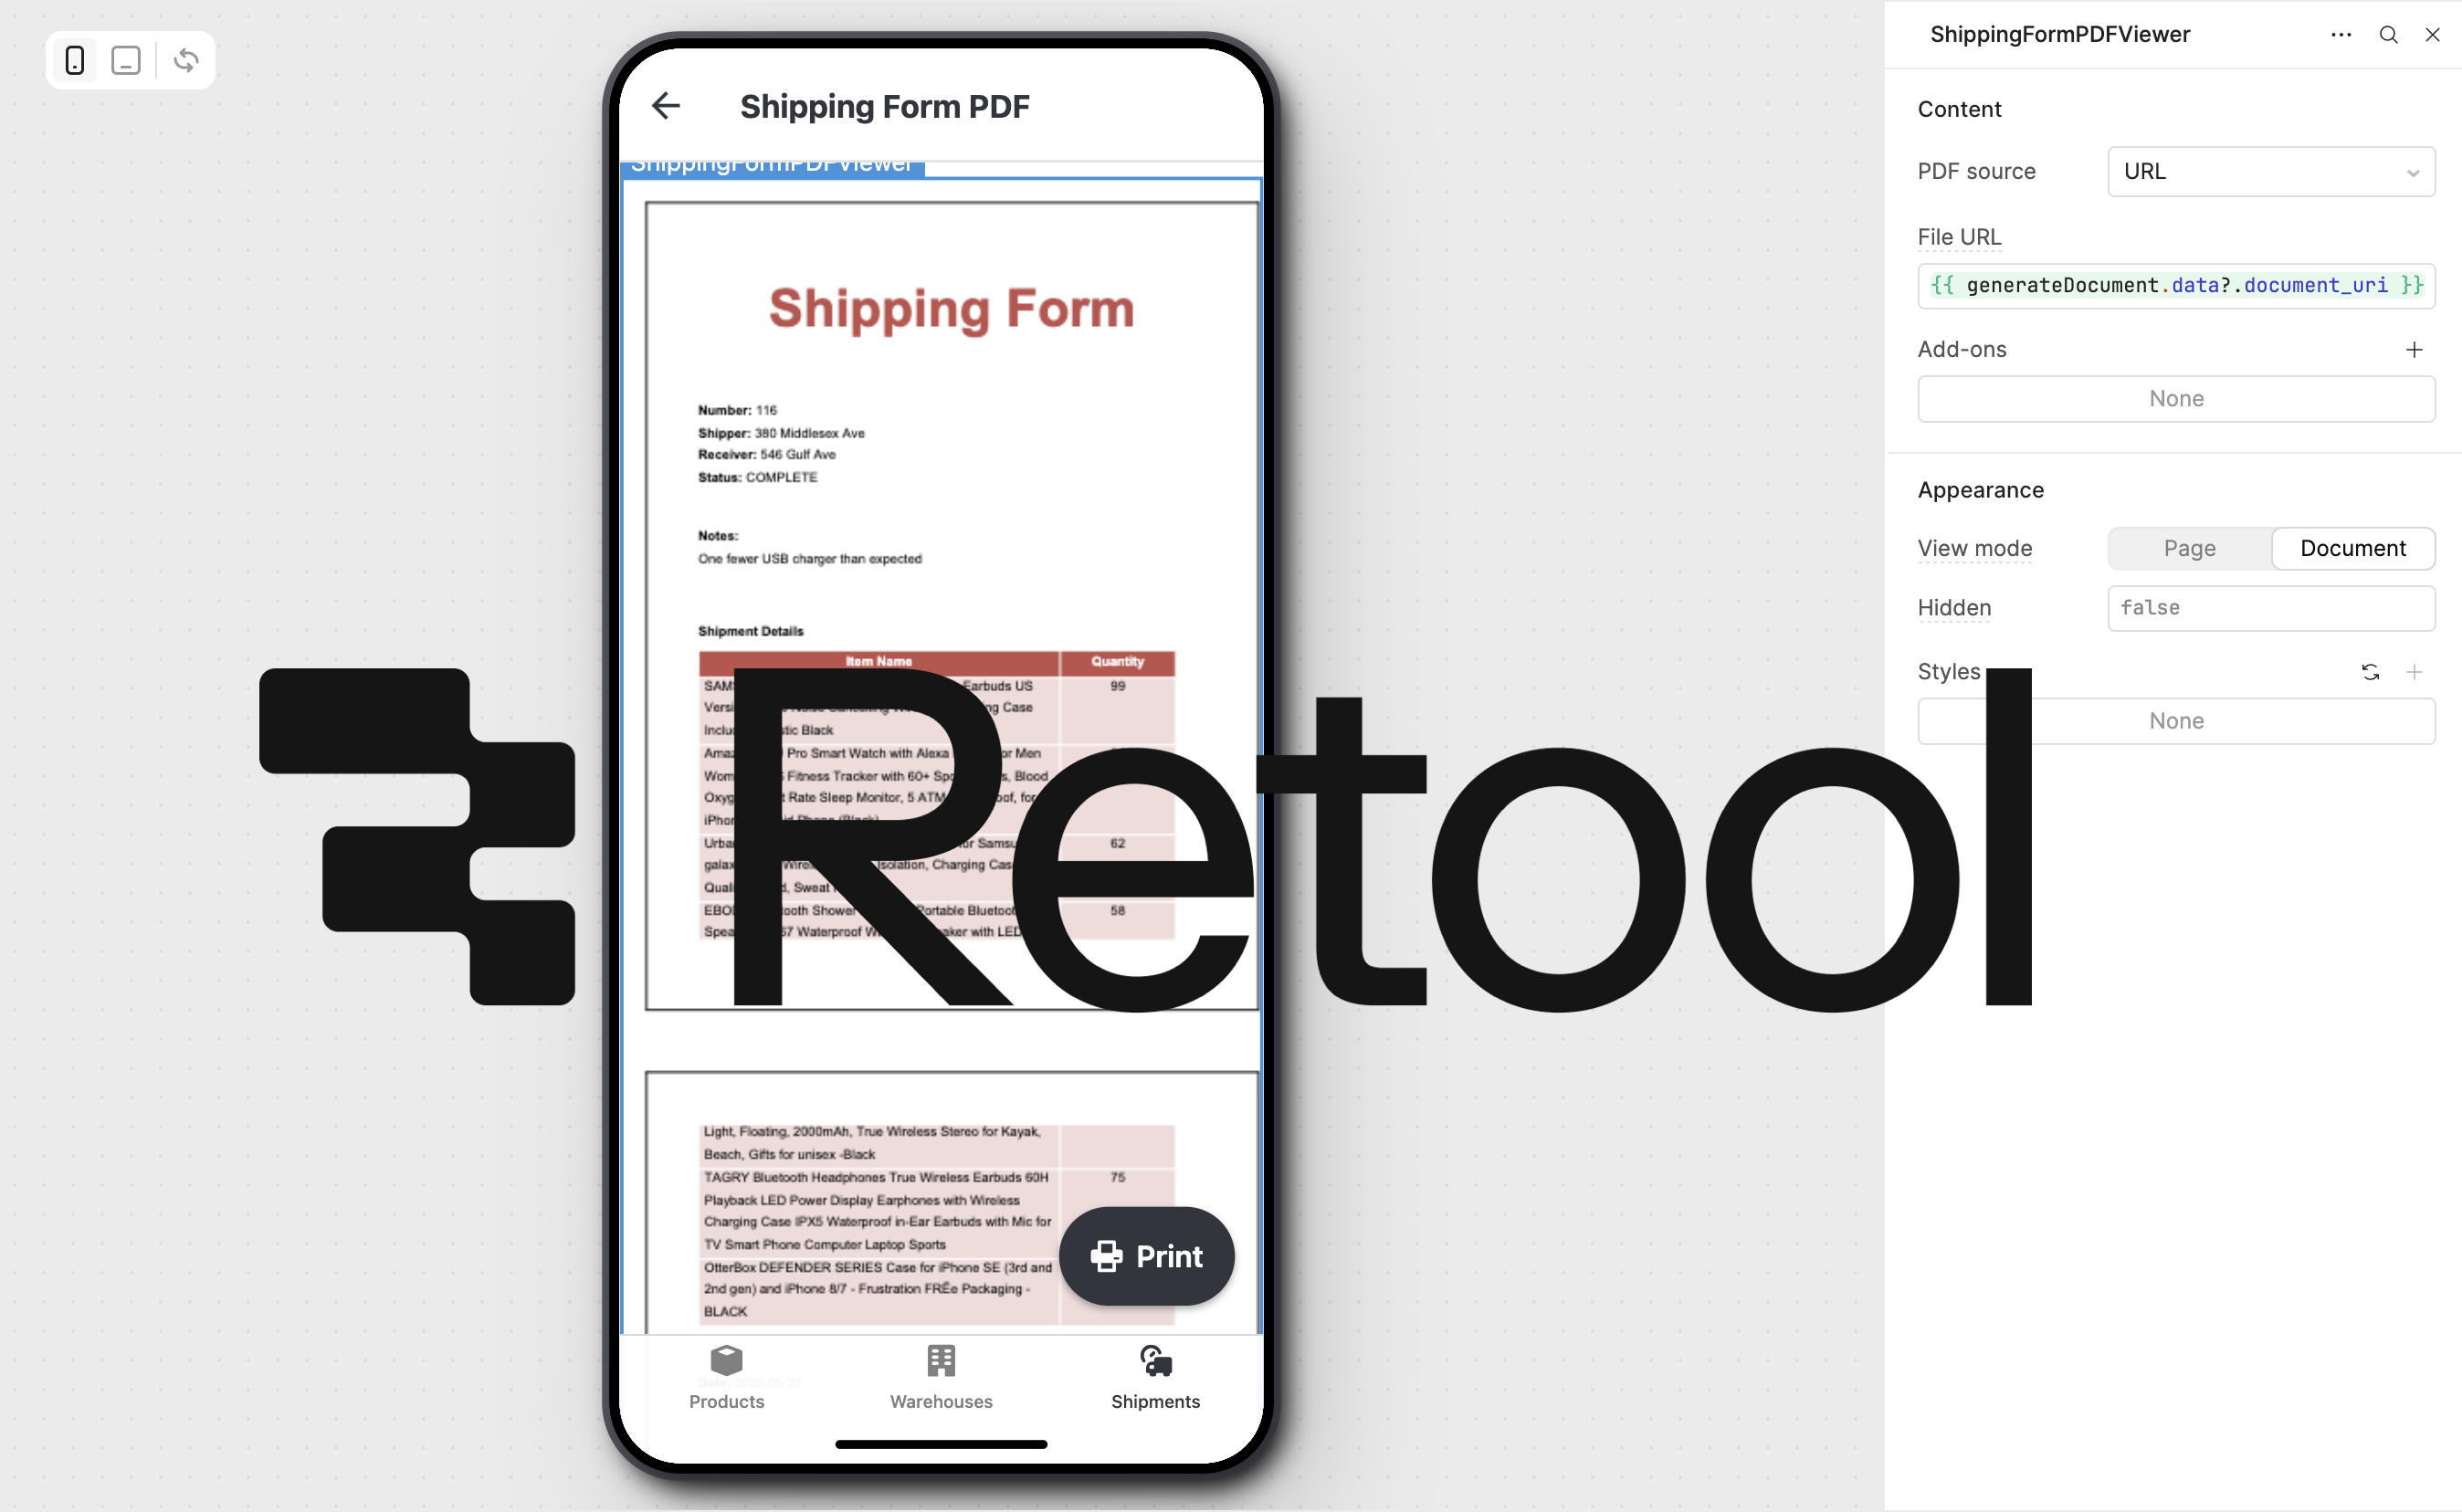
For example, try RSVPing to the “2 Day Pokemon Dance Party” event with your name and email. Then navigate to your template in DocuGenerate and view its generated documents. You should see a new document corresponding to your RSVP response.

The ticket should include the attendee’s name, email, event information, dates, and the event’s cover photo. For reference, you can download the example PDF ticket generated in this tutorial.
Possible Enhancements
The current workflow successfully generates tickets, but there are several ways you could enhance it to create an even more powerful event management system.
One valuable enhancement would be automatically emailing the ticket to the attendee. Xano supports email integration through various providers, and you could add an email function after the document generation step. This would send the ticket URL or attach the PDF directly to a confirmation email, providing instant gratification to attendees and reducing your administrative workload.
Another possibility is adding QR codes to your tickets using DocuGenerate’s QR code feature. You could encode the RSVP ID or a unique confirmation code in the QR code, making it easy to scan tickets at event check-in and verify attendance.
For events with limited capacity, you could add logic to check the current RSVP count before generating tickets. If the event is at capacity, the workflow could either prevent new RSVPs or add attendees to a waiting list instead of immediately generating tickets.
Conclusion
We’ve successfully built an automated event ticketing system that generates personalized PDF tickets when attendees RSVP to your events. This workflow demonstrates the power of combining Xano’s backend capabilities with DocuGenerate’s document generation features, all without writing traditional code.
The system is both practical and extensible, and can adapt to other use cases beyond event tickets, such as generating certificates, invoices, or any other document that needs to be created automatically based on database changes. The key concept of using database triggers to initiate document generation workflows can be applied to countless scenarios.
As you continue working with Xano and DocuGenerate, consider how you might customize this workflow for your specific needs. Whether you’re managing small community events or large conferences, this automated ticketing system provides a solid foundation that can scale with your requirements.
Resources