Introduction
In today’s digital workplace, automating document workflows saves valuable time and ensures consistency across your organization. Whether you’re generating employment certificates, contracts, invoices, or other business documents, having them automatically saved to cloud storage eliminates manual file management and creates a reliable backup system.
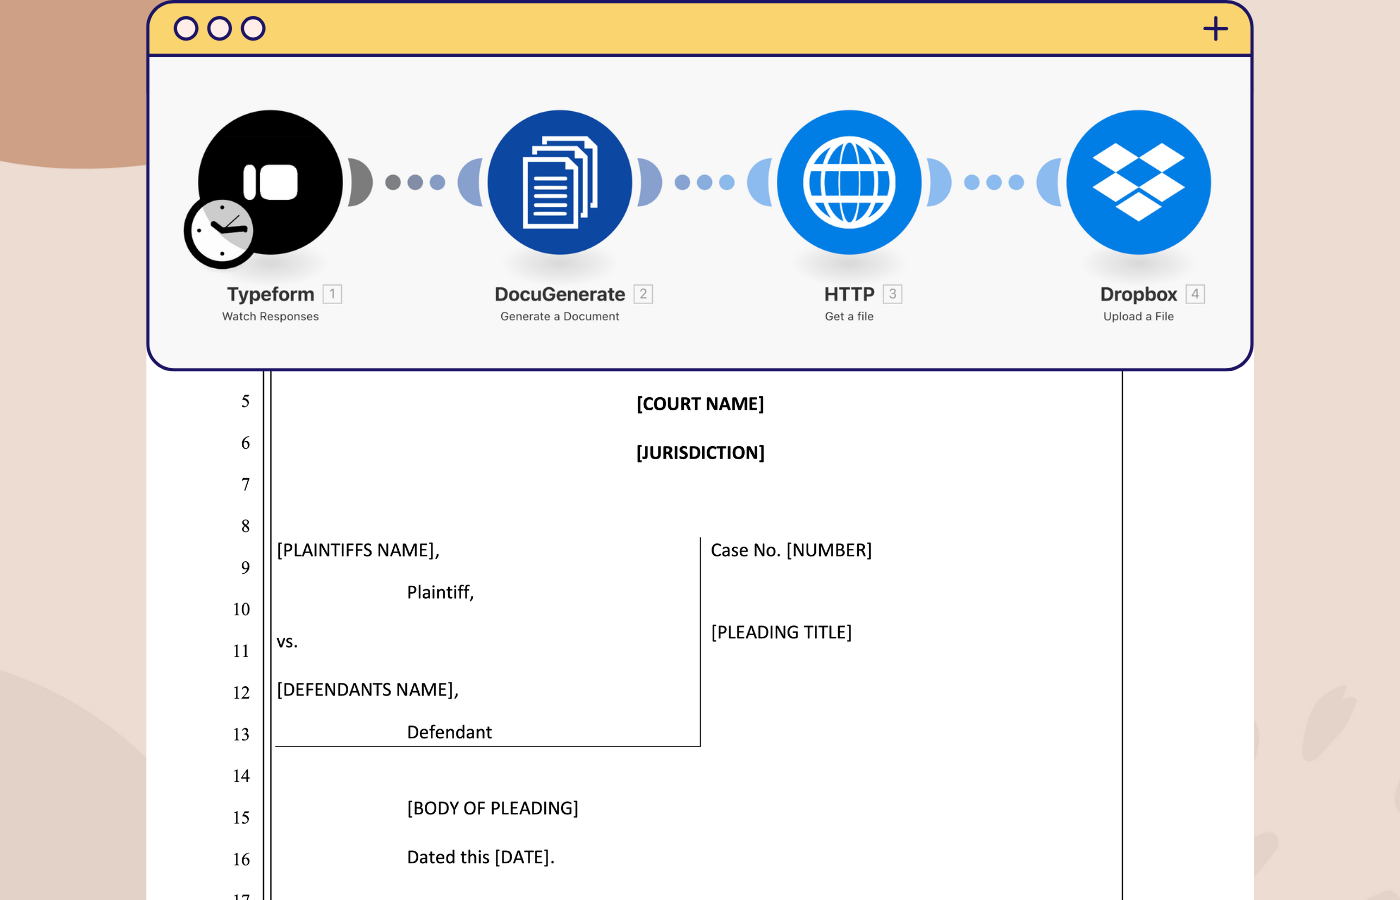
This tutorial demonstrates how to build a powerful automation that generates employment certificates using DocuGenerate and automatically saves them to Dropbox through Zapier. By connecting these three tools, you’ll create a seamless workflow that transforms data into professional documents and stores them in organized cloud folders.
Zapier serves as the automation bridge, connecting different apps without requiring any coding knowledge. DocuGenerate handles the document generation from your templates and data, while Dropbox provides secure cloud storage with easy sharing capabilities.
Setting Up Your Data Source with Zapier Tables
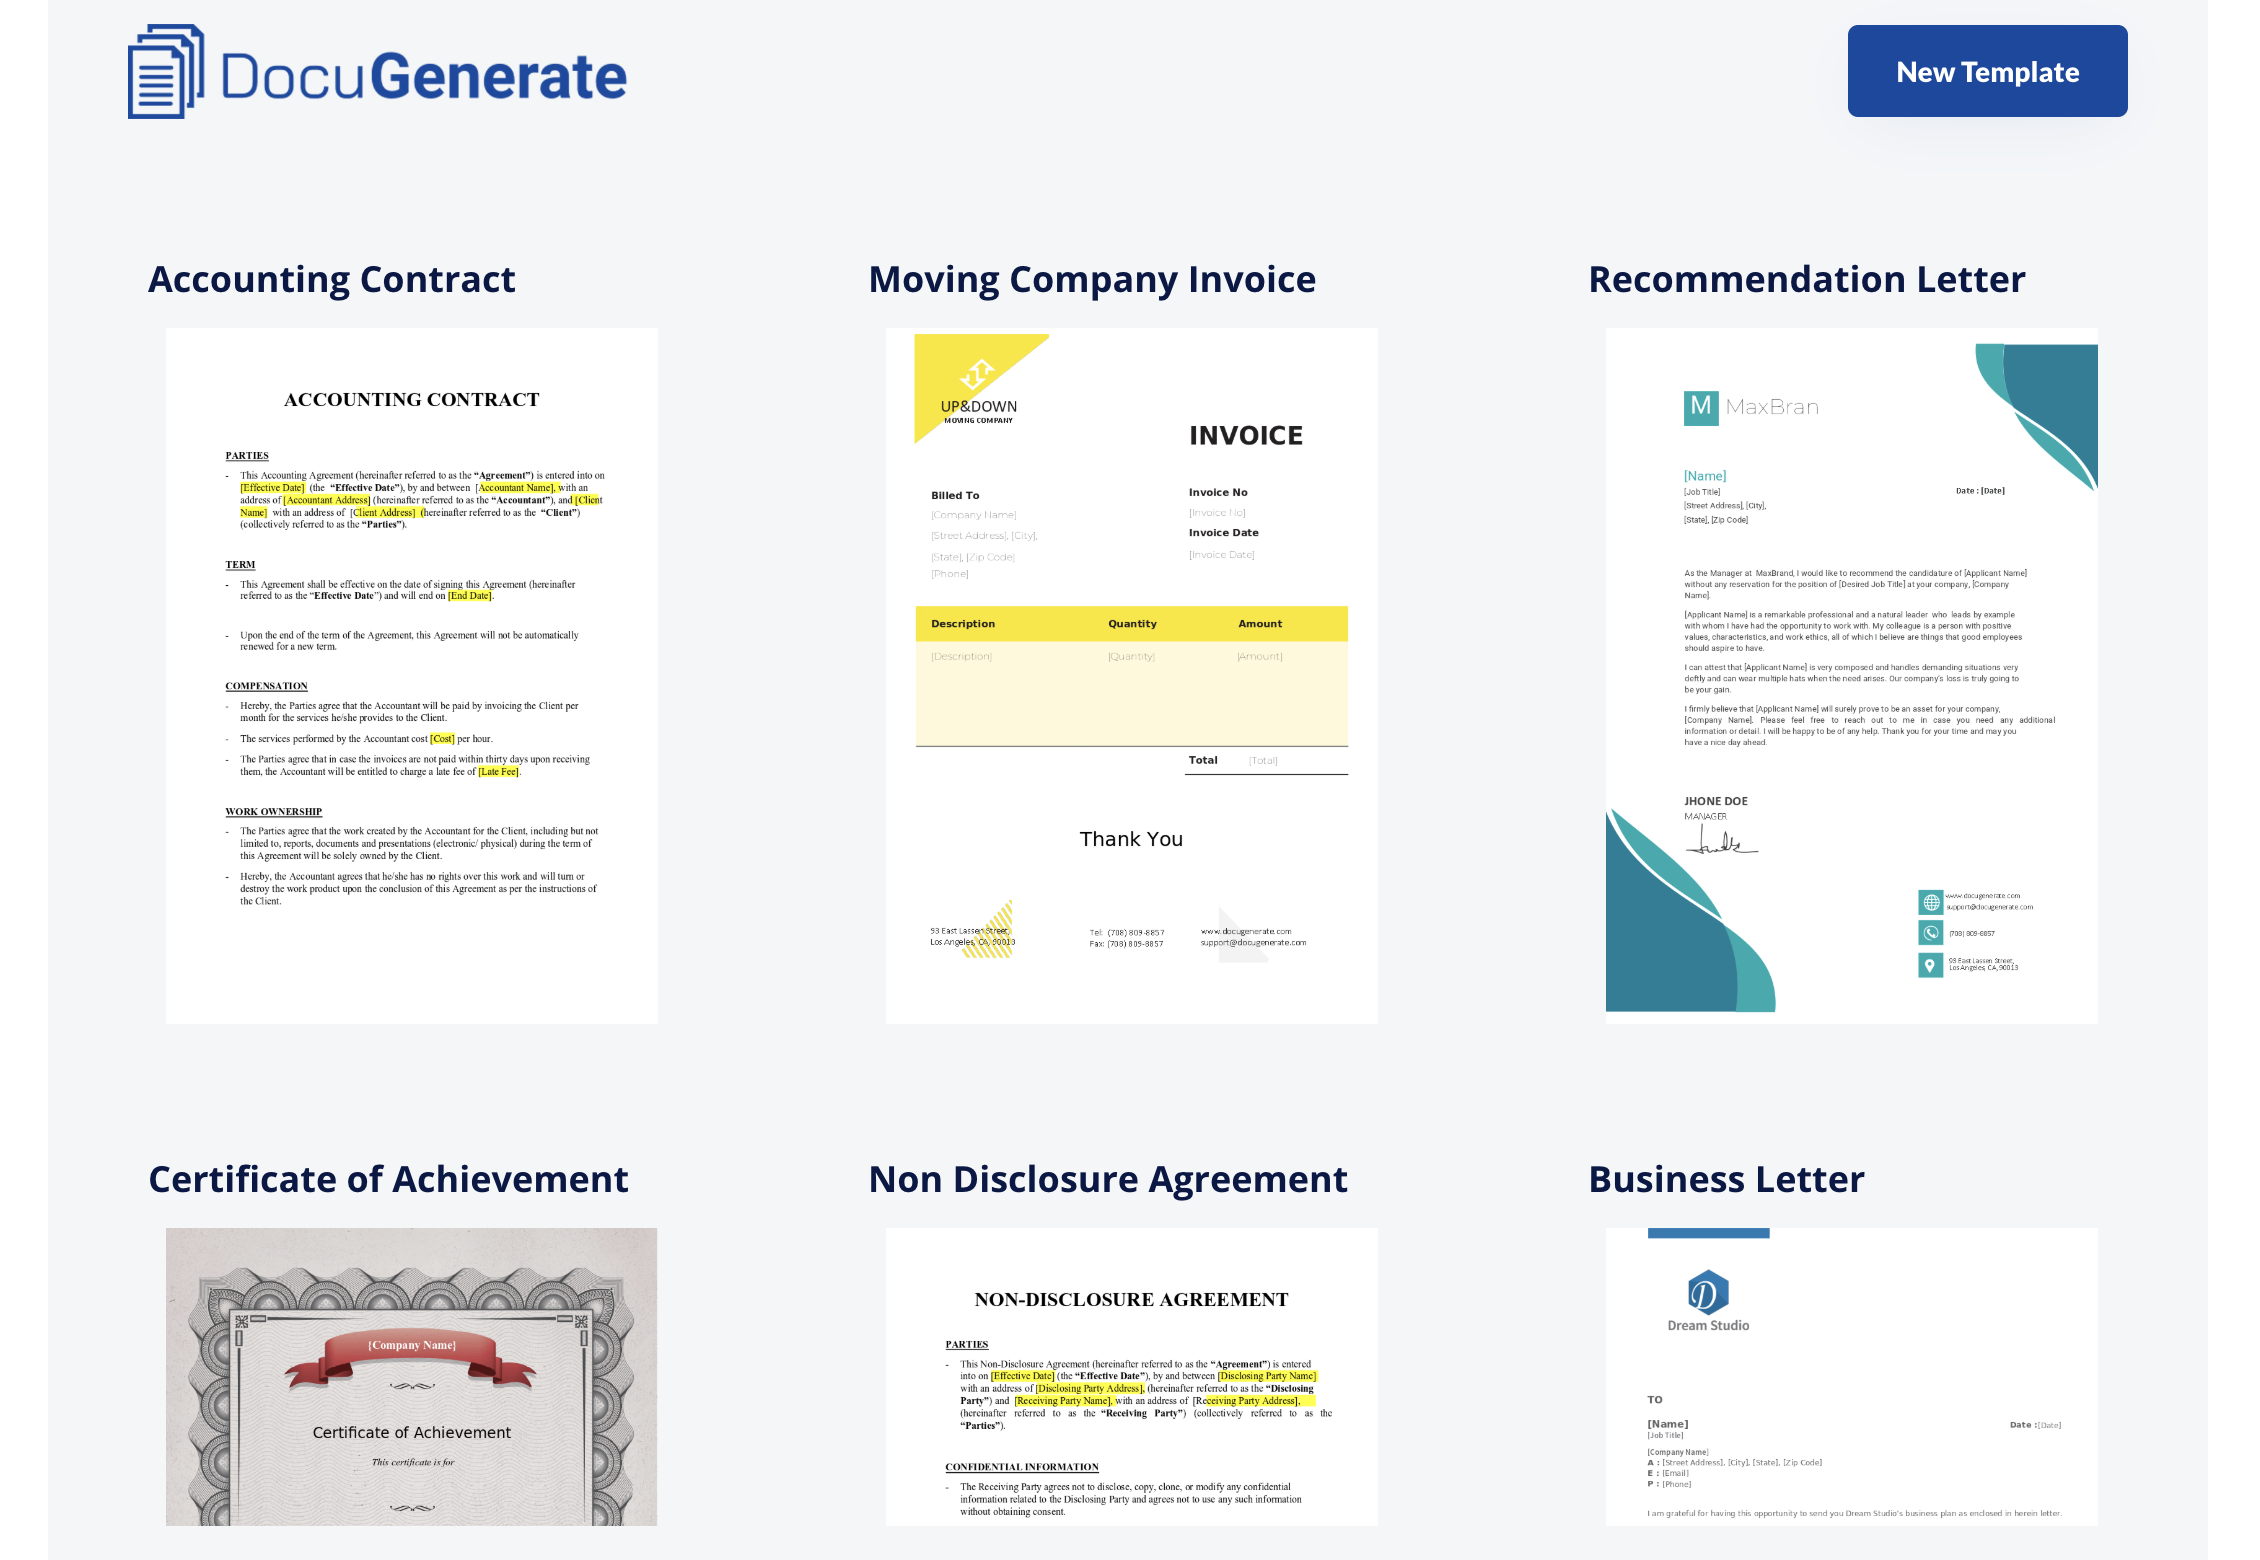
For this tutorial, we’ll use the Certificate of Employment template from DocuGenerate’s Template Library. This template includes both a Word document template and sample data that we’ll import into Zapier Tables for easy automation.
We’ll start by creating a data table in Zapier that contains employee information needed for generating certificates. Zapier Tables provides a convenient way to store and manage structured data that can trigger automations when records are added or updated.
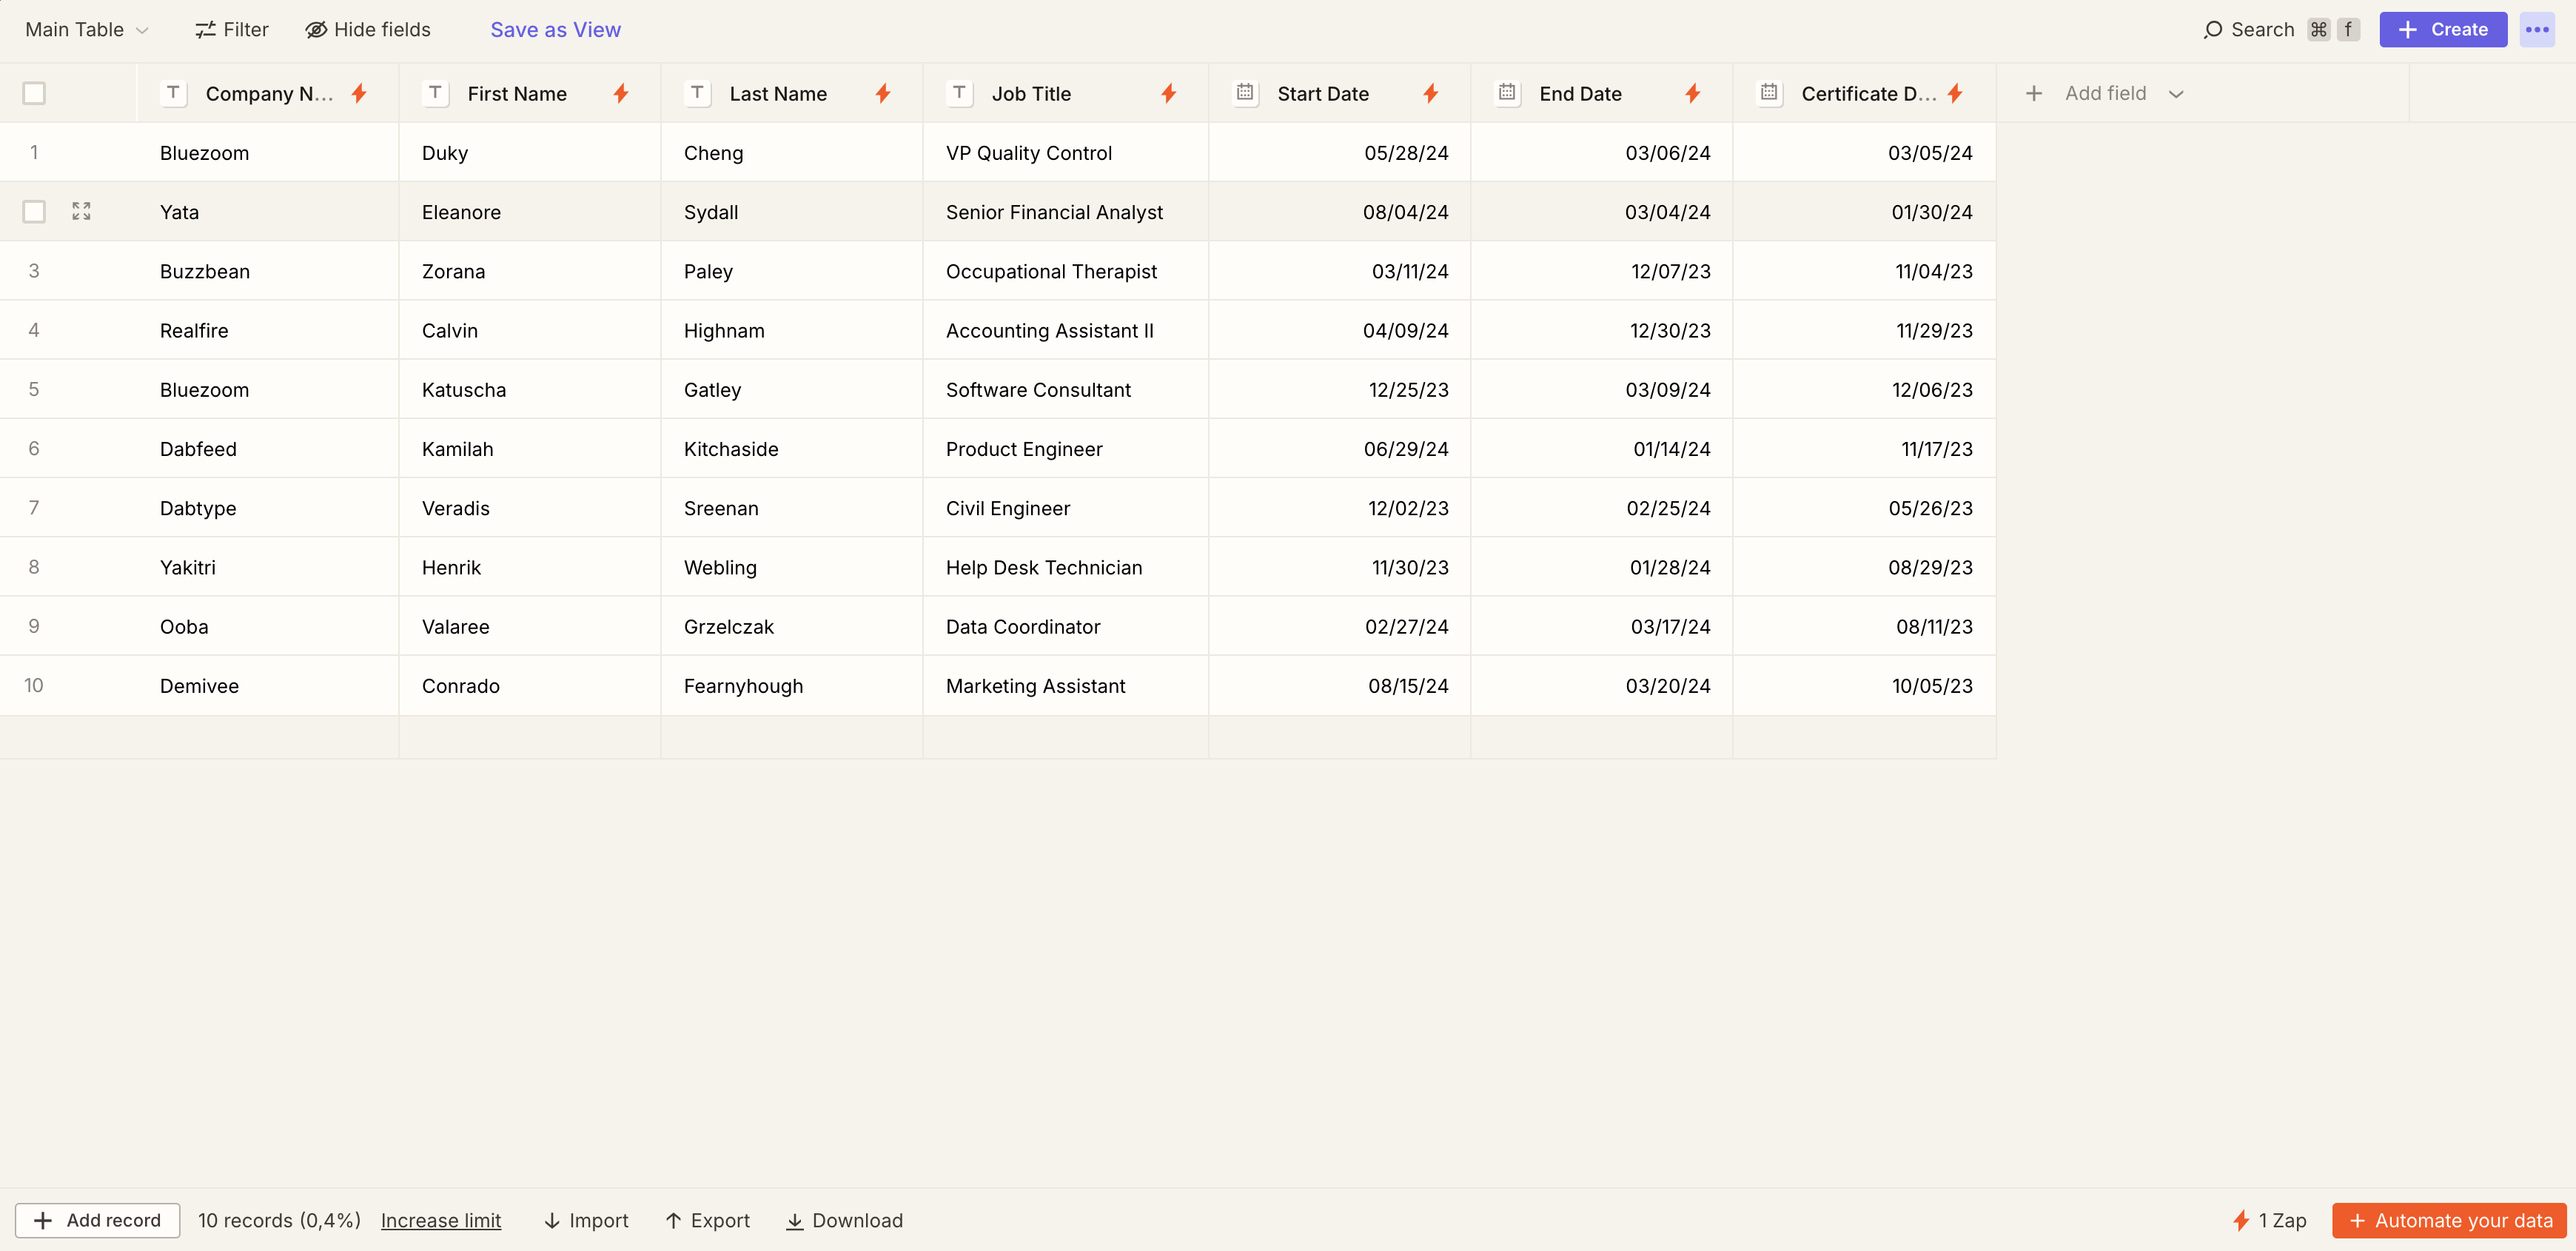
First, navigate to Zapier Tables and create a new table. We’ll import our sample data from a CSV file that contains the following columns:
- Company Name: The organization issuing the certificate
- First Name: Employee’s first name
- Last Name: Employee’s last name
- Job Title: Employee’s position
- Start Date: Employment start date
- End Date: Employment end date (if applicable)
- Certificate Date: Date the certificate is issued
To import the data, click on Import data and select Start with data from a CSV file or another platform. Upload the CSV file containing your employee data, and Zapier will automatically create the table structure and populate it with your records.
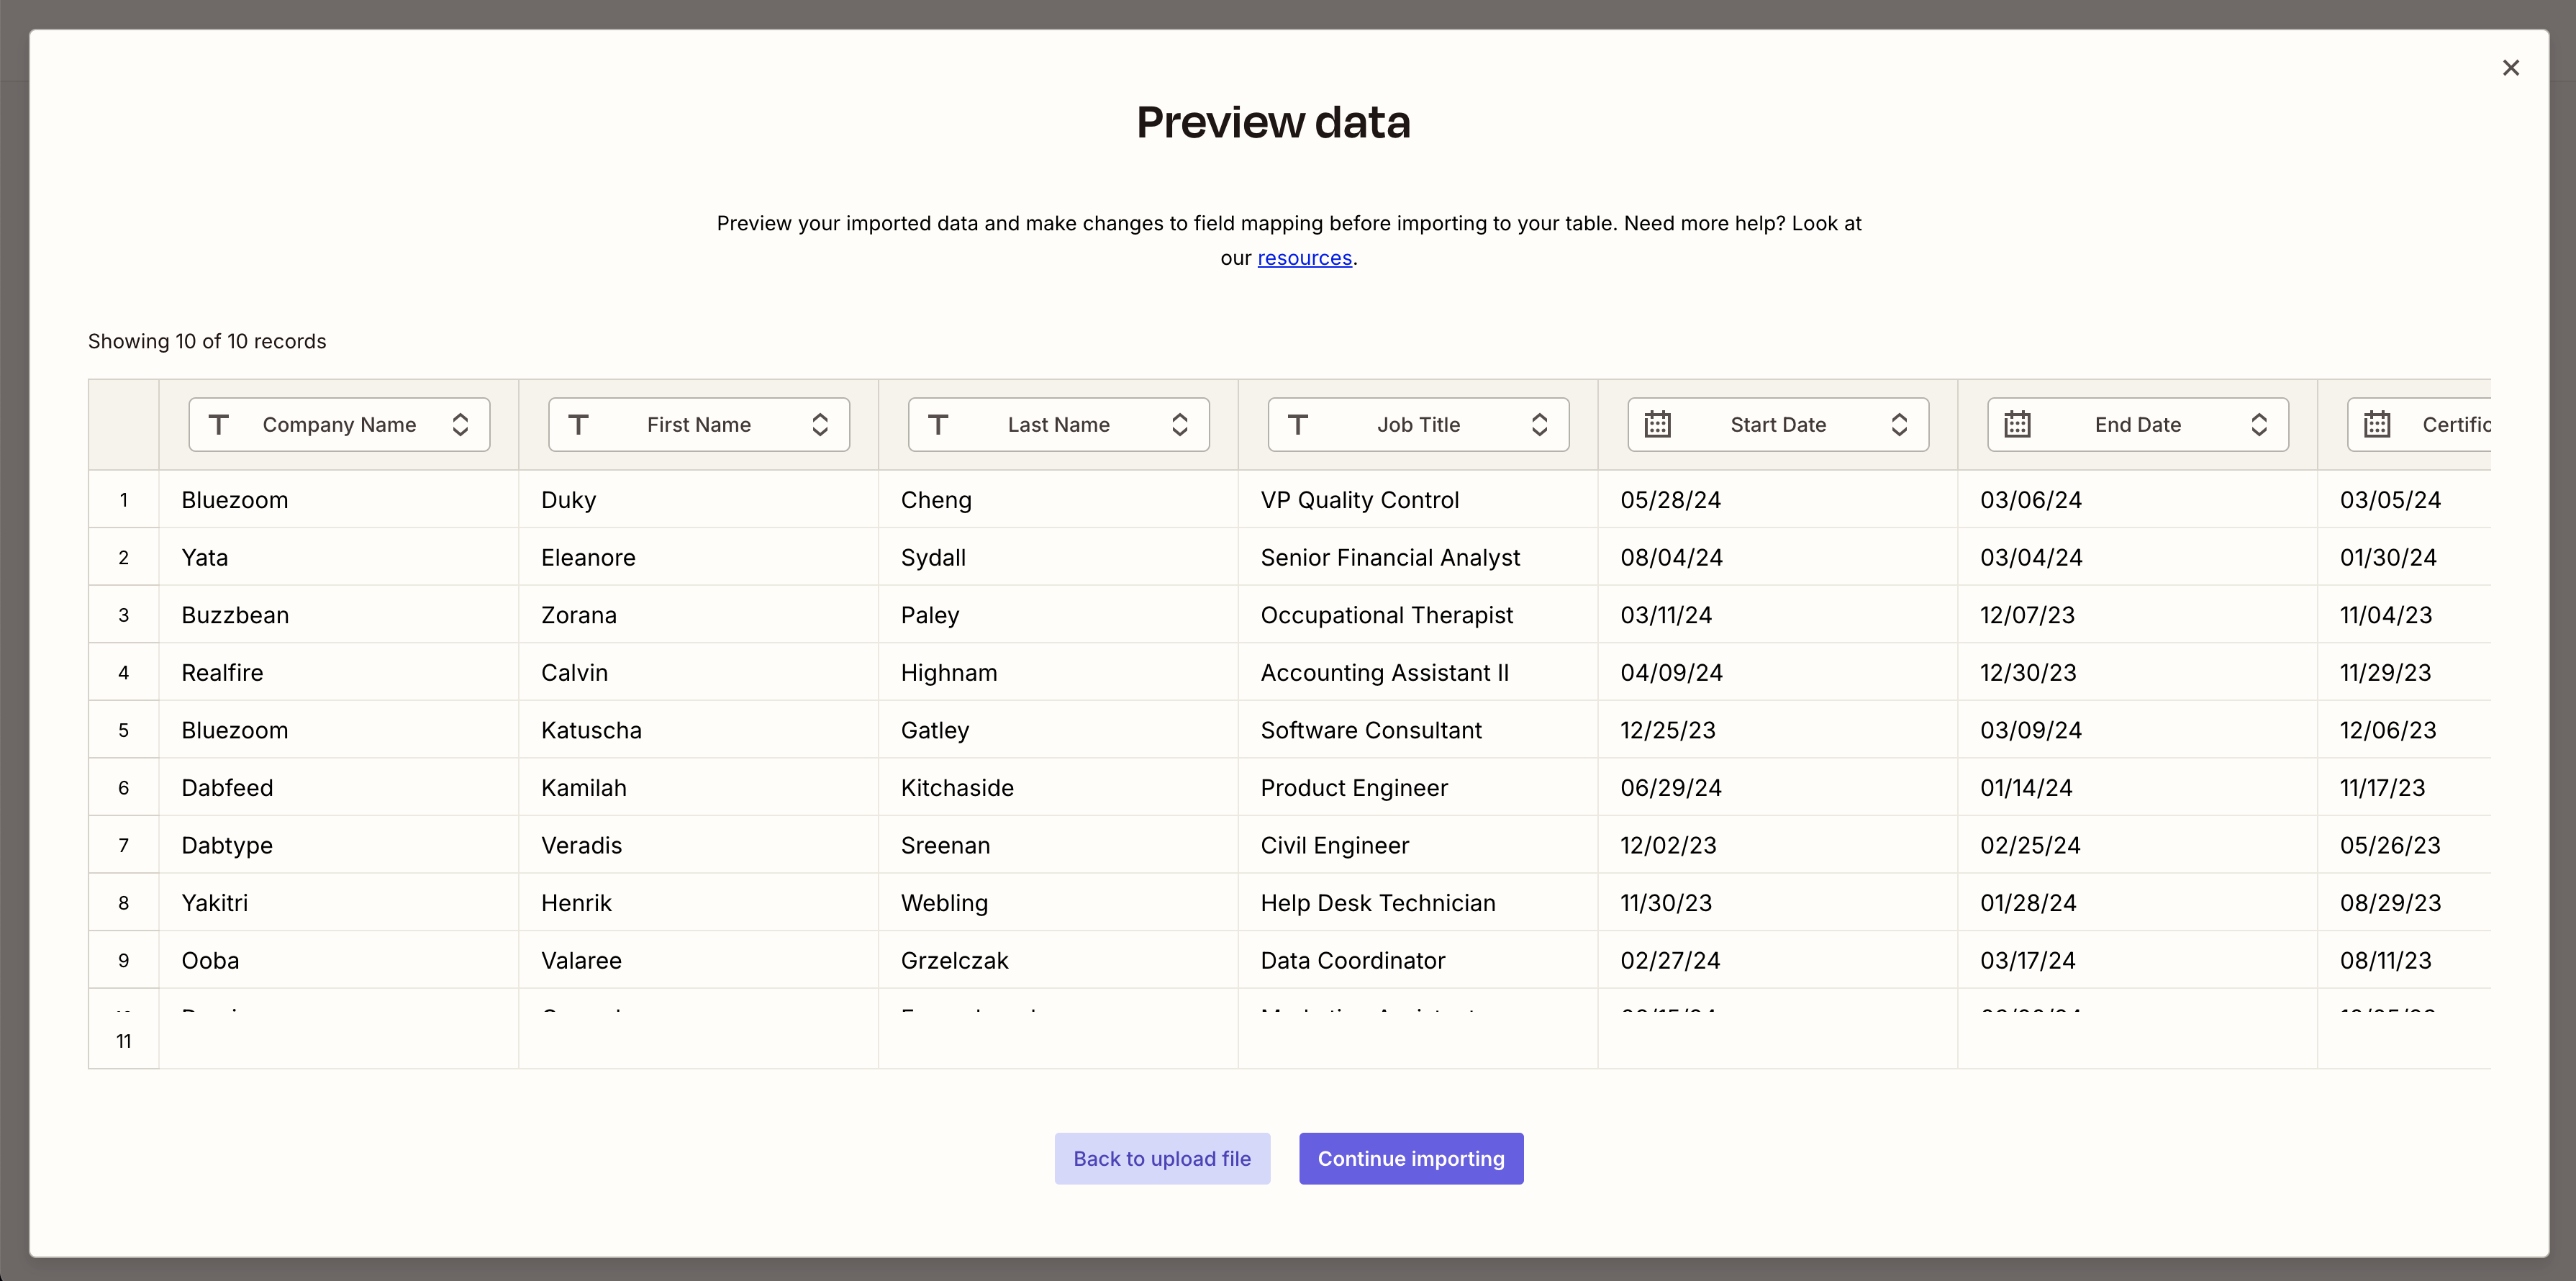
Once imported, your table should contain 10 sample records with employee information. Give your table a descriptive name like “Certificate of Employment” to make it easy to identify in your Zaps.
This table will serve as the trigger for our automation - whenever a new record is added or an existing record is updated, our Zap will automatically generate a certificate and save it to Dropbox.
Creating the Template in DocuGenerate
Before setting up the Zapier automation, we need to prepare our document template in DocuGenerate. Log in to your DocuGenerate account and create a new template using the Certificate of Employment Word document.
The template contains merge tags that correspond to the column names in our Zapier Table. They are automatically detected by DocuGenerate, making it easy to map the data during document generation.
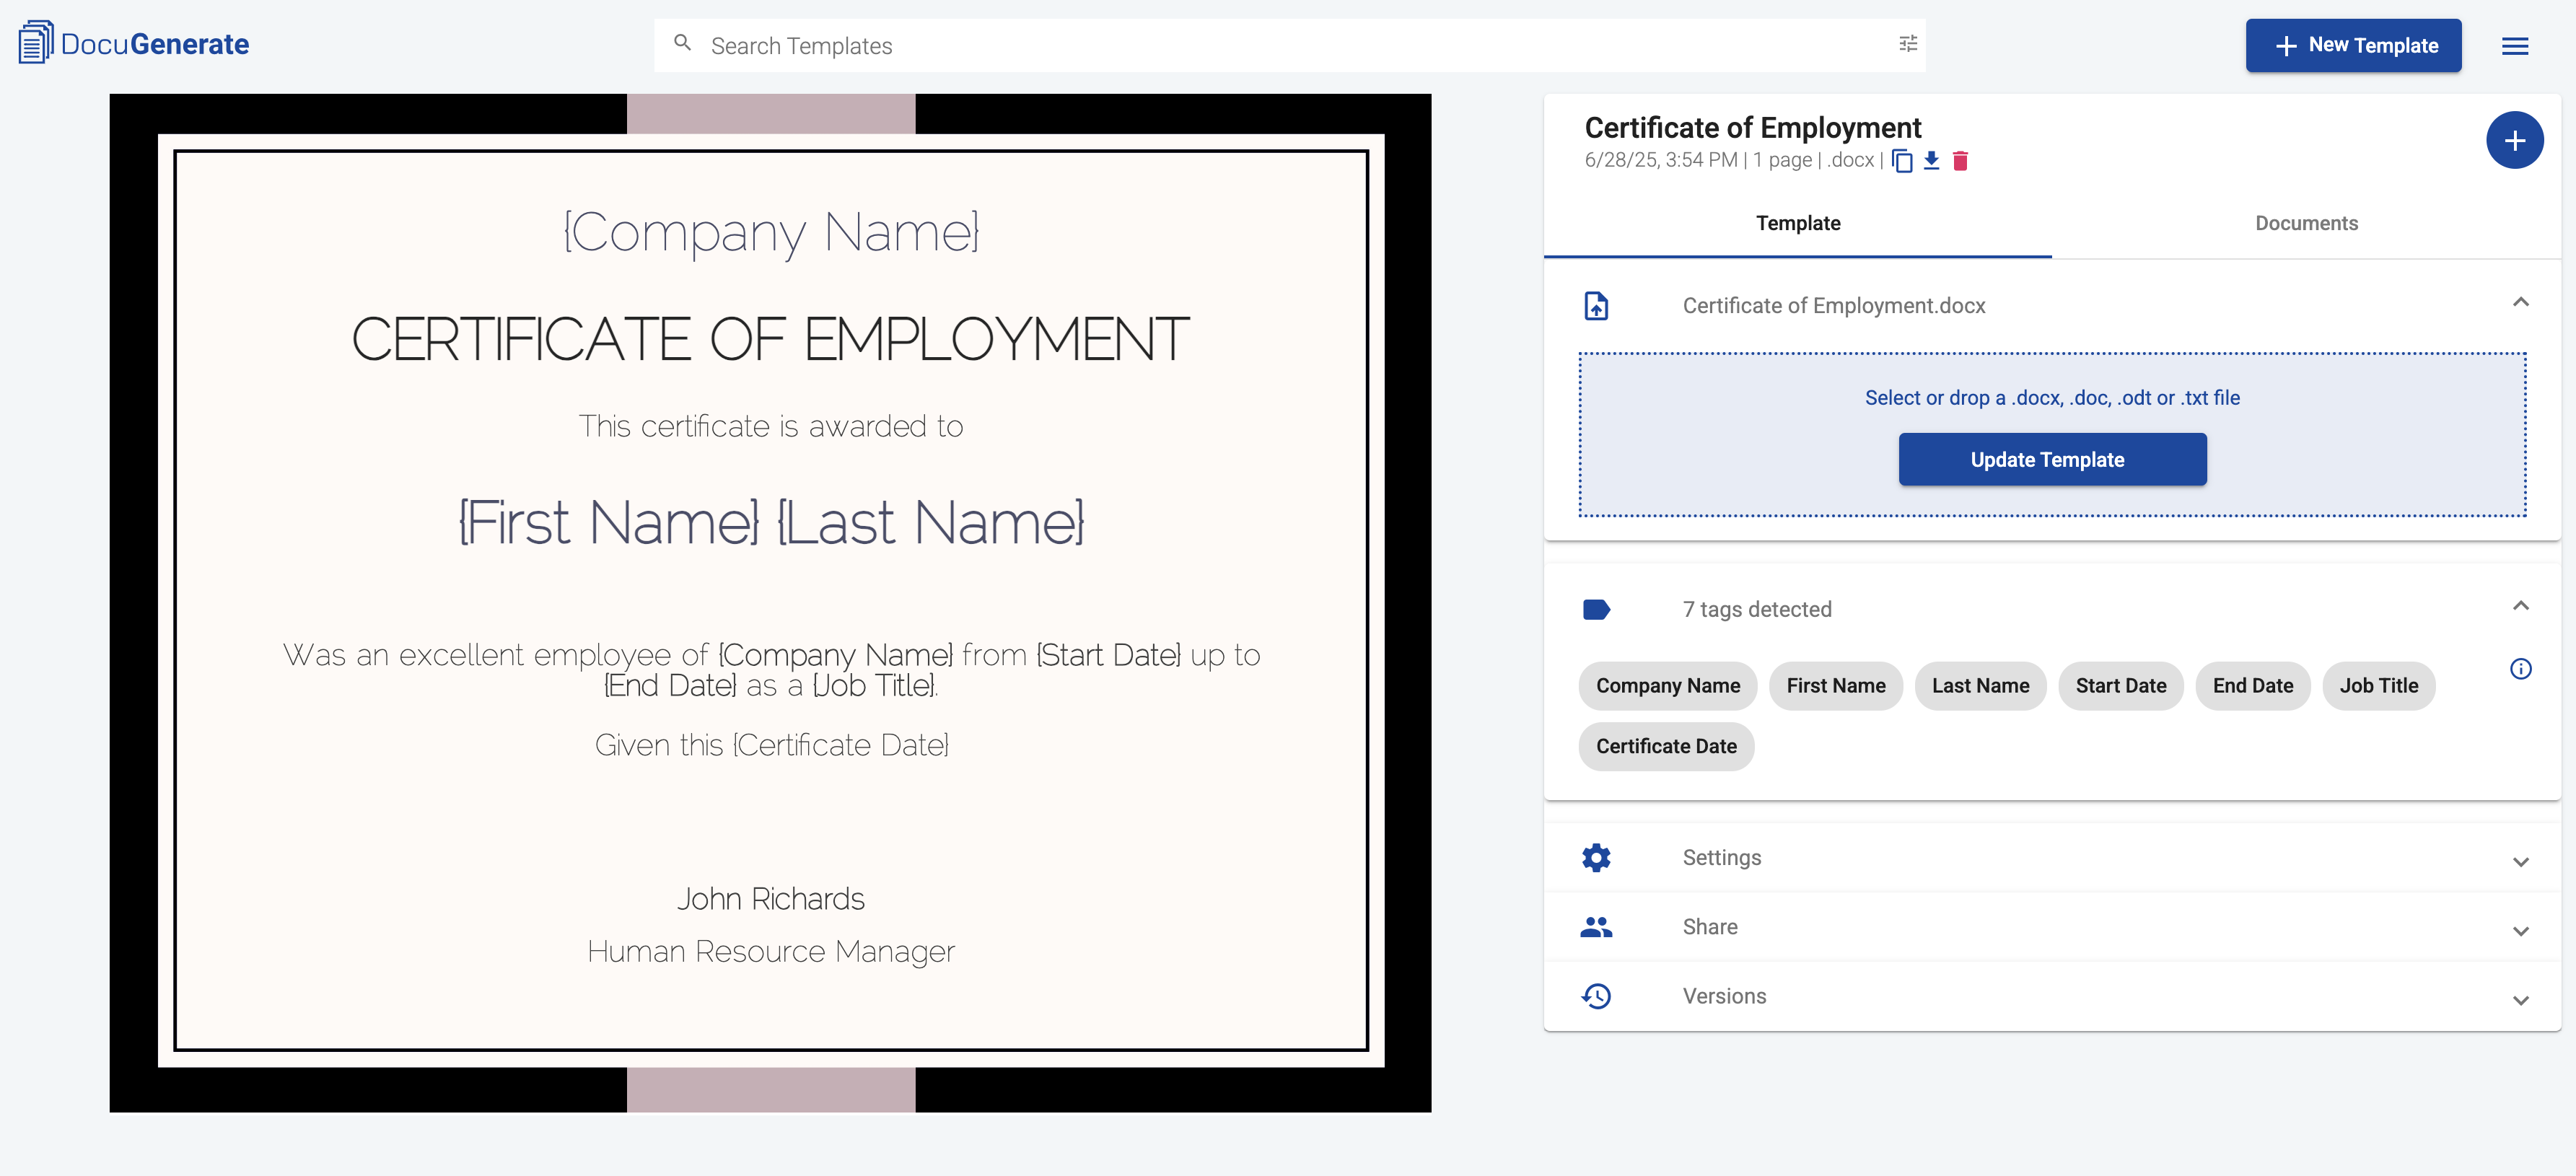
The merge tags in the template include [Company Name], [First Name], [Last Name], [Start Date], [End Date], [Job Title] and [Certificate Date]. These tags will be replaced with actual employee data when the document is generated through our Zapier automation.
Setting Up the Zapier Tables Trigger
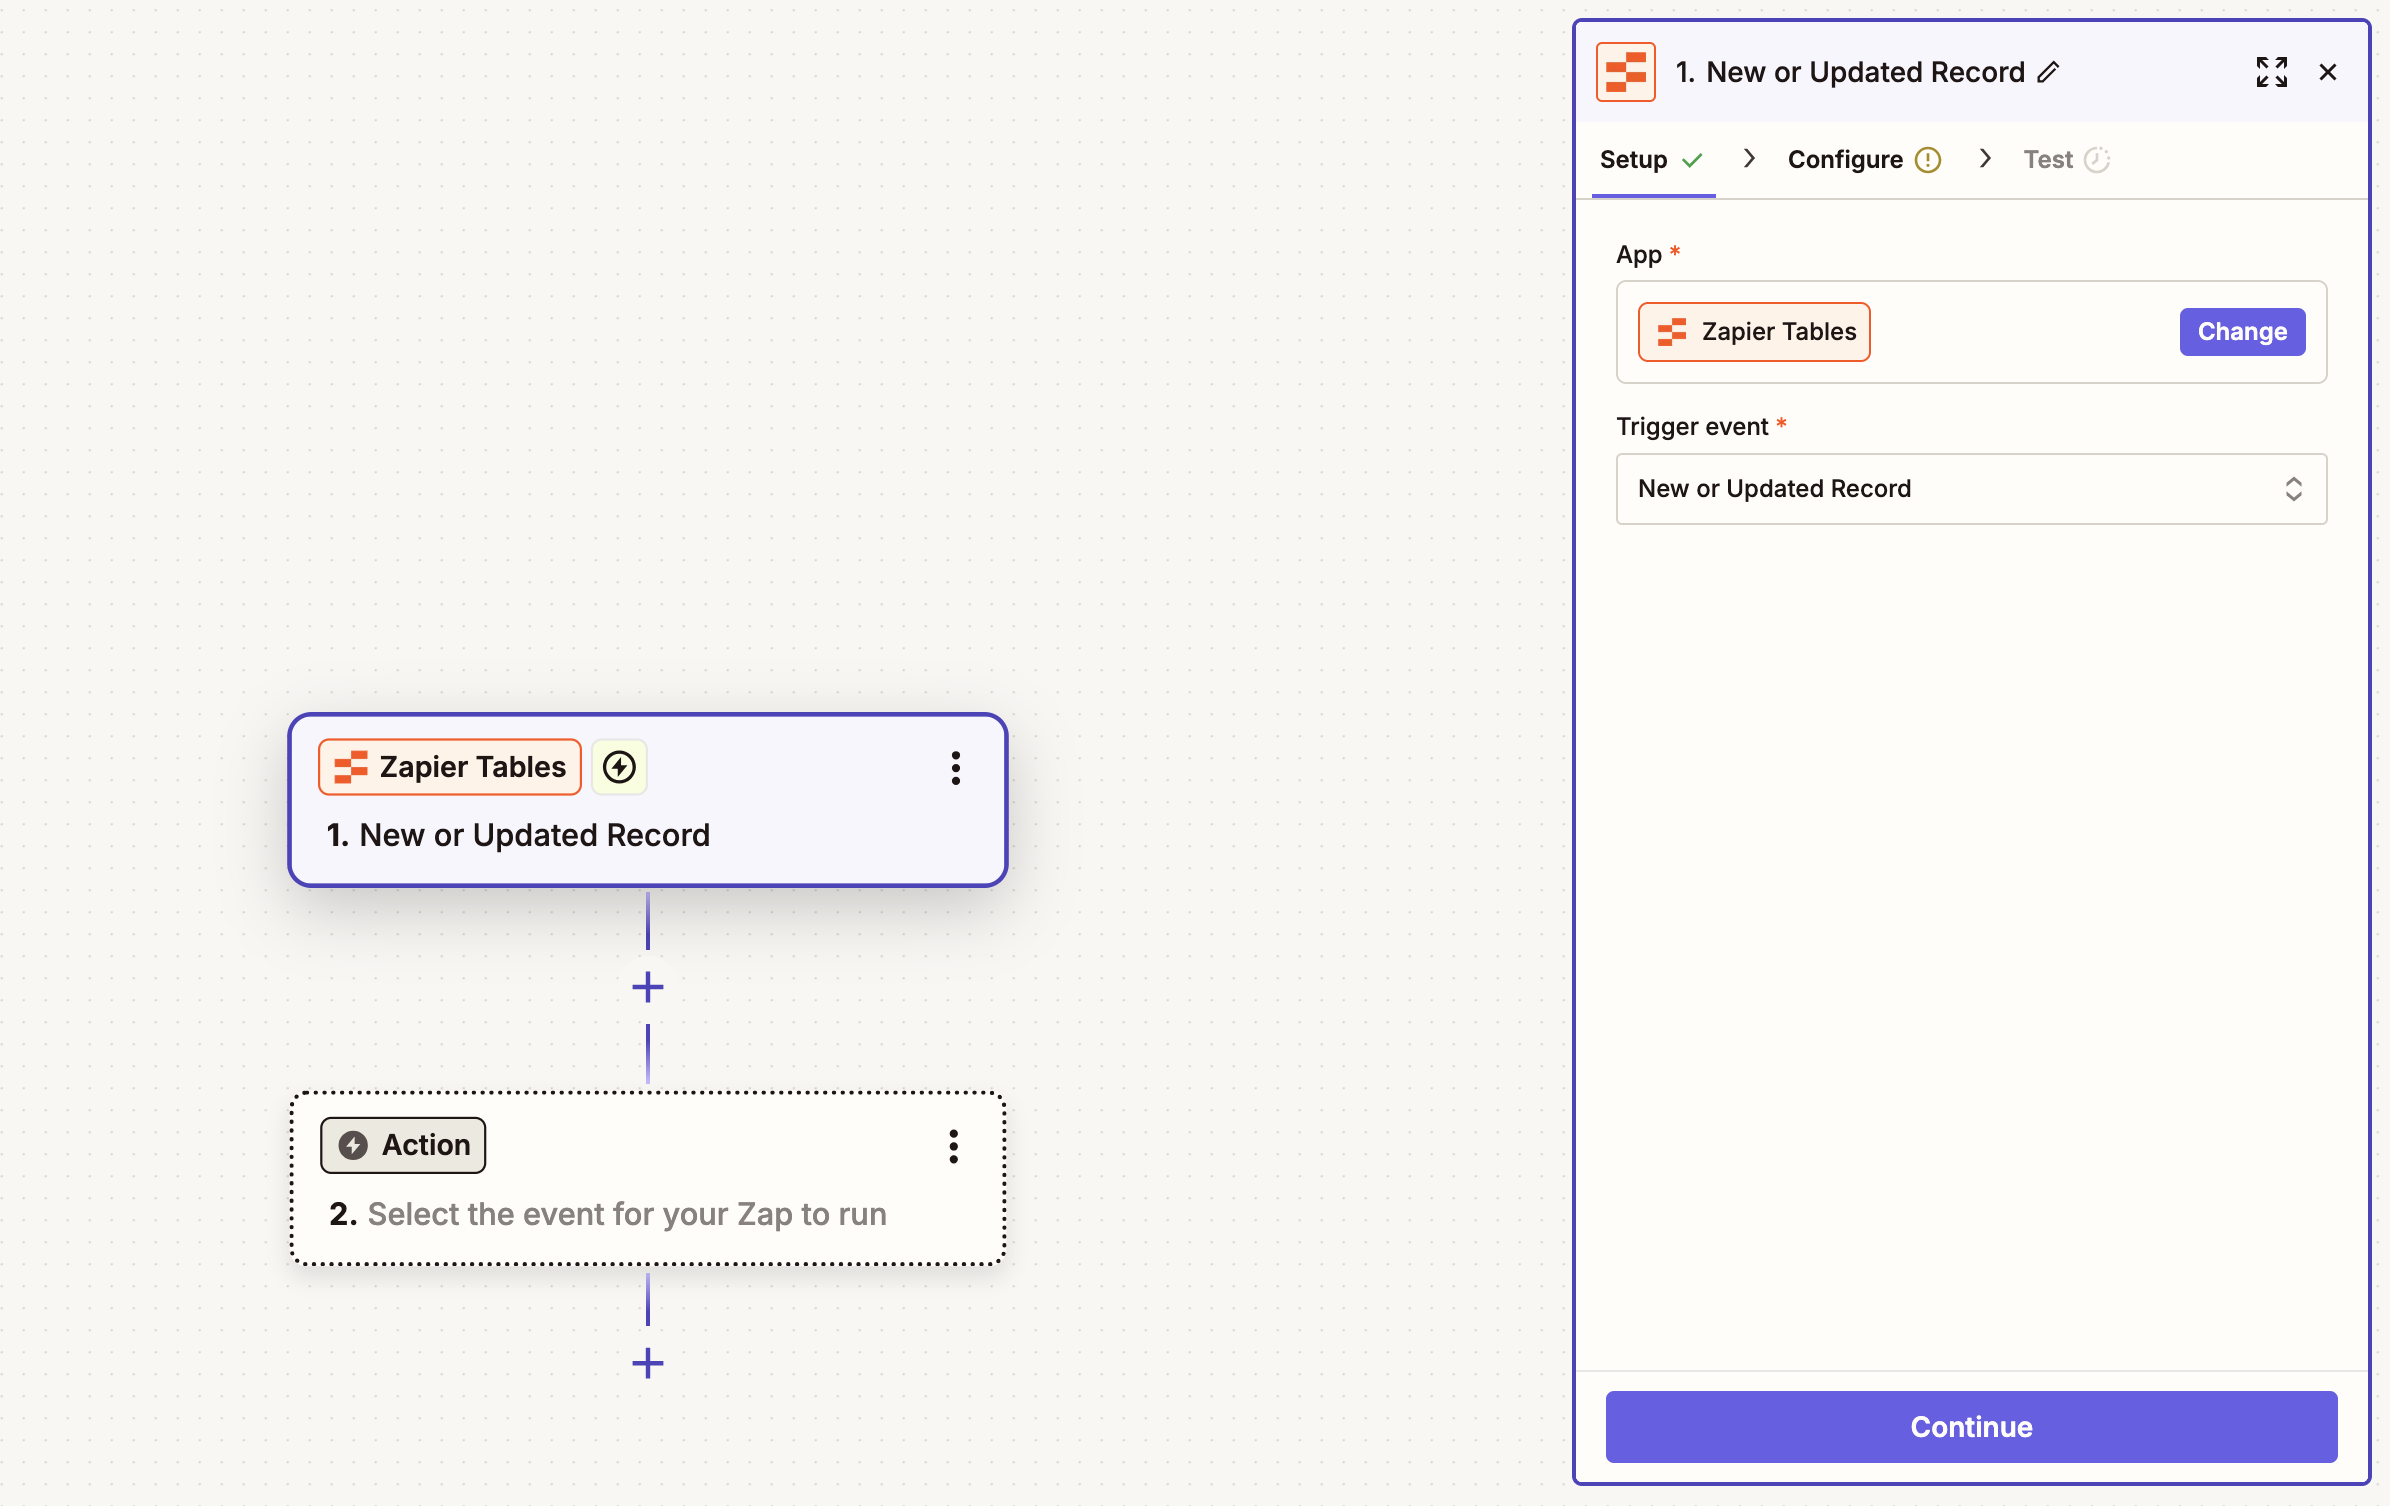
Now we’ll create our Zap to automate the entire process. Start by creating a new Zap in Zapier and select Zapier Tables as the trigger app. Choose the New or Updated Record trigger event. This ensures our automation runs whenever employee data is added or modified in our table.
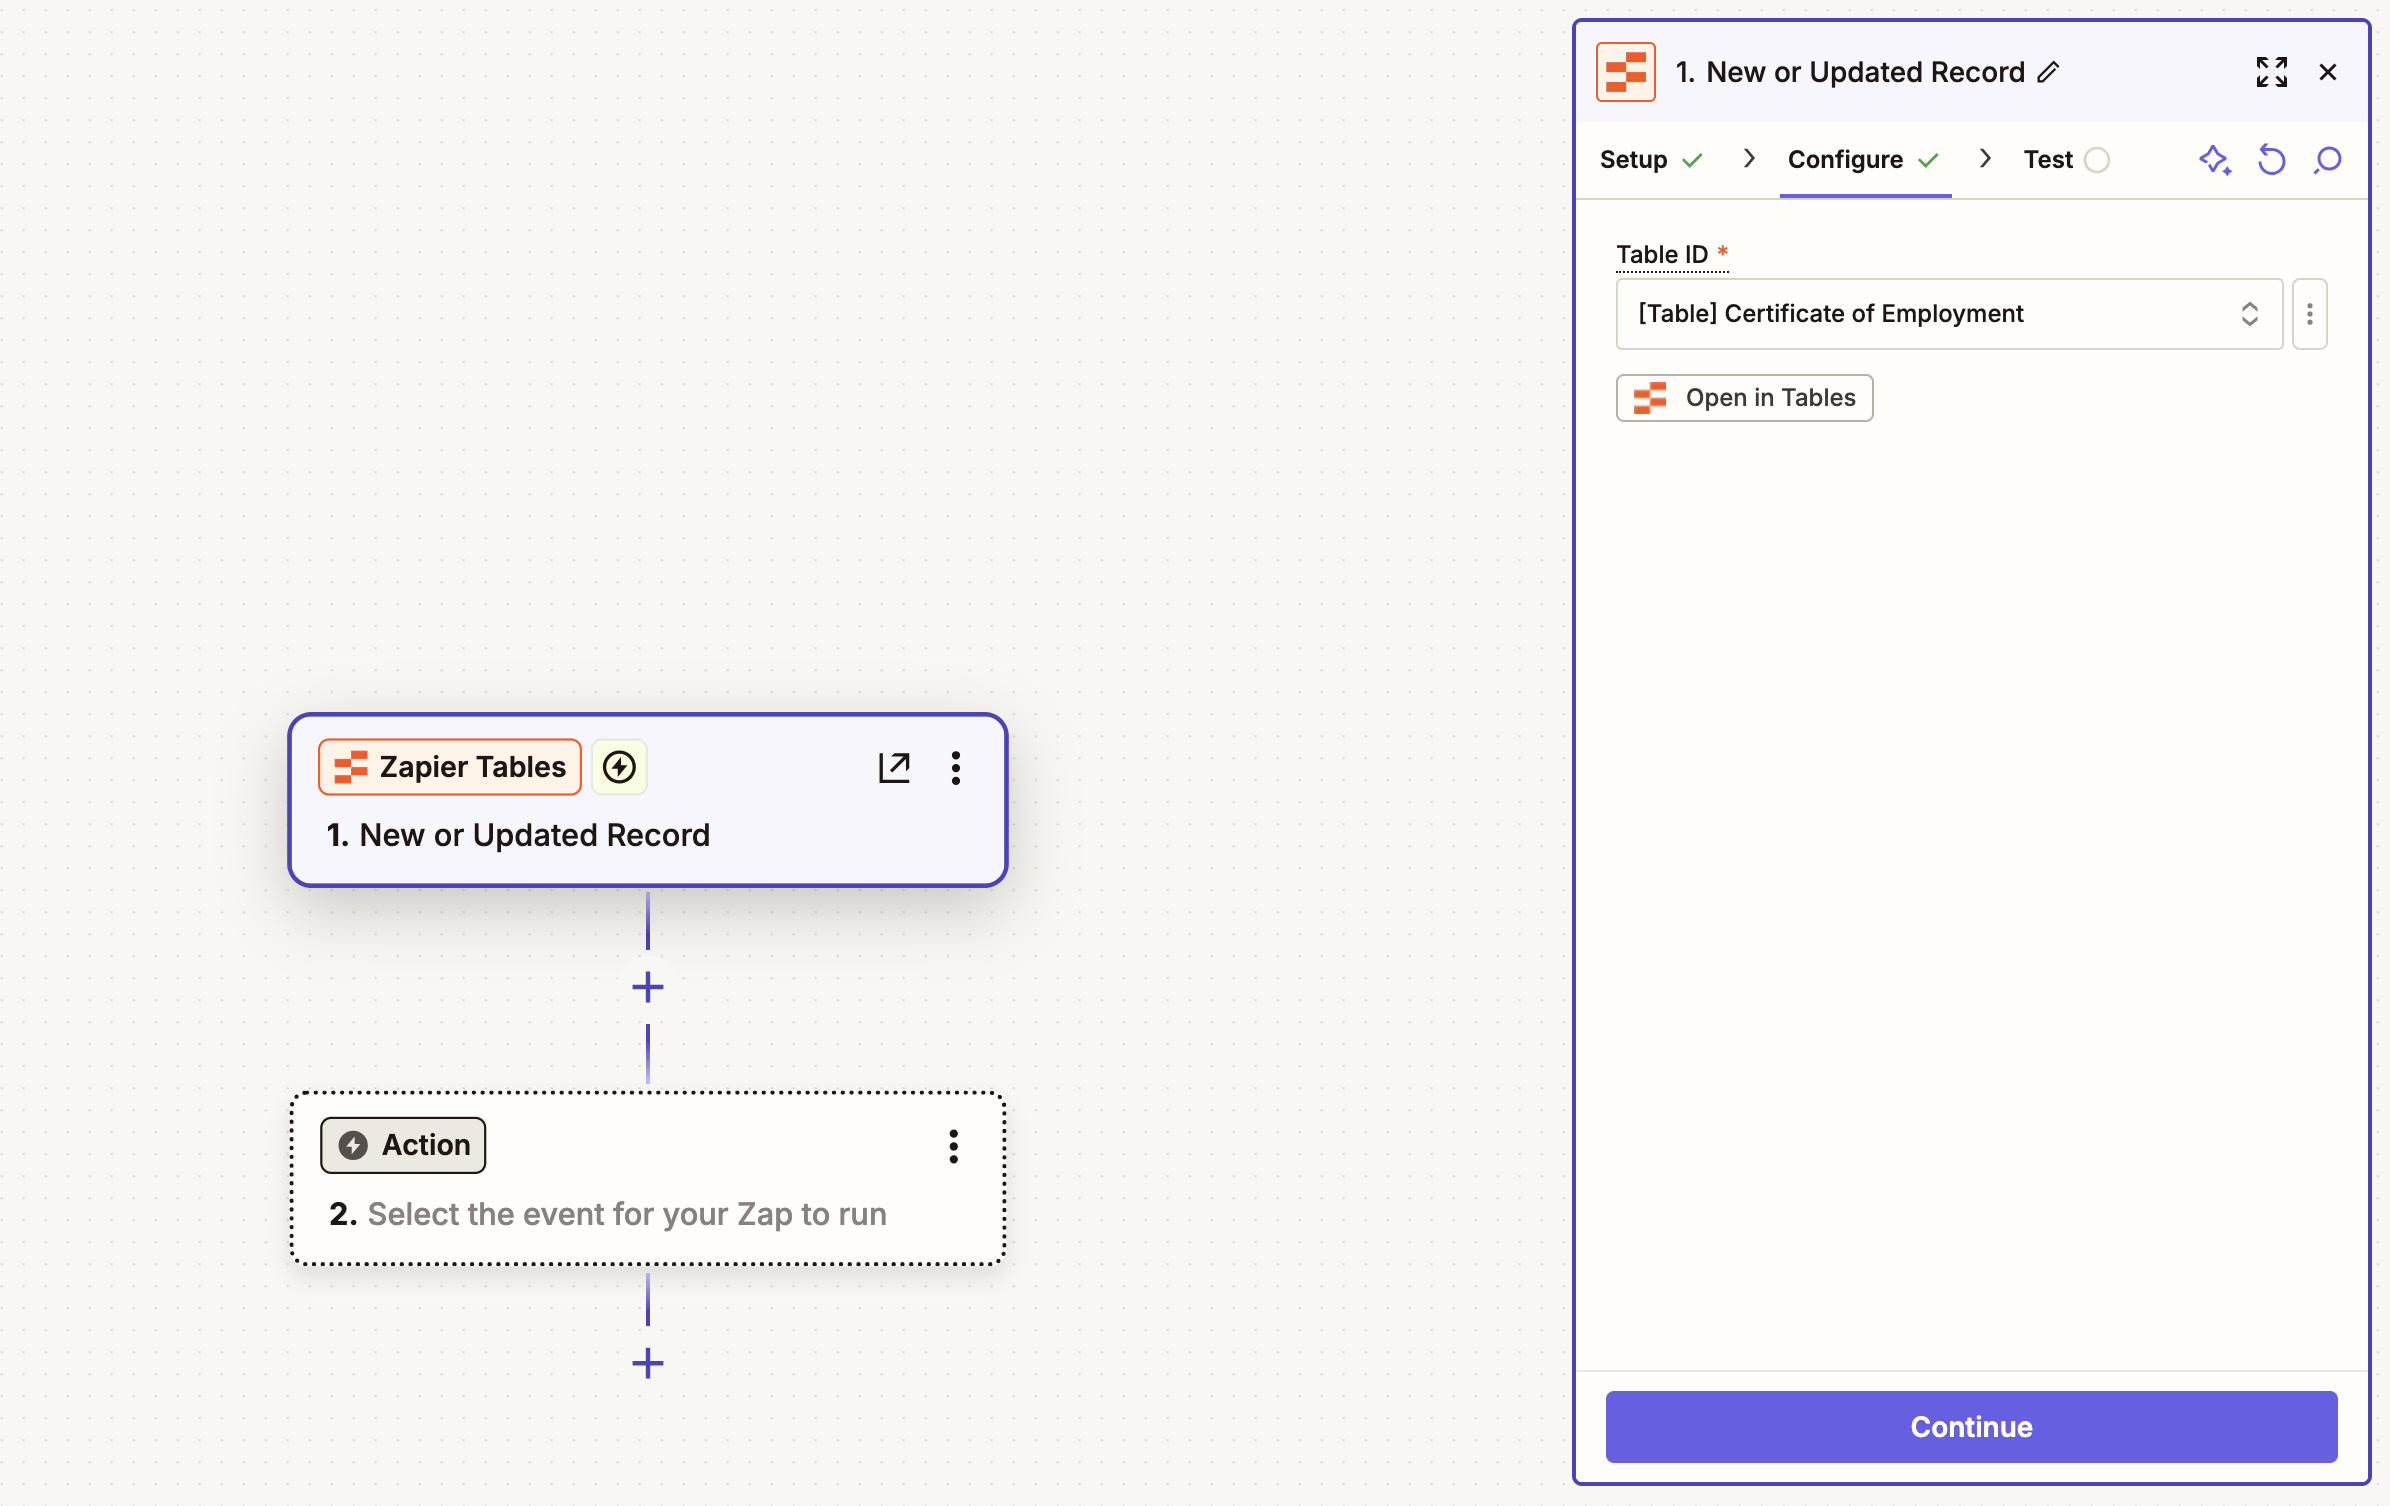
In the trigger configuration, connect to your Zapier Tables account if you haven’t already, then select the Certificate of Employment table we created earlier.
Test the trigger to ensure it’s working correctly. Zapier will show you the most recent records from your table, allowing you to select one for testing the subsequent steps in your Zap.
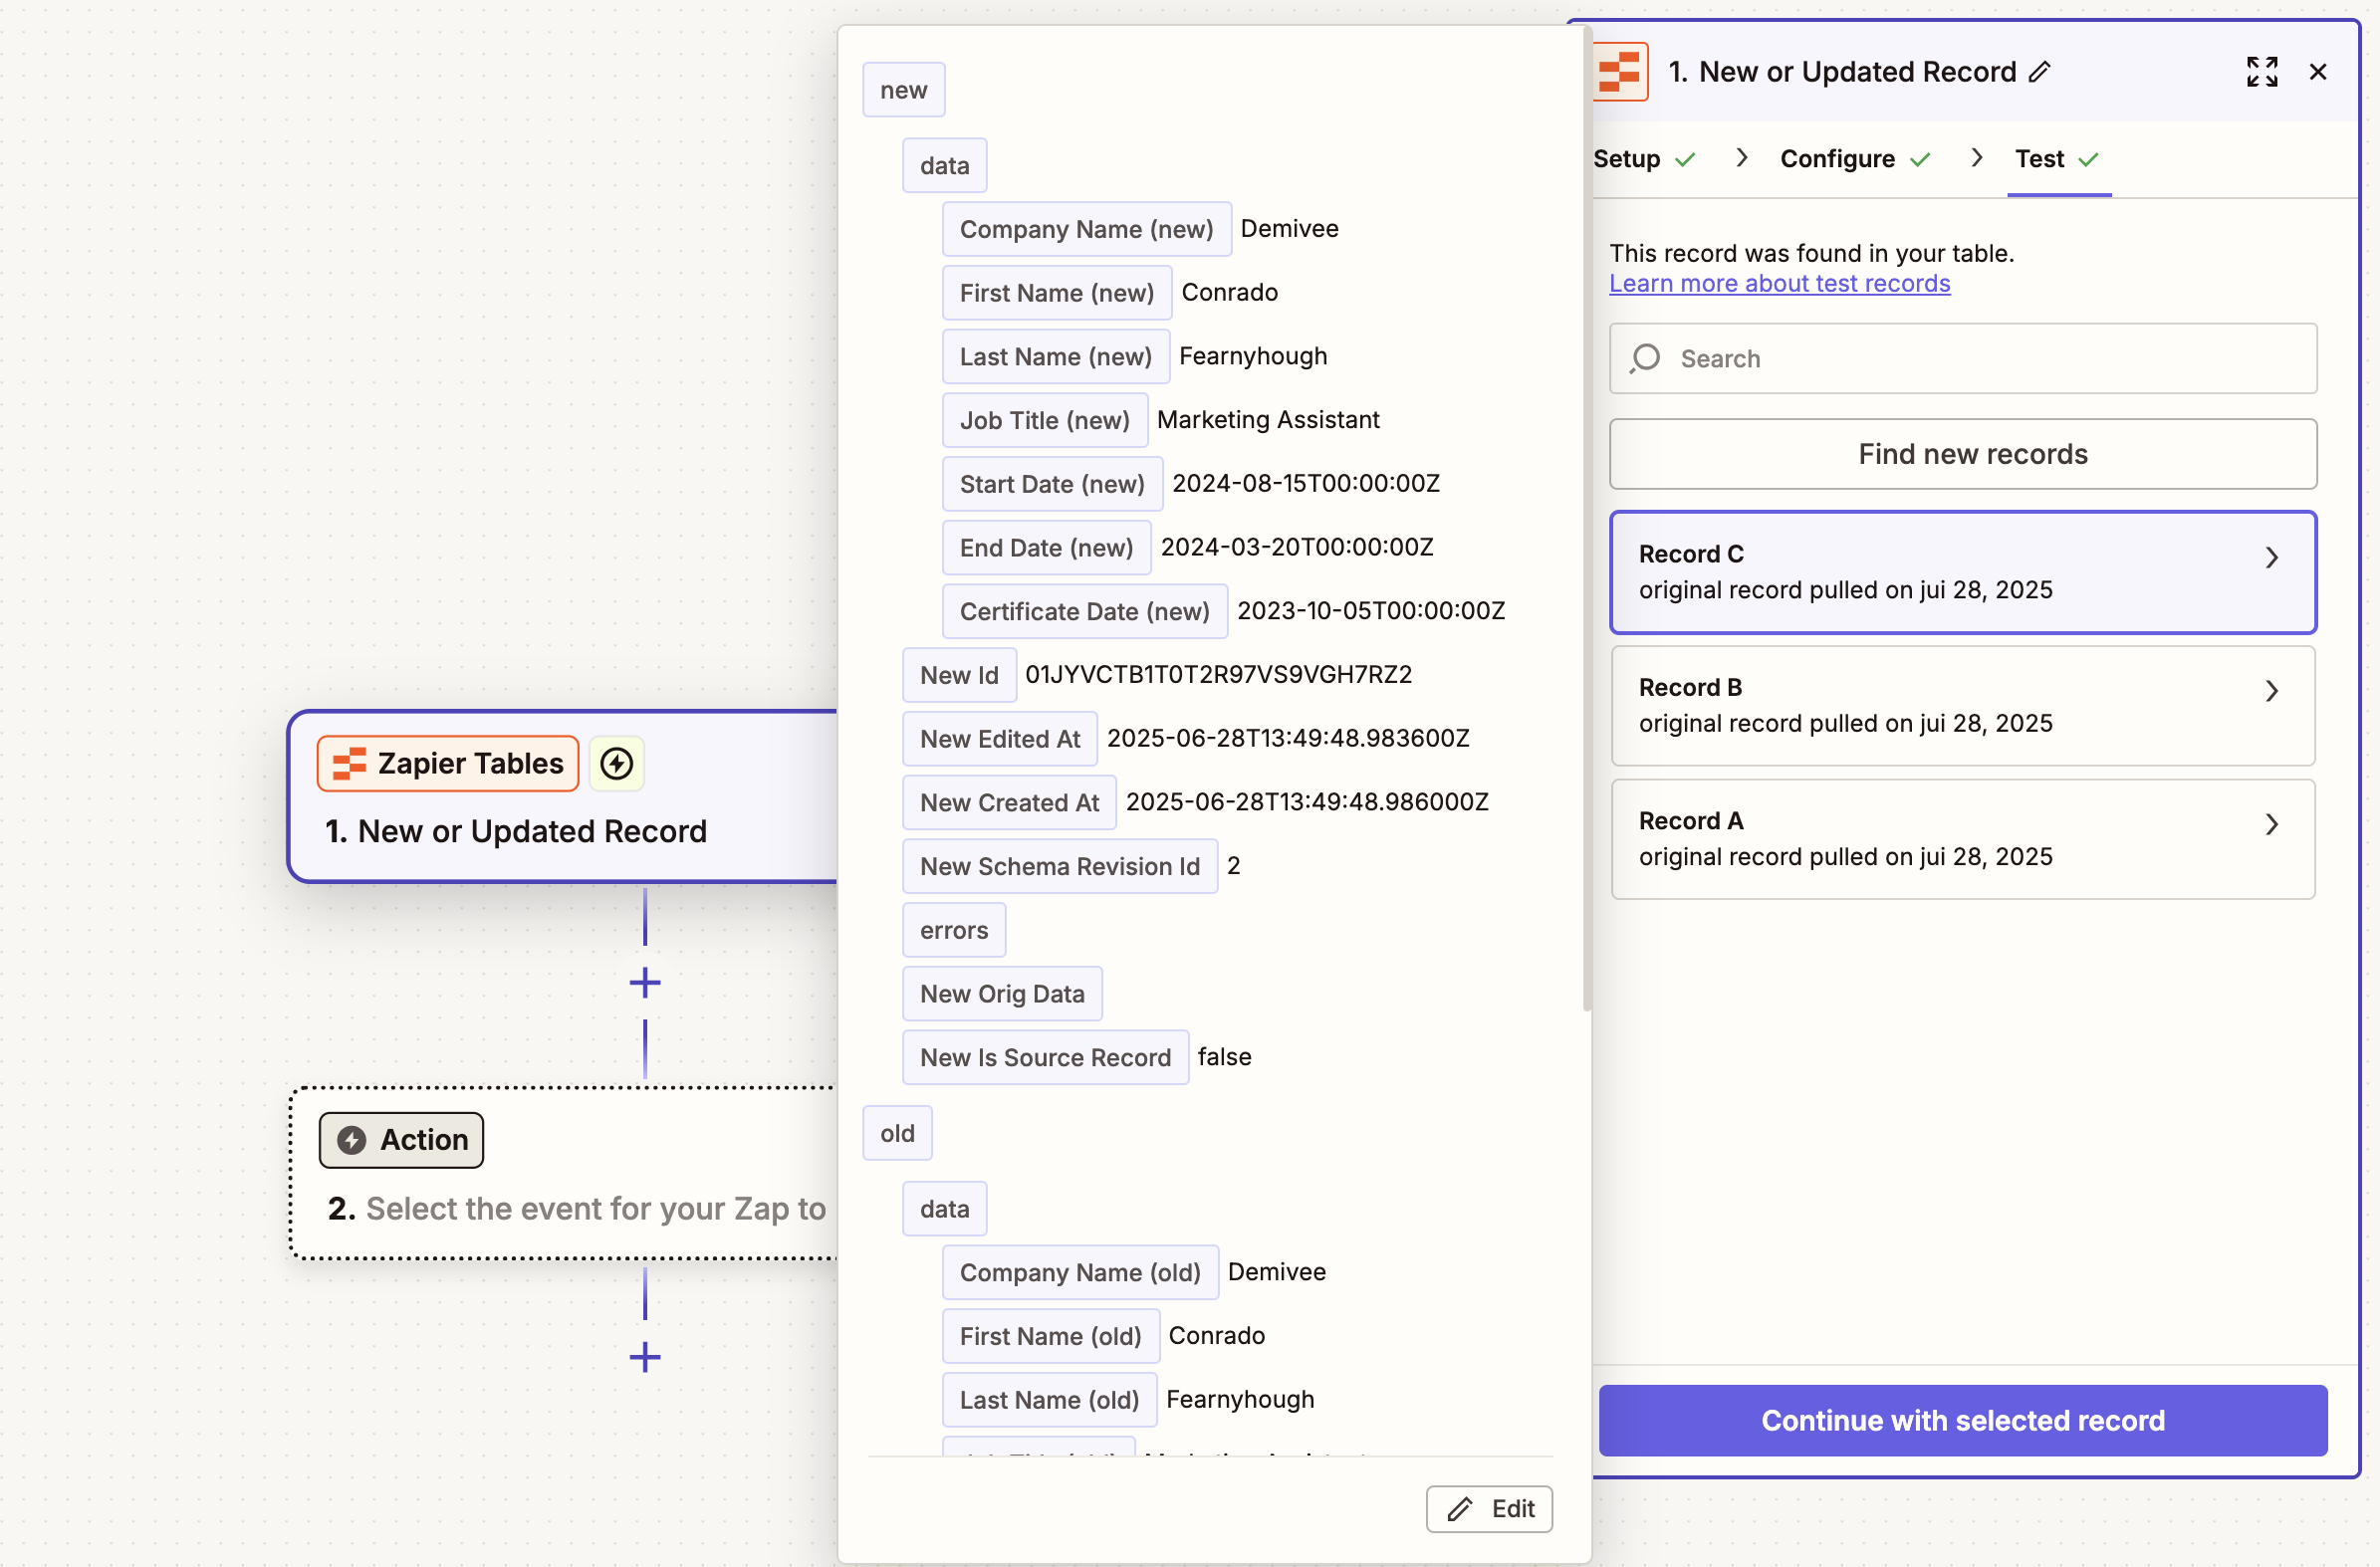
Select one of the employee records and continue. This test record will be used to preview data mapping in the following steps of our automation.
Configuring the Generate Document Action
Next, we’ll add DocuGenerate to our Zap to handle document generation. Search for the DocuGenerate app and add the Generate Document action.
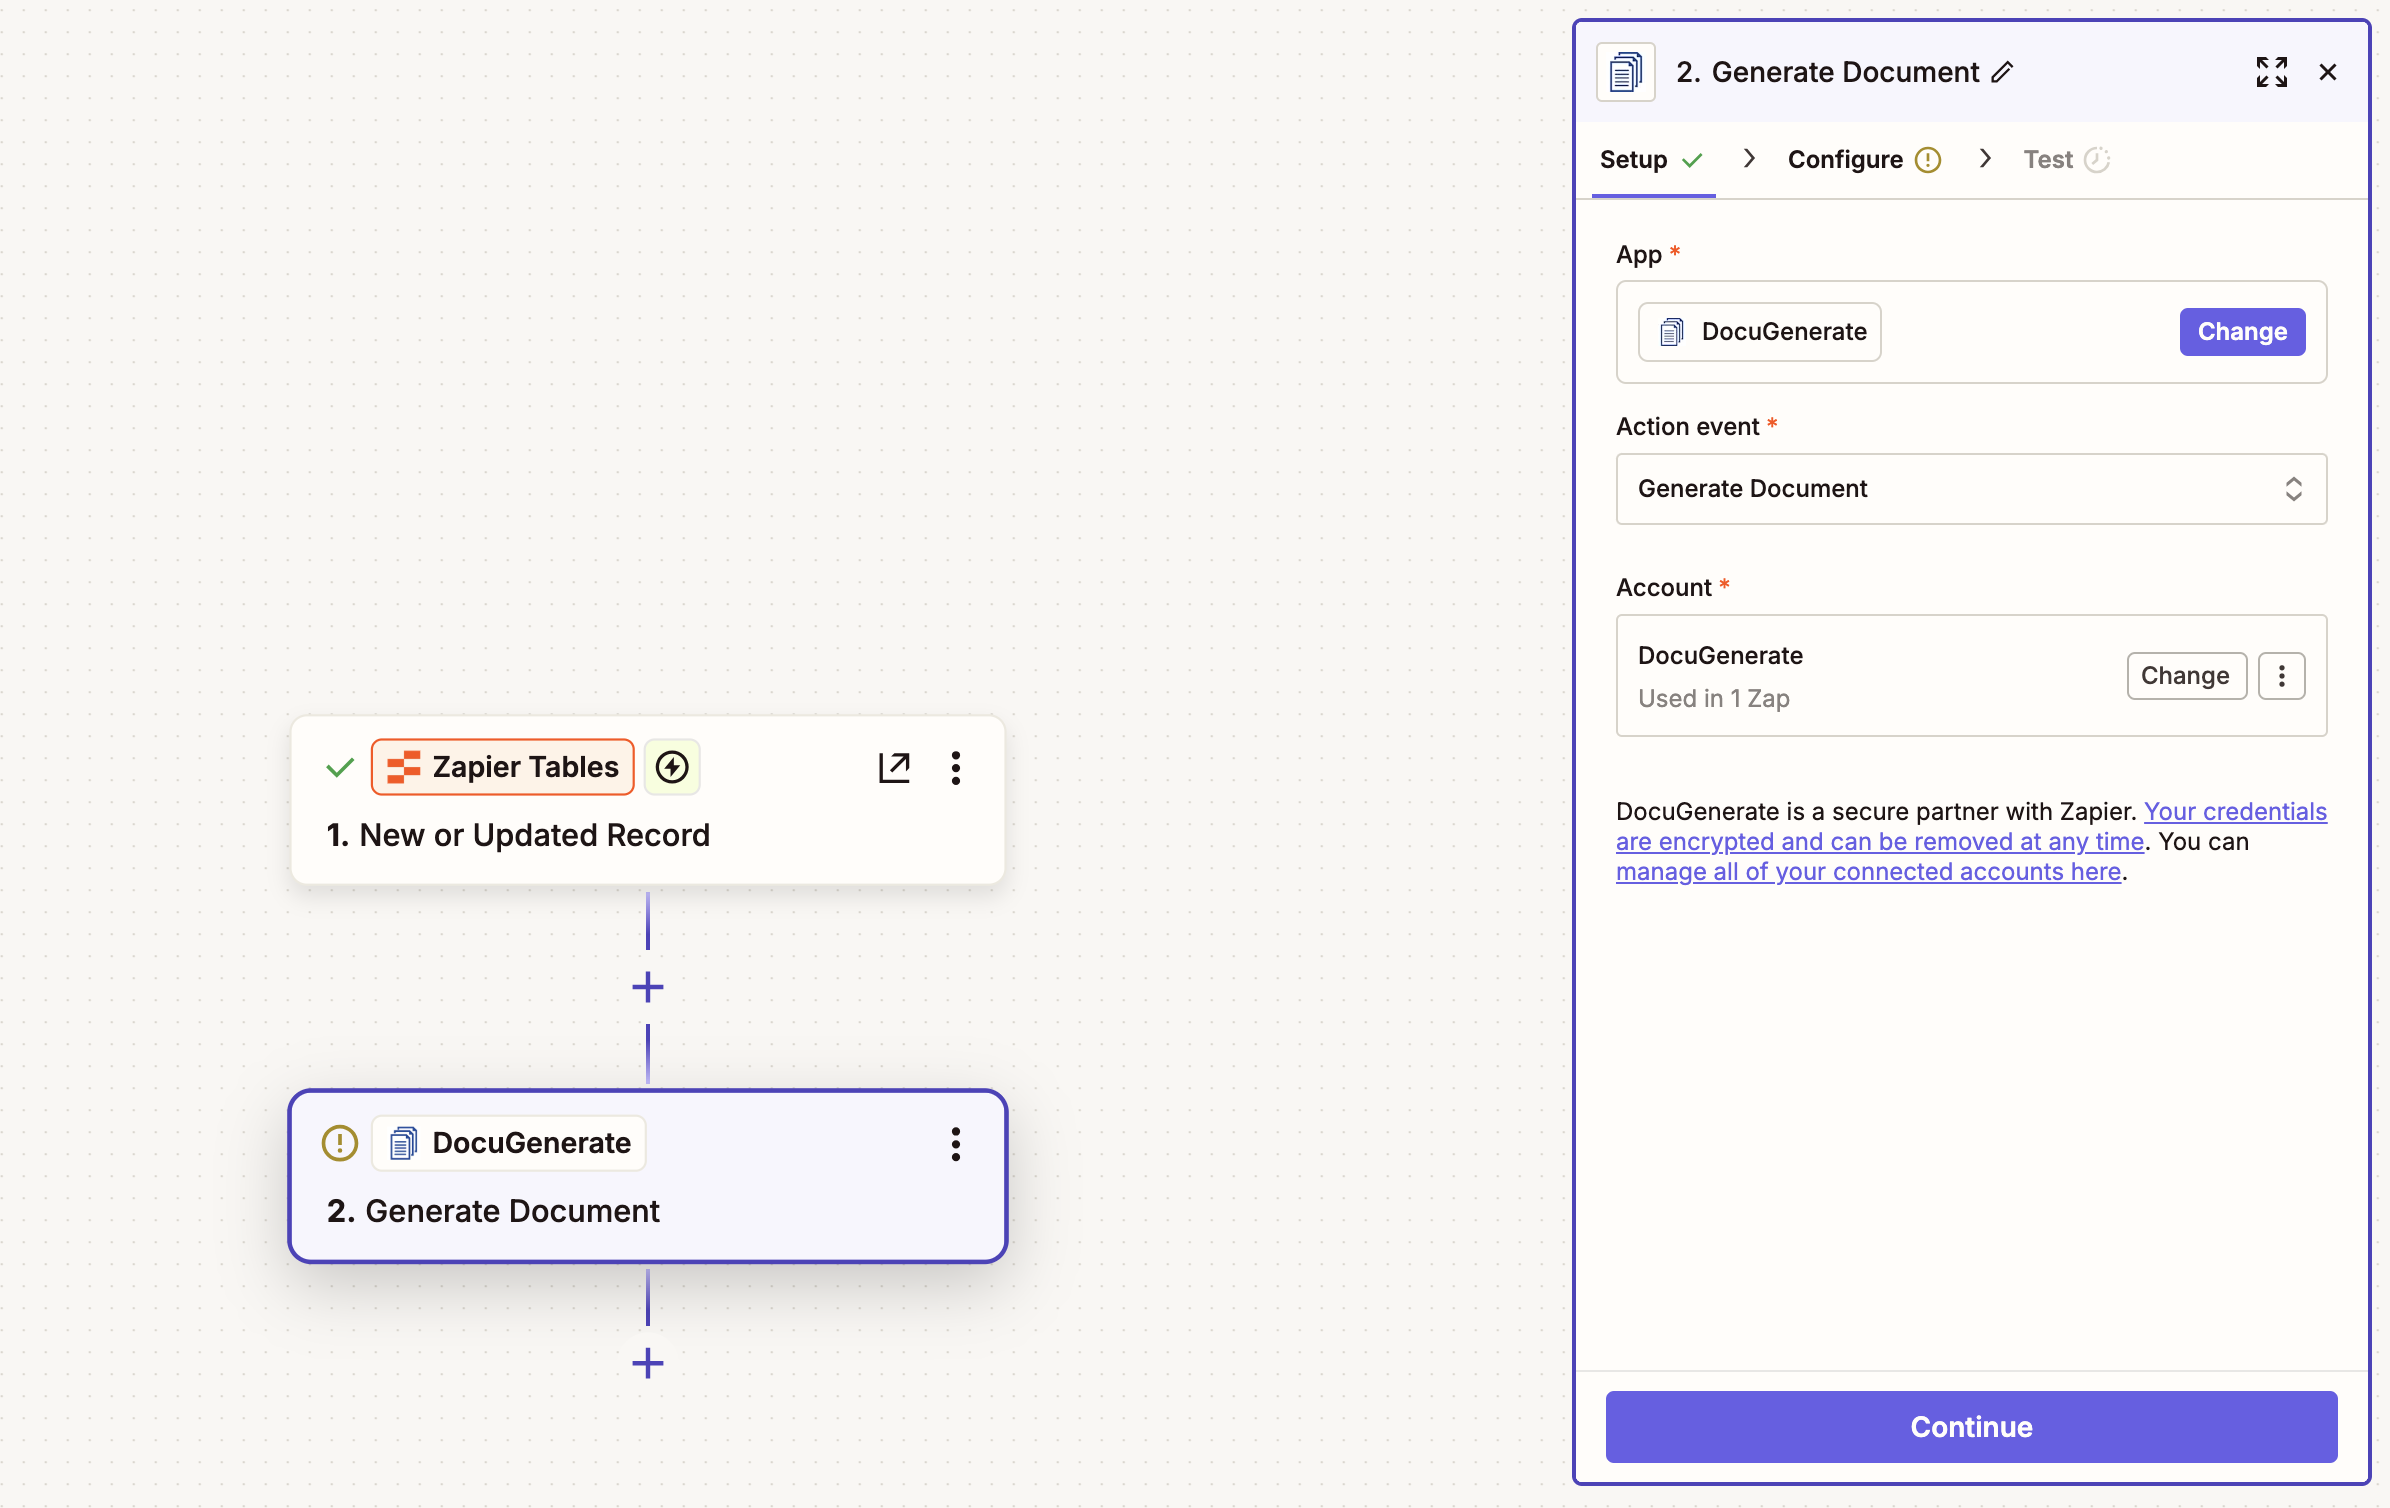
If this is your first time connecting DocuGenerate to Zapier, you’ll need to authenticate using your DocuGenerate API Key. You can find your API key in your DocuGenerate account settings.
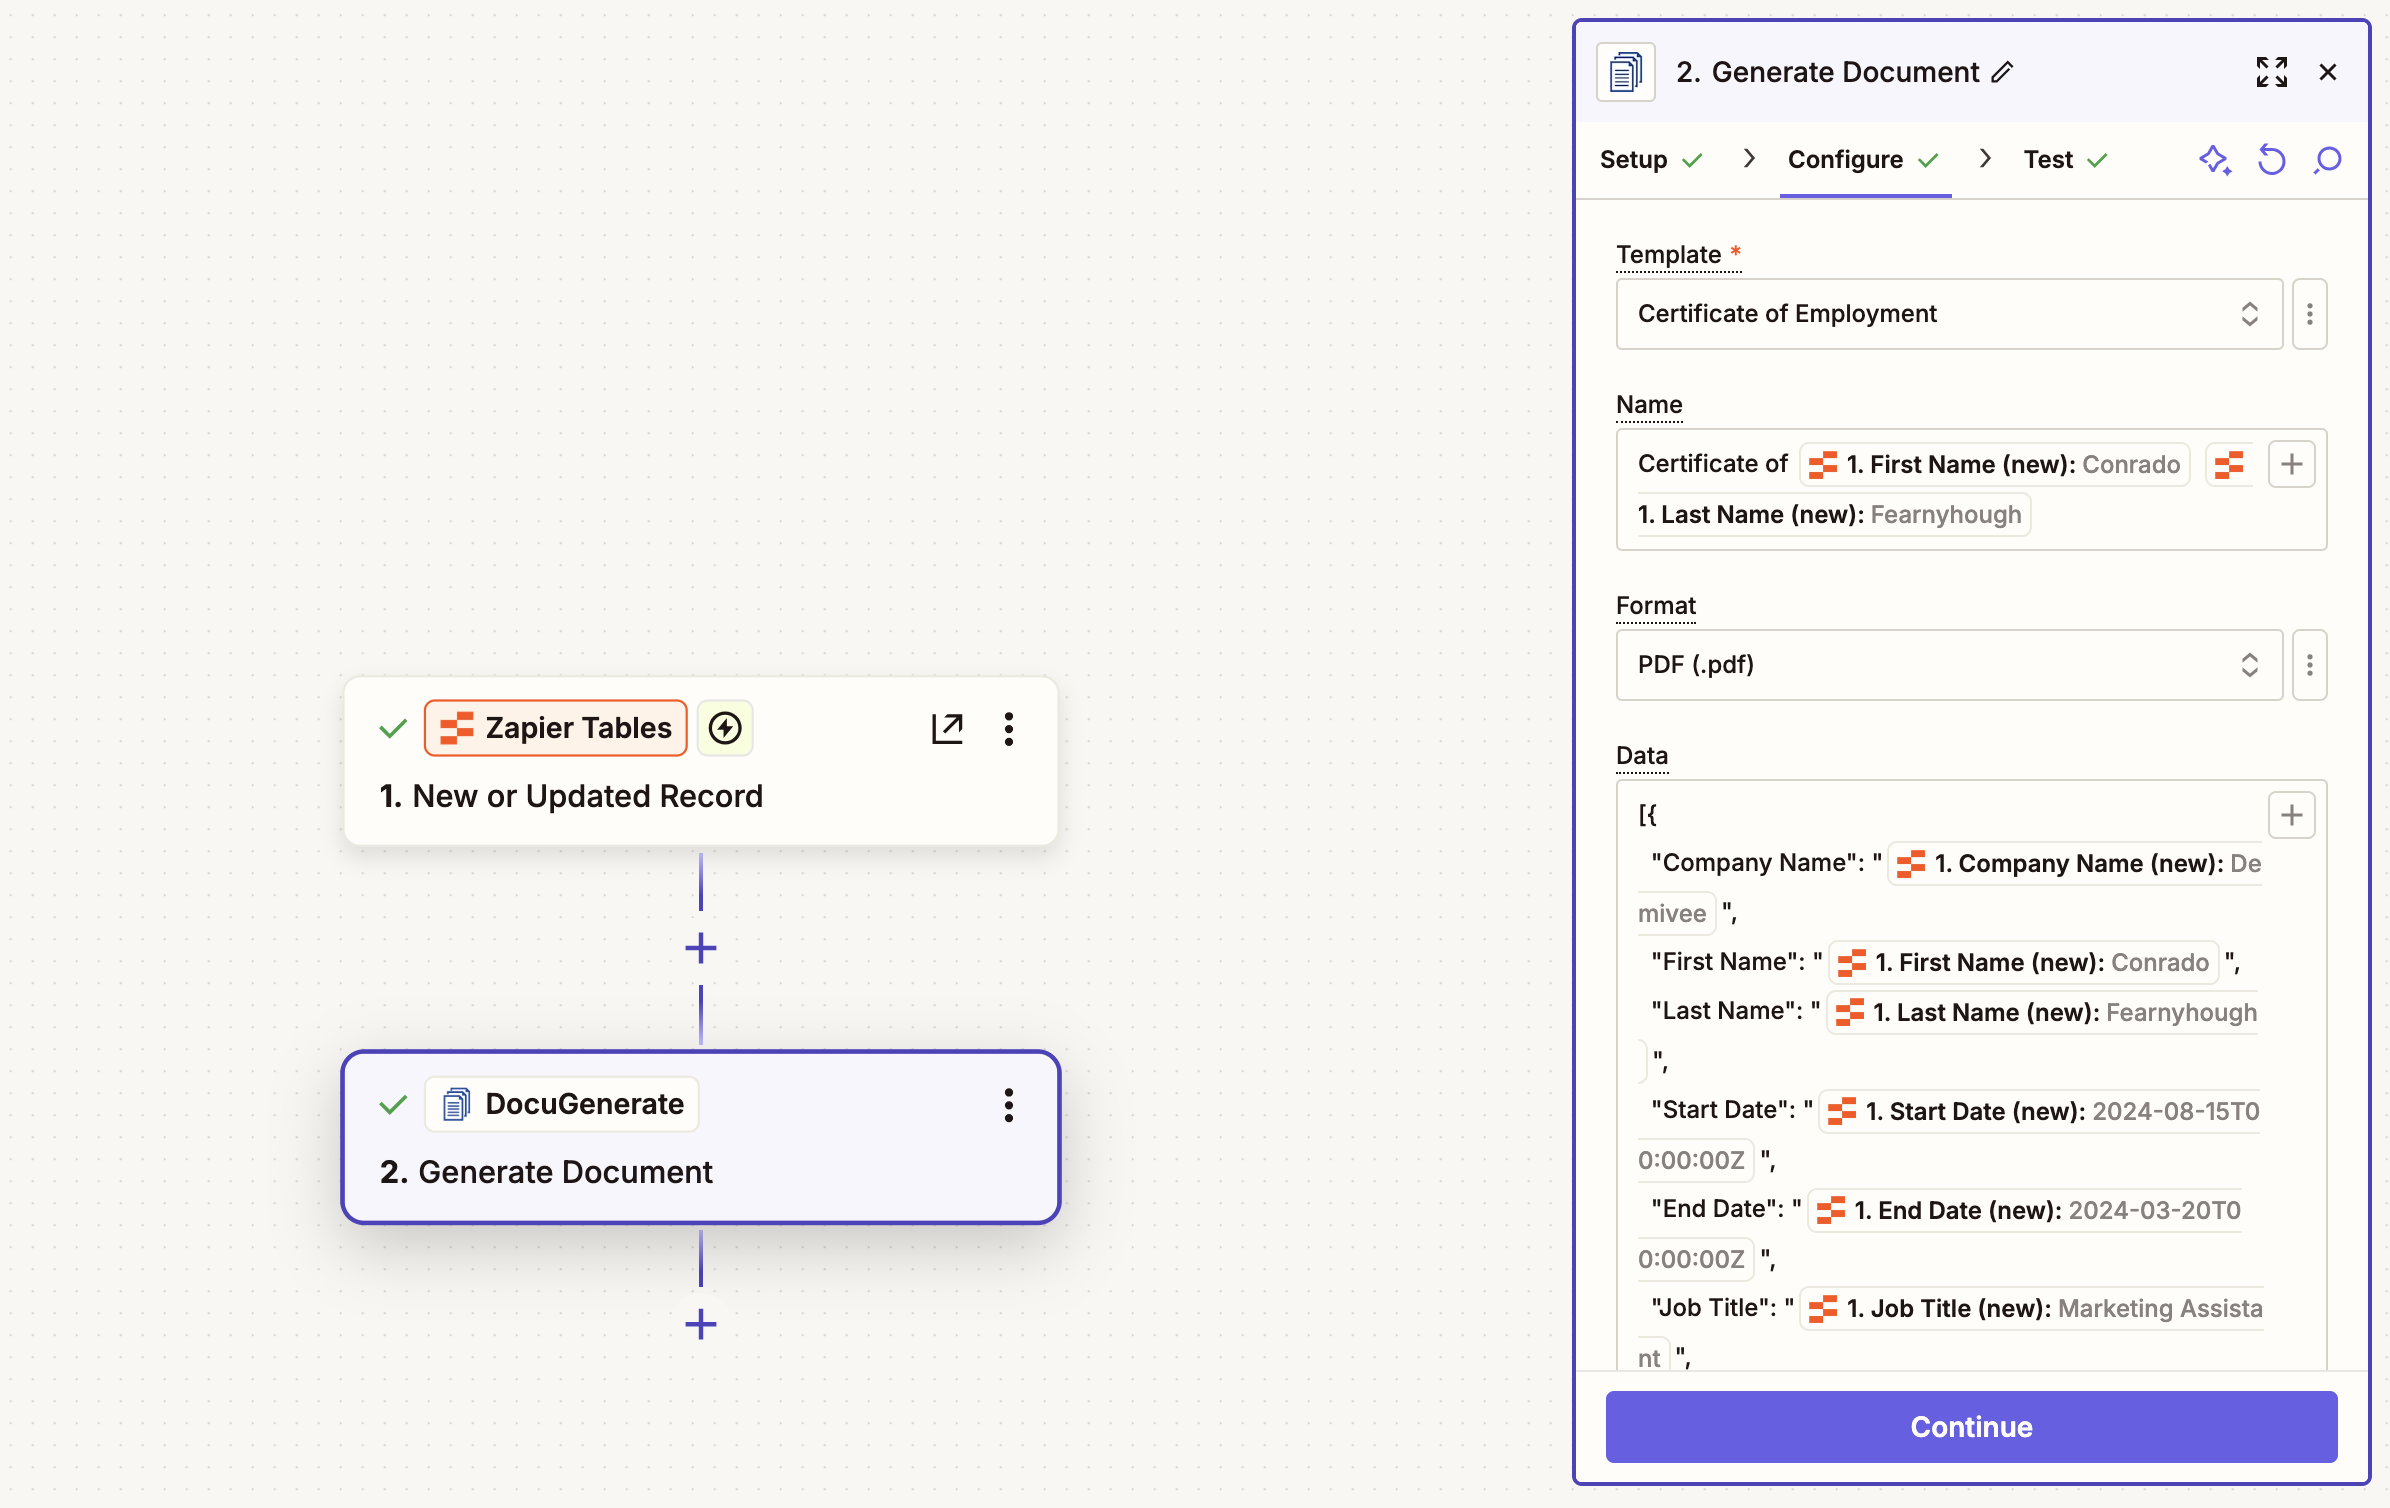
In the action configuration, select the Certificate of Employment template from the dropdown list. For the document name, we’ll use dynamic values from our Zapier Table: Certificate of [First Name] [Last Name]. This way, the generated document’s name will be personalized with the person’s name. Set the export format to PDF to ensure the certificates are generated in a professional, print-ready format.
The most important part is mapping the data from your Zapier Table to the template merge tags. In the Data field, make sure to select the actual field values from the previous step for each key. The dynamic field insertion will populate these values automatically when the Zap runs.
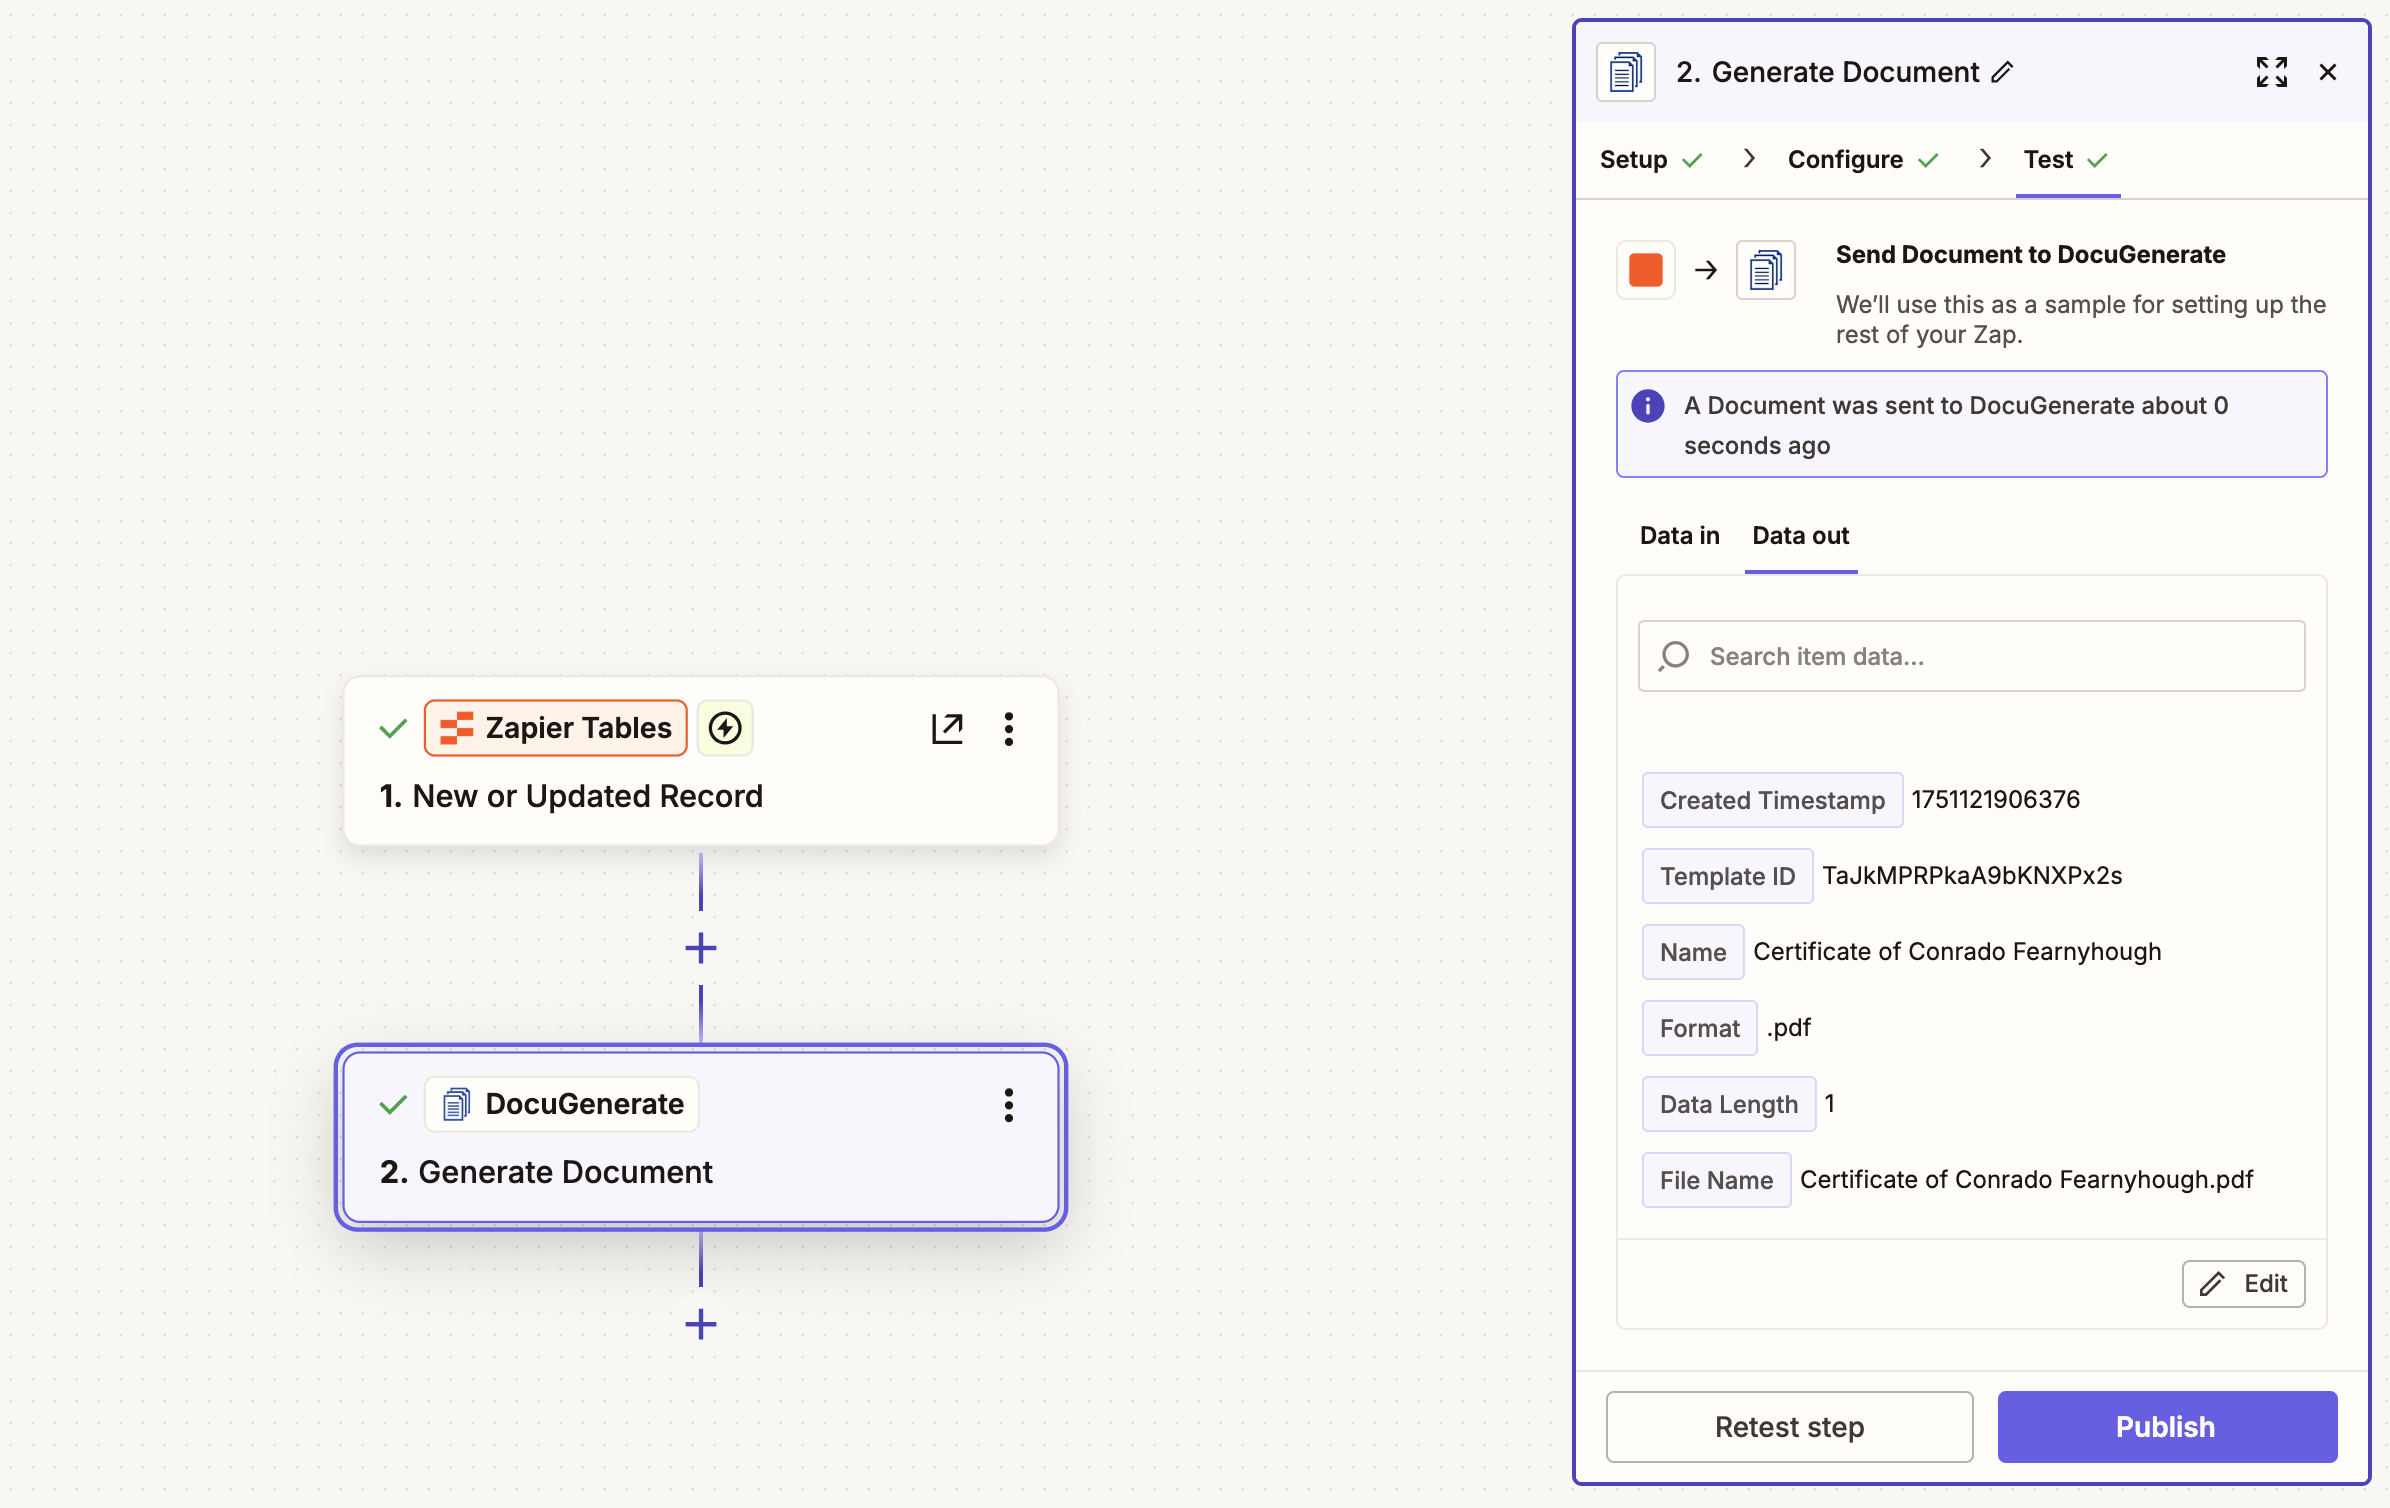
Test this step to ensure the document generation works correctly. If successful, you’ll see a JSON response from DocuGenerate containing the document details, like the document ID, name, format and Document URL, which points to the generated PDF file that we’ll use in the next step. You’ll notice that the document name and file name are personalized with the selected record’s values as intended.
Adding the Dropbox Upload Action
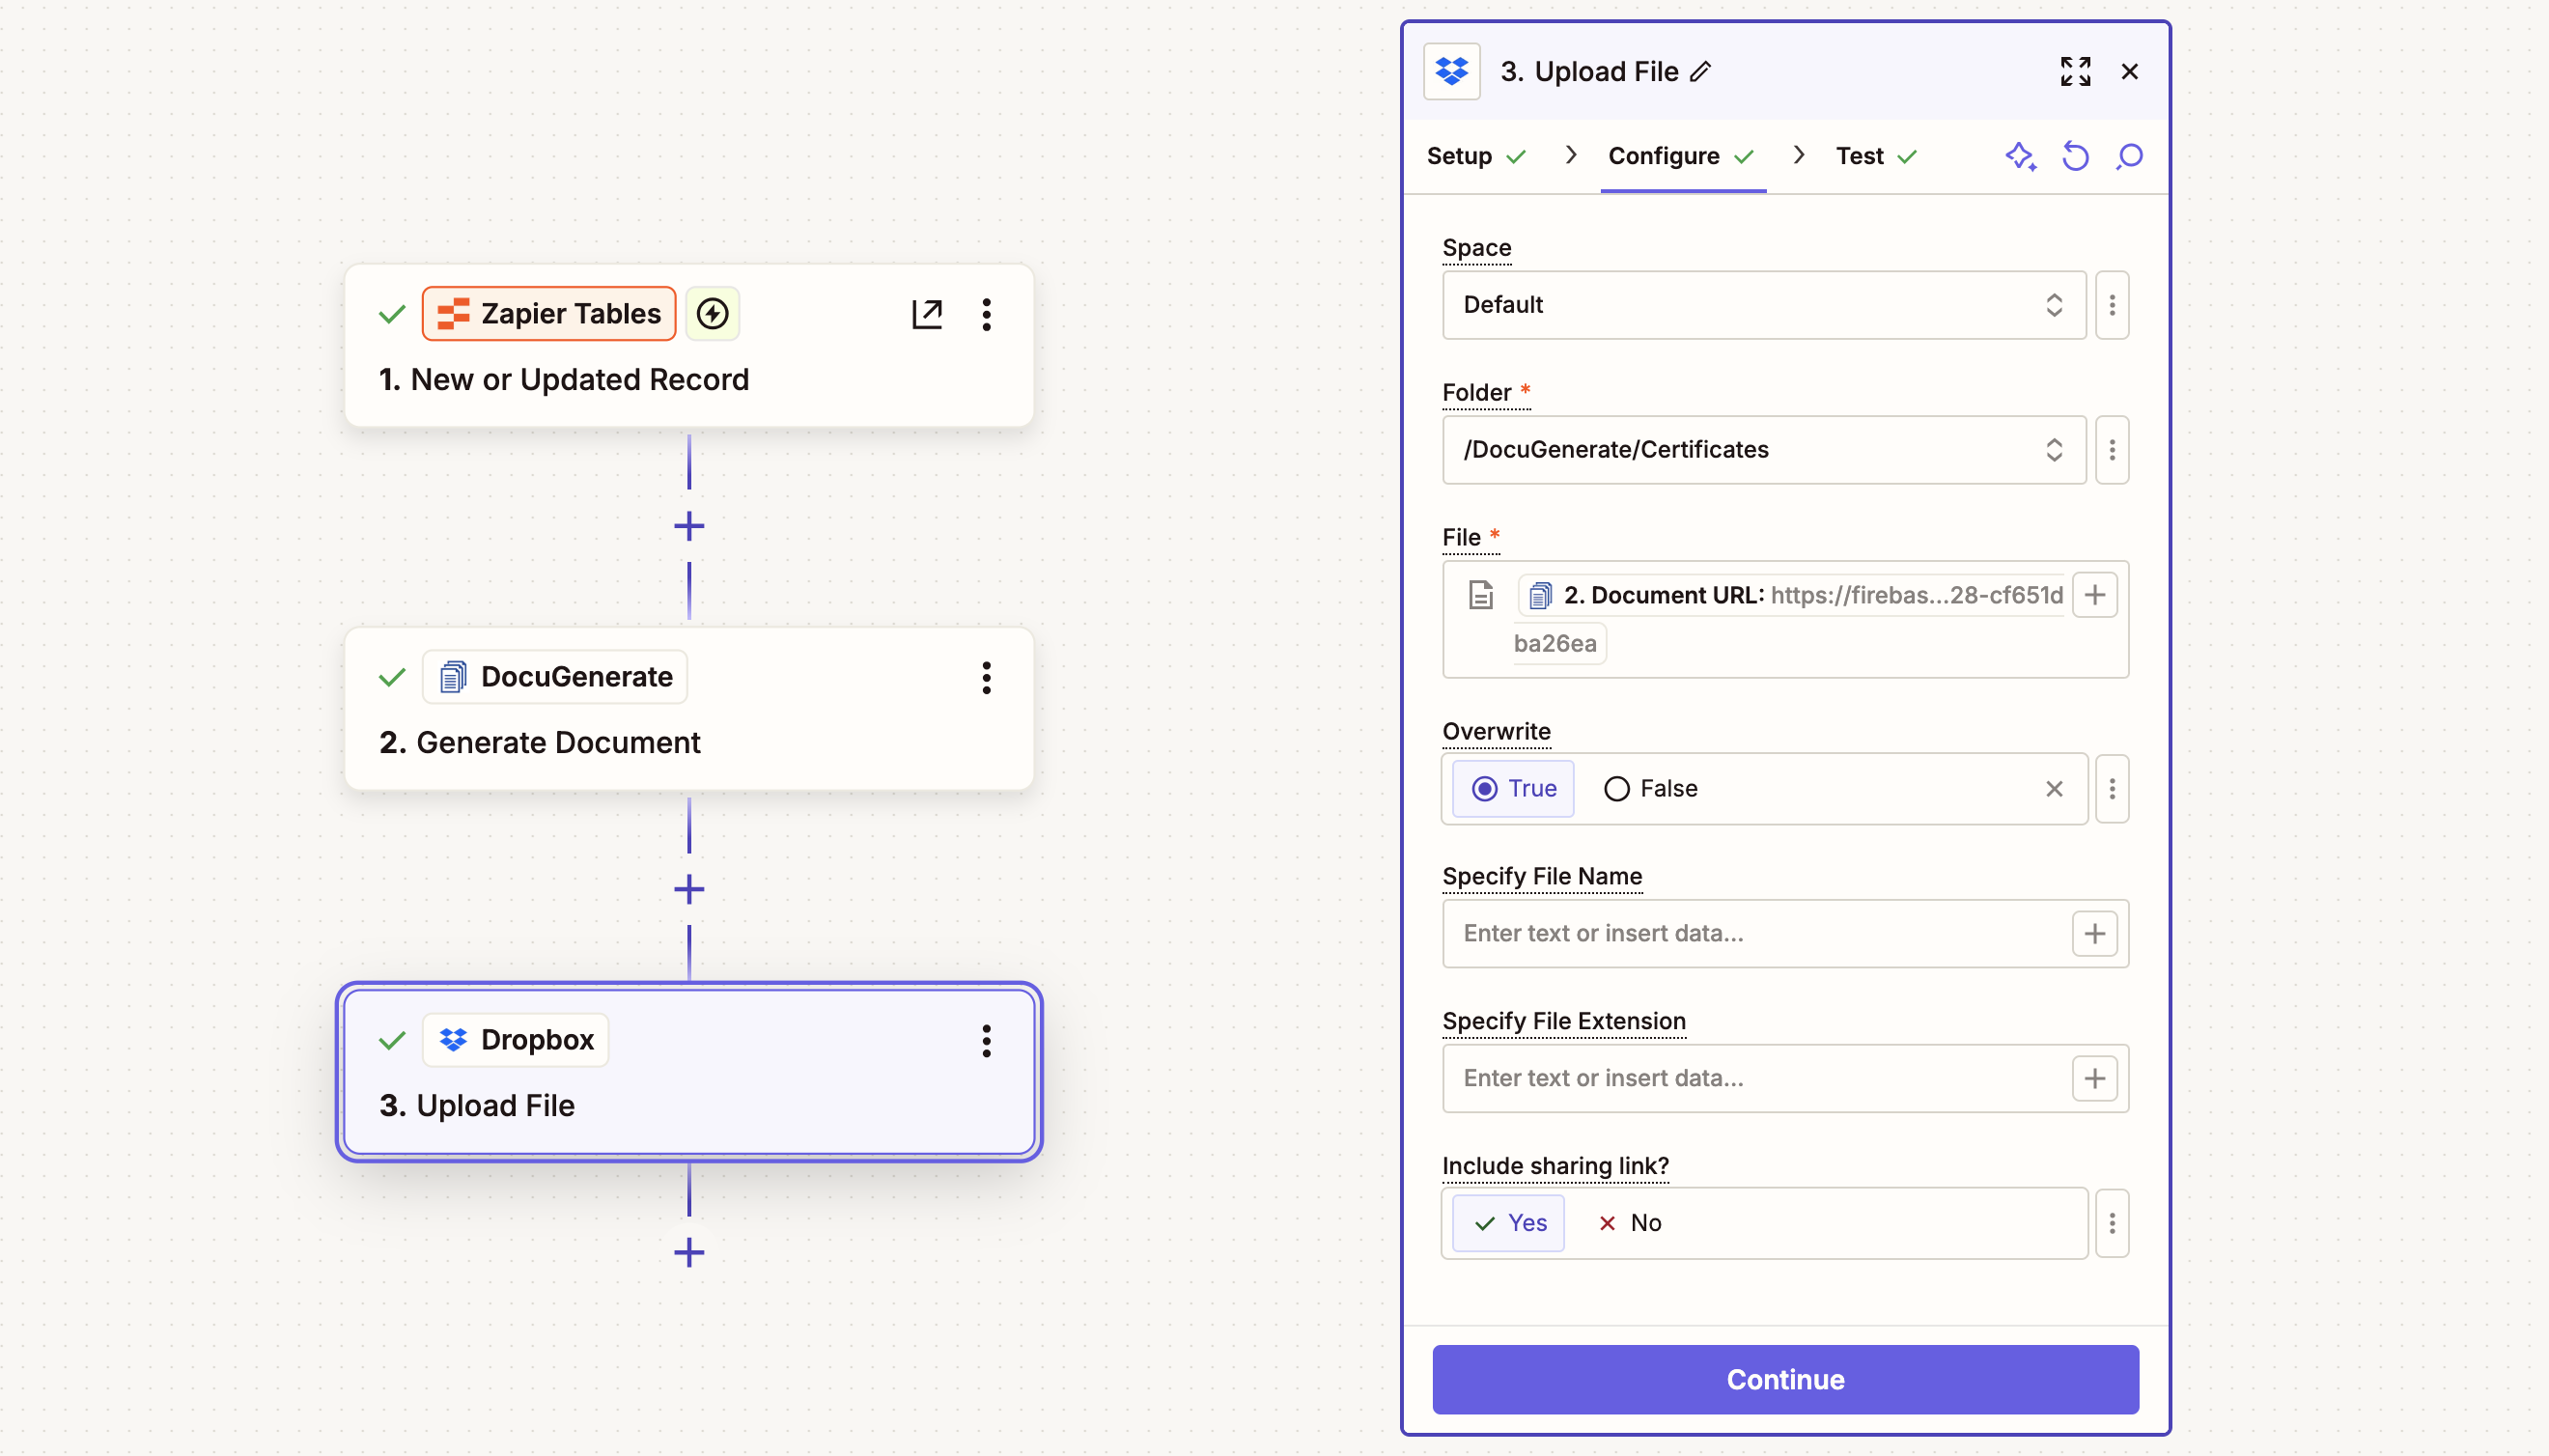
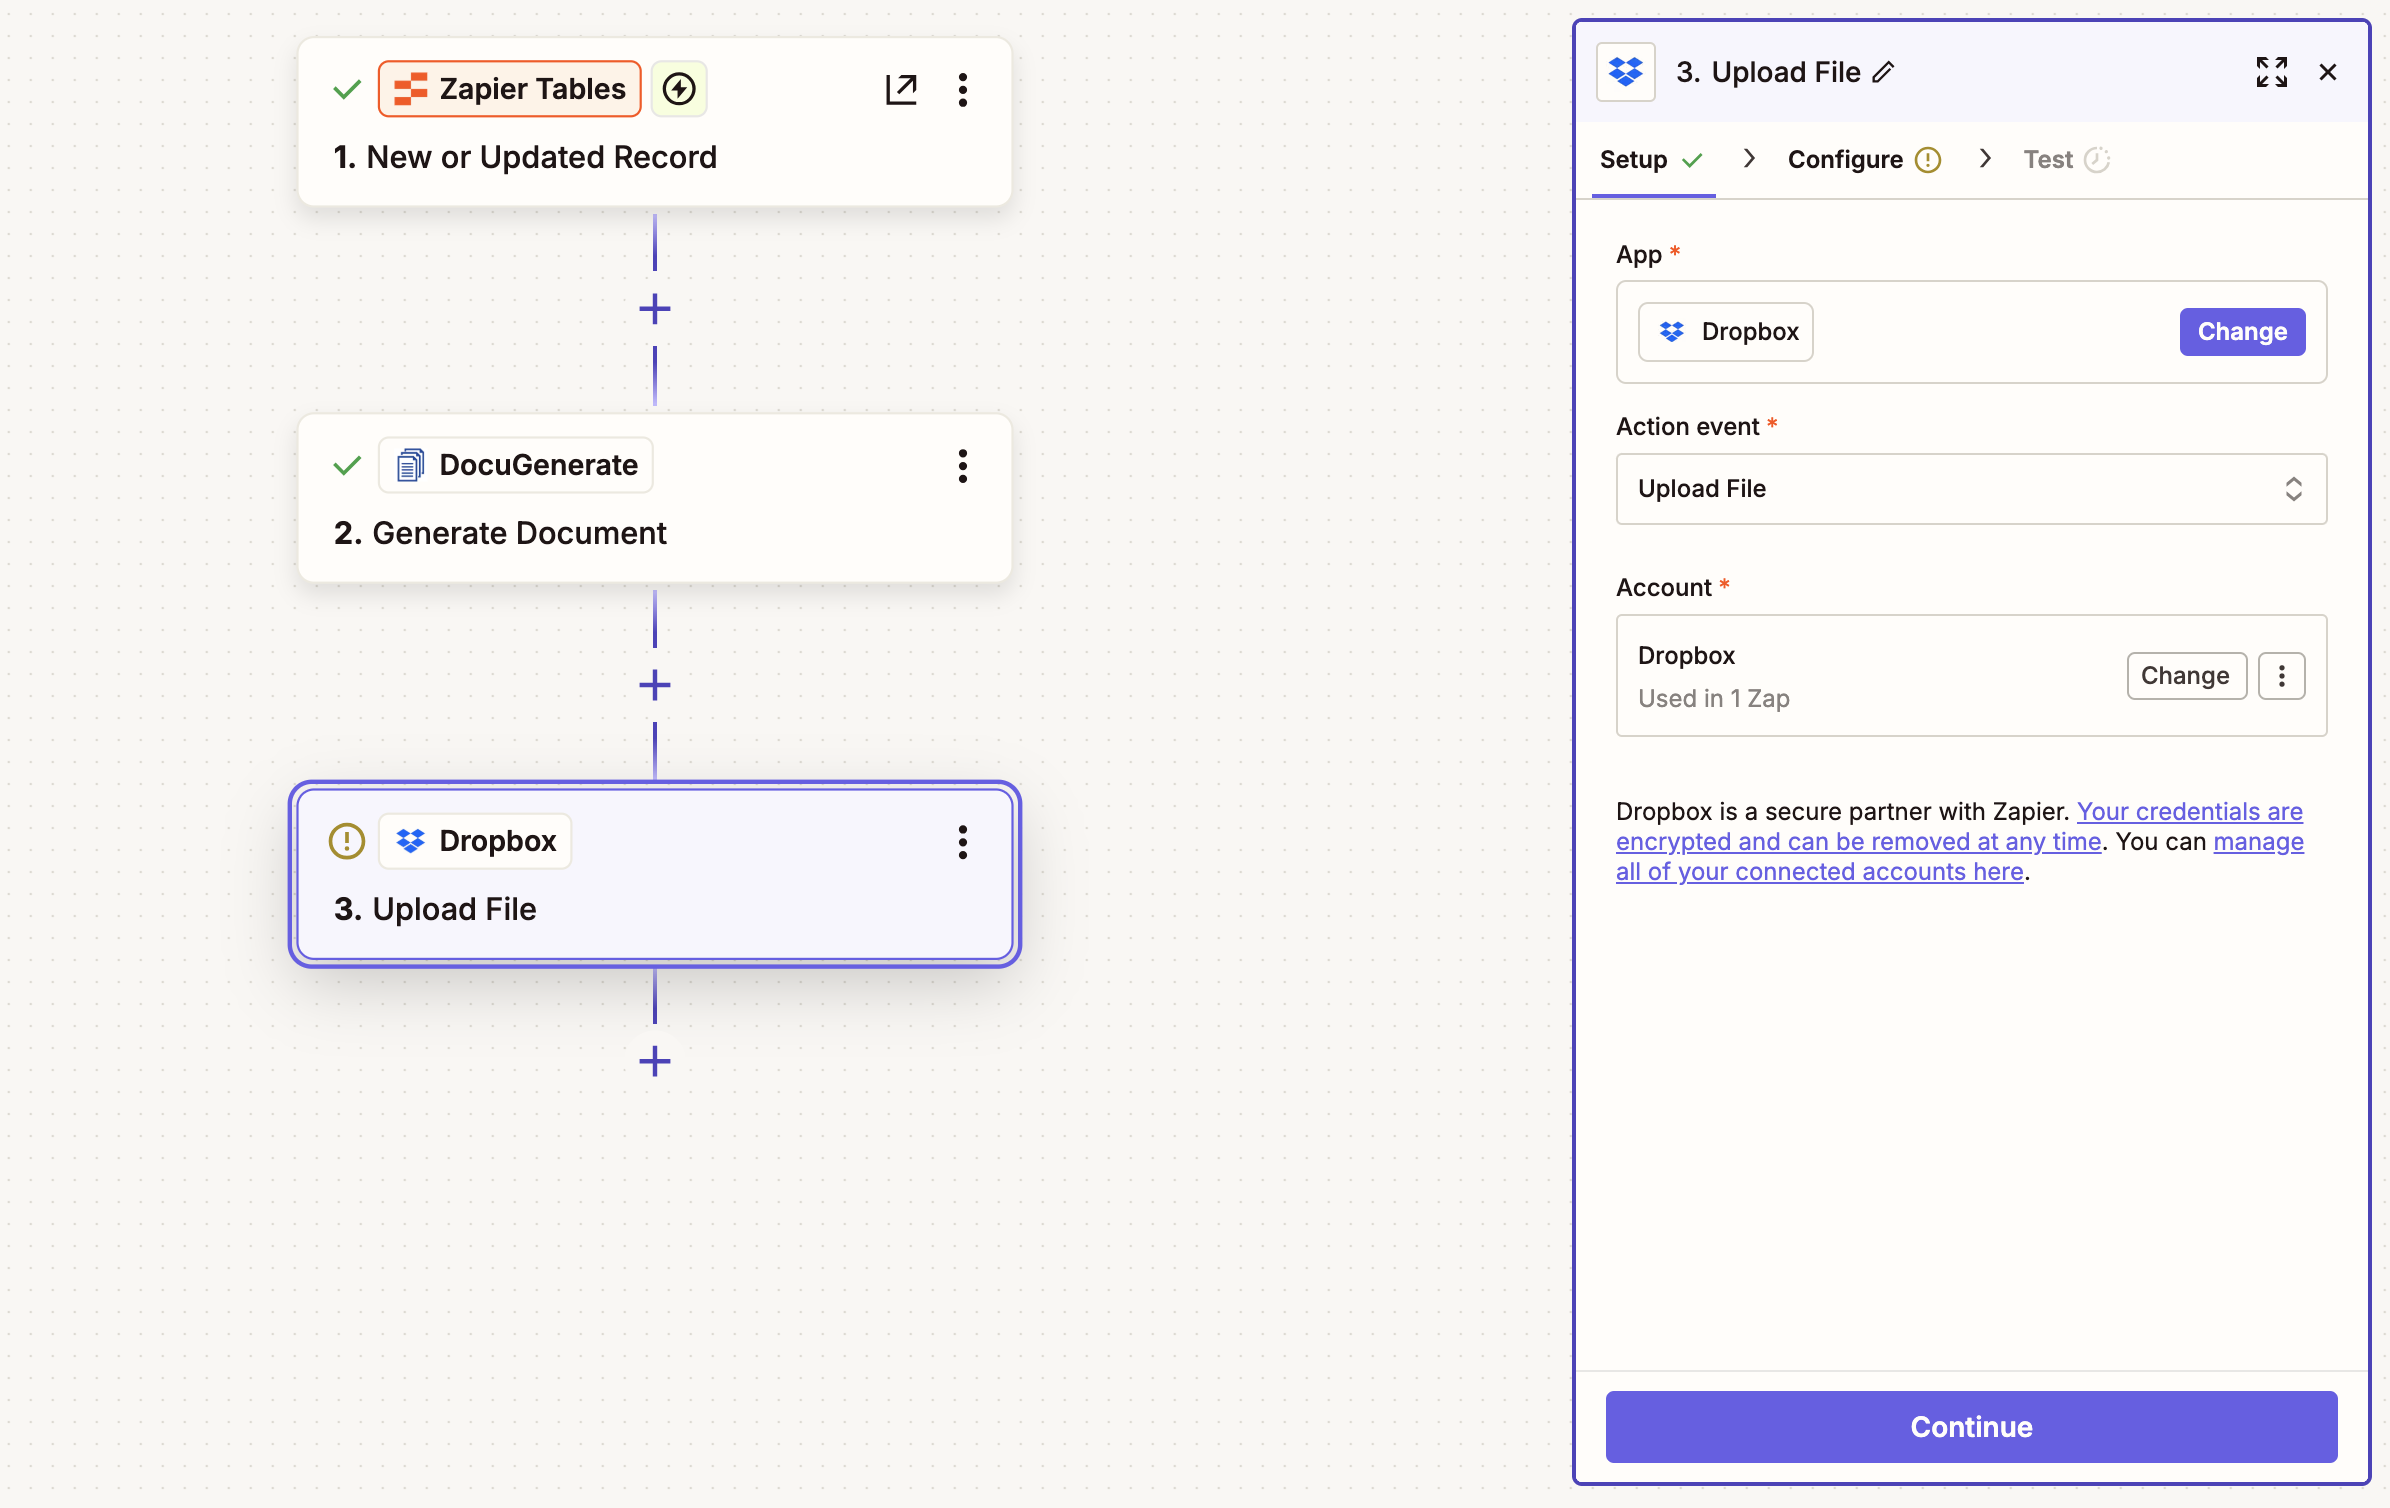
The final step in our automation is to save the generated certificate to Dropbox. Add the Dropbox app to your Zap and select the Upload File action. Connect your Dropbox account to Zapier if you haven’t already. This will allow Zapier to upload files to your Dropbox storage.
In the action configuration, you’ll need to specify two key parameters:
-
Folder: Choose where to save the certificates in your Dropbox. For this tutorial, we’ll use the static path /DocuGenerate/Certificates. This creates an organized folder structure for easy document management. You can also use dynamic folder names based on data from your table, such as organizing by company name or date.
-
File: This is where we specify the file to upload. Select the Document URL from the DocuGenerate step. This tells Dropbox to download the file from DocuGenerate’s storage and save it to your specified folder.
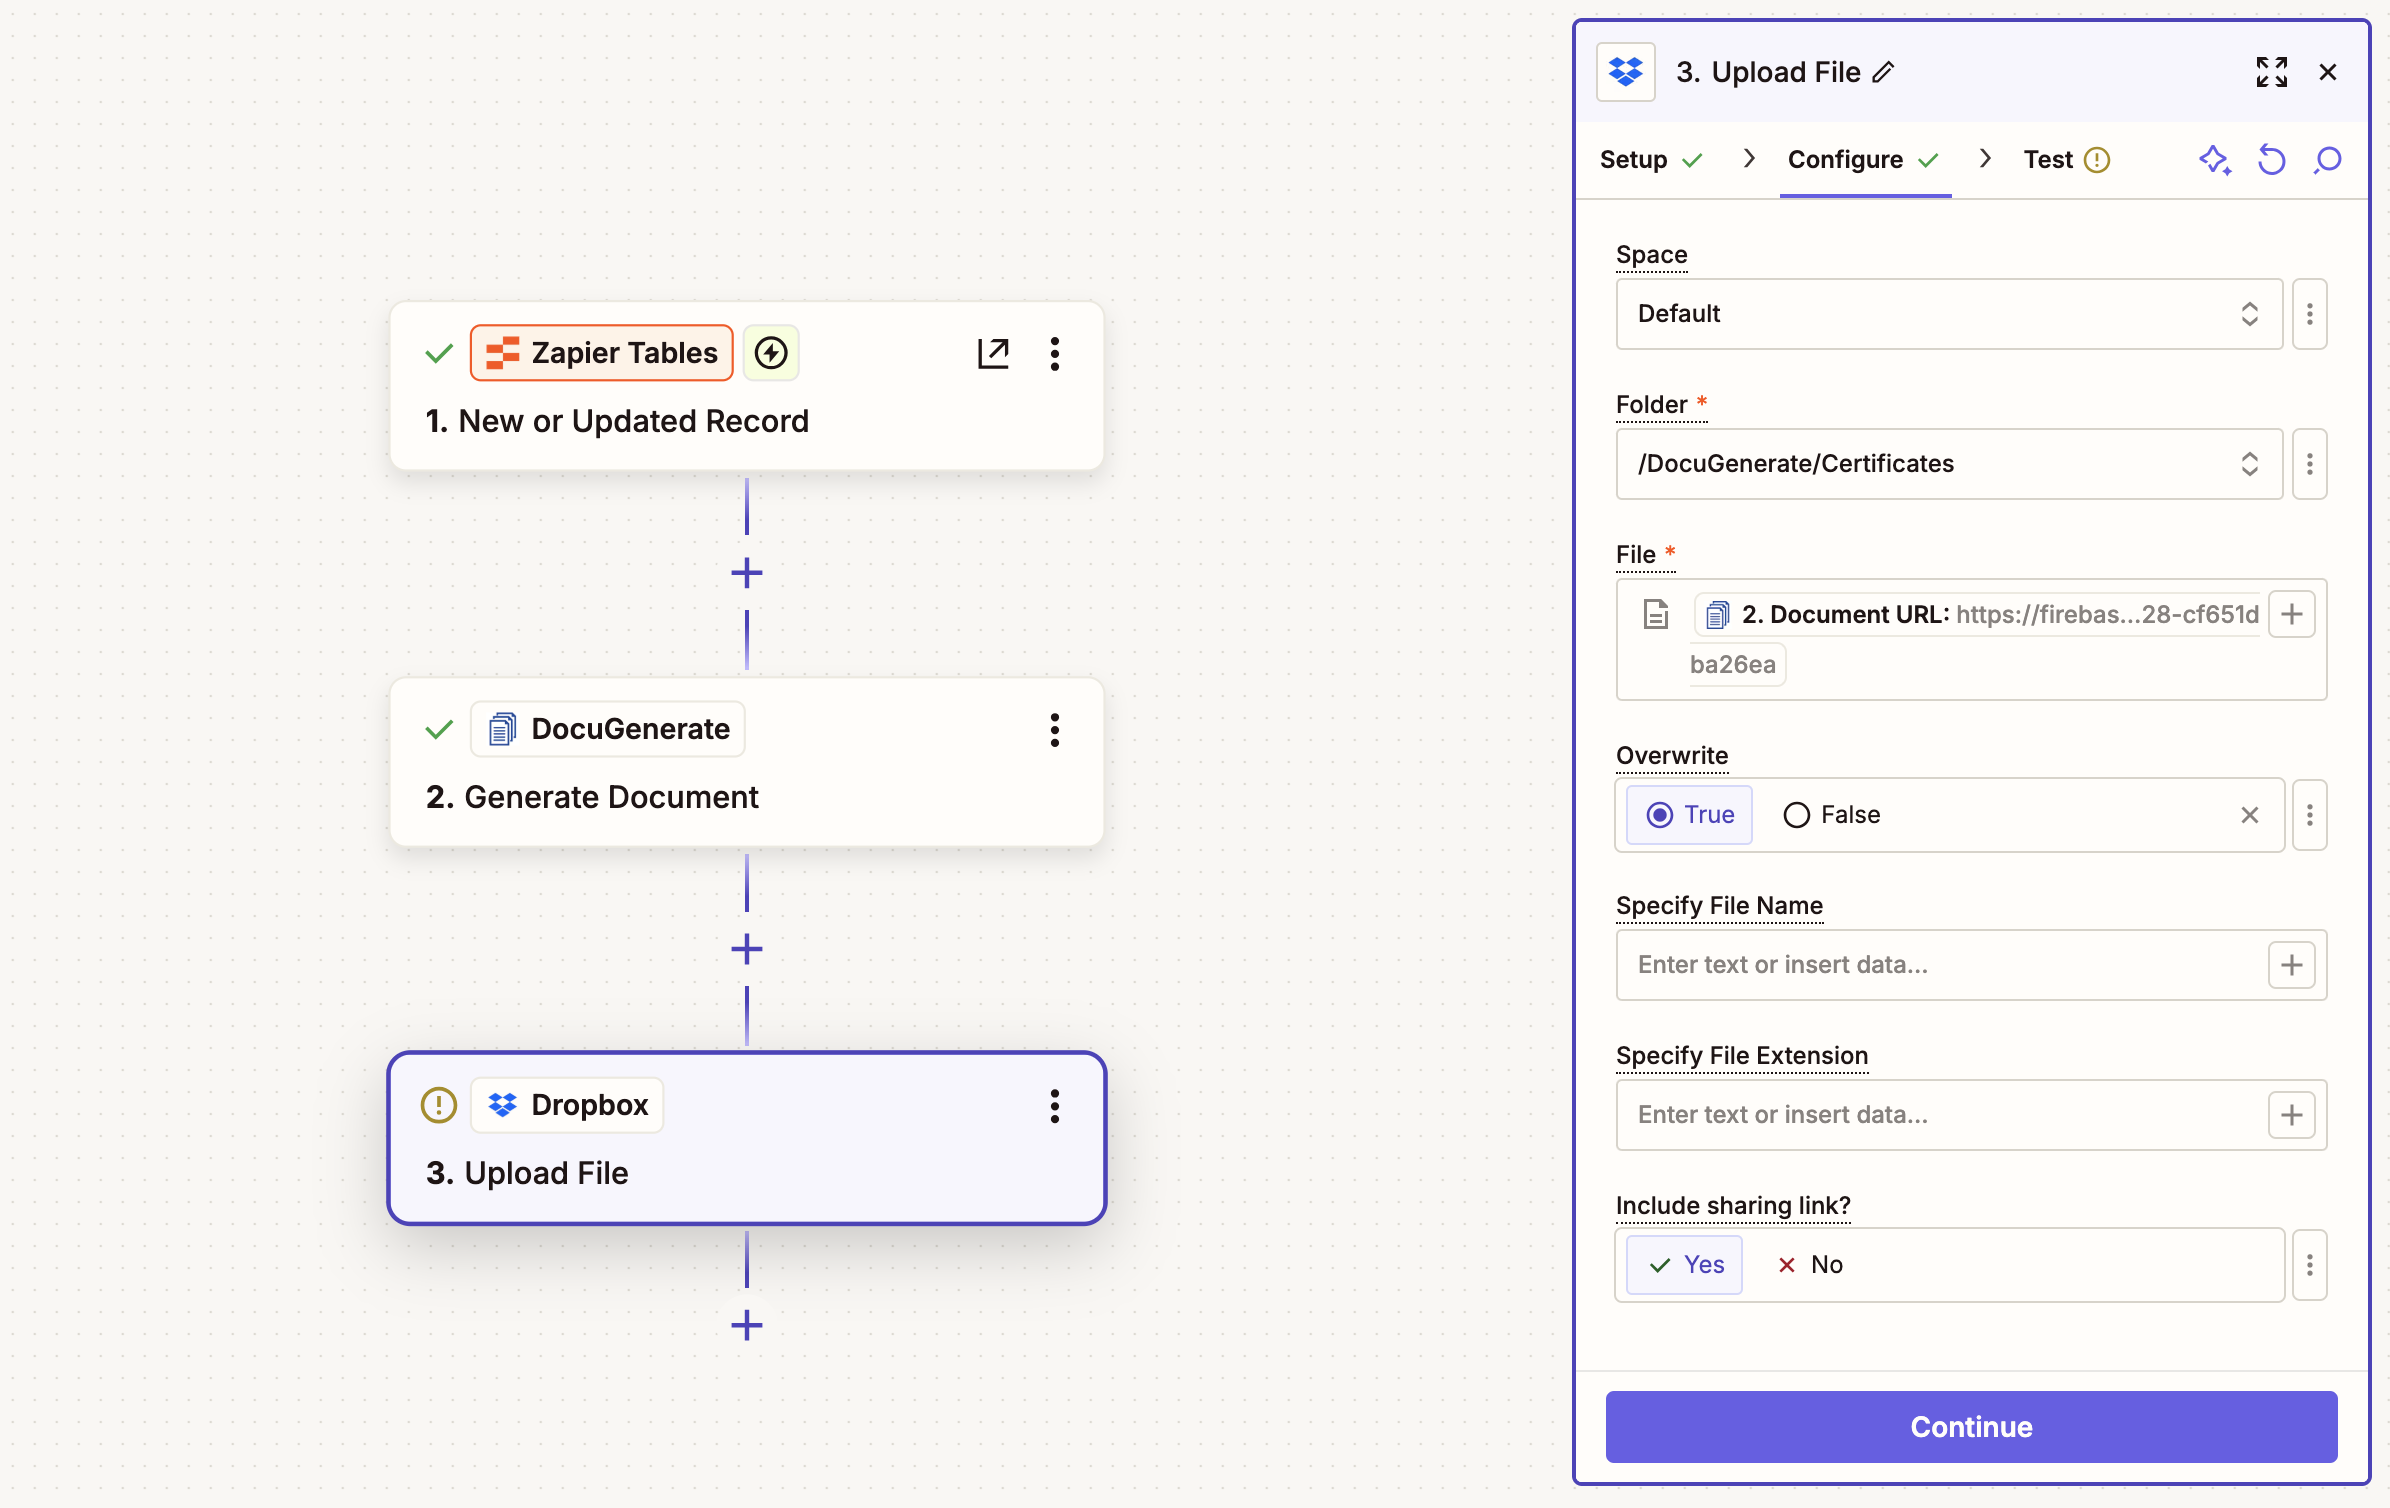
Leave the Specify File Name and Specify File Extension fields empty. This allows Dropbox to use the original filename and extension from the generated document, which for the sample selected record is Certificate of Conrado Fearnyhough.pdf.
Test this step to verify that the file uploads successfully to your Dropbox folder.
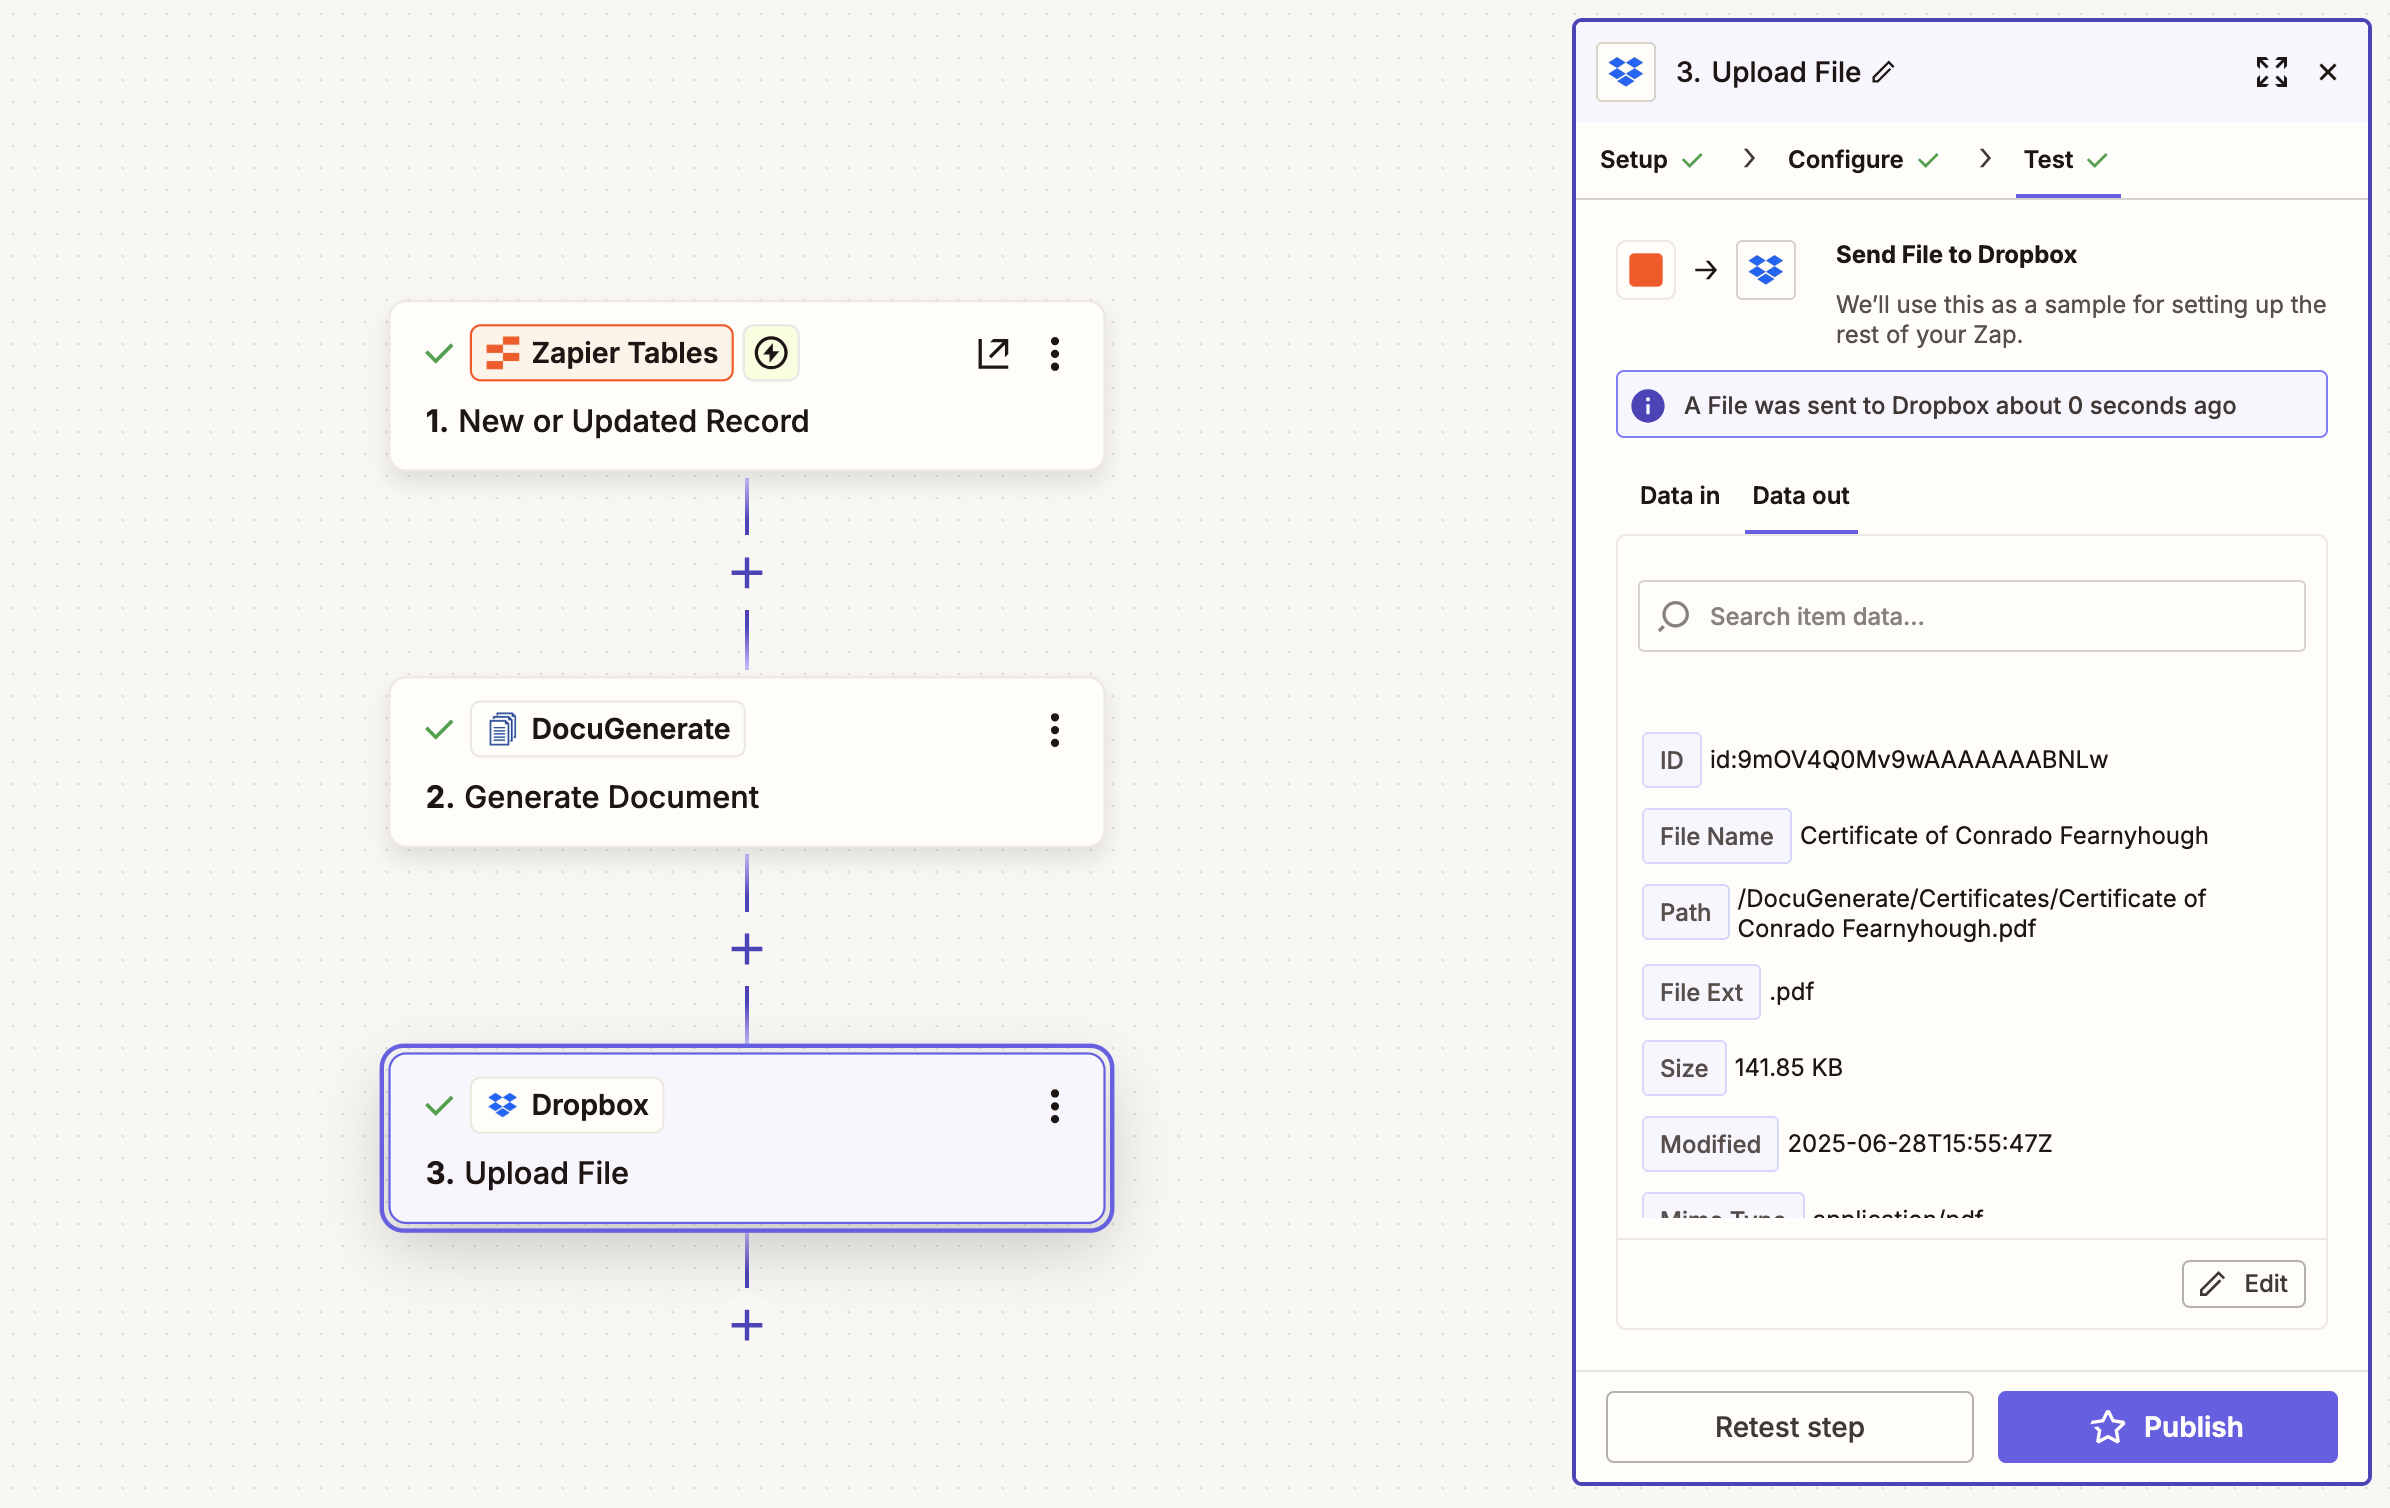
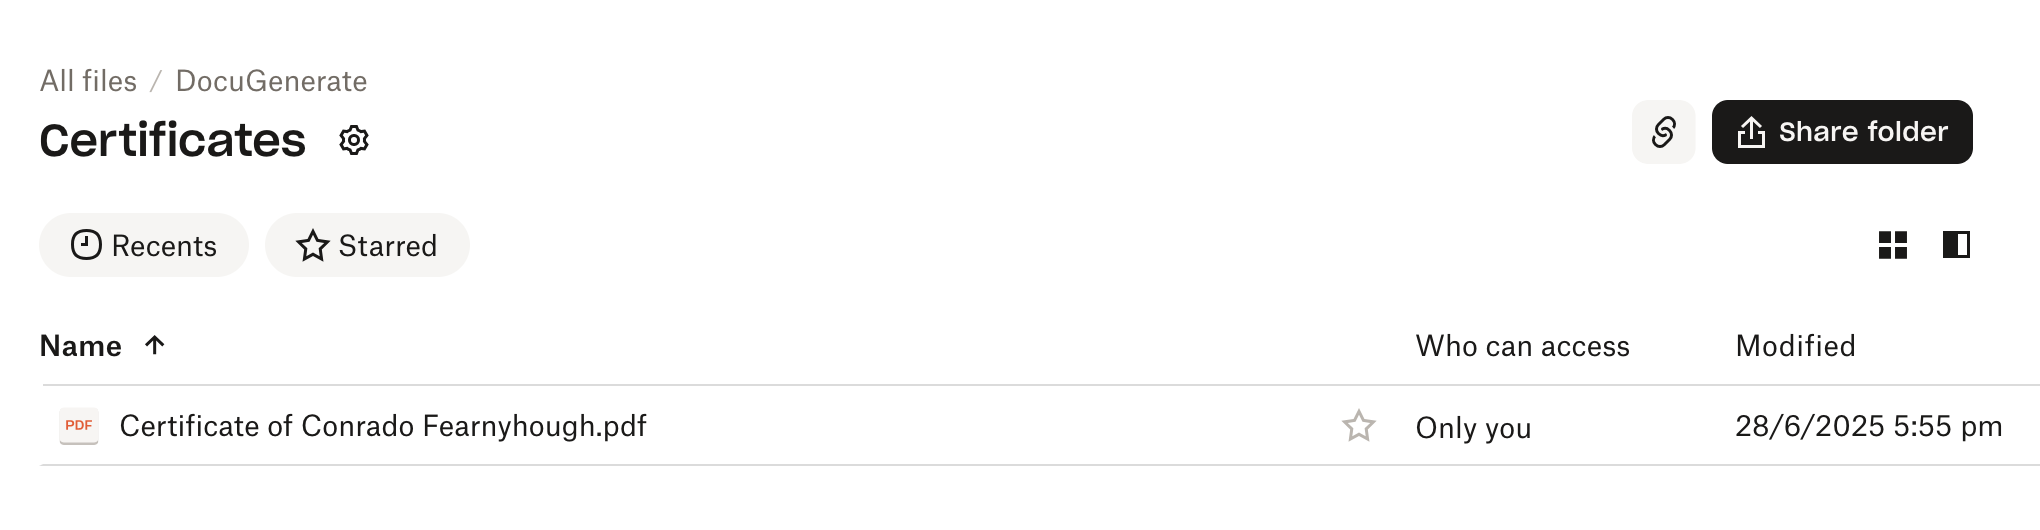
If the test is successful, you’ll see confirmation that the file has been uploaded to your specified Dropbox folder. You can verify this by checking your Dropbox account directly.
Enhancing Your Automation
Once your basic automation is working, consider these enhancements to make it even more powerful. These additional features can help you create more sophisticated workflows and better organize your document management system.
Dynamic Folder Organization
Instead of using a static folder path, you can organize certificates by company, department, or date. For example:
/DocuGenerate/Certificates/[Company Name]/DocuGenerate/Certificates/[Certificate Date]/DocuGenerate/Certificates/[Job Title]
Conditional Logic
Use Zapier’s Filter or Paths features to handle different document types or approval workflows:
- Generate different certificate templates based on job title
- Route documents through approval processes before final storage
- Apply different folder structures for different company divisions
Notification Systems
Add email notifications to inform HR managers when certificates are generated and saved. You can use Zapier’s Email or Gmail actions to send automated notifications.
Security and Compliance Considerations
When automating document workflows, especially for HR documents like employment certificates, consider these security aspects:
Data Privacy
- Ensure your Zapier Tables contain only necessary employee information
- Consider data retention policies for both generated documents and source data
- Review Dropbox sharing settings to prevent unauthorized access
Access Control
- Limit access to your Zapier automations to authorized personnel only
- Use Dropbox’s team features to control who can access certificate folders
- Regularly audit user permissions and remove access for former employees
Audit Trails
- Zapier automatically maintains logs of all automation runs
- Consider adding additional logging or notification steps for compliance requirements
- Document your automation process for internal auditing purposes
Conclusion
Automating document generation and cloud storage with DocuGenerate, Zapier, and Dropbox creates a powerful workflow that saves time while ensuring consistent, professional results. This automation eliminates manual file management, reduces errors, and creates an organized system for document storage and retrieval.
By following this tutorial, you’ve created a foundation that can be adapted for many different document types and business processes. Whether you’re managing HR documents, sales proposals, or administrative paperwork, this automation approach can streamline your workflows and improve operational efficiency.
Consider expanding this automation to handle other document types or integrate with additional business tools. The flexibility of Zapier makes it easy to add new steps, connect different apps, or create more sophisticated workflows as your needs evolve.
Resources