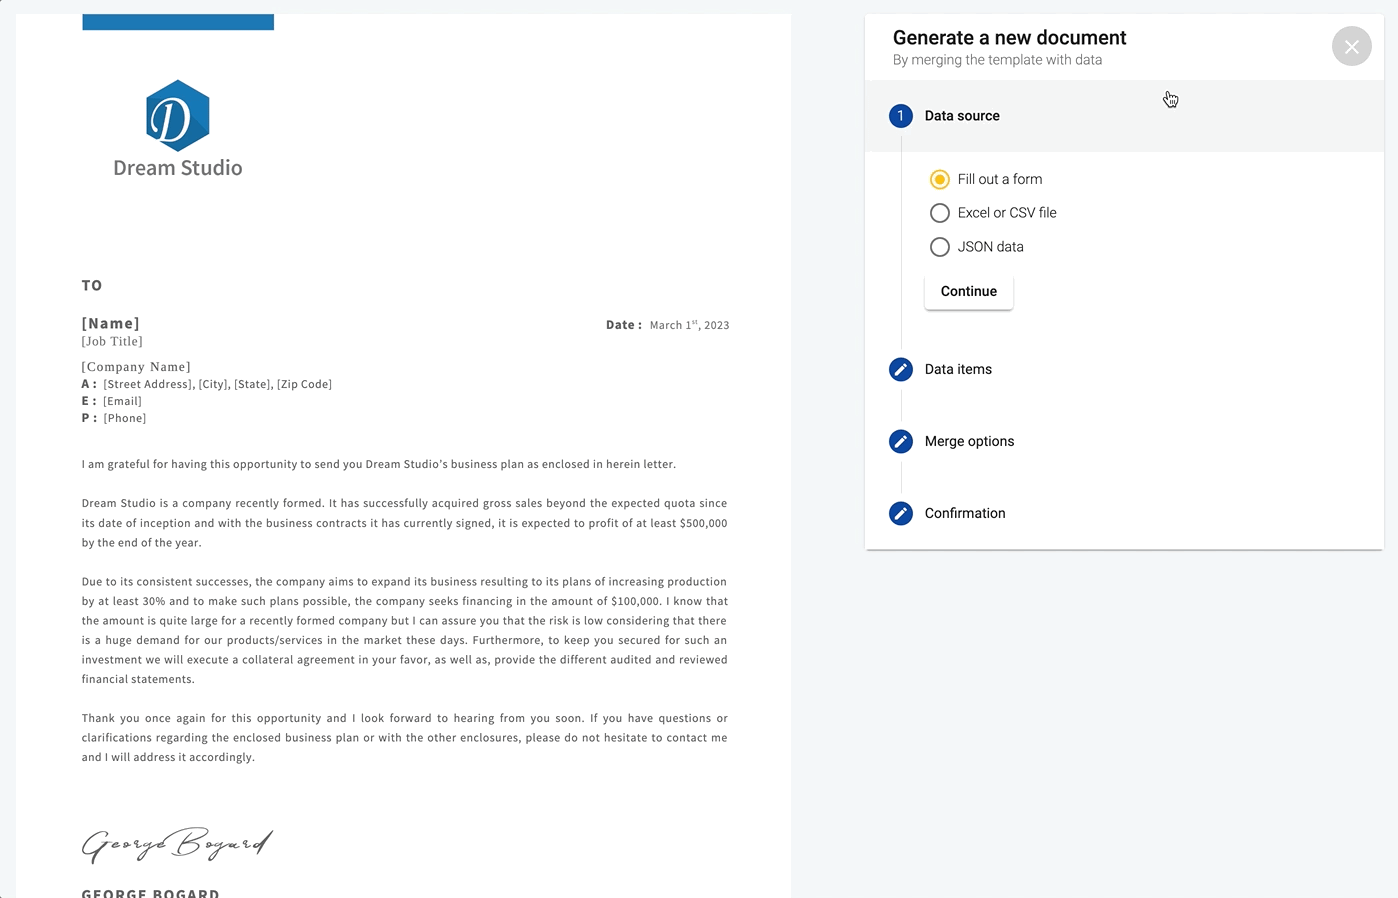
DocuGenerate offers multiple options for defining your data source when generating documents, one of which is Fill out a form. This option provides an interactive way to input your data directly into the system, making it a quick and simple solution for one-off document generation.
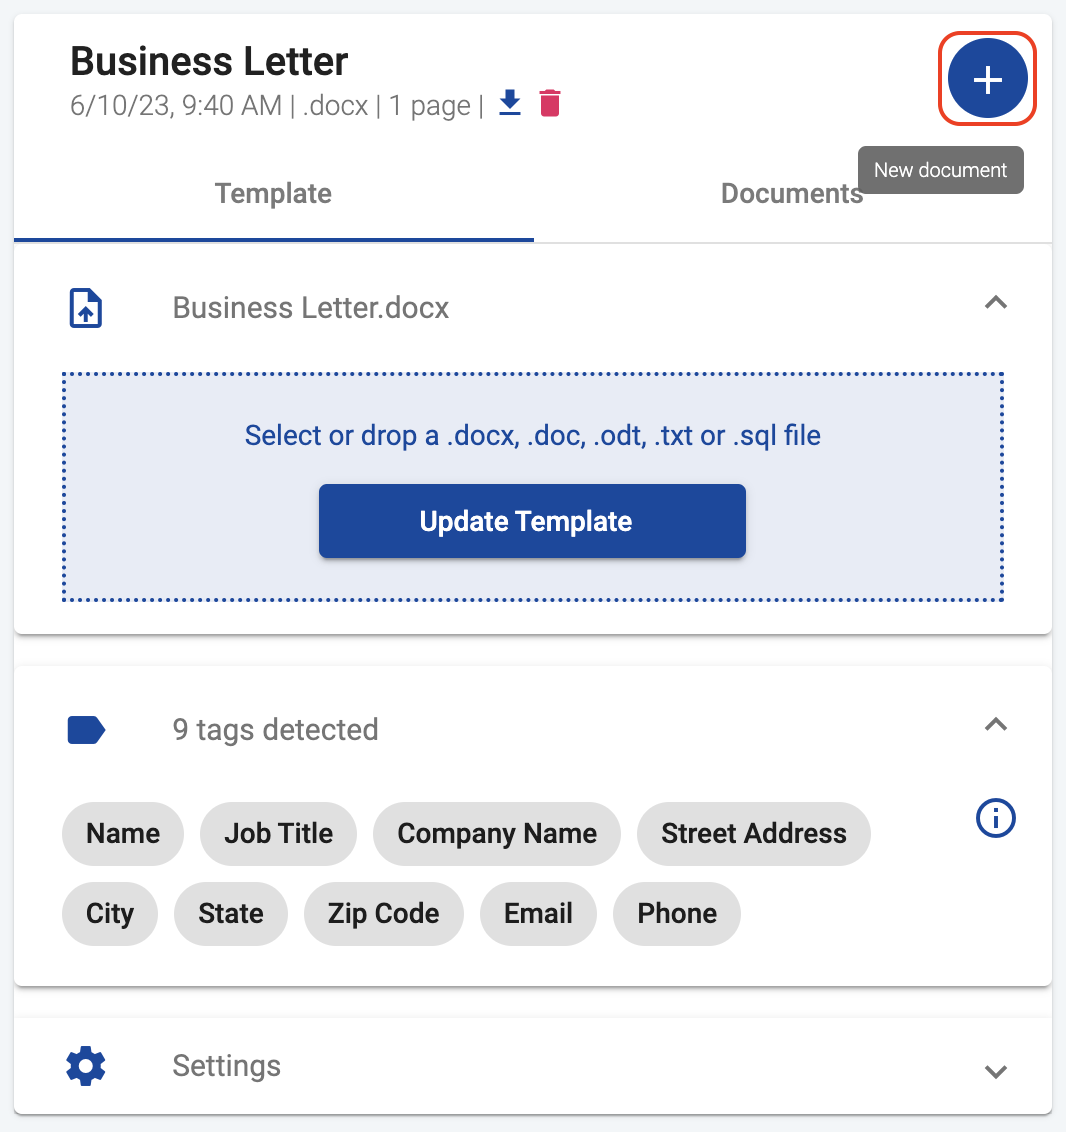
To get started with generating documents by filling out a form, click on the New document button. This button is represented by a plus sign icon:
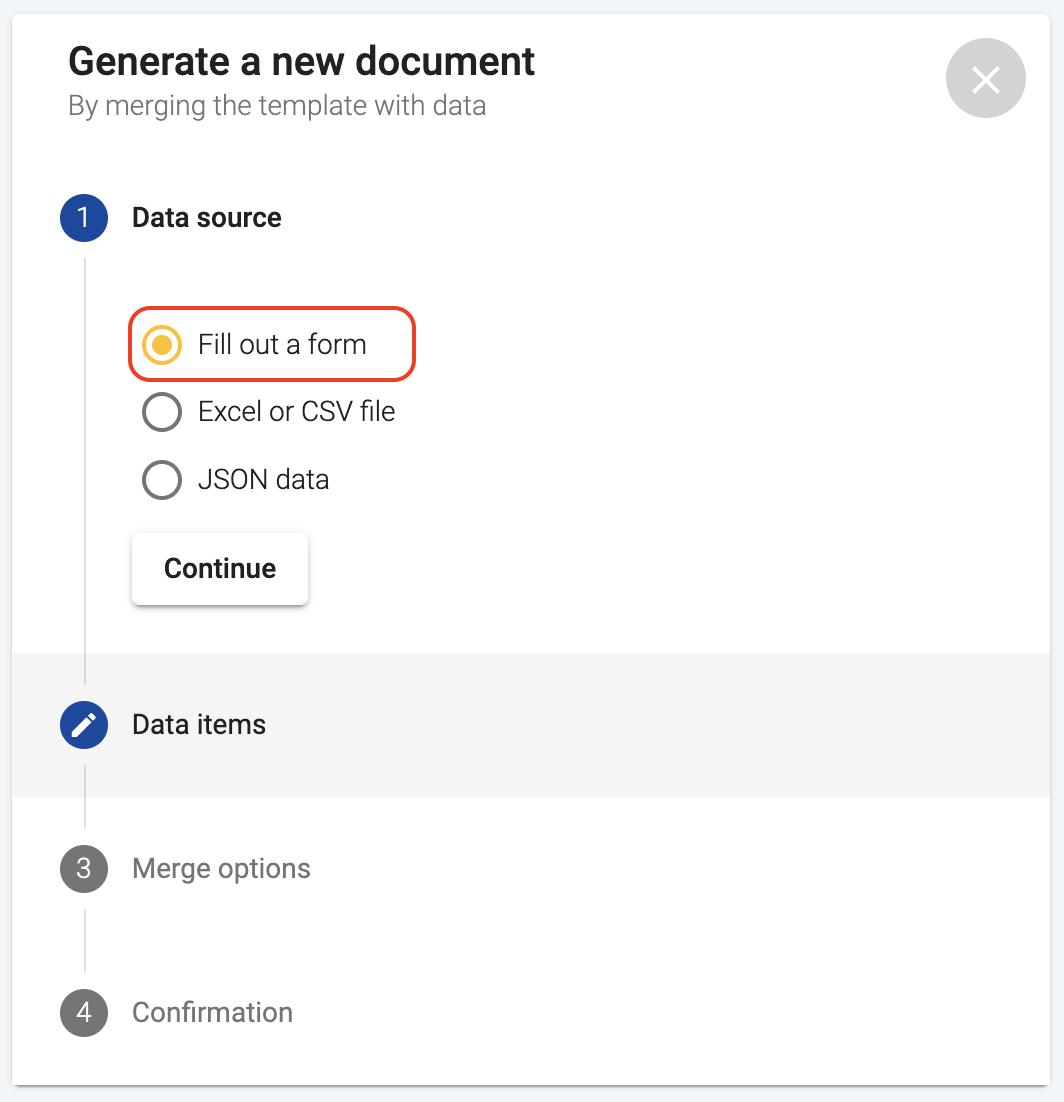
Then for the Data source select Fill out a form. The other options you will see are Excel or CSV file and JSON data.
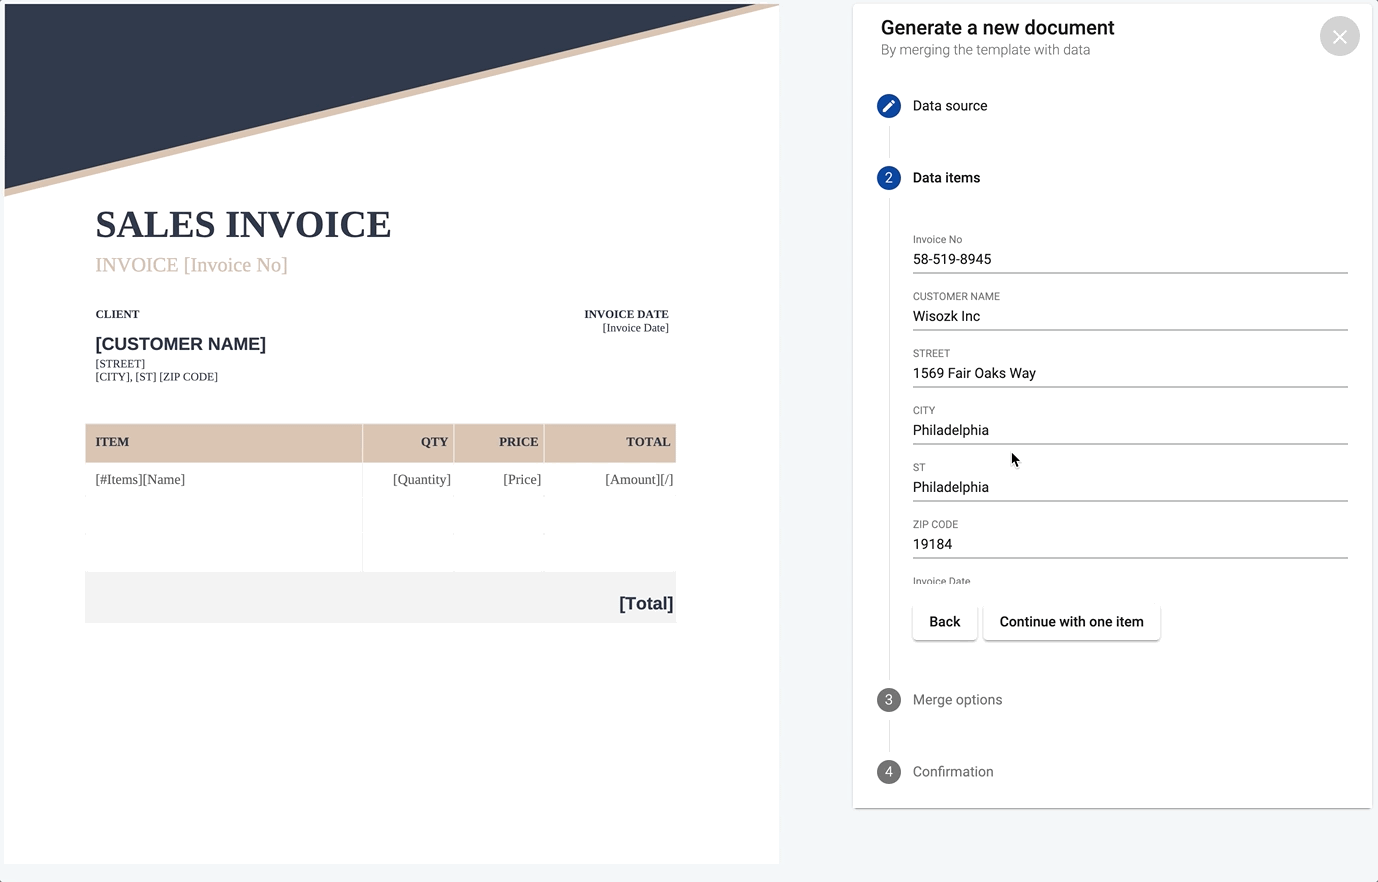
After clicking Continue, you’ll land on the Data items section. Here, a form will be displayed with input fields corresponding to all the merge tags in your template. If there are many fields, you can scroll down to access them all.
Each input field on the form corresponds to a merge tag in your template. You can input text values into these fields. These values will be used to replace the respective merge tags during document generation.
None of the fields are required, meaning you have the flexibility to fill out as many or as few as you want based on your document’s requirements.
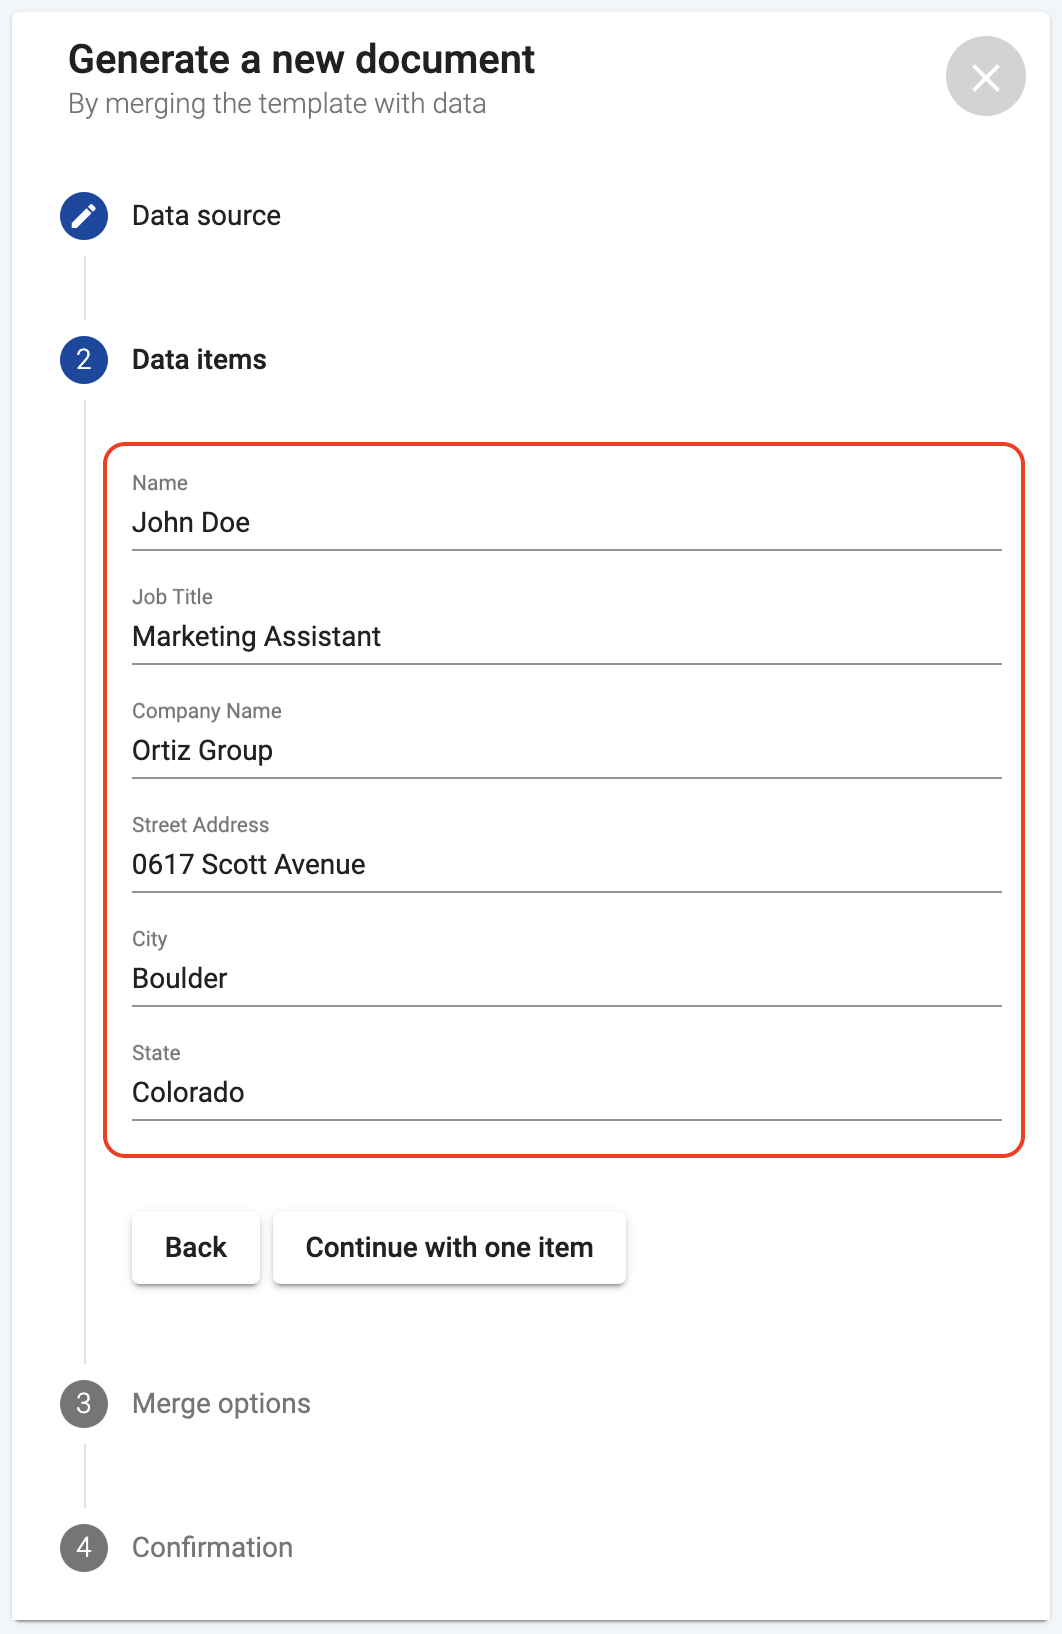
After you’ve filled out the fields as needed, click on Continue with one item. The system will then use your form inputs to generate the document after you select the merge options.
Input data manually for lists and tables
When generating documents by filling out a form, DocuGenerate supports interactive addition and removal of items or rows for lists and tables. This functionality allows you to manage your data more effectively, making it easier to generate documents with varying amounts of information.
Consider an invoice template that includes a table to define invoice items, as you can see in the image below. The Items tag includes the Name, Quantity, Price, and Amount merge tags for each row in the table:
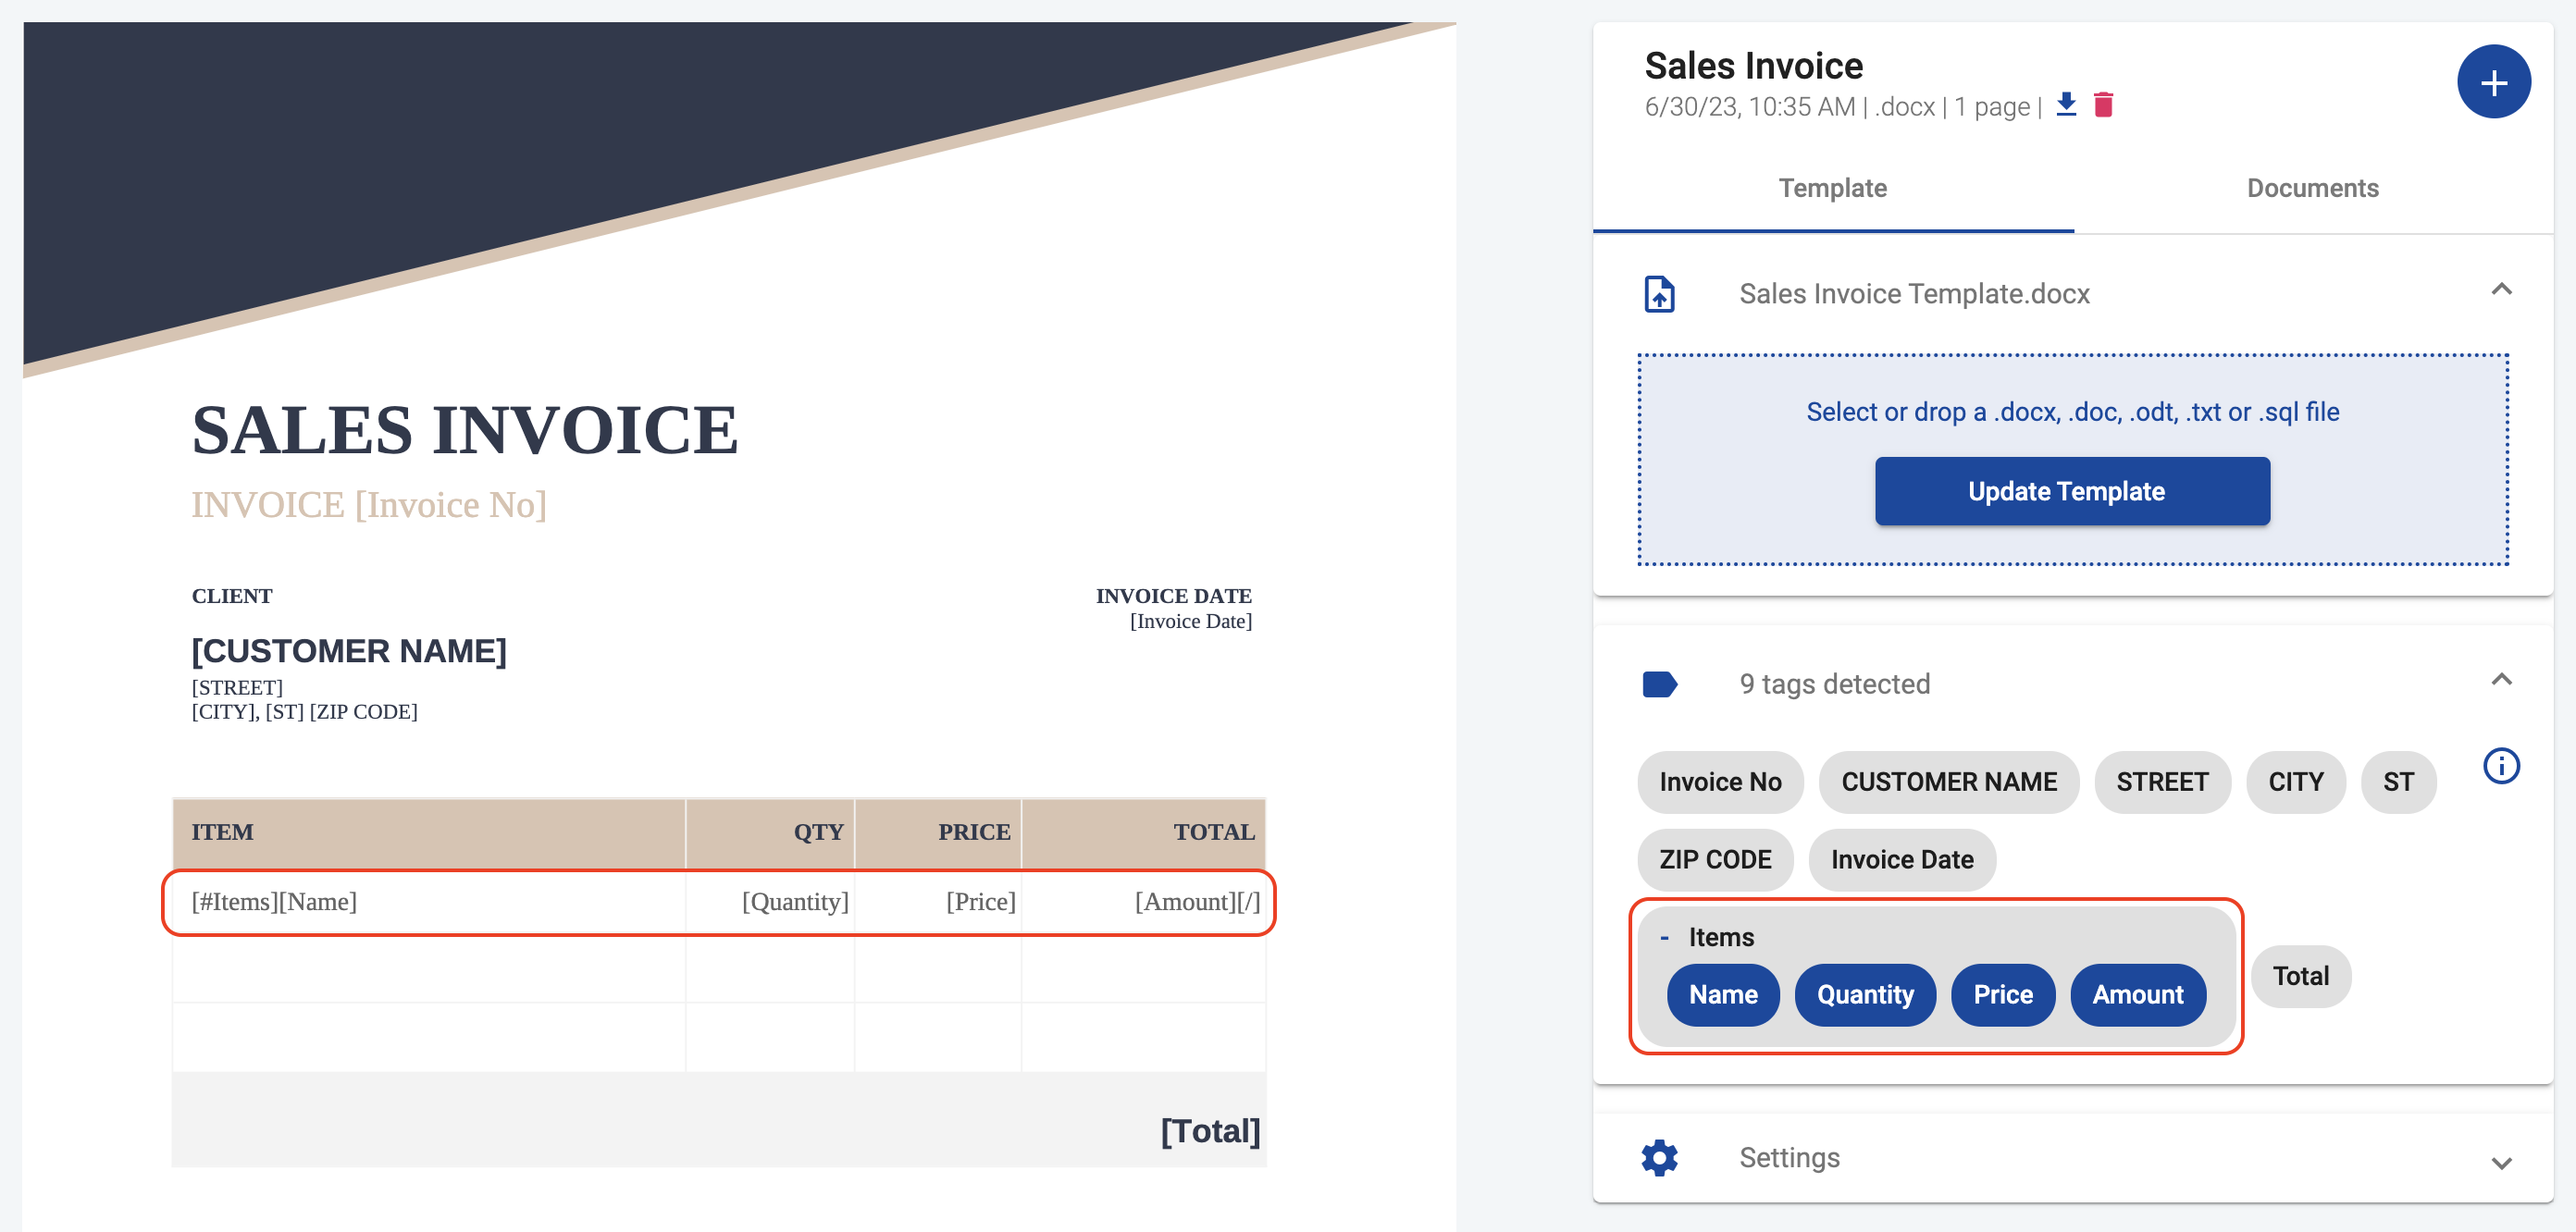
In the form editor, next to the Items property there’s a + button, allowing you to add a new invoice item. Click it and a new set of fields appears for Name, Quantity, Price, and Amount.
To delete an invoice item, click on the Delete icon next to the item you want to remove. Once you’ve finished editing the data, click on Continue with one item to generate your invoice with the newly added or removed items.
As you can see, the table in the generated document has two rows, corresponding to the items manually entered in the form:
With this feature, you can create documents with dynamic lists or tables, adding or removing entries as needed for each individual document.