Use Tally and Make to Generate Reports based on Form Submission
By DocuGenerate
March 16, 2024
The Workflow we’re Building
In today’s fast-paced business world, automation is key to maximizing efficiency and accuracy. Imagine a scenario where your sales team needs to create reports after completing sales calls – this process can be time-consuming and error-prone if done manually. In this article, we’ll explore how you can leverage the power of Tally, Make, and DocuGenerate to automate the generation of reports based on form submissions. By combining these tools, you can enhance your workflow and ensure that your reports are consistently accurate and timely.
At its core, the workflow we’re building involves a sales representative filling out a form with information about a sales call. This information includes details about the company, contact person, and the outcome of the call. After submitting the form, the system automatically generates a PDF report using a template configured in DocuGenerate. Let’s break down the key components of this workflow:
Tally: Tally serves as the platform for creating the user-friendly form. It provides a user interface for designing rich forms with various fields. Additionally, Tally offers features beyond form creation, making it a versatile tool for gathering data seamlessly.
Make: Make (formerly known as Integromat) acts as the glue that connects Tally and DocuGenerate. Make allows you to create automation scenarios, or “scenarios,” that trigger actions based on specific events. In this case, Make listens for new form submissions on Tally and automatically calls the DocuGenerate API to generate reports.
DocuGenerate: DocuGenerate is a web app and API designed for generating documents from templates and data. It offers the ability to replace merge tags in templates with data provided through API requests. This is crucial for dynamically populating report templates with accurate information.
Creating the Report Template
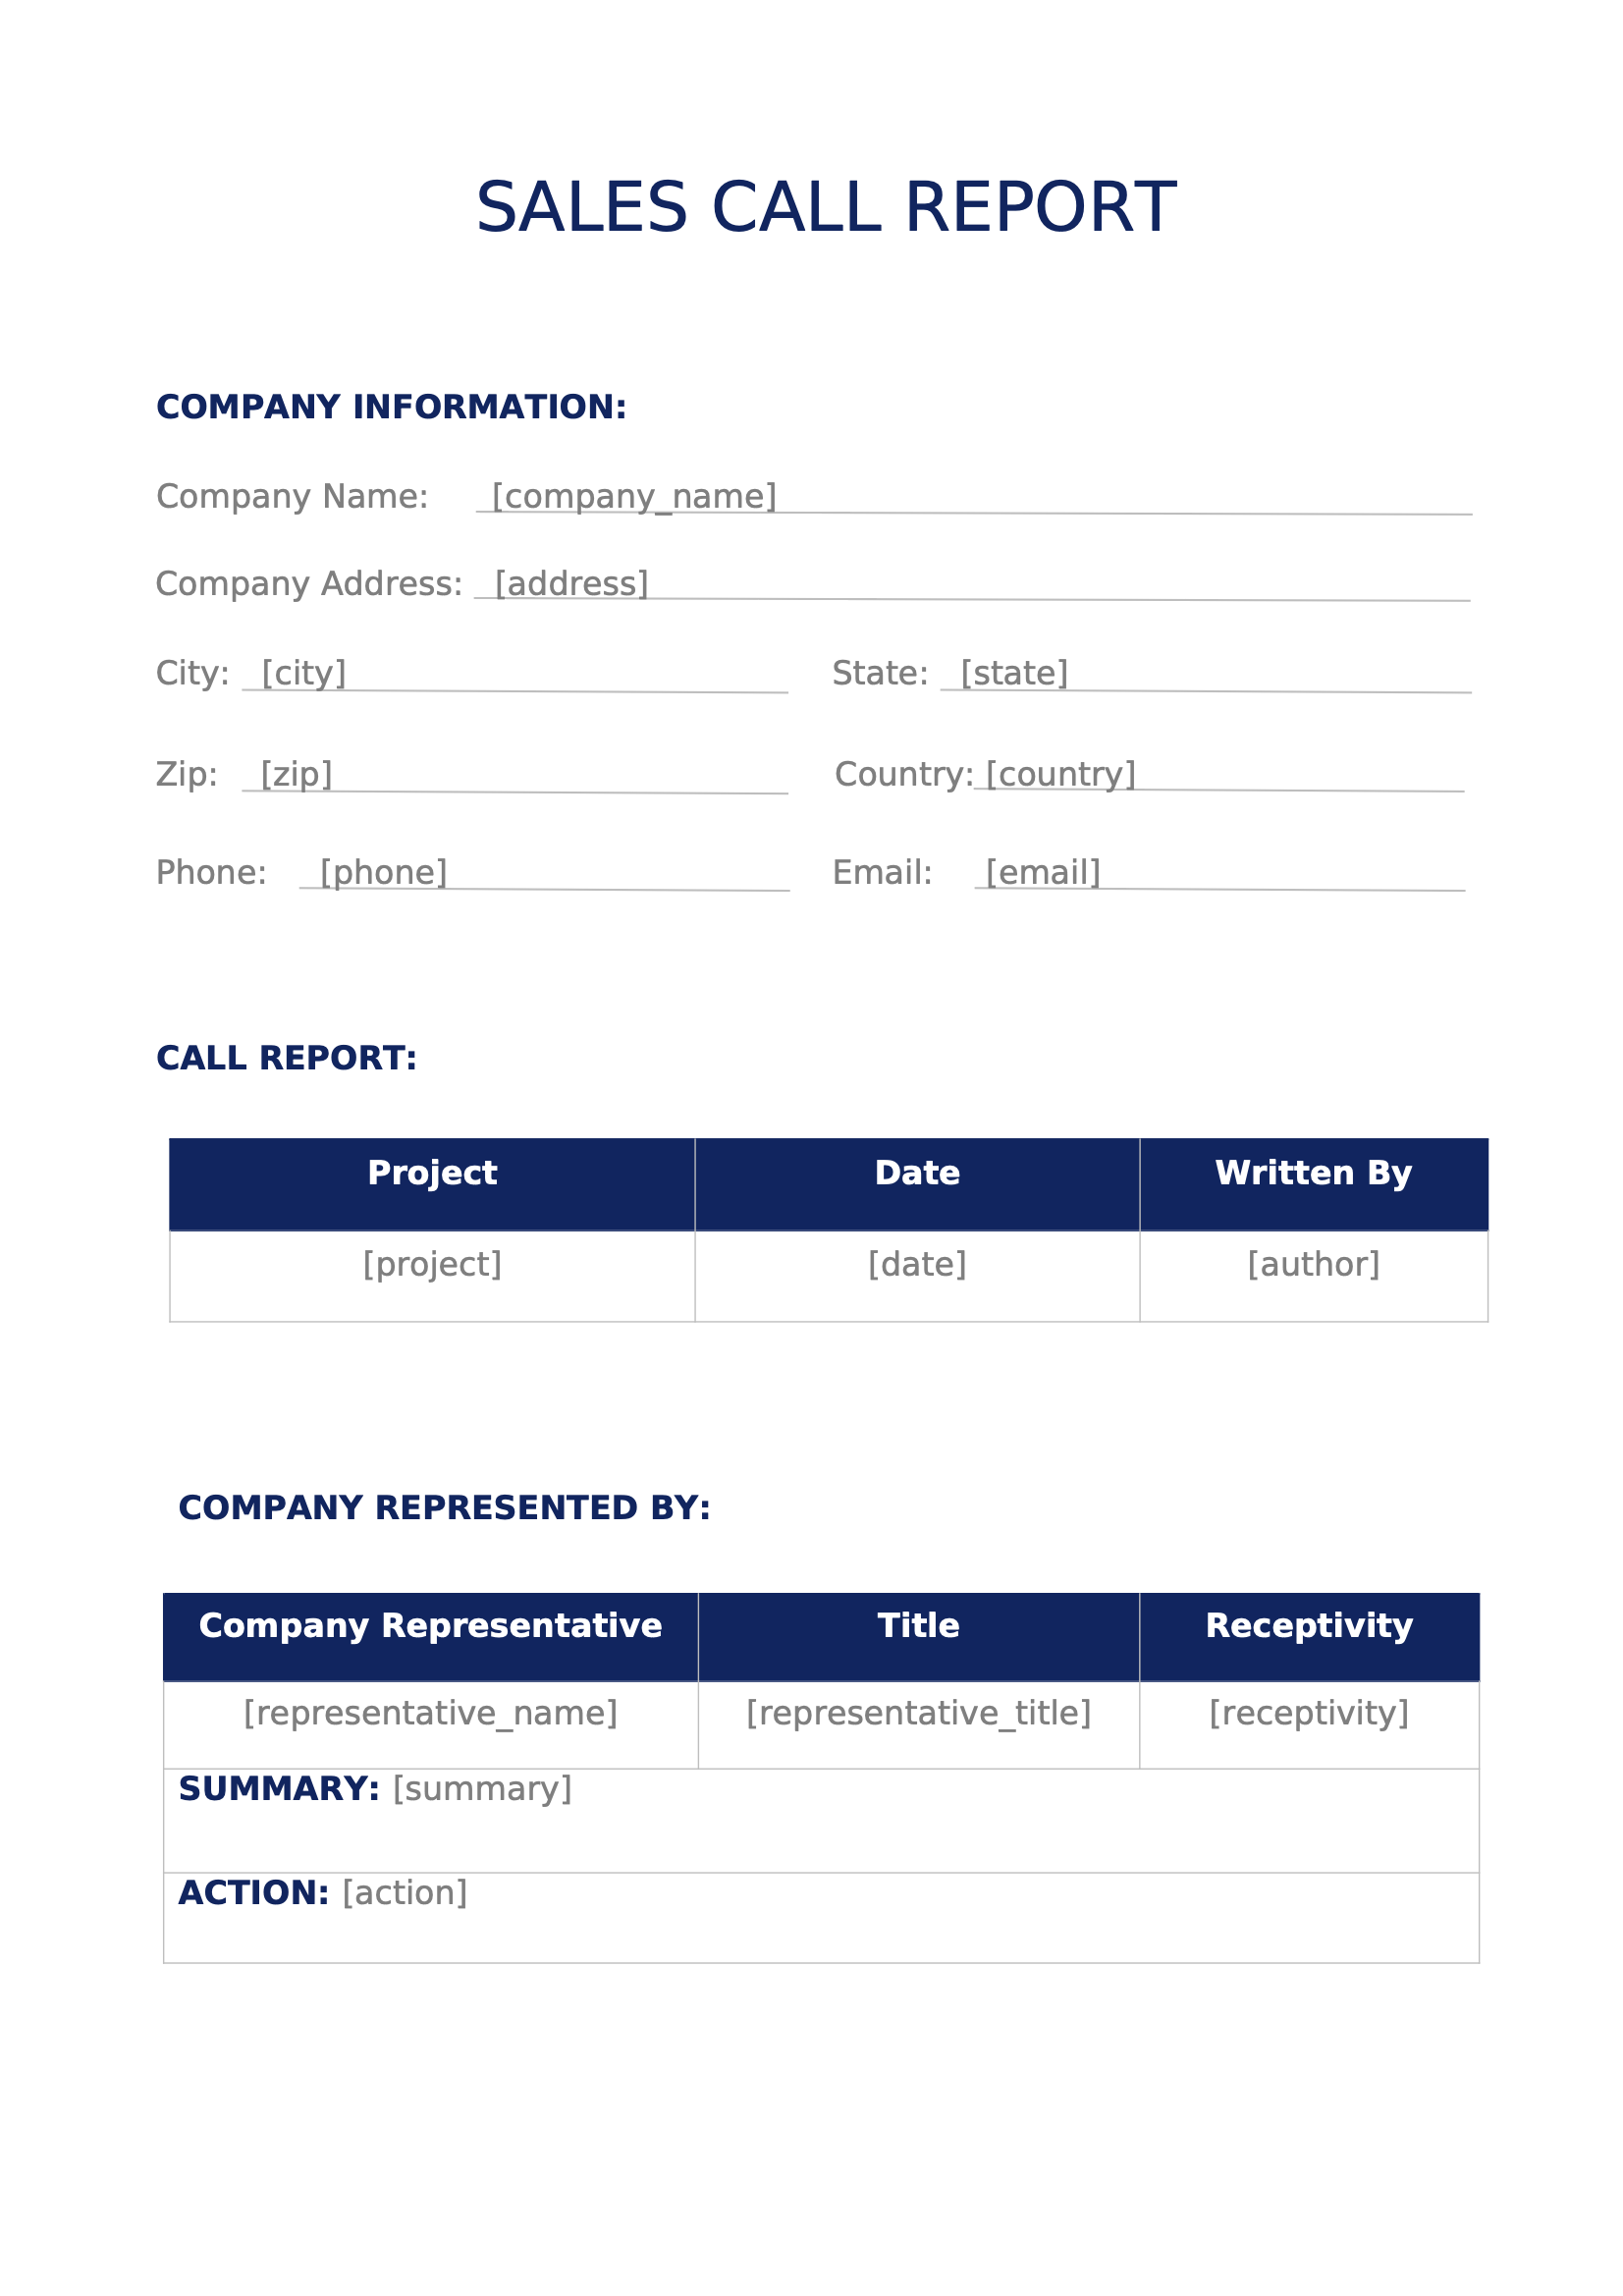
To kick off the process, you’ll need a Sales Call Report template in DocuGenerate. This template will serve as the blueprint for the generated reports. The template contains placeholders known as merge tags, which will be replaced with actual data when the document is generated.
For instance, your template might include merge tags for various fields, such as [city], [state], [zip], [country], [company_name], [address], [phone], [email], [project], [date], [author], [representative_name], [representative_title], [receptivity], [summary] and [action].
These tags serve as placeholders that will be populated with the data submitted through the form. As you can see, they don’t contain whitespaces, which is a prerequisite if we want to add conditions and expressions later on to the template using the enhanced syntax.
Designing the Form in Tally
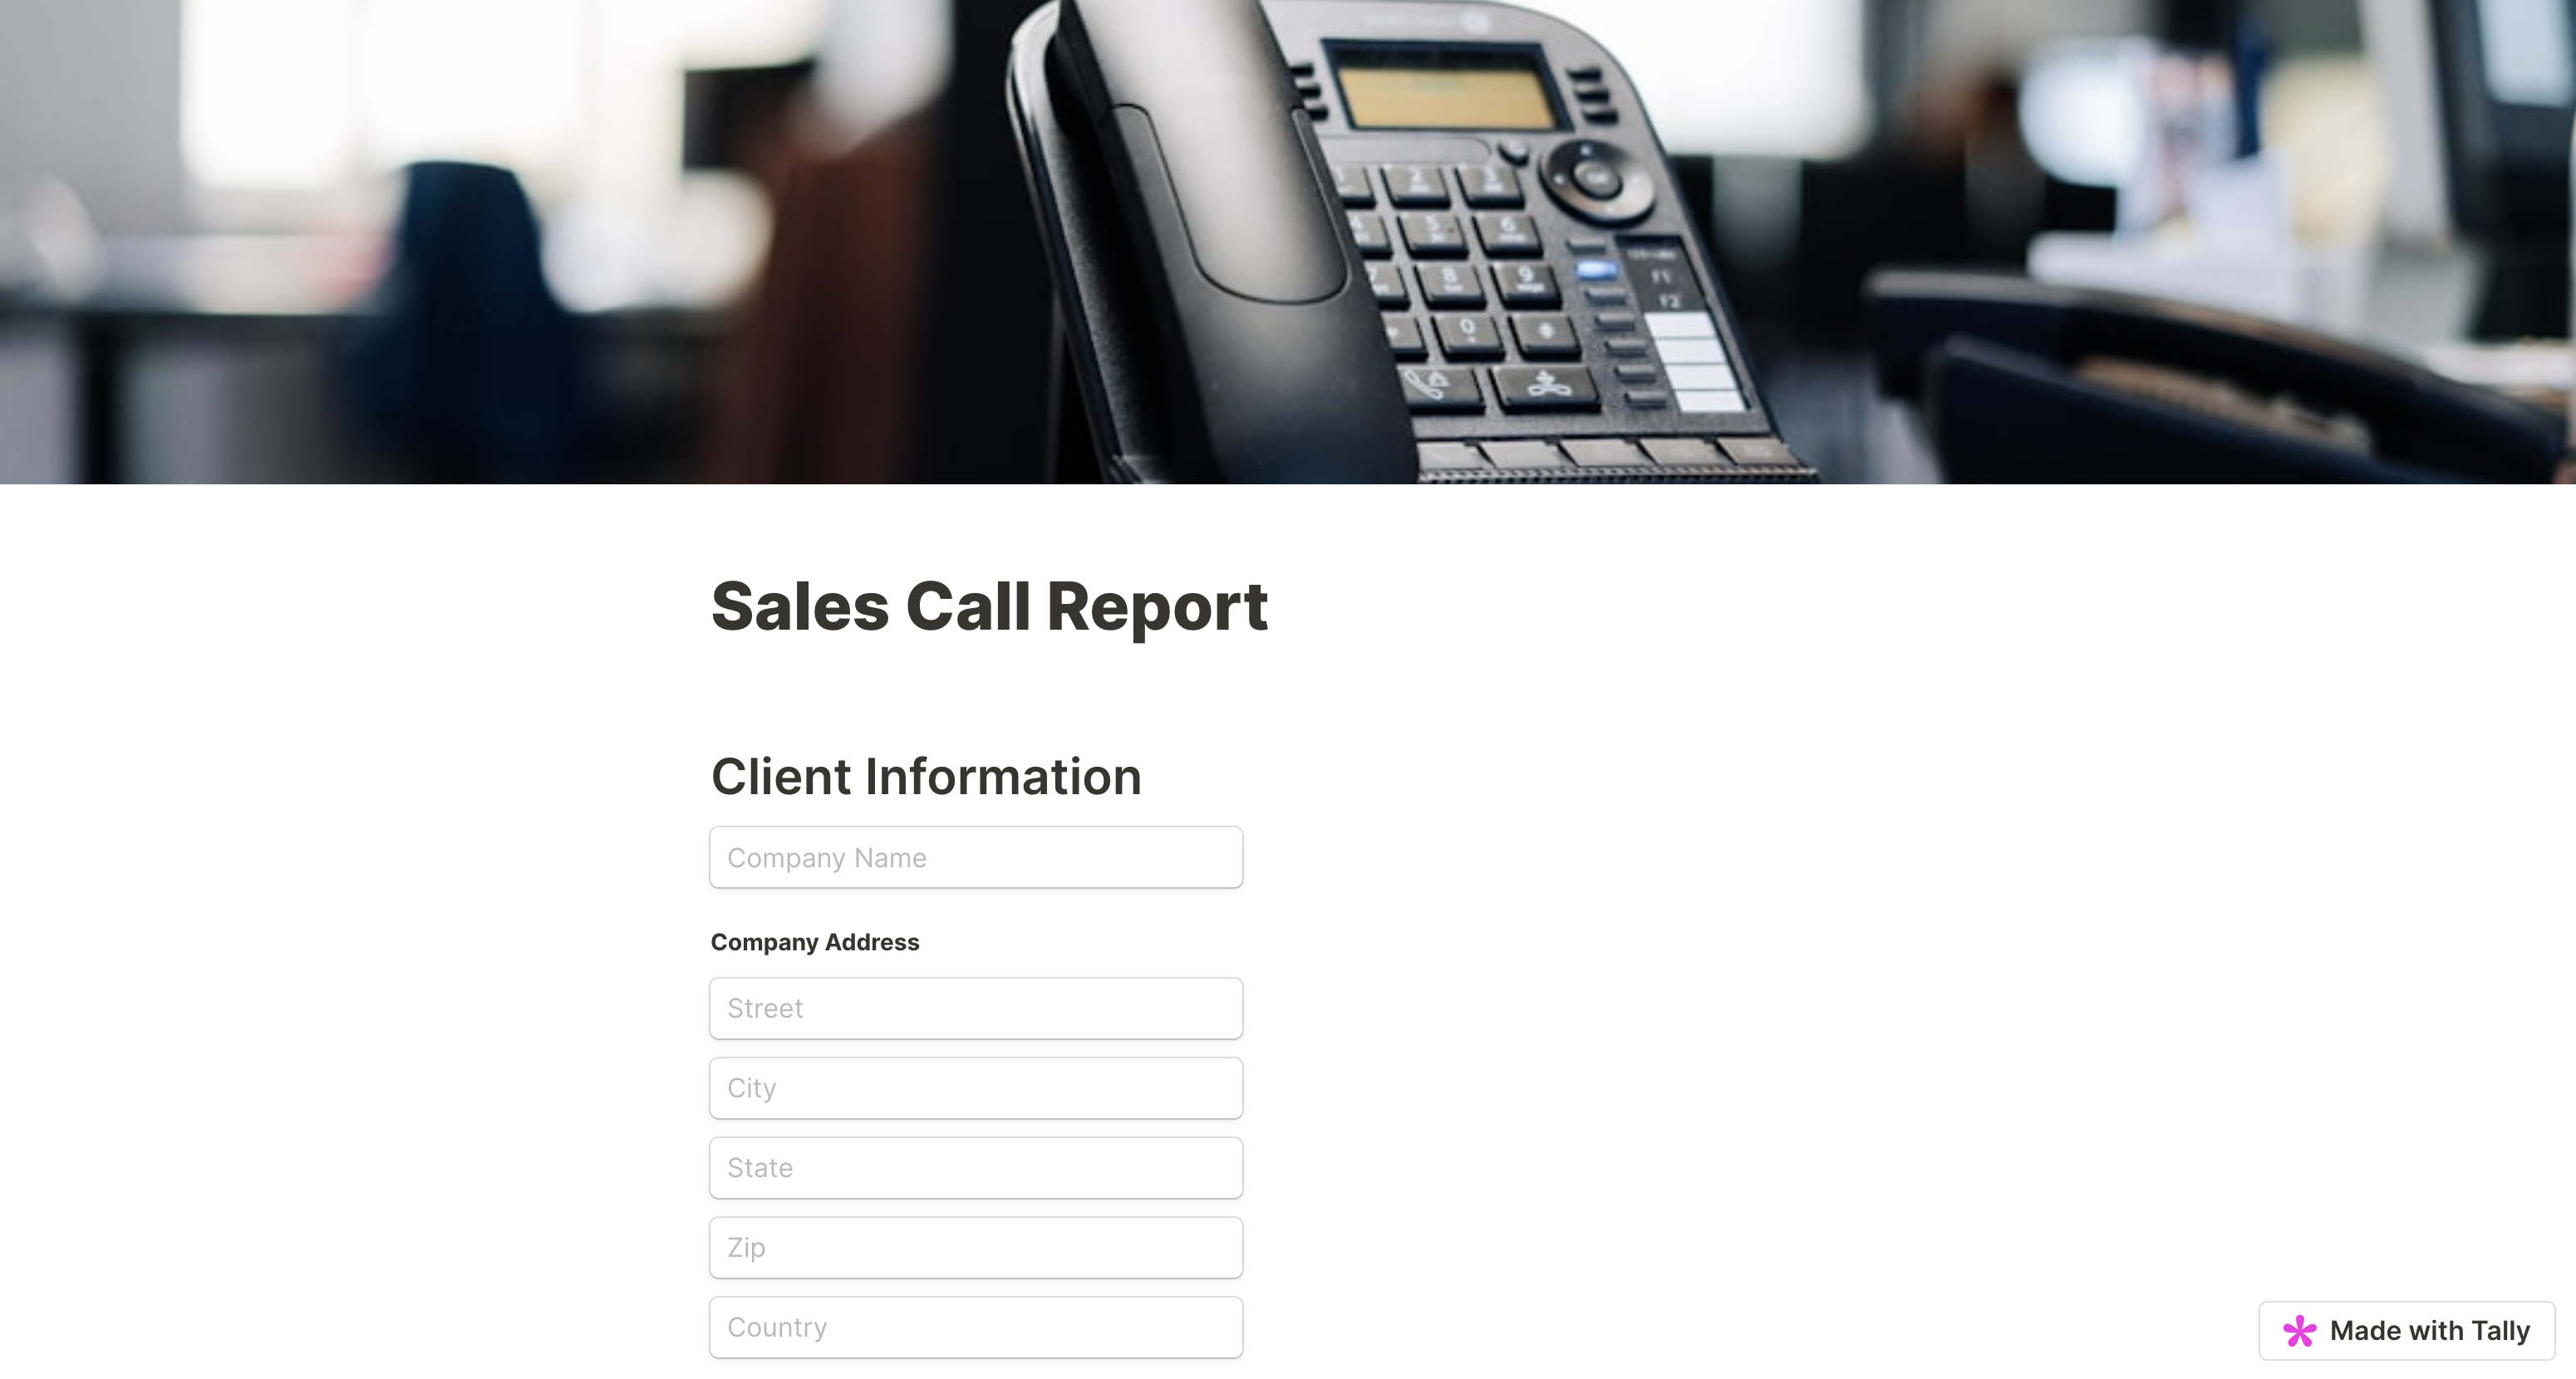
With the template in place, you’ll create a corresponding form in Tally. The form will collect the necessary information for generating the report. The form is split into two pages: one for gathering company information and the other for recording details about the call (who the contact person was, what’s the call summary and what are the action items.)
Tally’s intuitive interface makes it easy to design the form according to your requirements. You’ll map each form field to a specific merge tag in the template. This mapping ensures that the data collected through the form aligns perfectly with the placeholders in the report template.
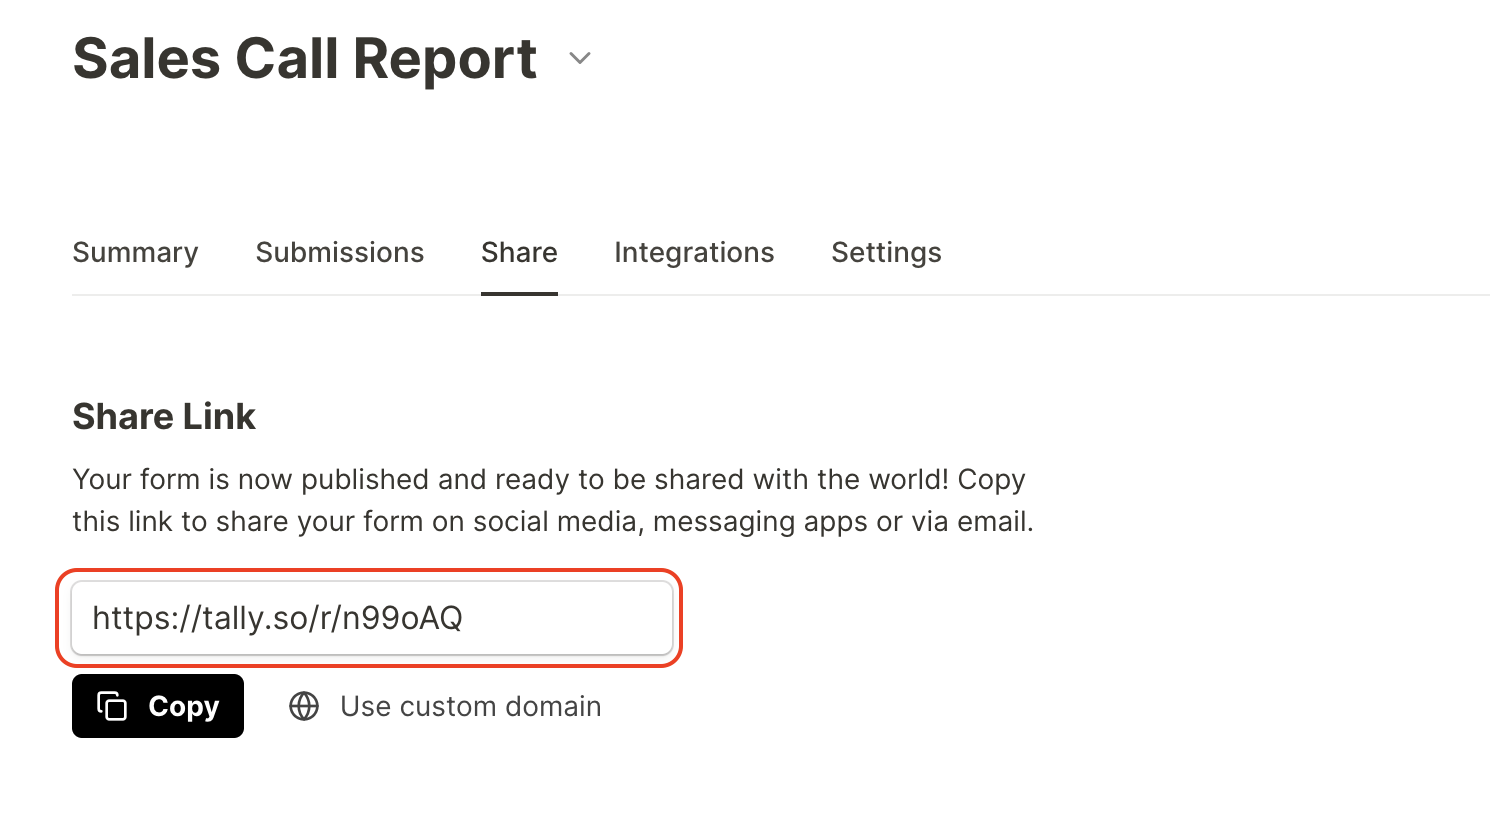
Once the form is designed, you can find the Share Link for the form, which allows users to access and submit it. For the Sales Call Report you can access the form at this URL: https://tally.so/r/n99oAQ
Connecting Tally with Make
Integrating Tally and Make is a crucial step in automating the workflow. This integration enables Make to monitor new form submissions and trigger subsequent actions. You can find useful how-to guides about connecting the two on the Tally help center or on the Make help center.
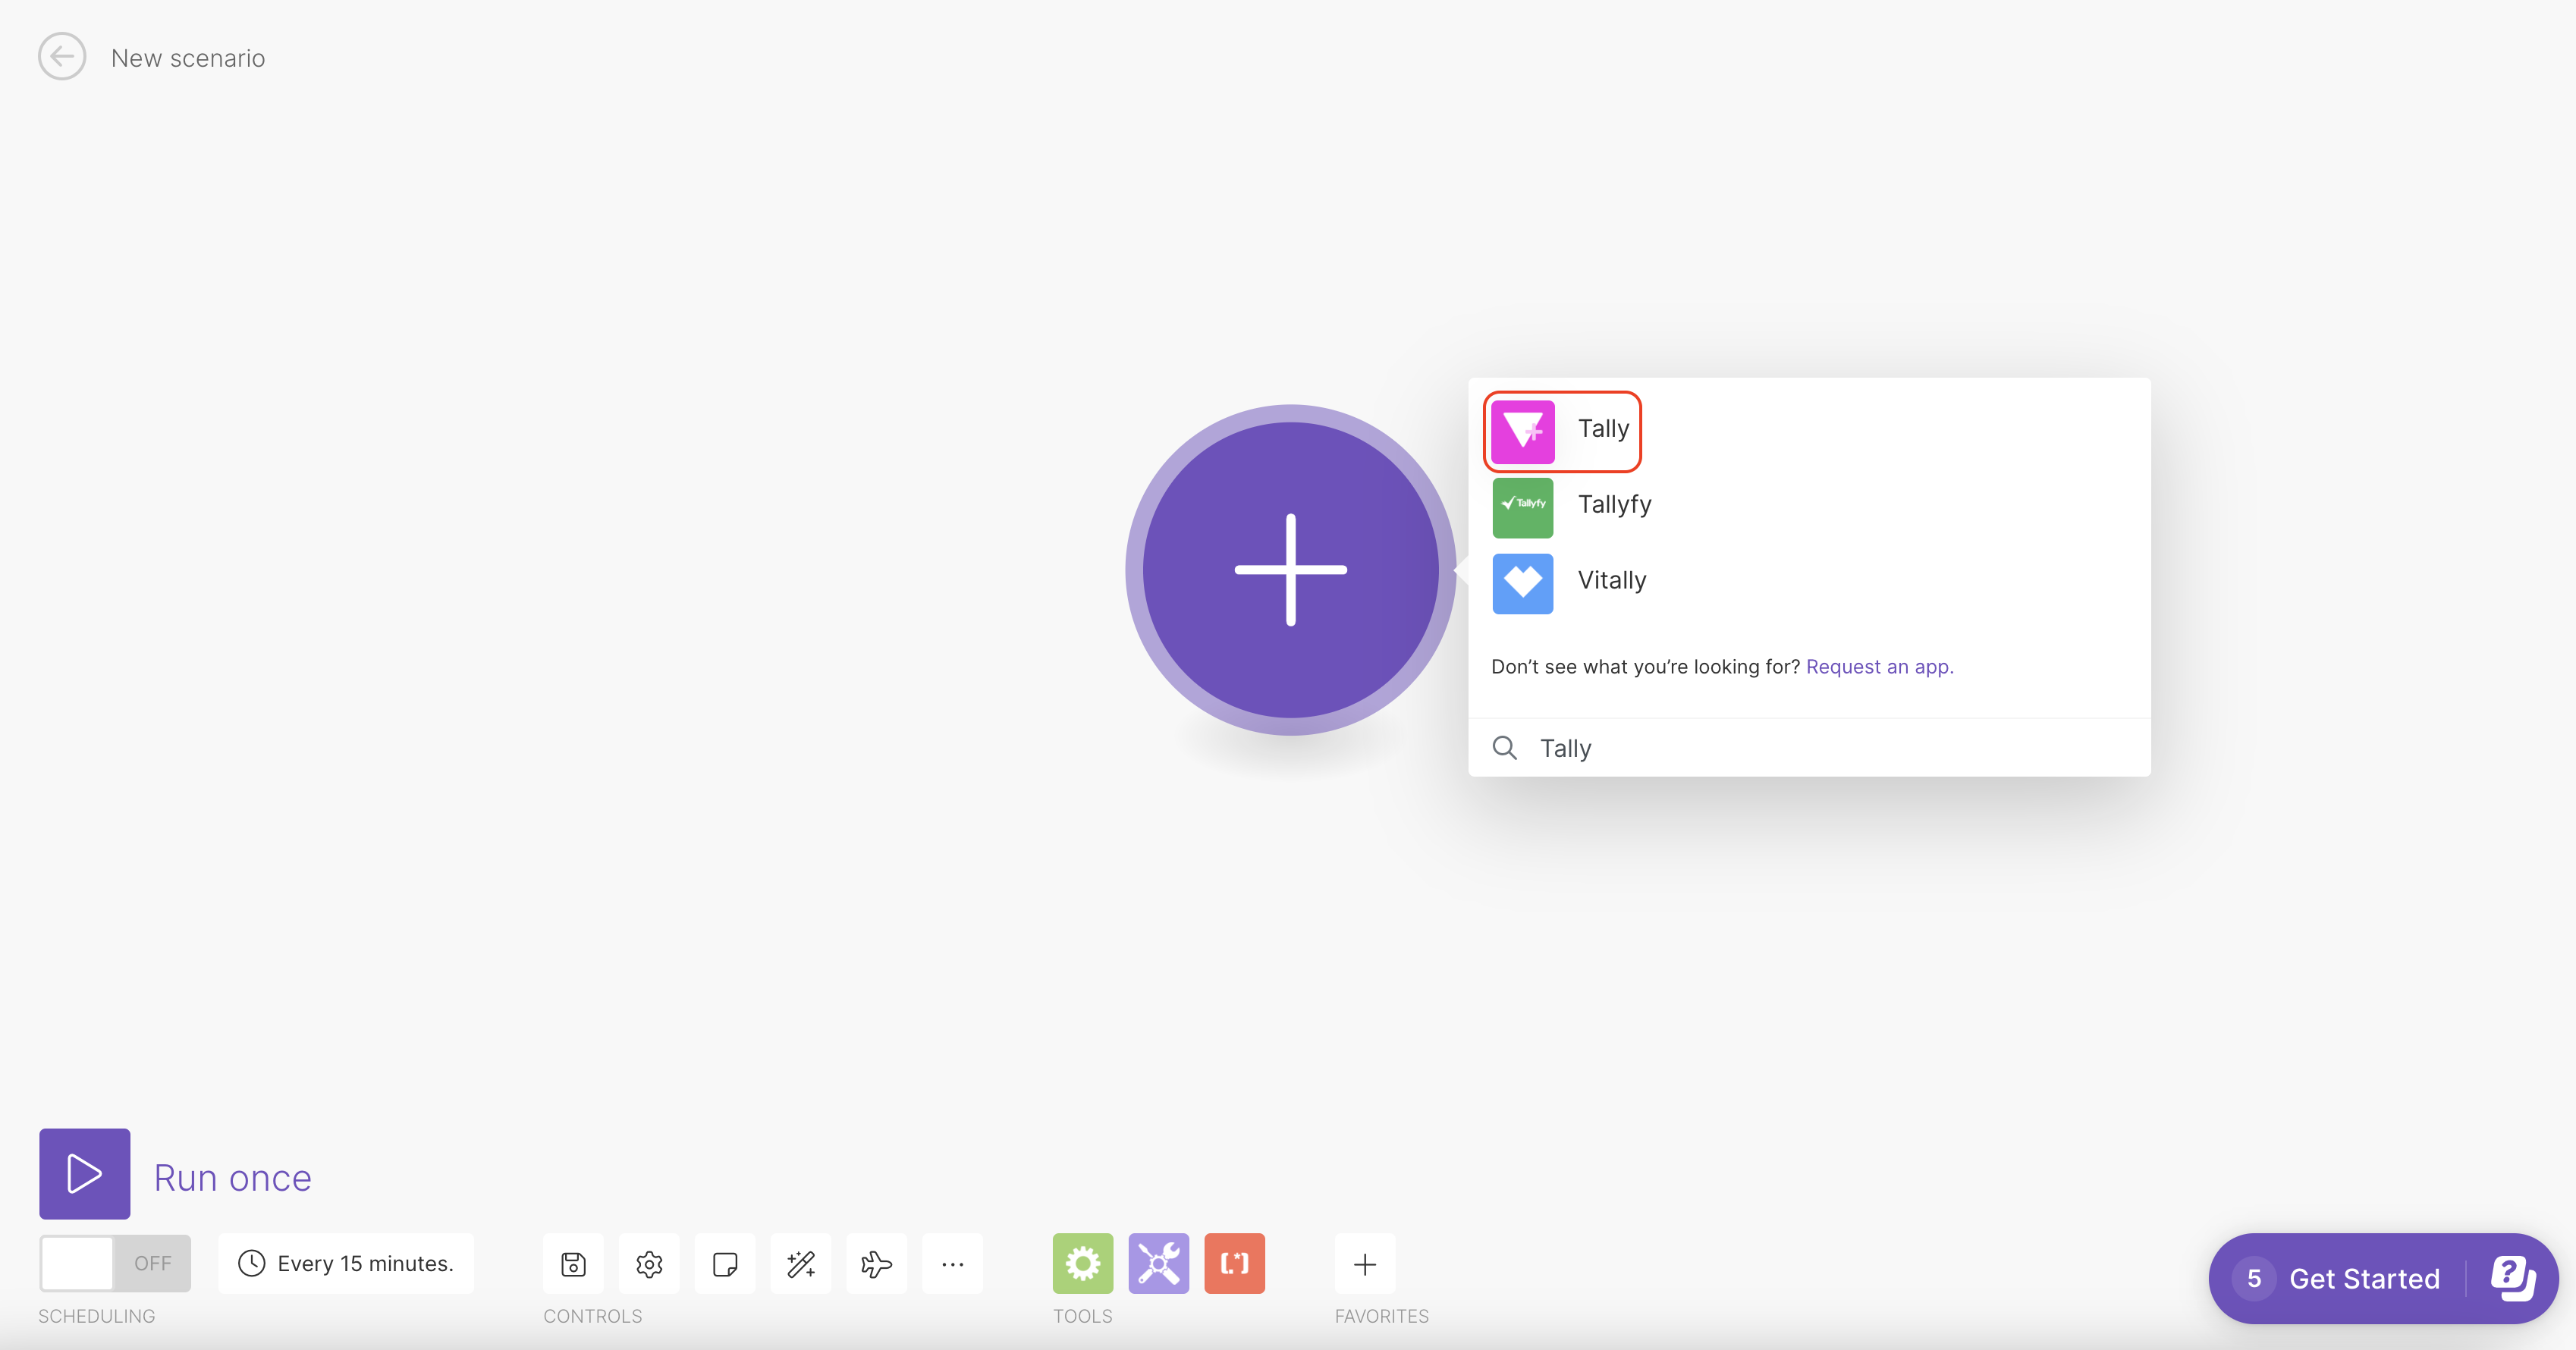
To start, click on the Plus button and search for Tally application, then click on it:
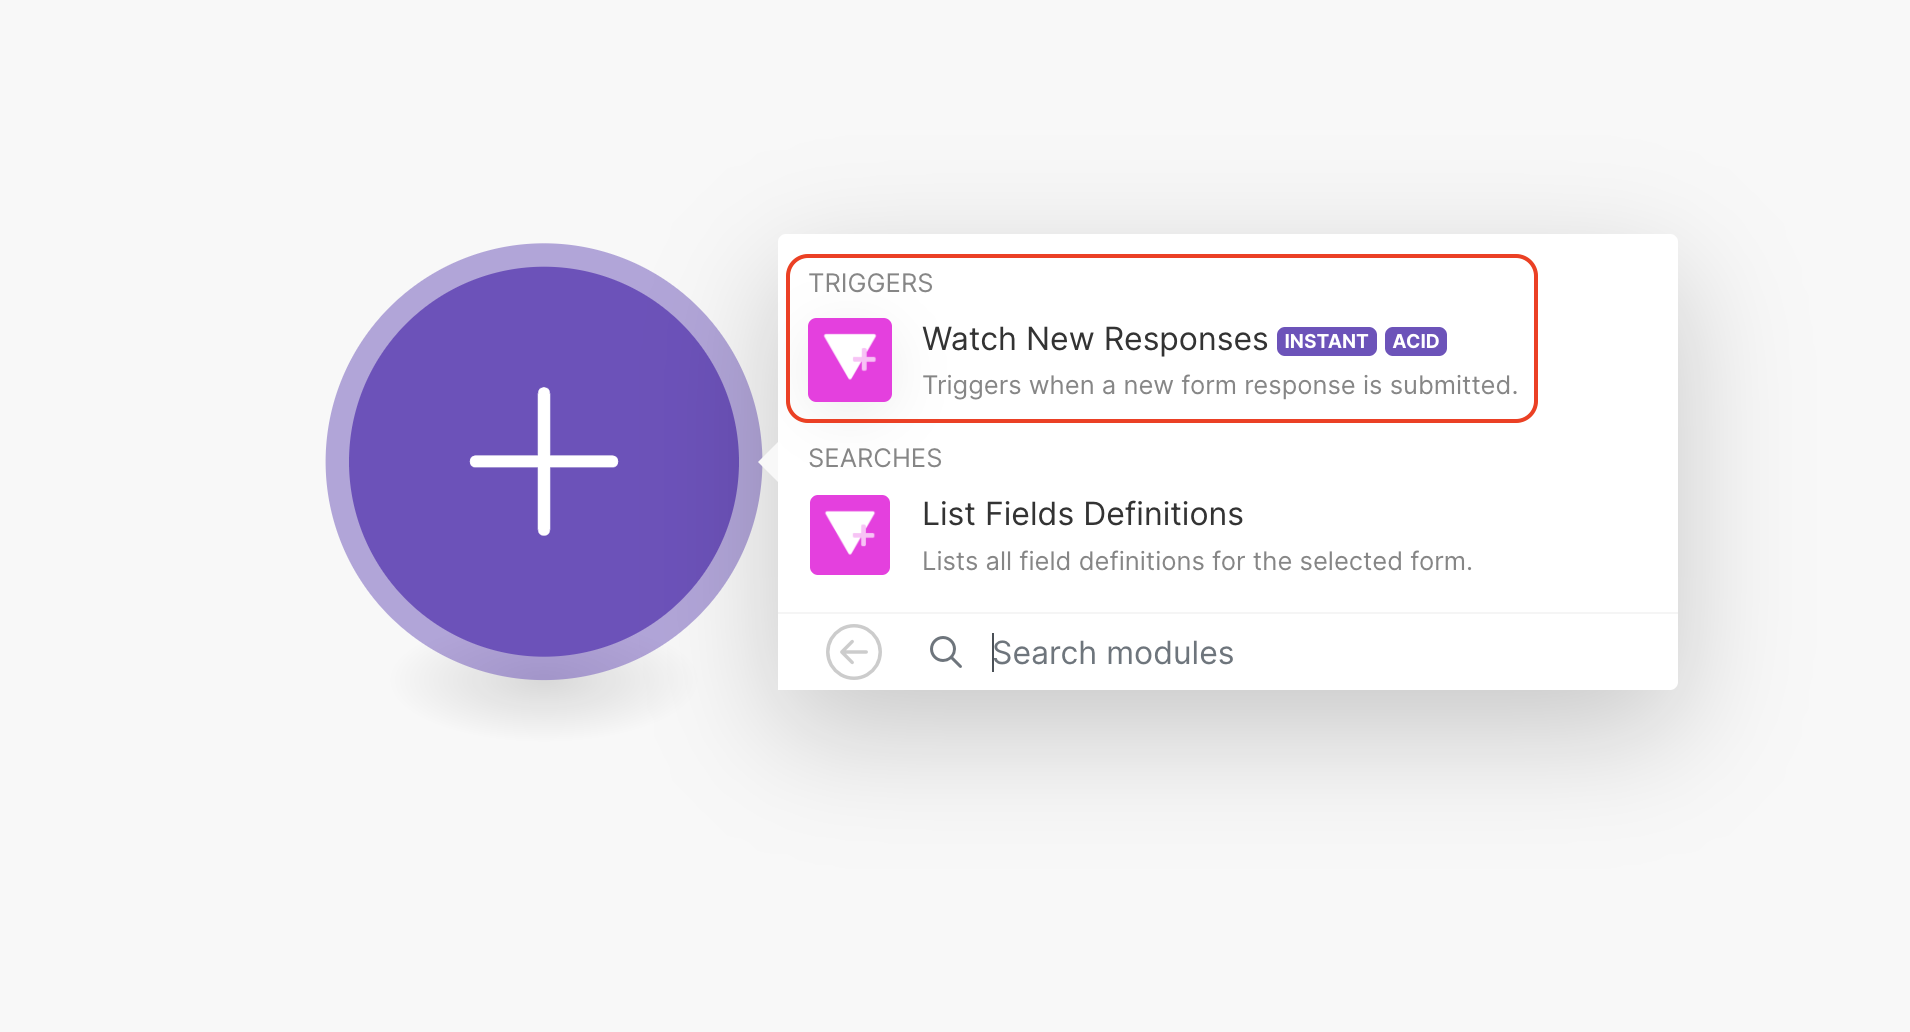
Then select the Watch New Responses trigger, which is executed whenever a new form response is submitted.
The following video show how connecting Make with Tally works: 1. Click on Create a webhook 2. Then click on Create a connection 3. A pop-up window will appear - you need to click on Accept to allow Make to access your Tally account 4. And finally you’ll need to select the Sales Call Report form from the lists of available Tally forms
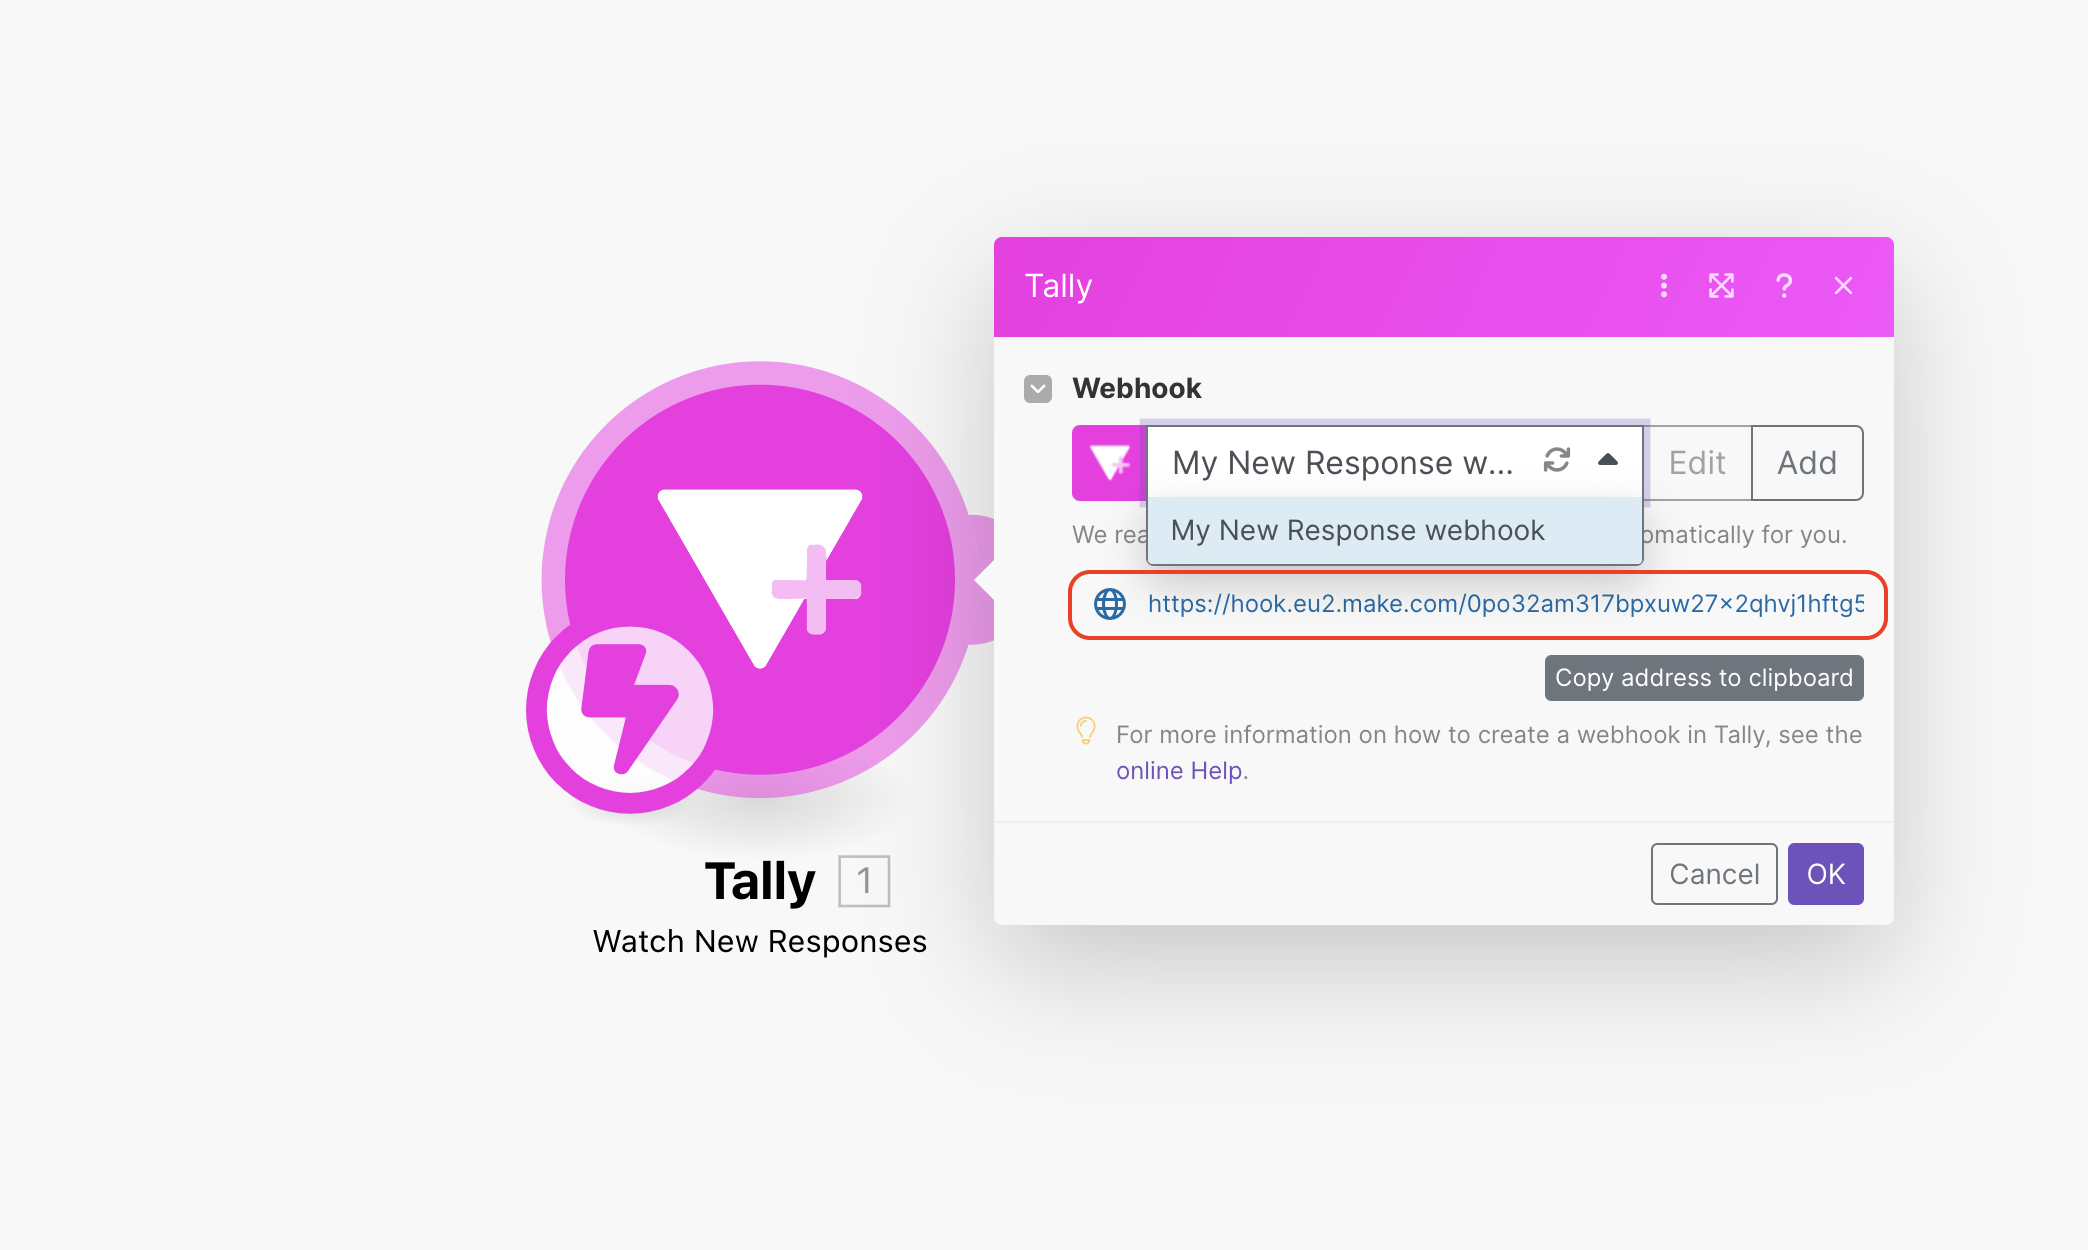
You can see the assigned webhook URL in Make. A webhook is a mechanism that allows one application (Tally) to send data to another application (Make) in real-time. In this case, Tally sends a webhook to Make every time a new form response is received.
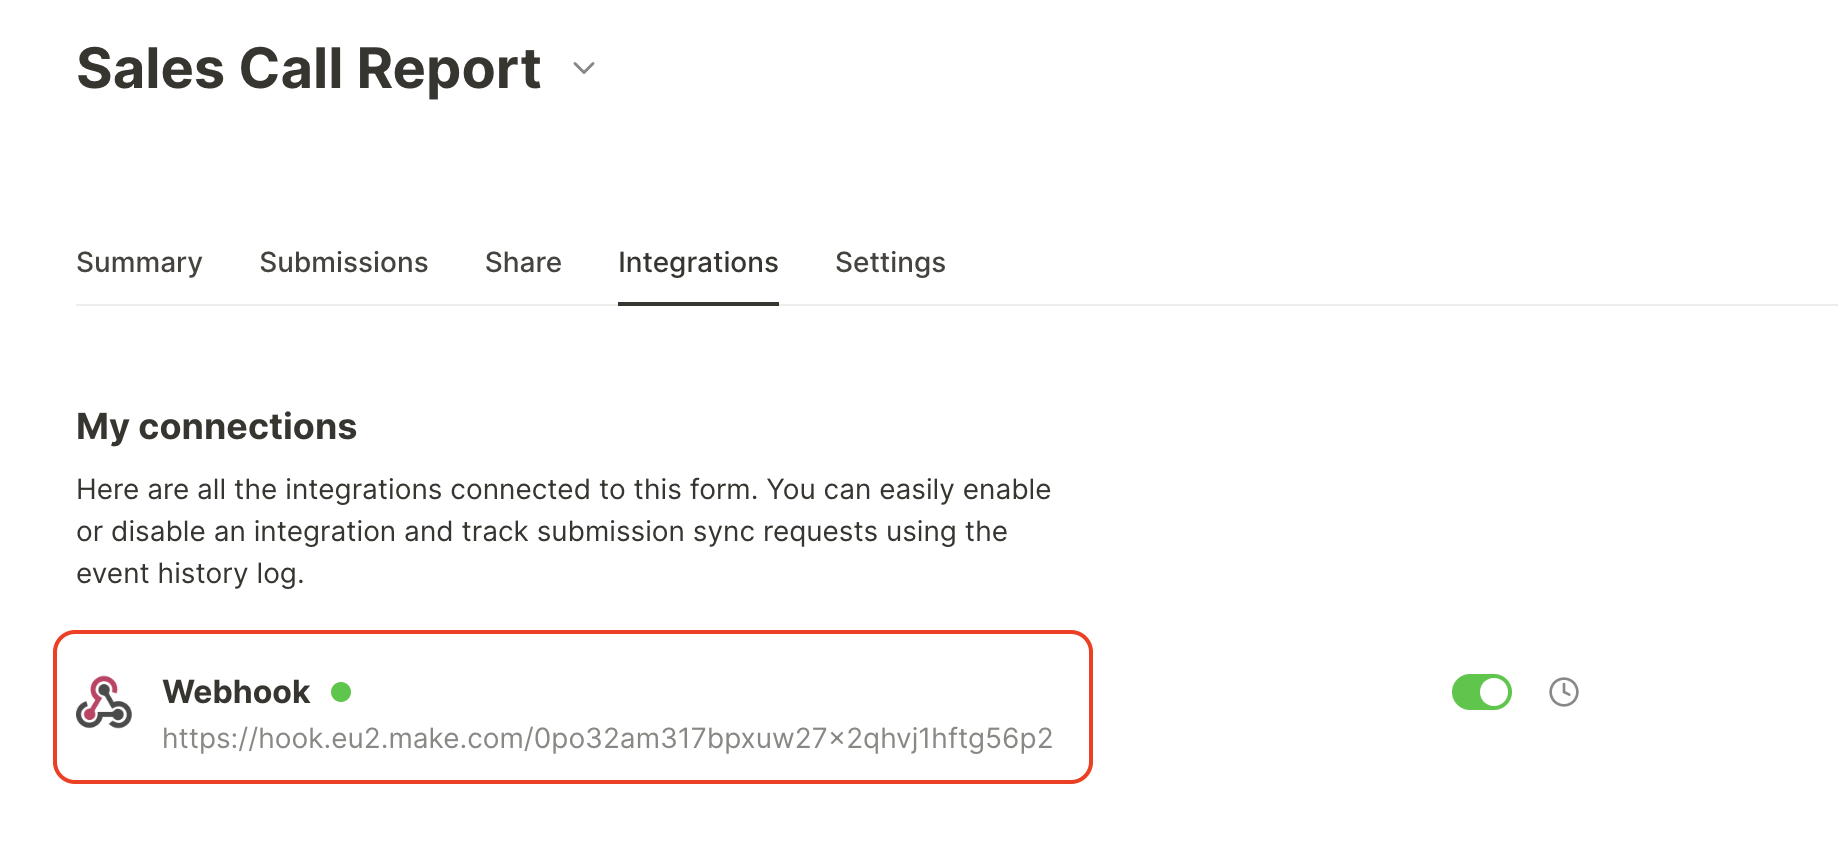
Once the connection is established, you will see on the form’s Integration tab in Tally the same webhook URL as in Make, allowing you to confirm that everything is set up correctly.
Connecting DocuGenerate with Make
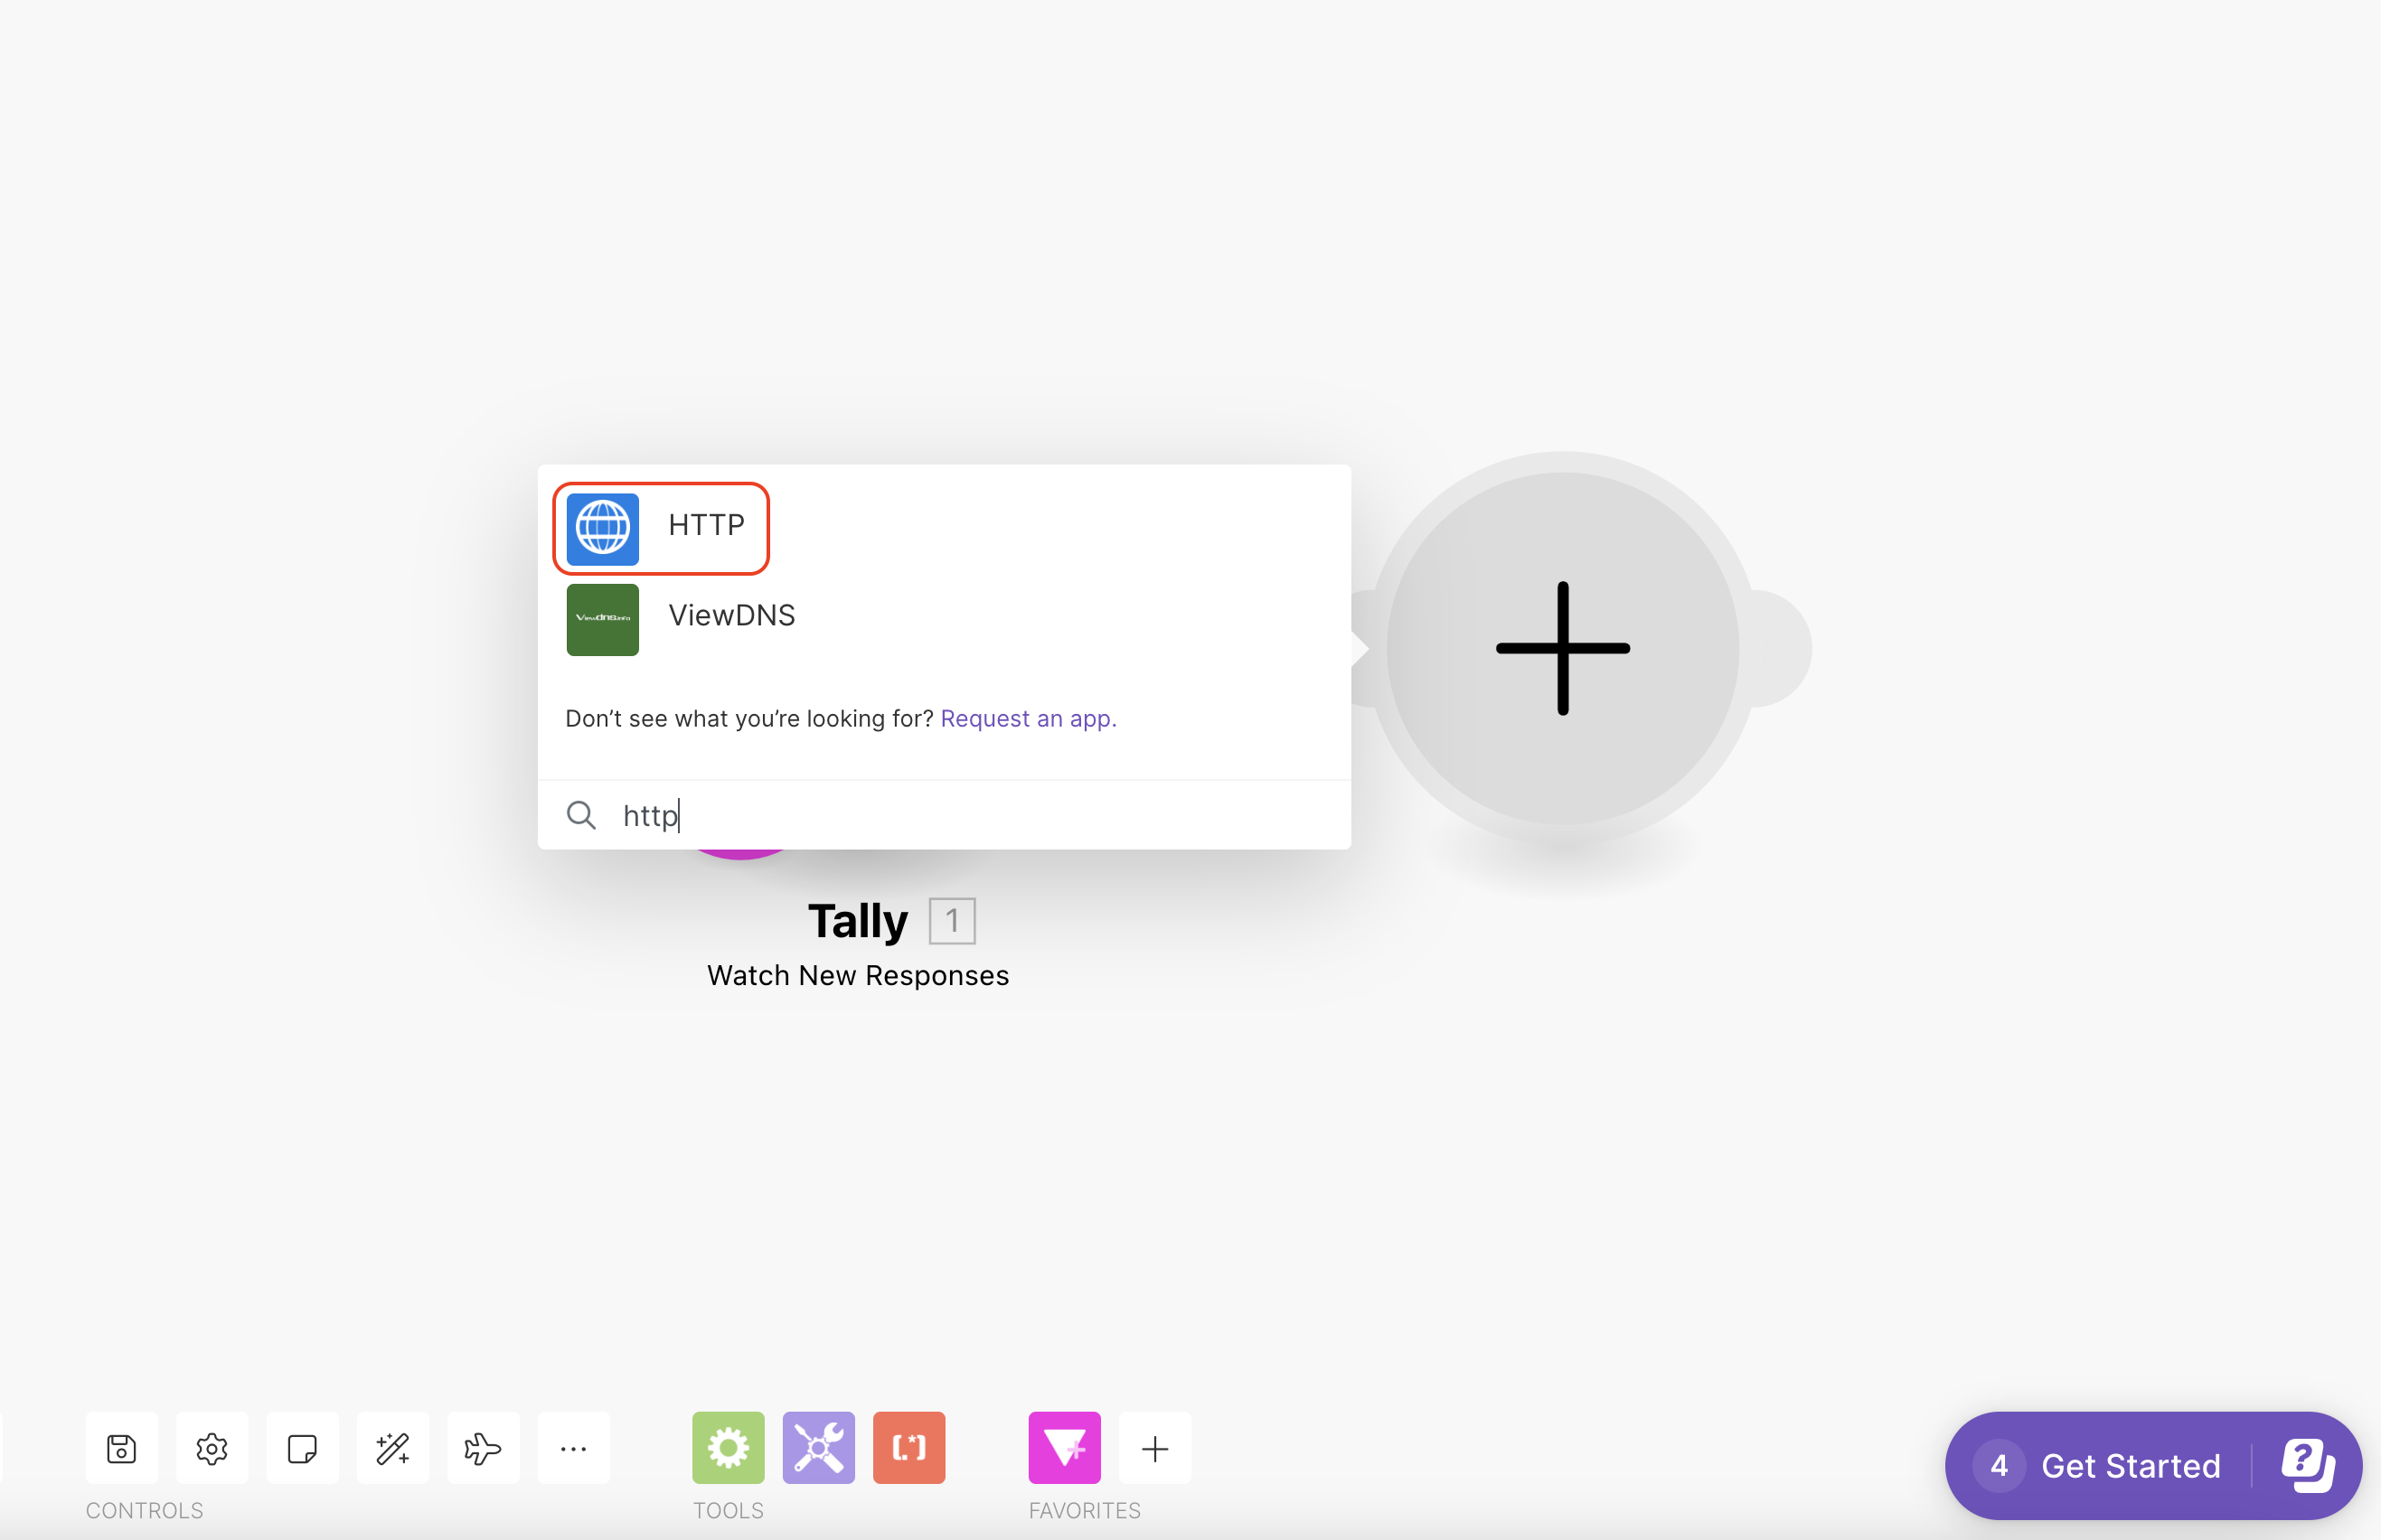
With the Tally-Make connection in place, it’s time to integrate DocuGenerate into the workflow. Make’s flexibility allows you to add modules to the scenario, and in this case, you’ll add an HTTP module to call the DocuGenerate API and create the report.
Configuring the HTTP module involves specifying the API endpoint for DocuGenerate. Additionally, you’ll need to provide authorization using an API key, which can be obtained from the DocuGenerate settings page. The API key is essential for secure communication between Make and DocuGenerate.
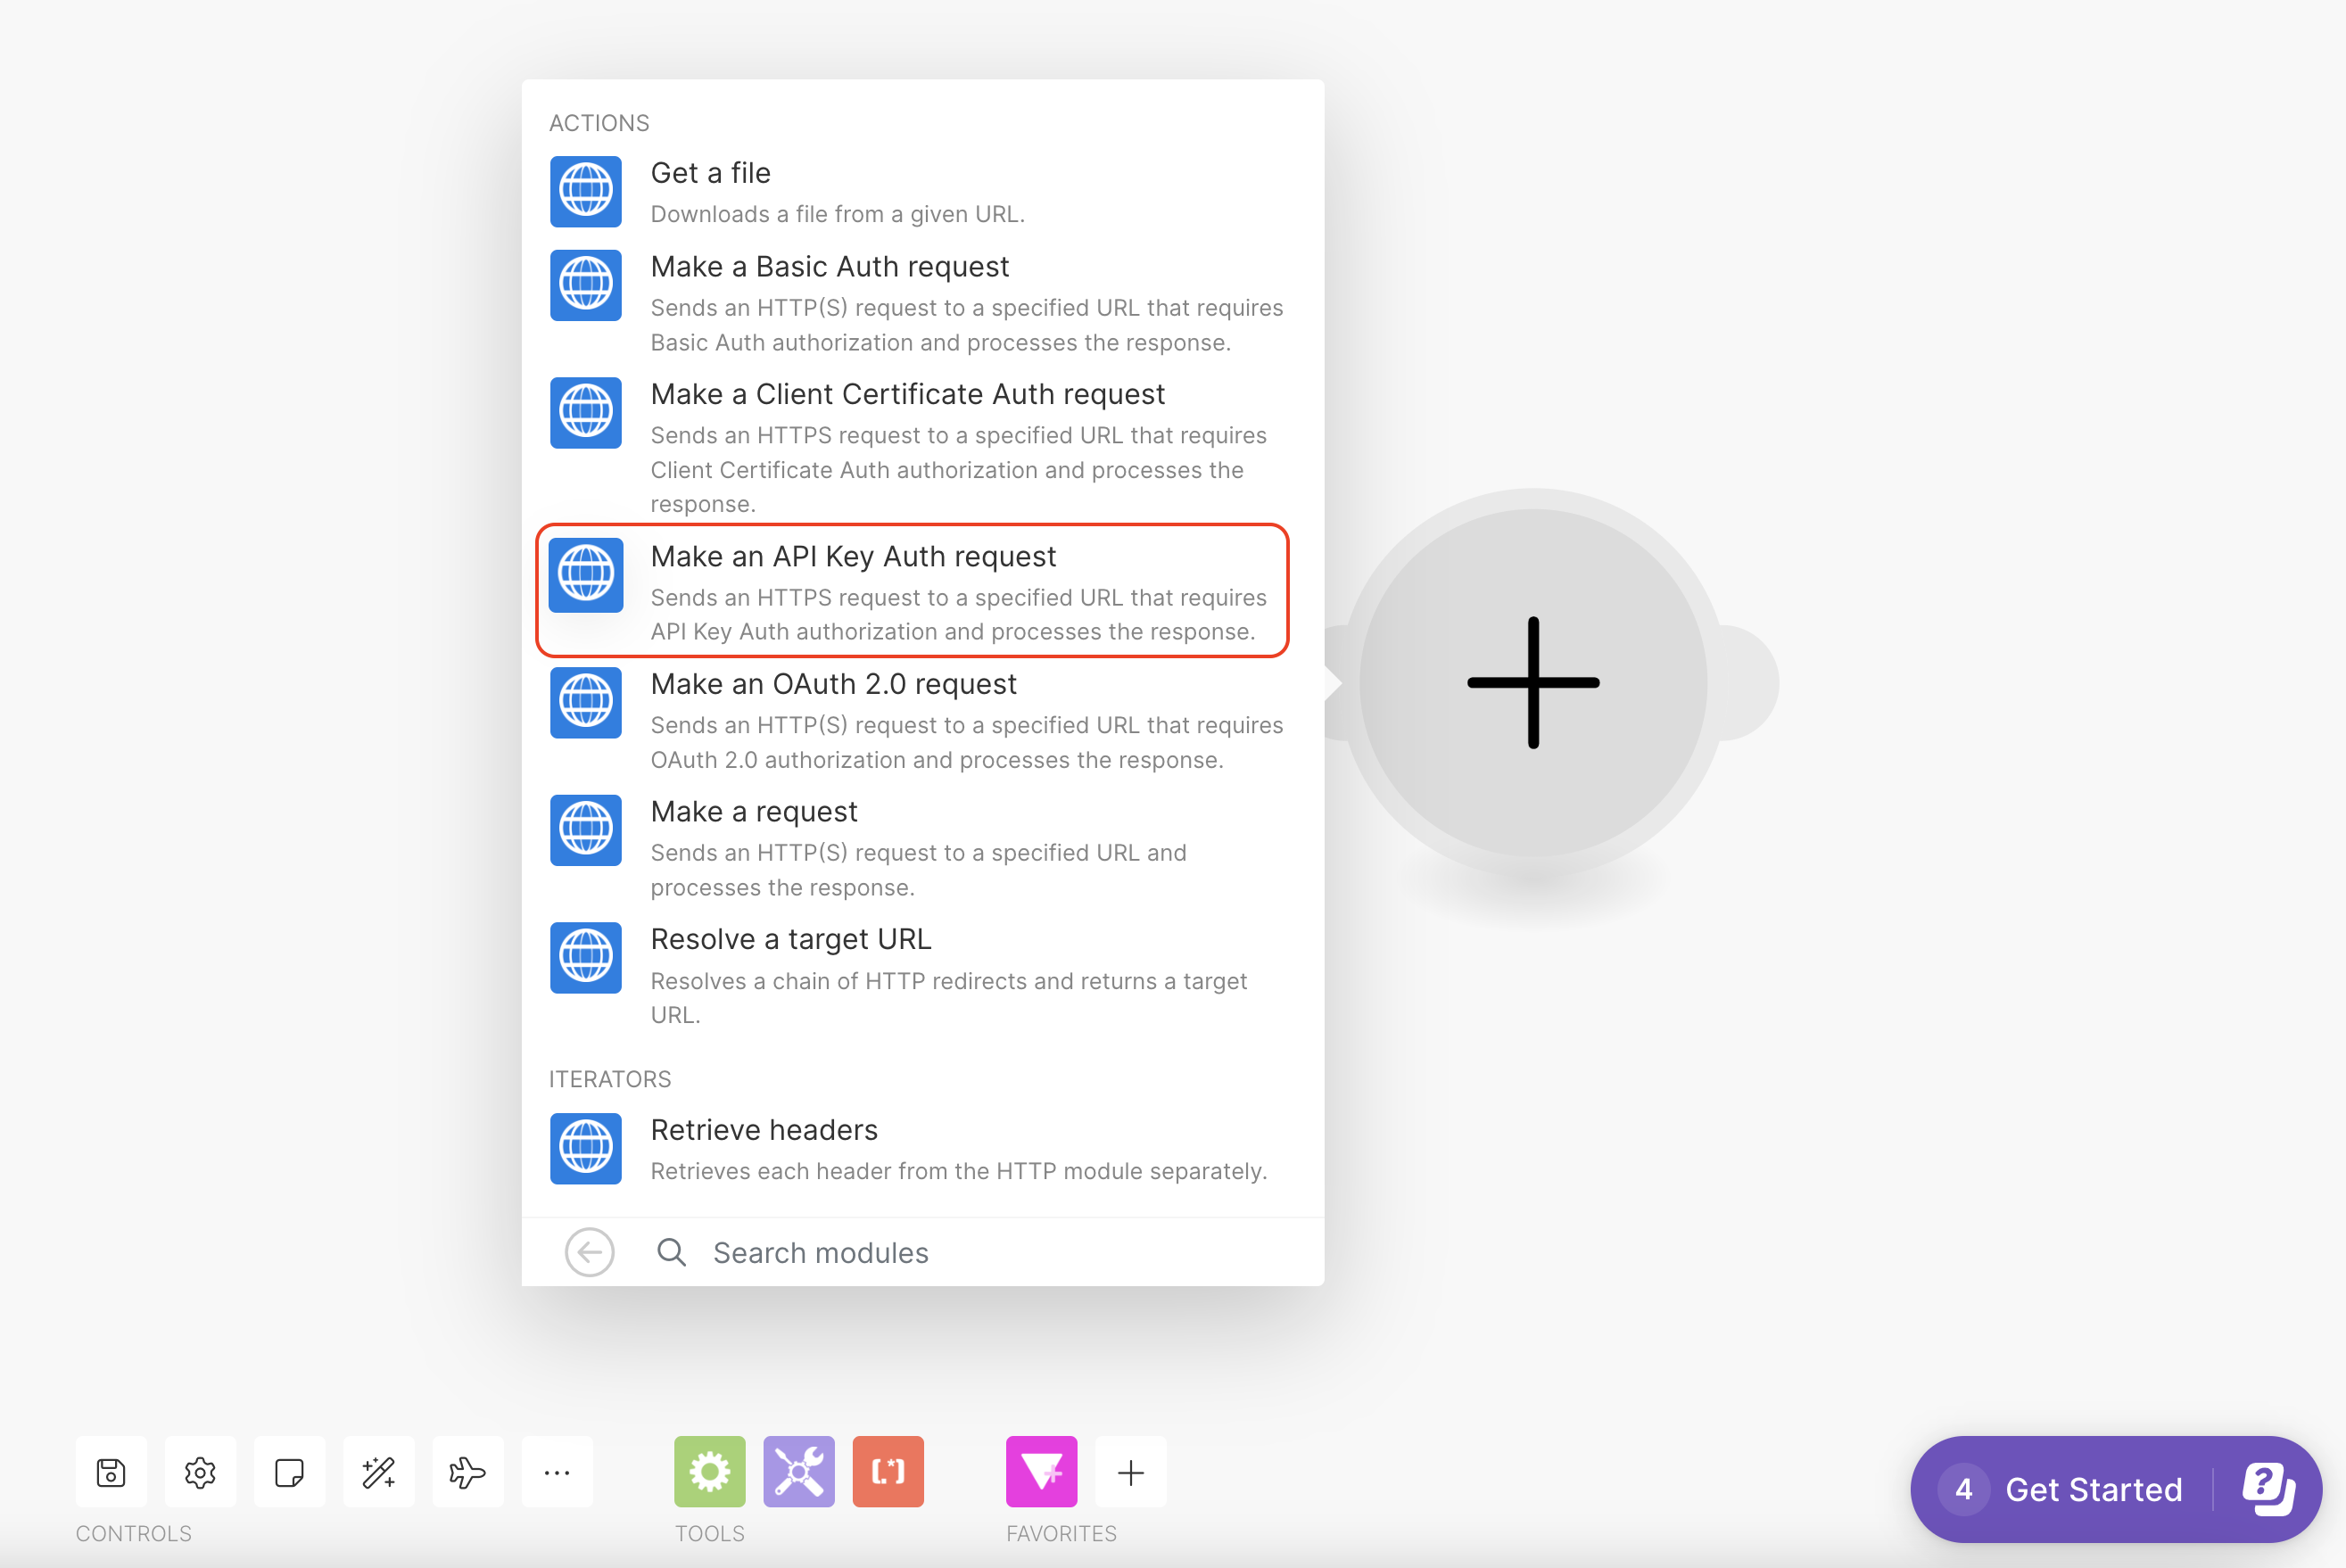
First, select the option Make an API Key Auth request. This will send as HTTPS request to a specified URL that requires API Key Auth authorization and processes the response.
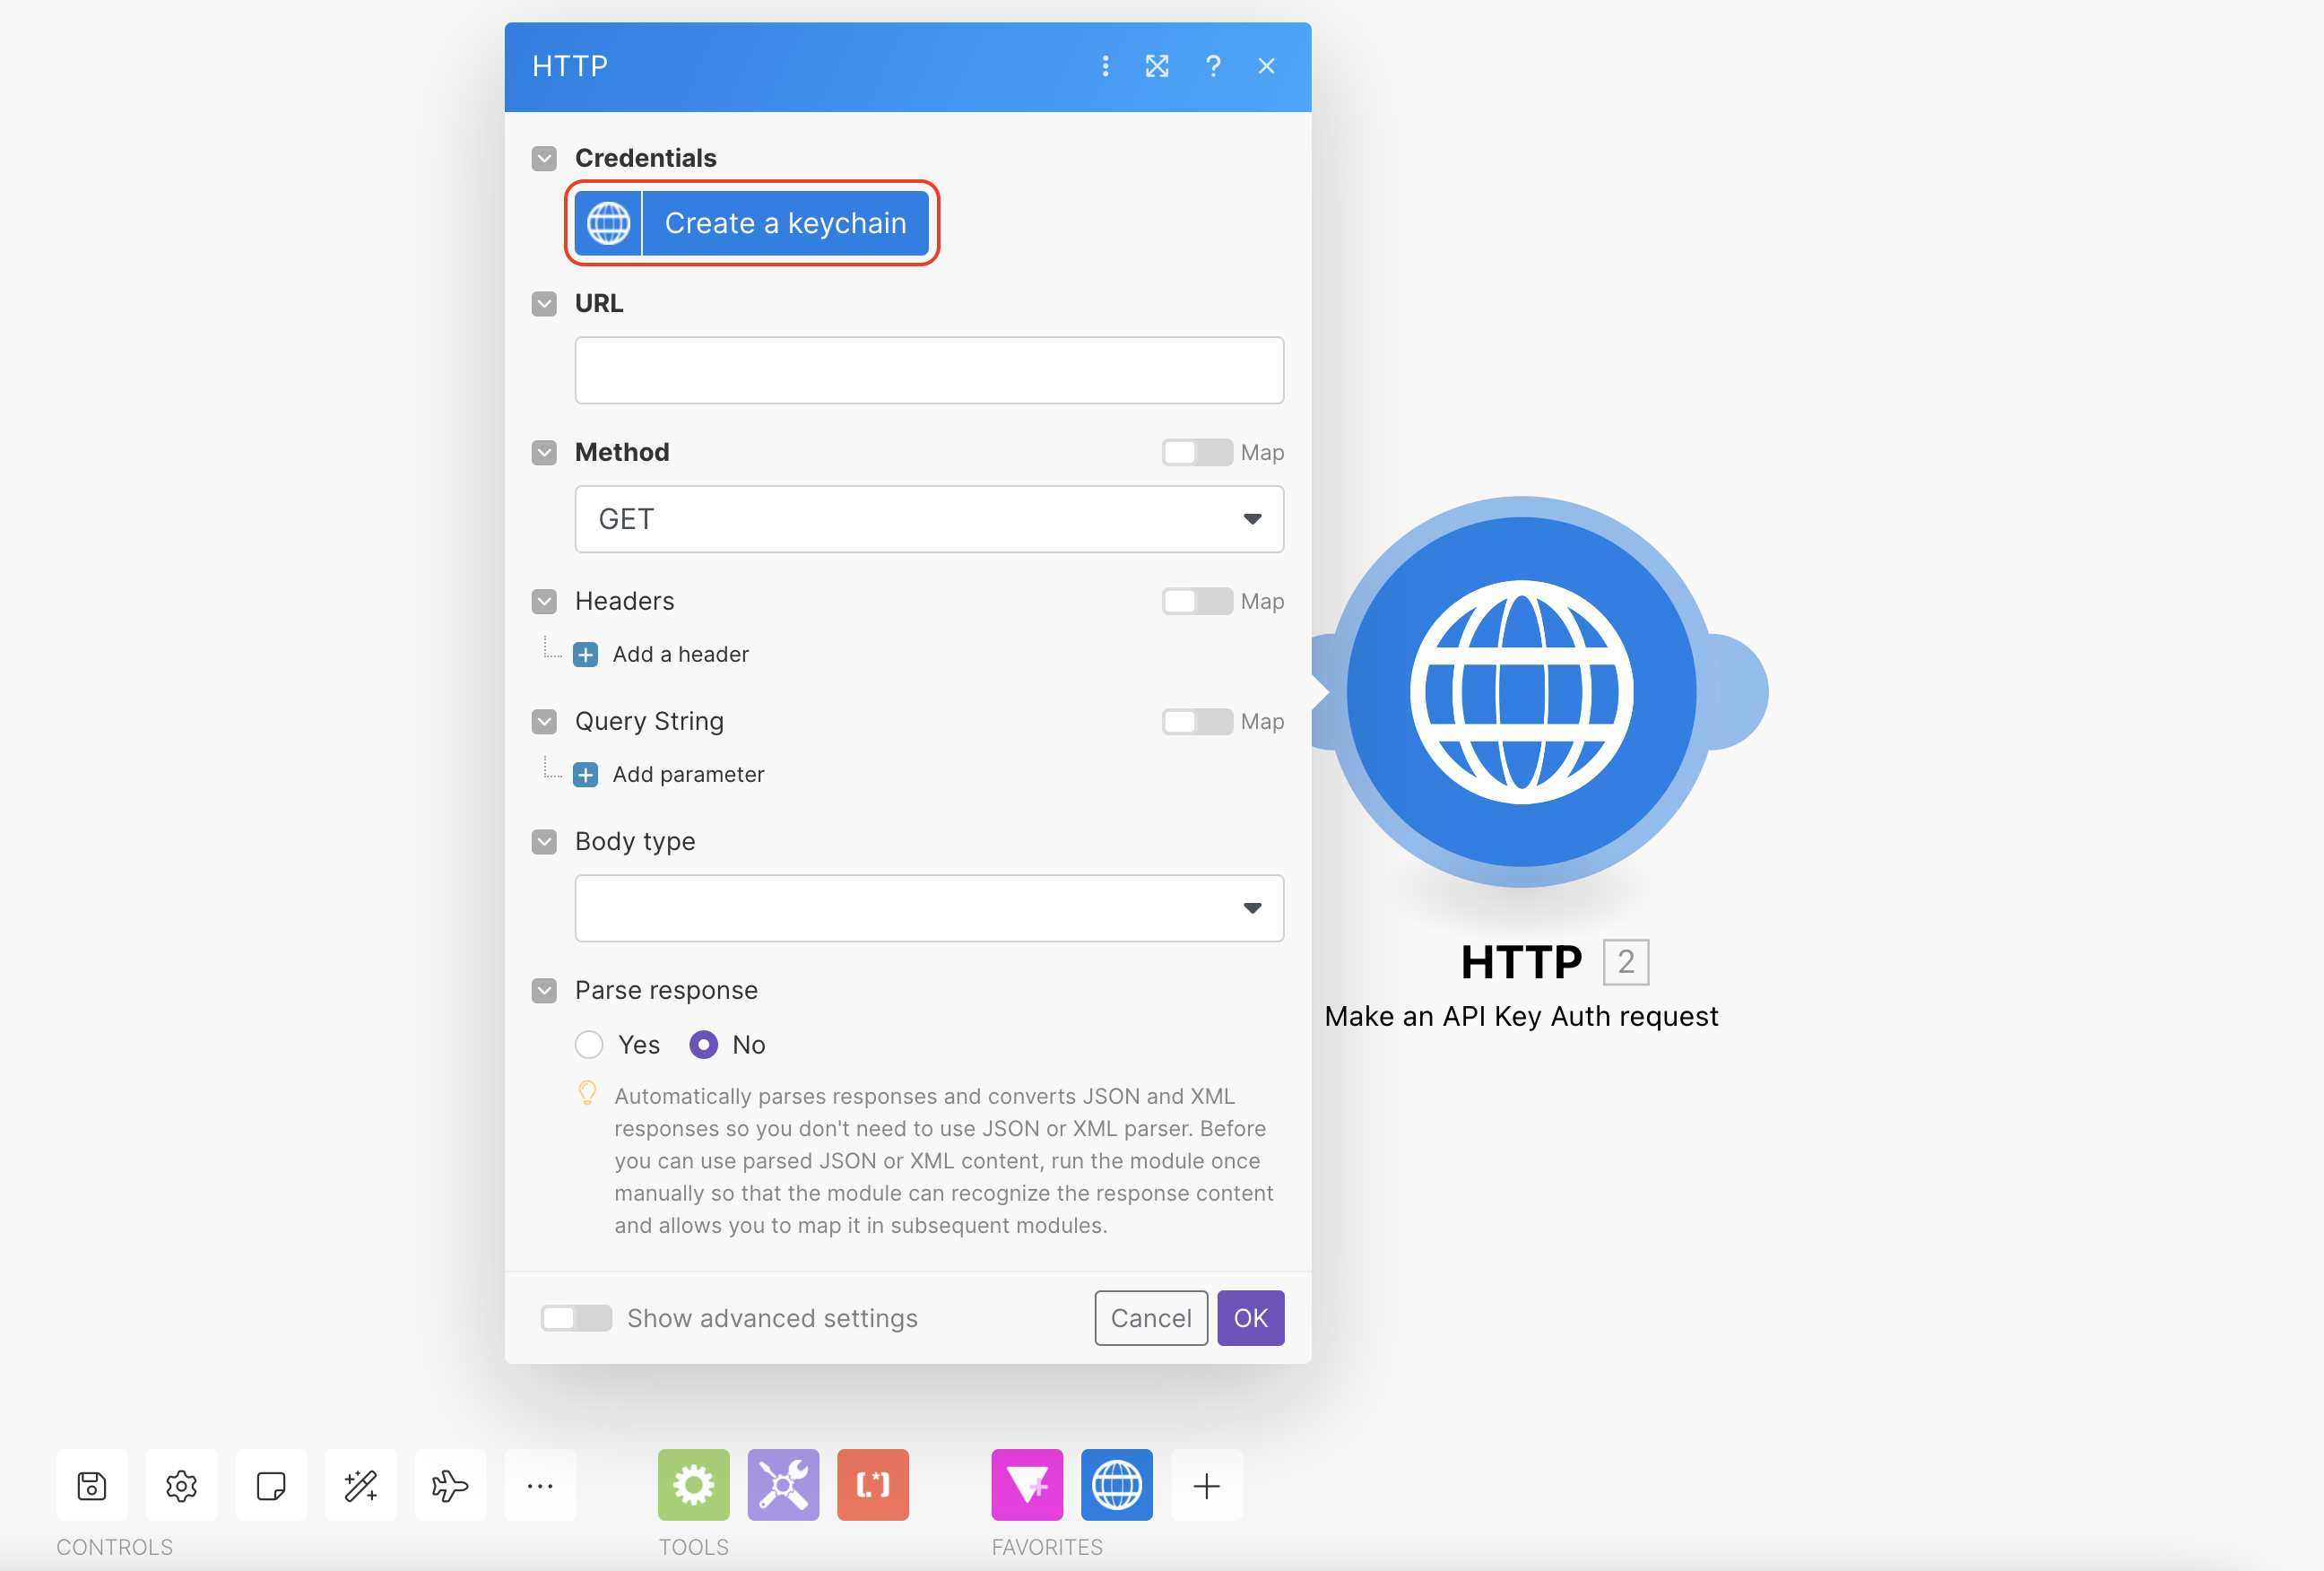
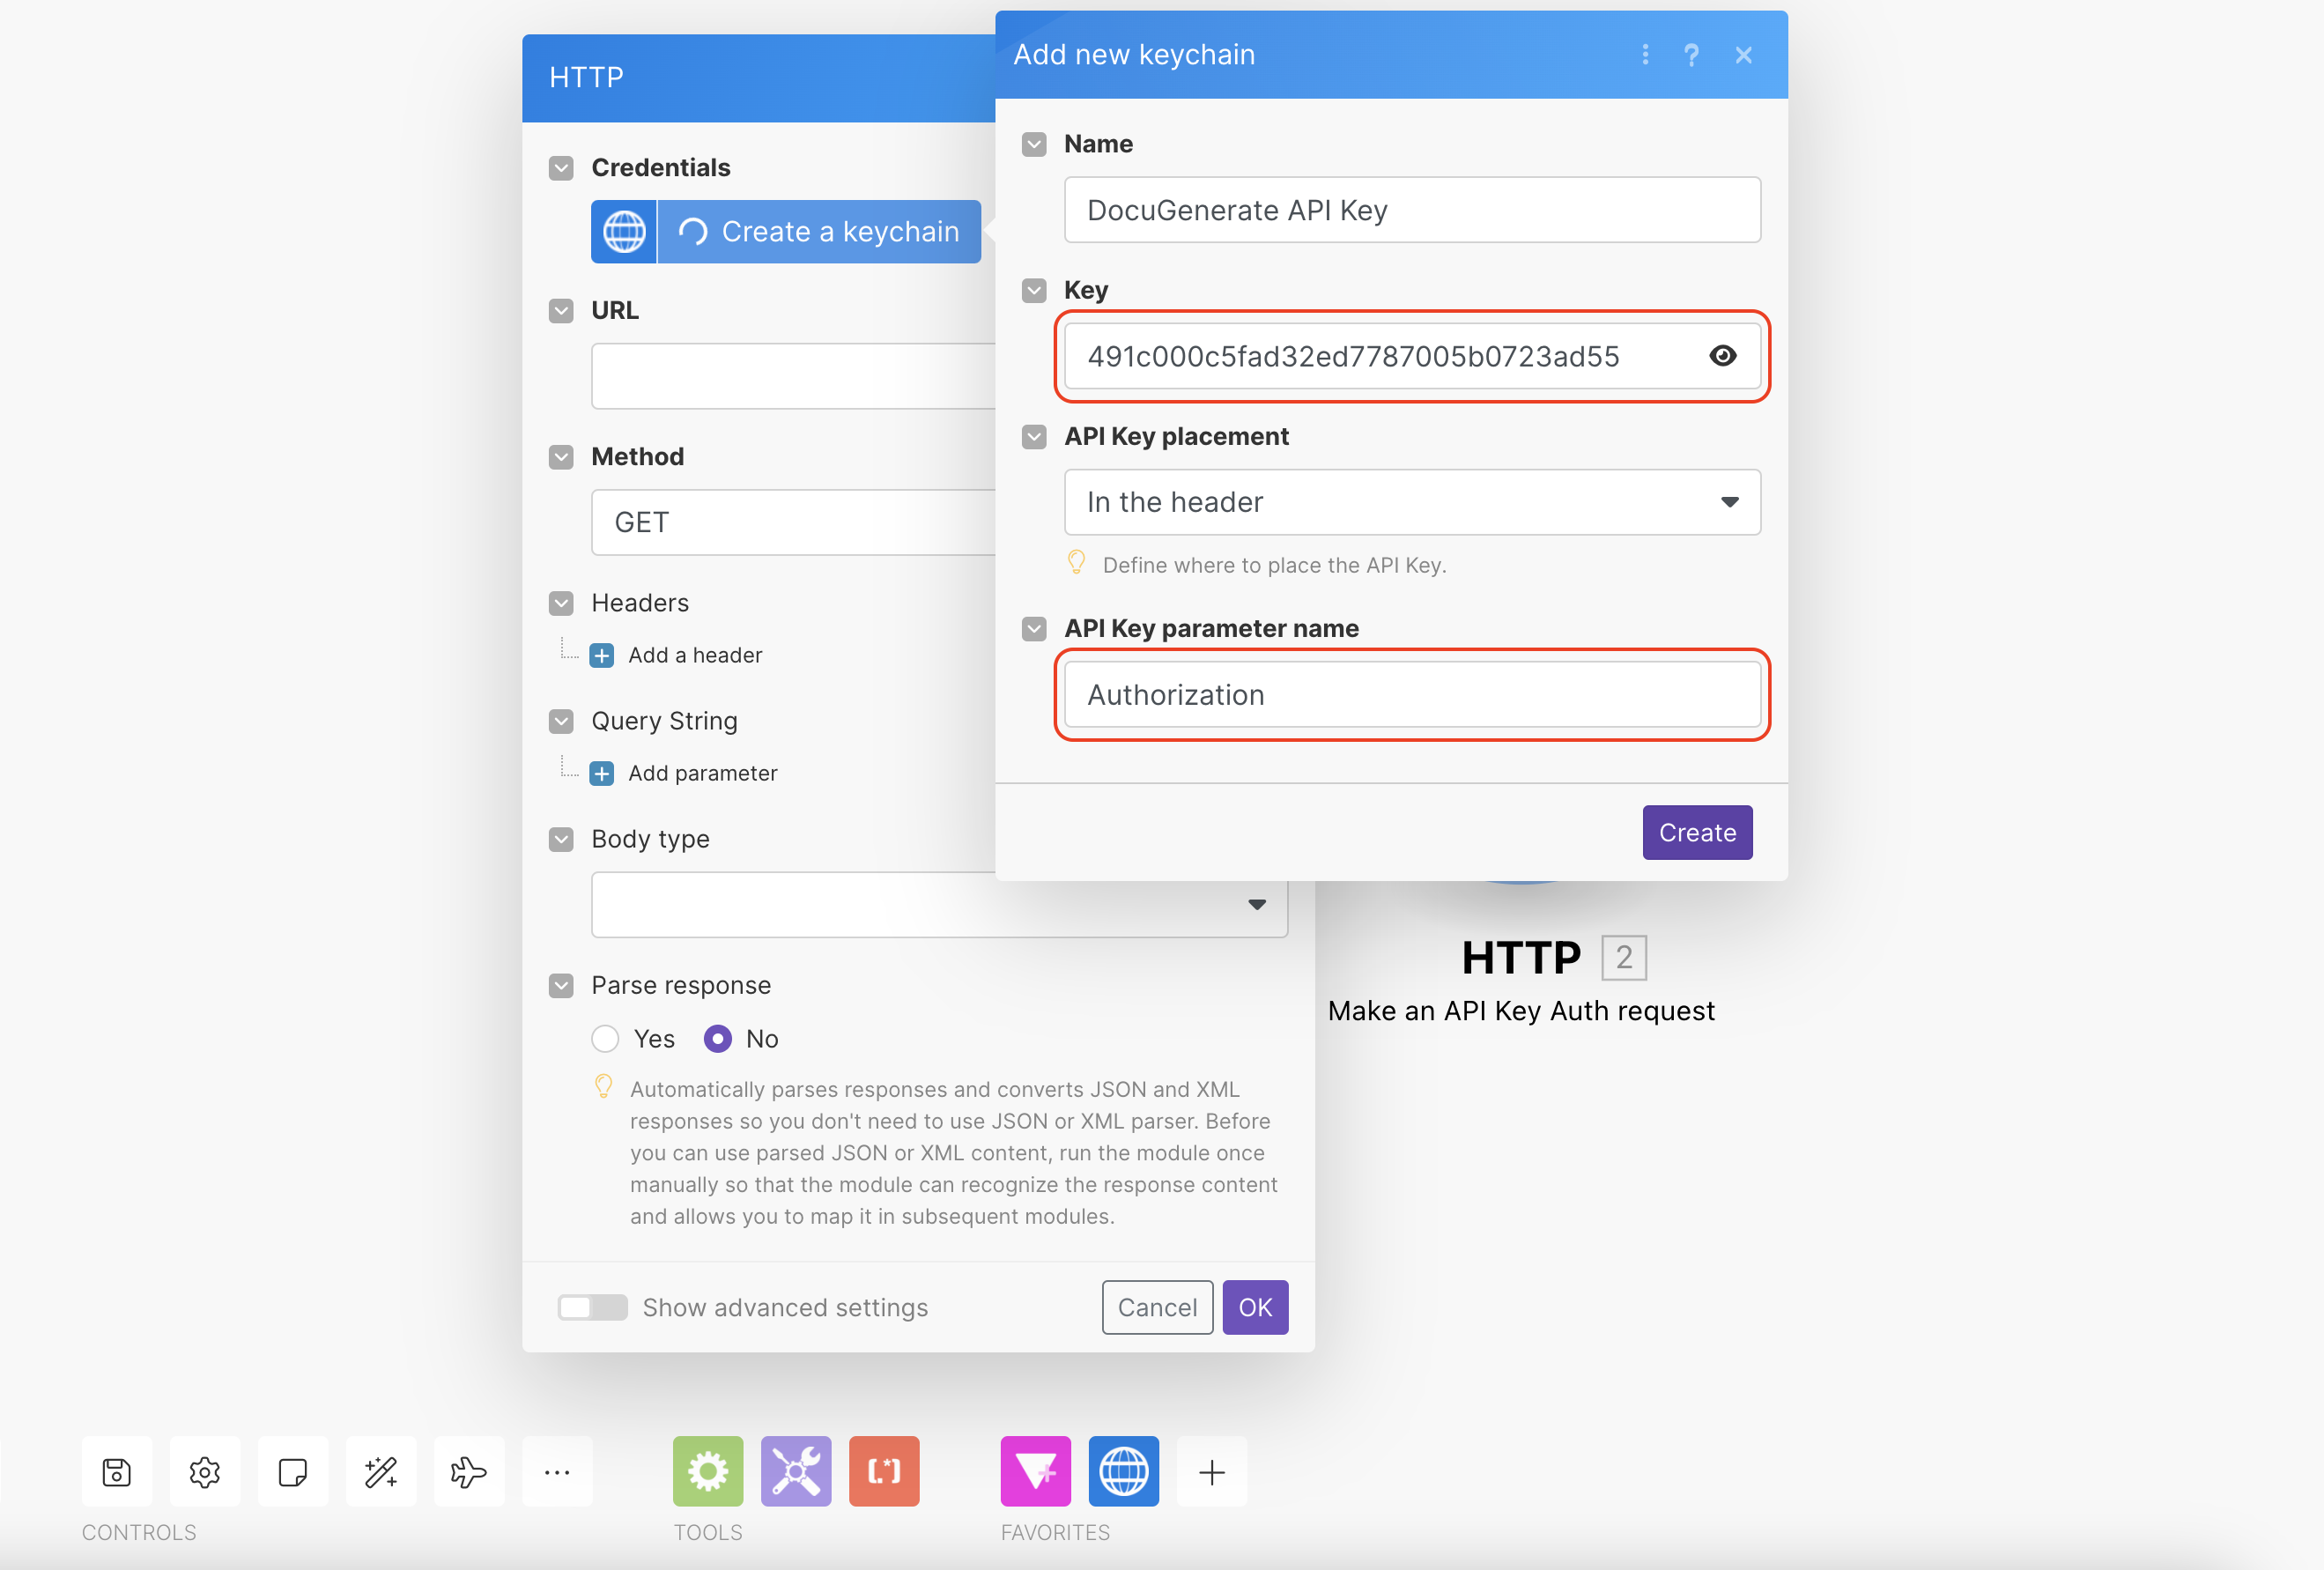
Next click on the Create a keychain in the Credentials section. This will open a dialog for adding a new keychain.
You need to give a Name to the new keychain, like DocuGenerate API Key for example. For the Key value you’ll need to enter your API Key that you can find on DocuGenerate’s Settings page. For the API Key placement you can leave the default value In the header. And finally for the API Key parameter name, you’ll need to enter Authorization like it’s specified on the API Reference page.
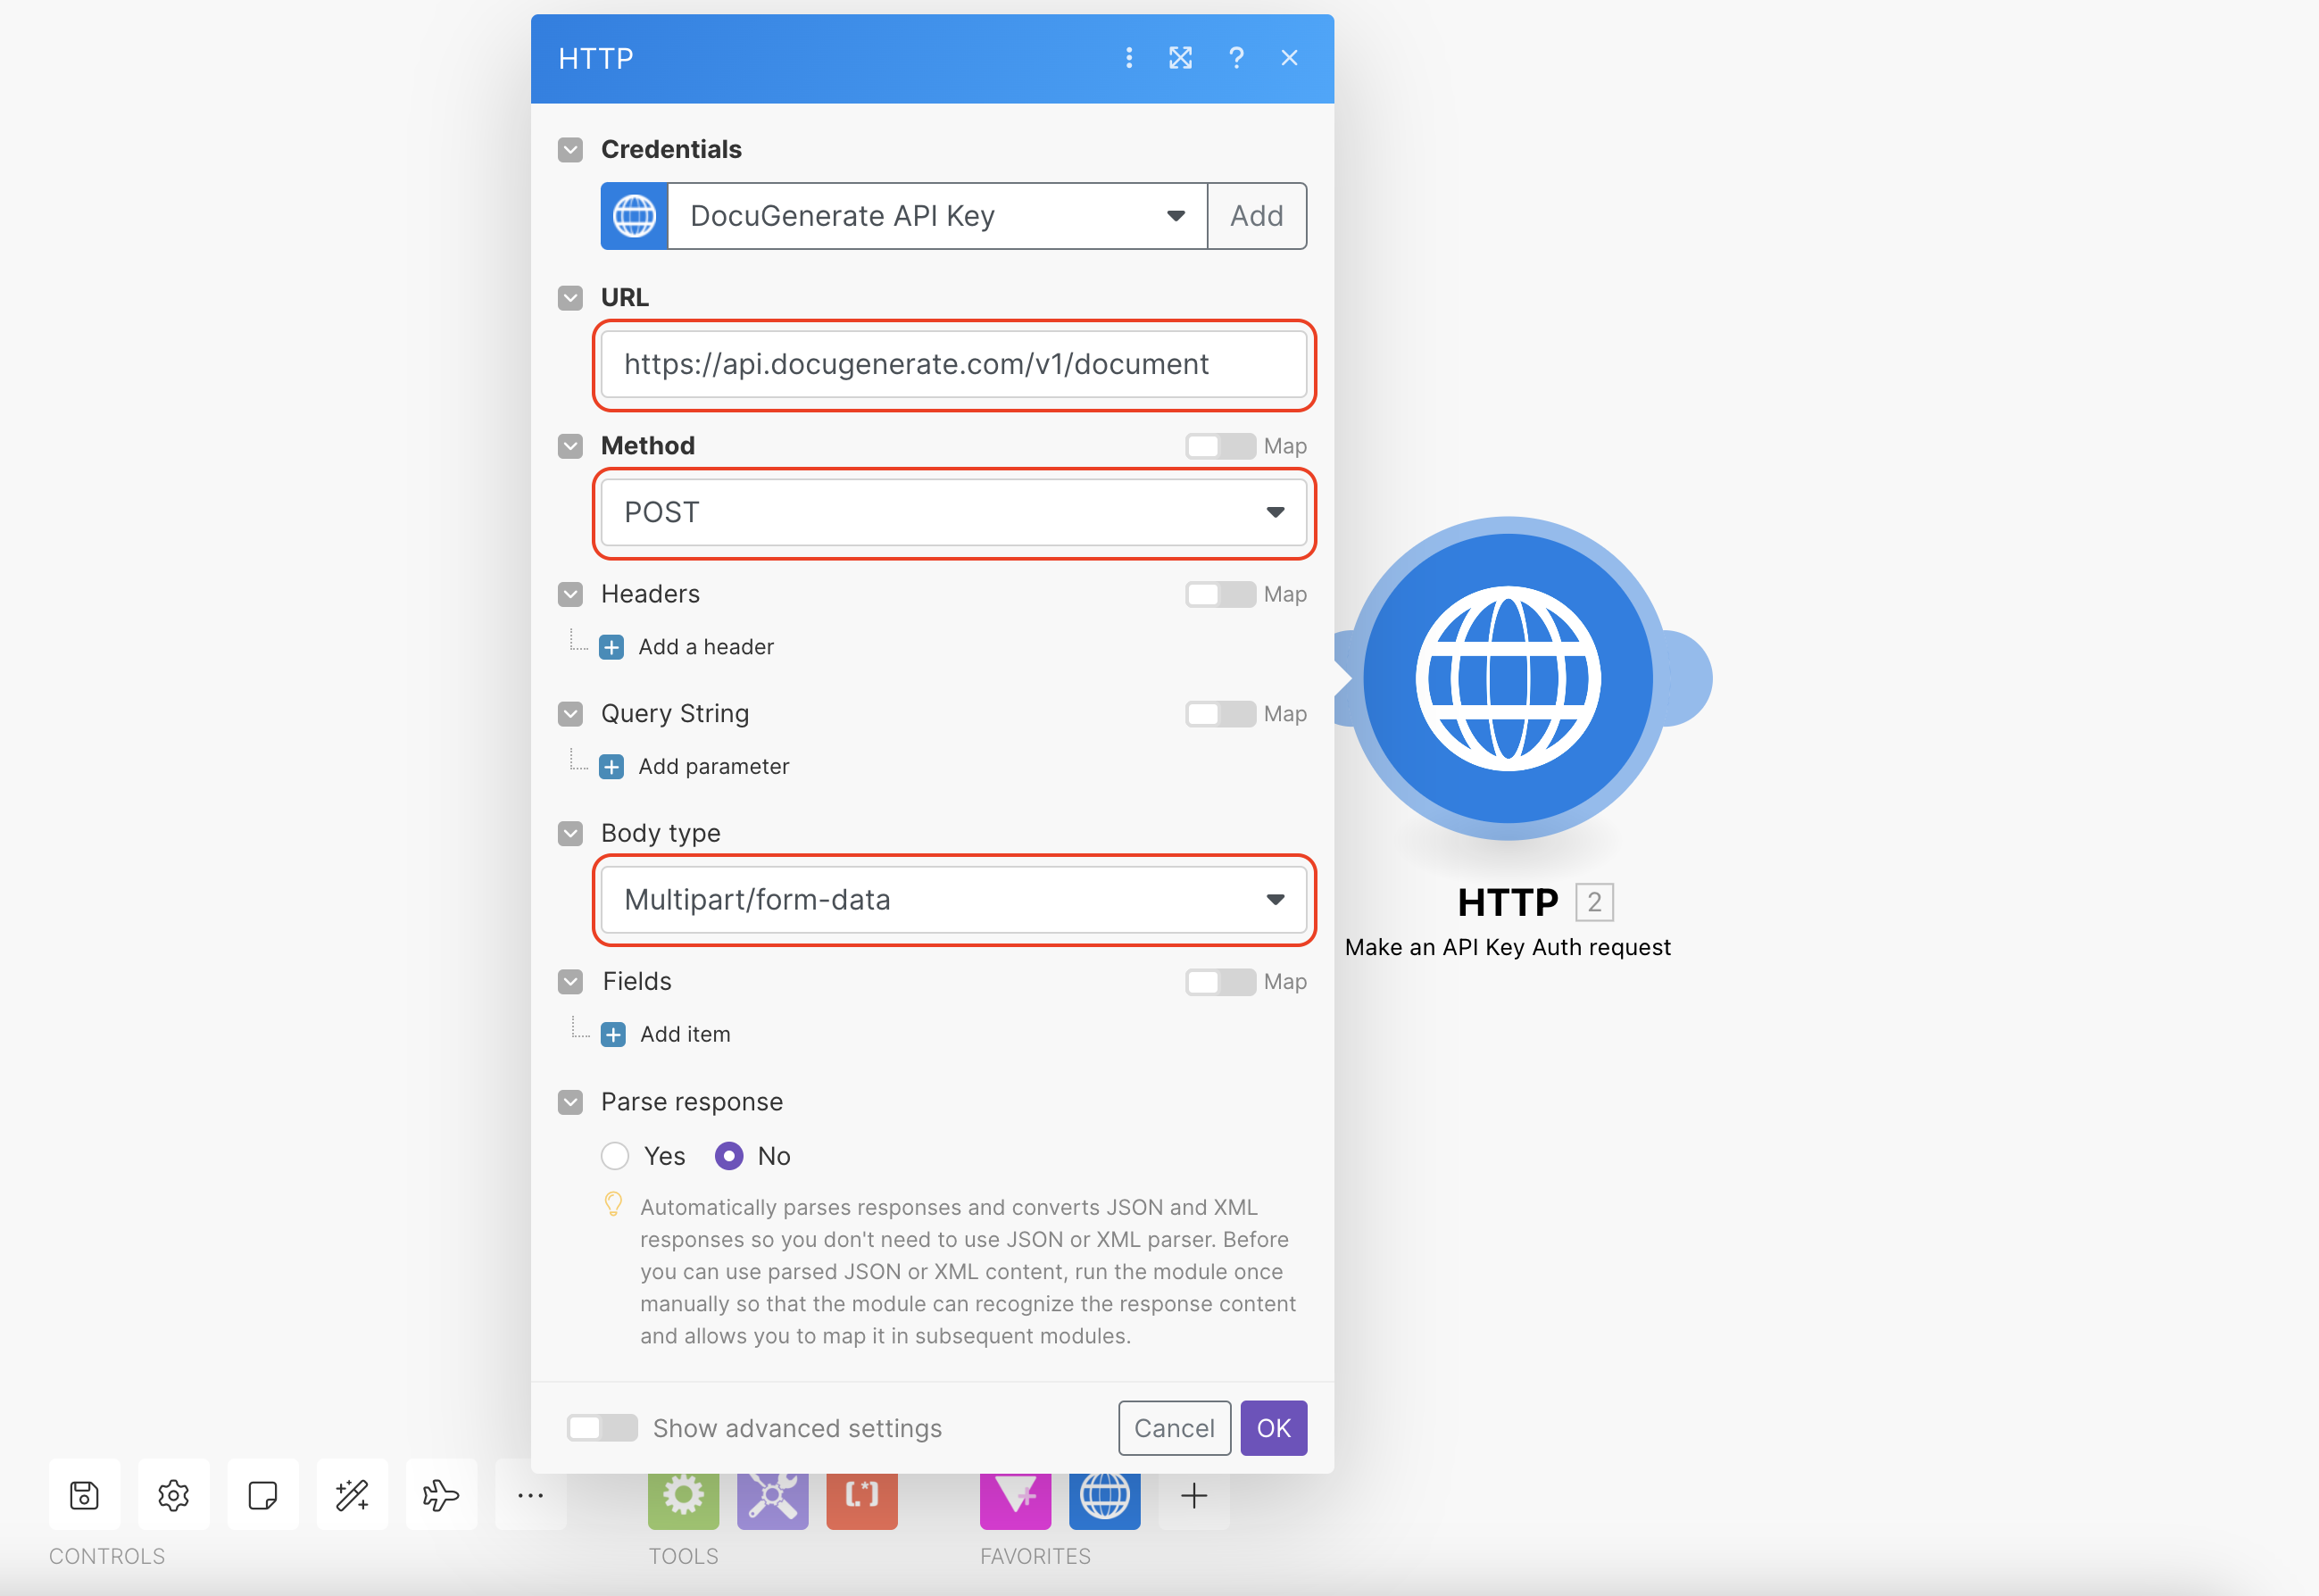
After configuring the Credentials section, you’ll need to specify the API endpoint that will be called on DocuGenerate. Enter the following values for the concerned fields: 1. URL = https://api.docugenerate.com/v1/document 2. Method = POST 3. Body type = Multipart/form-data
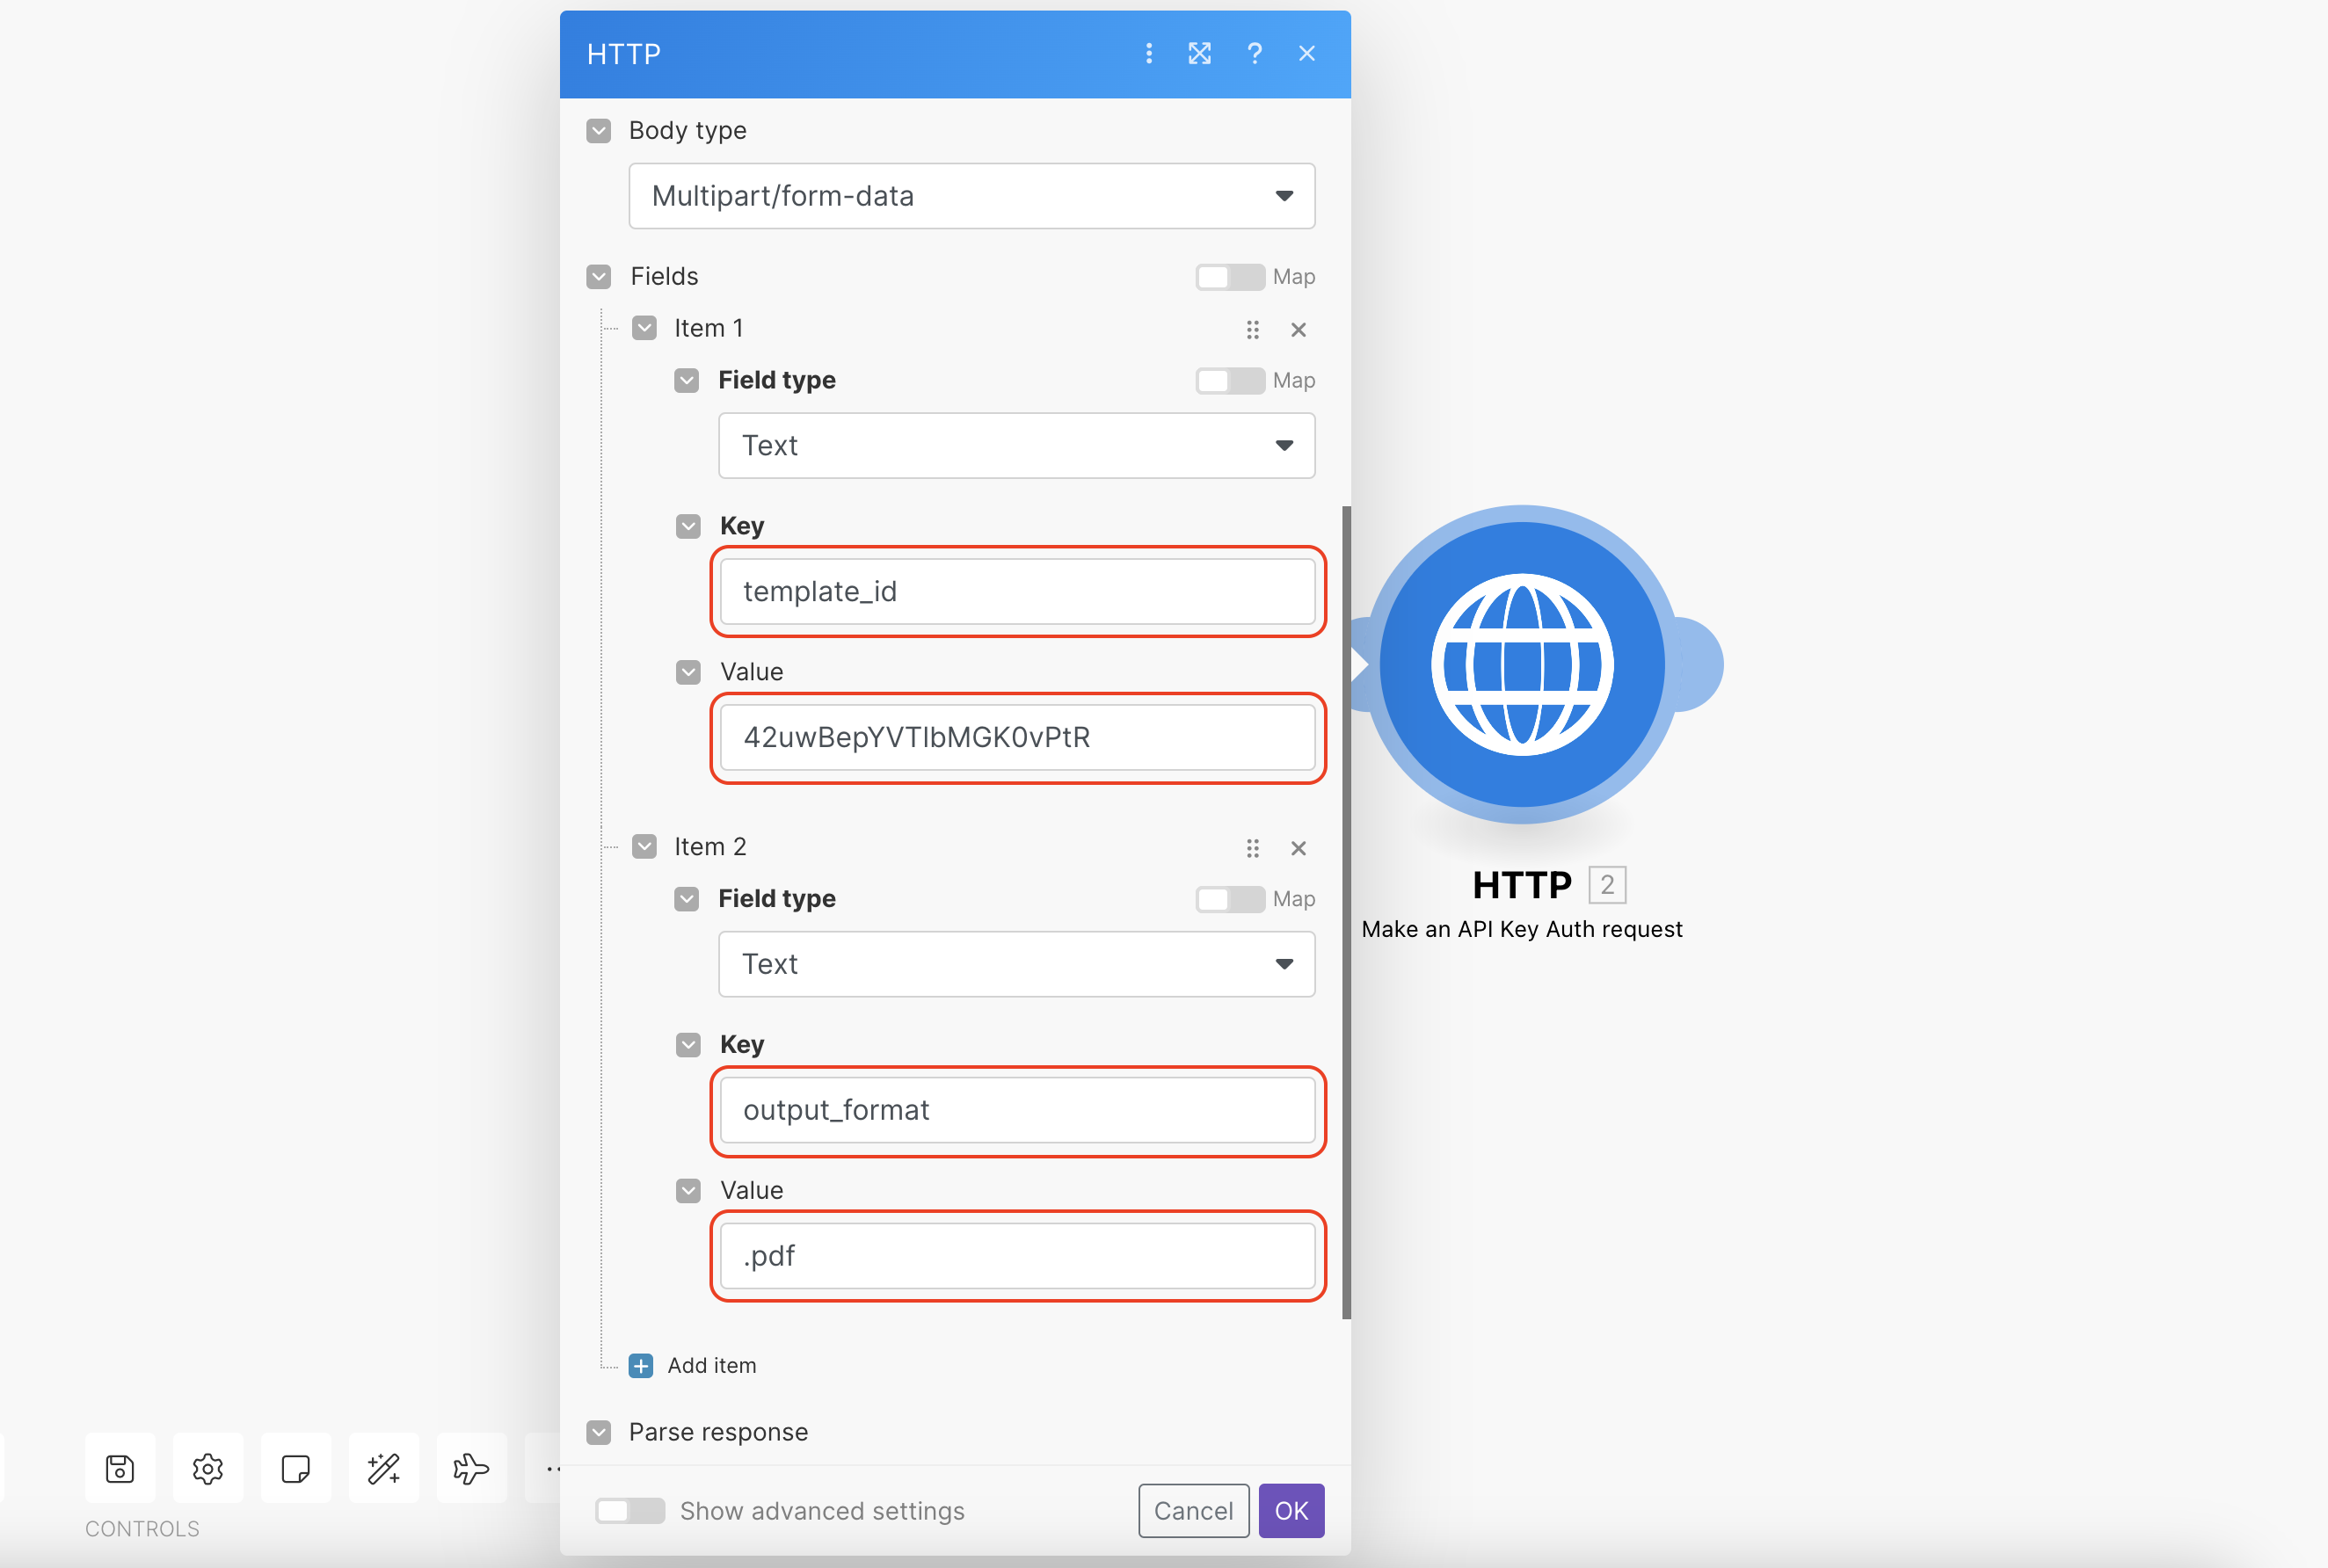
The next part is configuring the fields for the HTTP request. The complete list of possible parameters for the Create Document endpoint can be found on the API Reference page. For the purpose of this tutorial, we’ll be using only the template_id, output_format and data parameters.
First, for the template_id field we’ll need to enter the ID of the template that we create earlier in the Creating the report template section. Then for the output_format we’ll use .pdf, but any of the following values can also be used: .docx, .pdf, .doc, .odt or .txt.
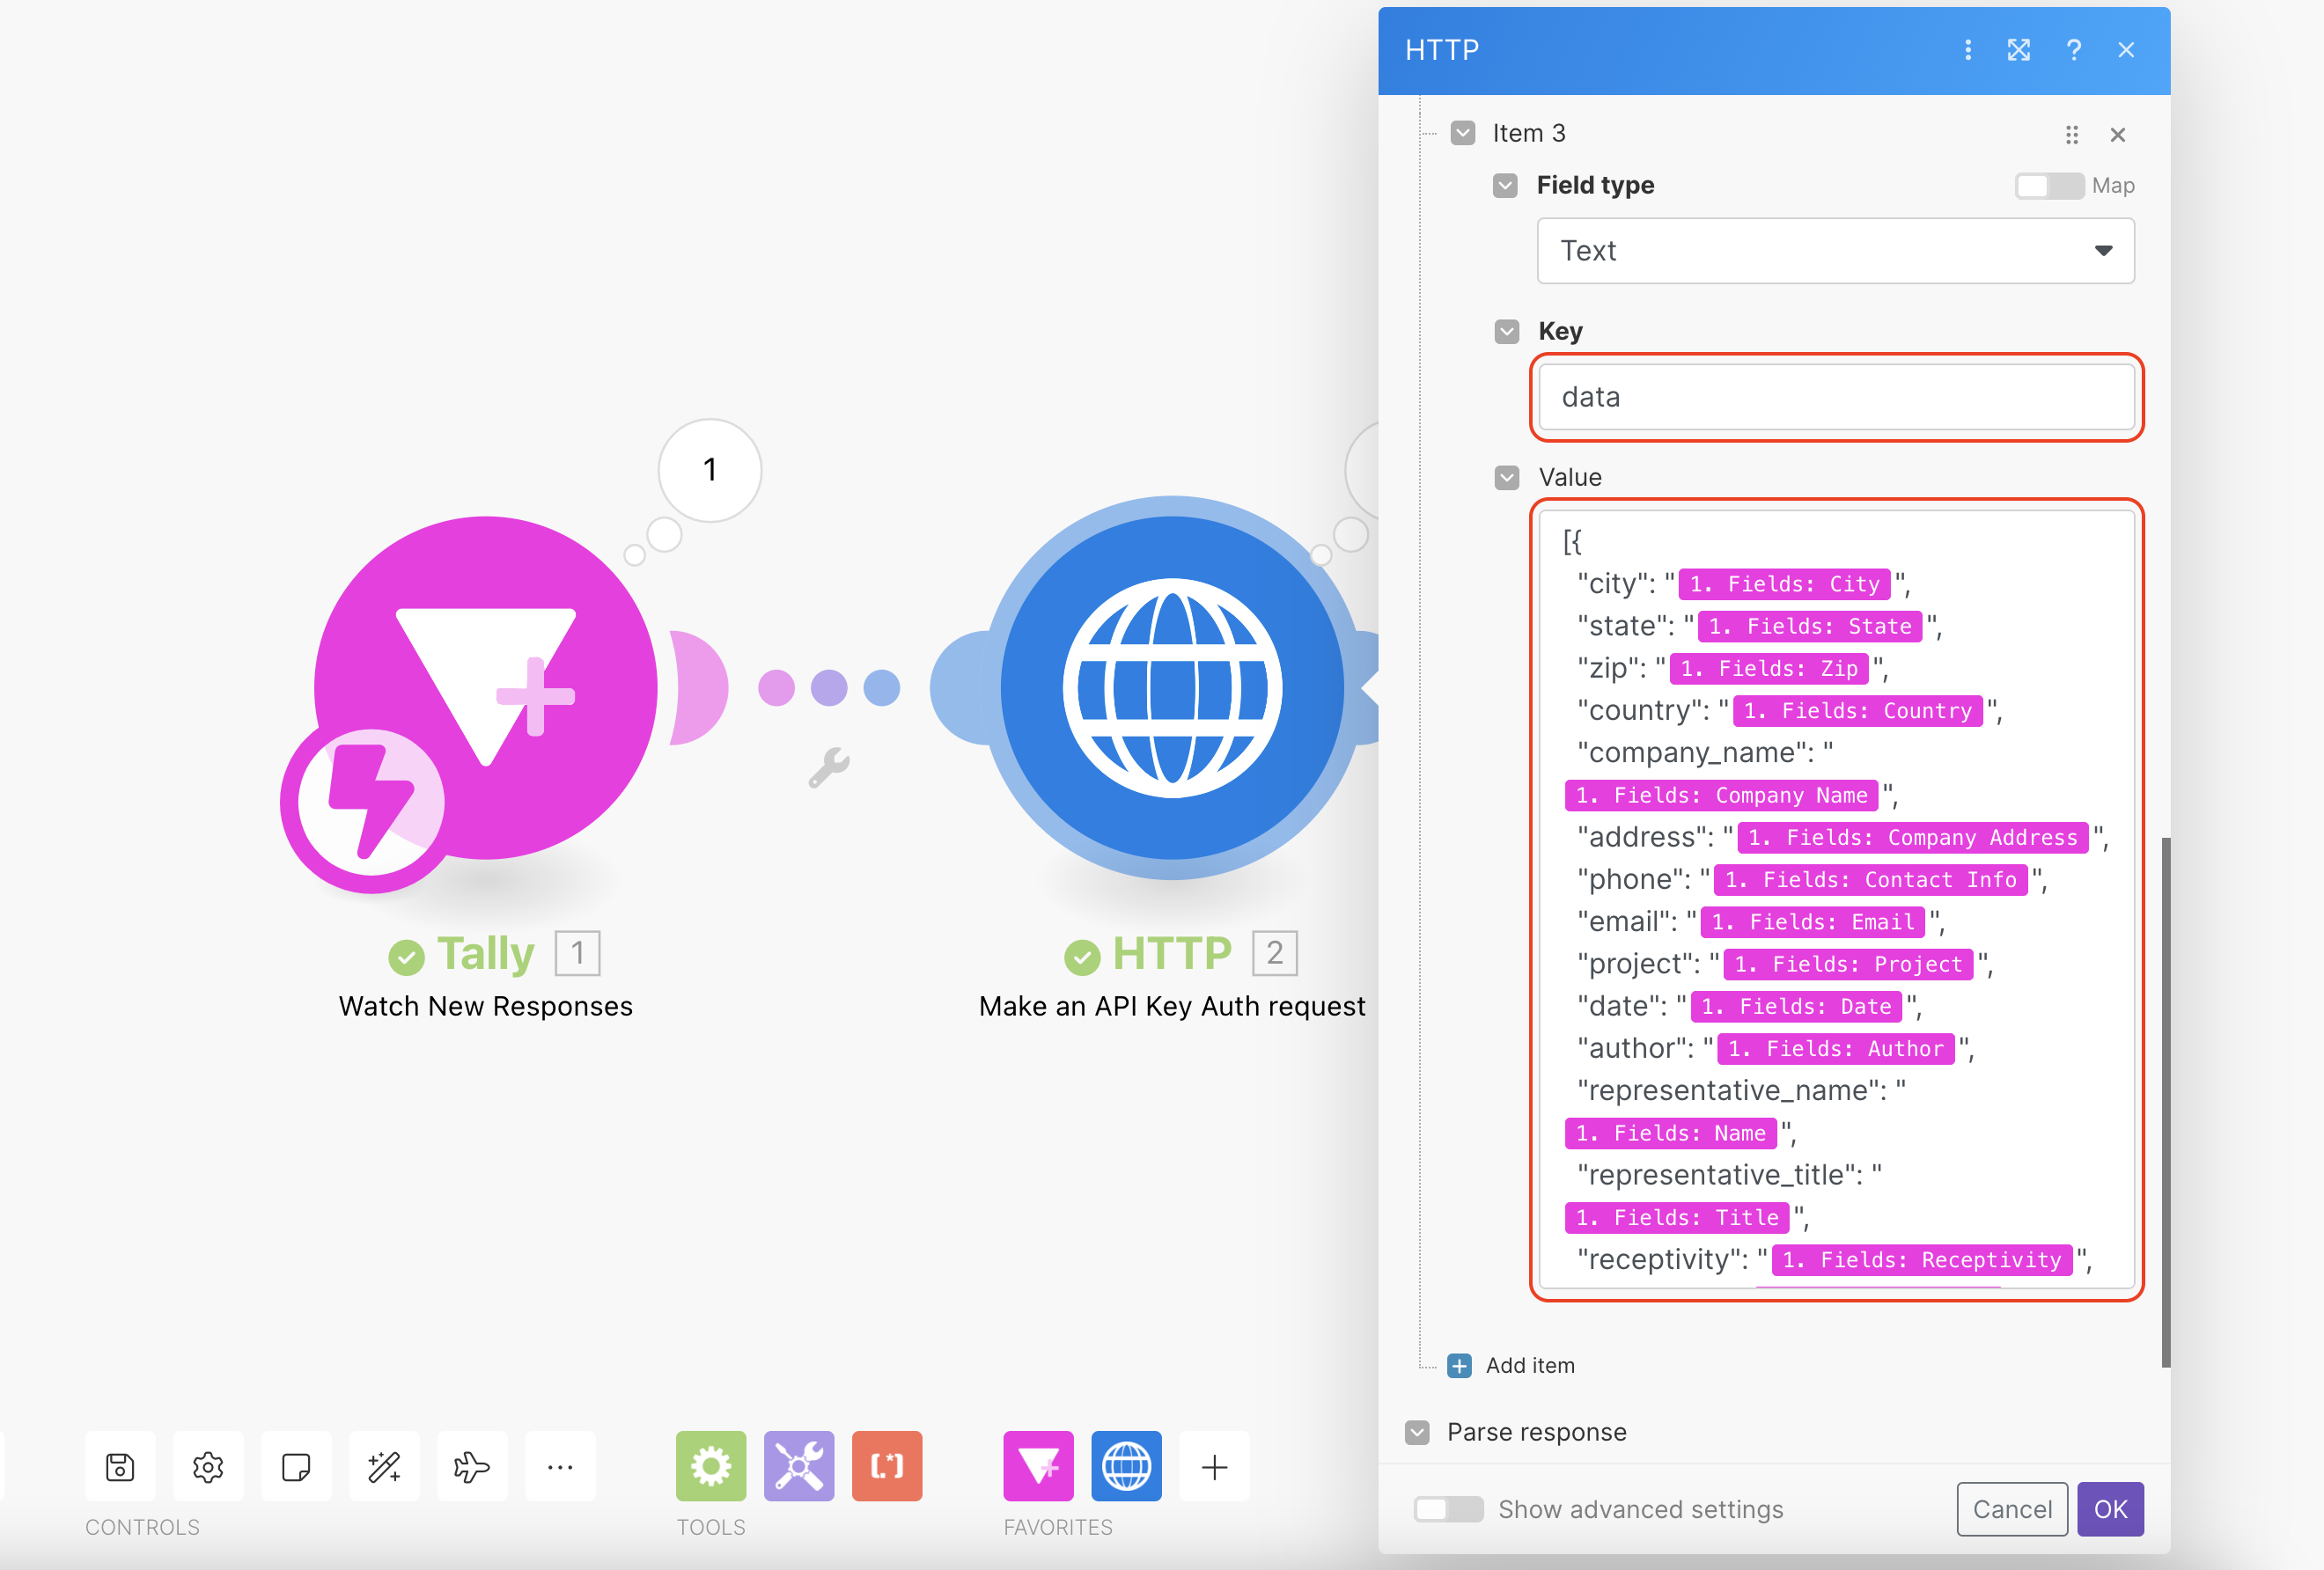
Next we’ll configure the data field for the HTTP request. Data that will be used to do the merge and generate the documents based on the template. The expected format is an array of JSON objects and a document will be generated for each object in the array by replacing the tags from the template with the object’s values.
To get the expected format of the JSON object, you can try generating documents from JSON data in the web app and copy the pre-filled JSON that contains empty value. You can then paste it in Make as the value for the data field.
Once you have that, you can map the fields from the Tally response with the corresponding keys in the JSON object. Put your cursor in the ”“ value that you want to fill in with a form field, then click on one of the pink fields from the left panel to use it as the value. Make sure the fields from Tally are enclosed within quotes, as in ”{{1.fields.City}}“, otherwise the data payload will not be formatted correctly and the call for generating a document will return a 400 error status code.
This is how the data value should look after mapping all the fields to the corresponding JSON values. Make allows you to map the form fields to the corresponding merge tag values in the data payload, ensuring that the generated document accurately reflects the form input.
Running the Scenario End-to-End
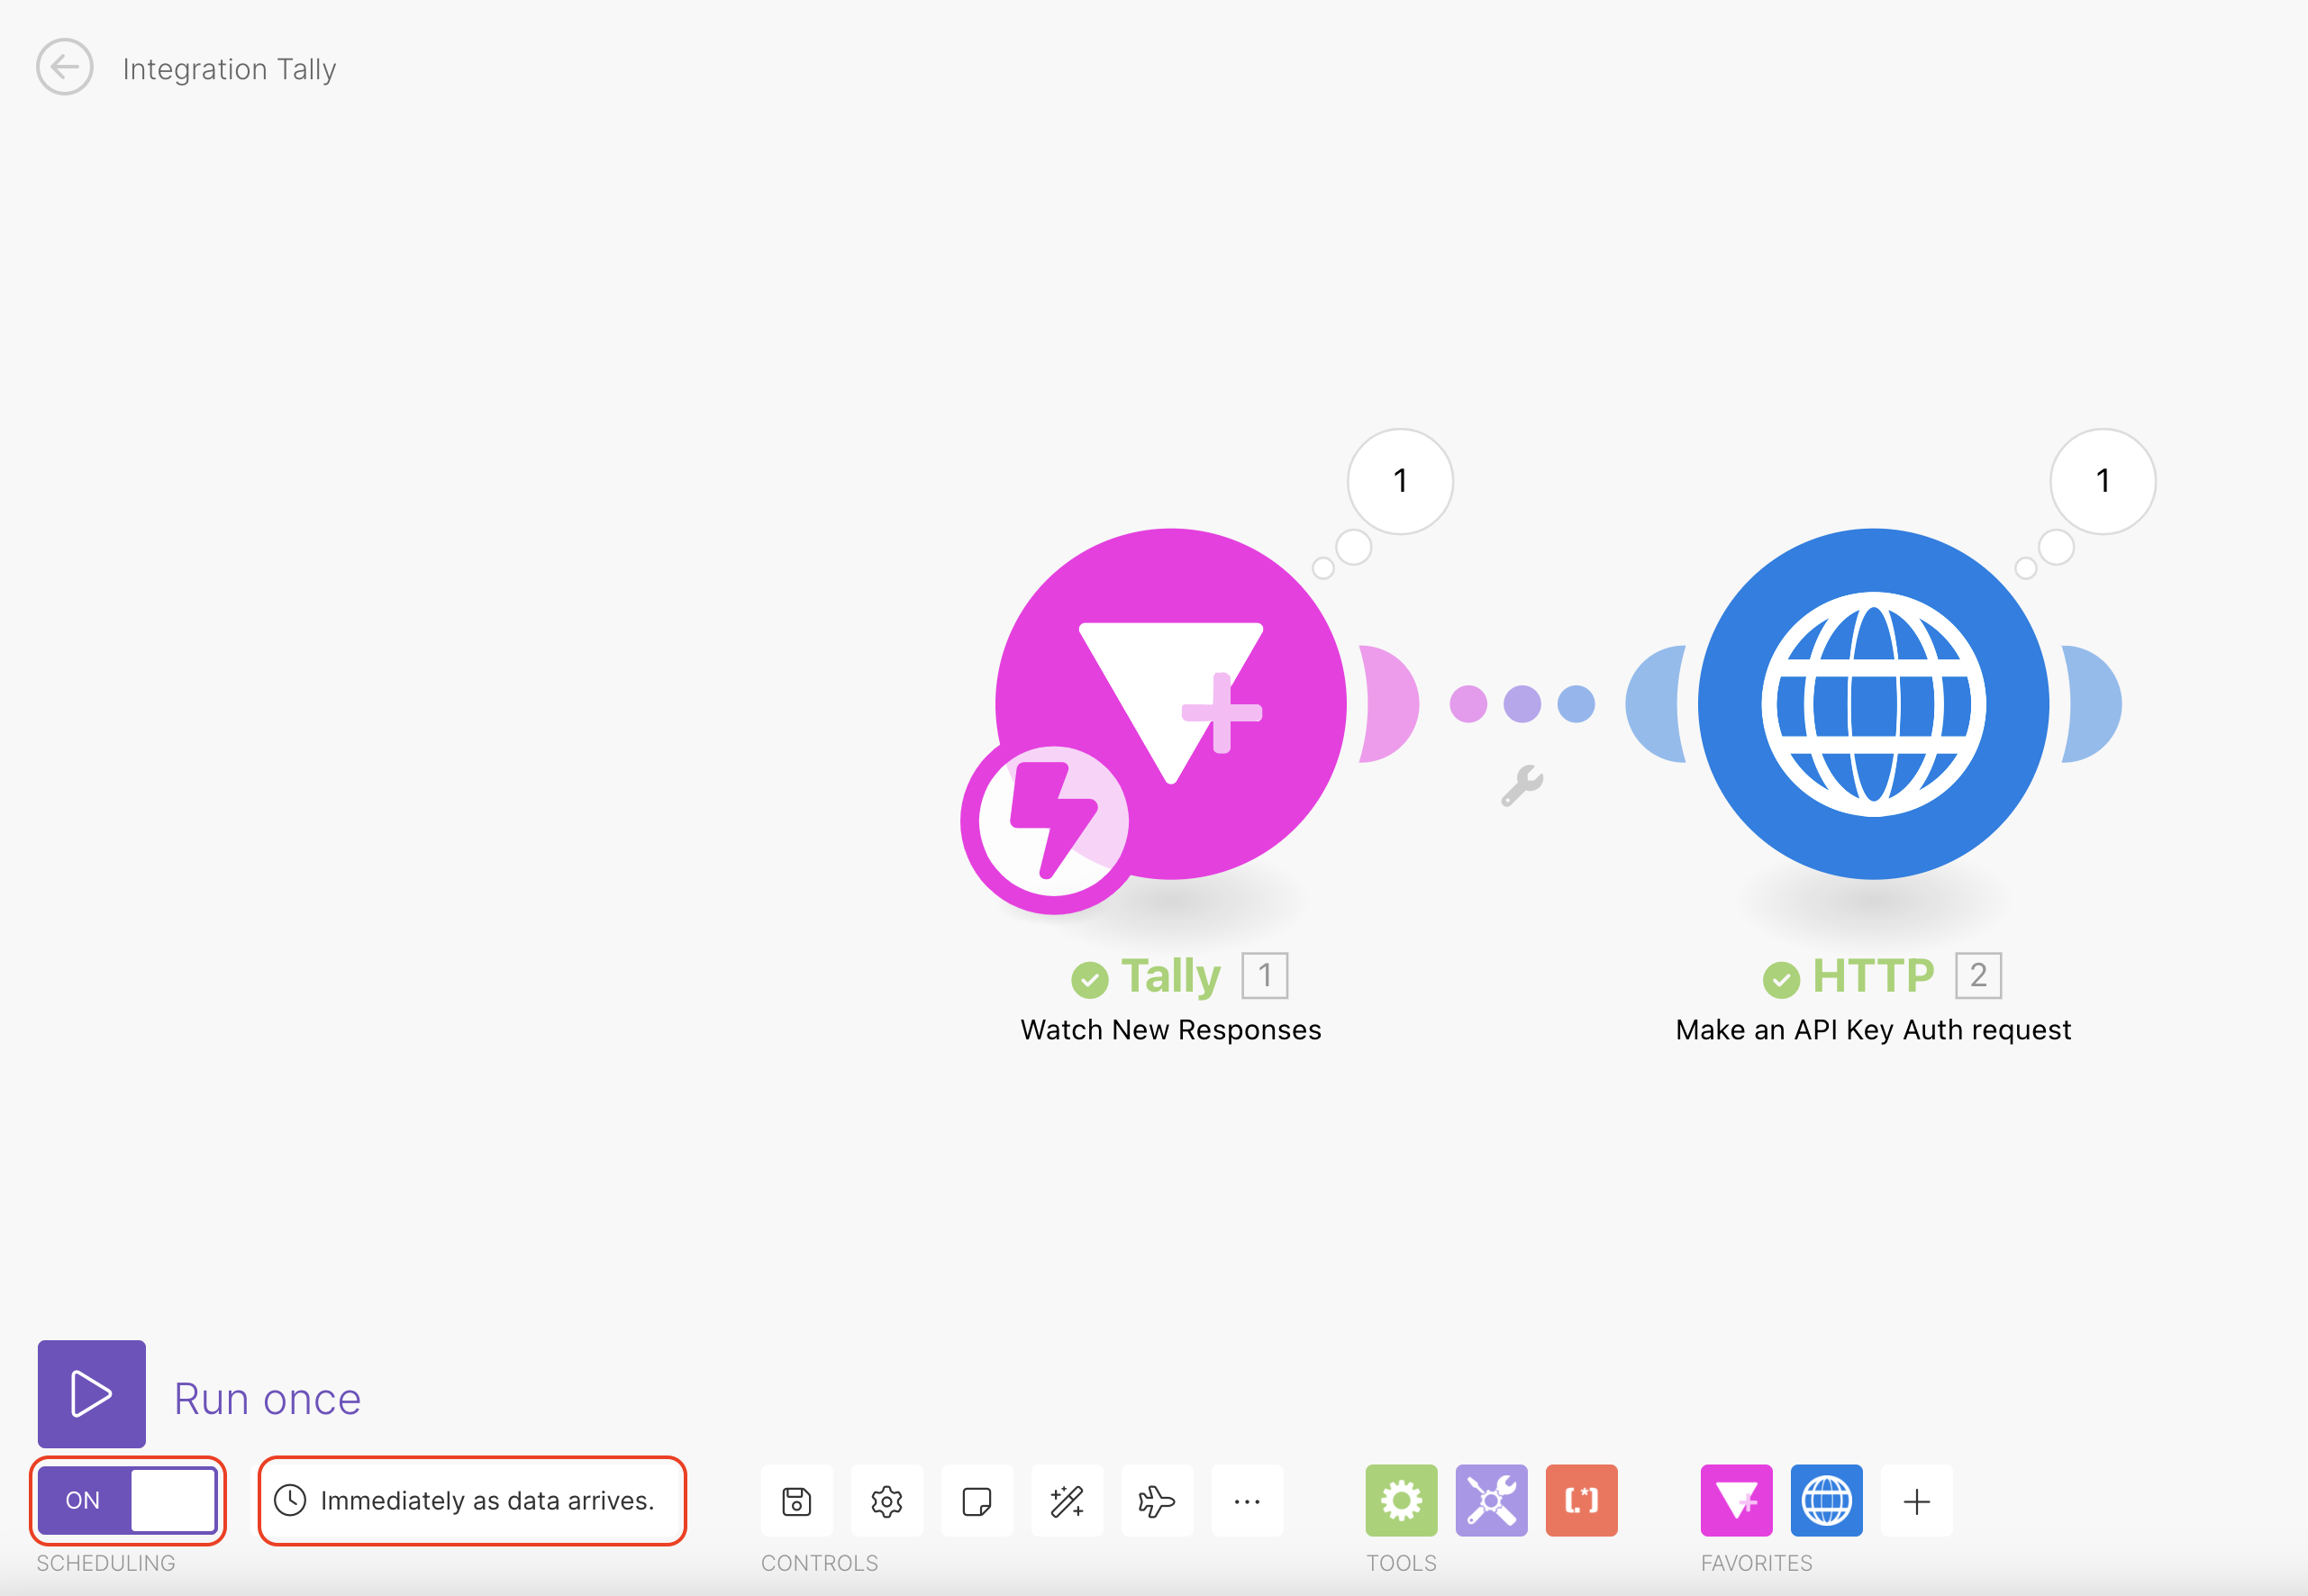
Once both Tally and the HTTP module are set up in the Make scenario, you can activate the scenario’s scheduling. This scheduling ensures that the workflow runs automatically as soon as new form data arrives. The scenario can be extended with additional steps, such as sending an email with the generated document as an attachment, but for the purpose of this tutorial we’ll limit the scenario to these 2 actions.
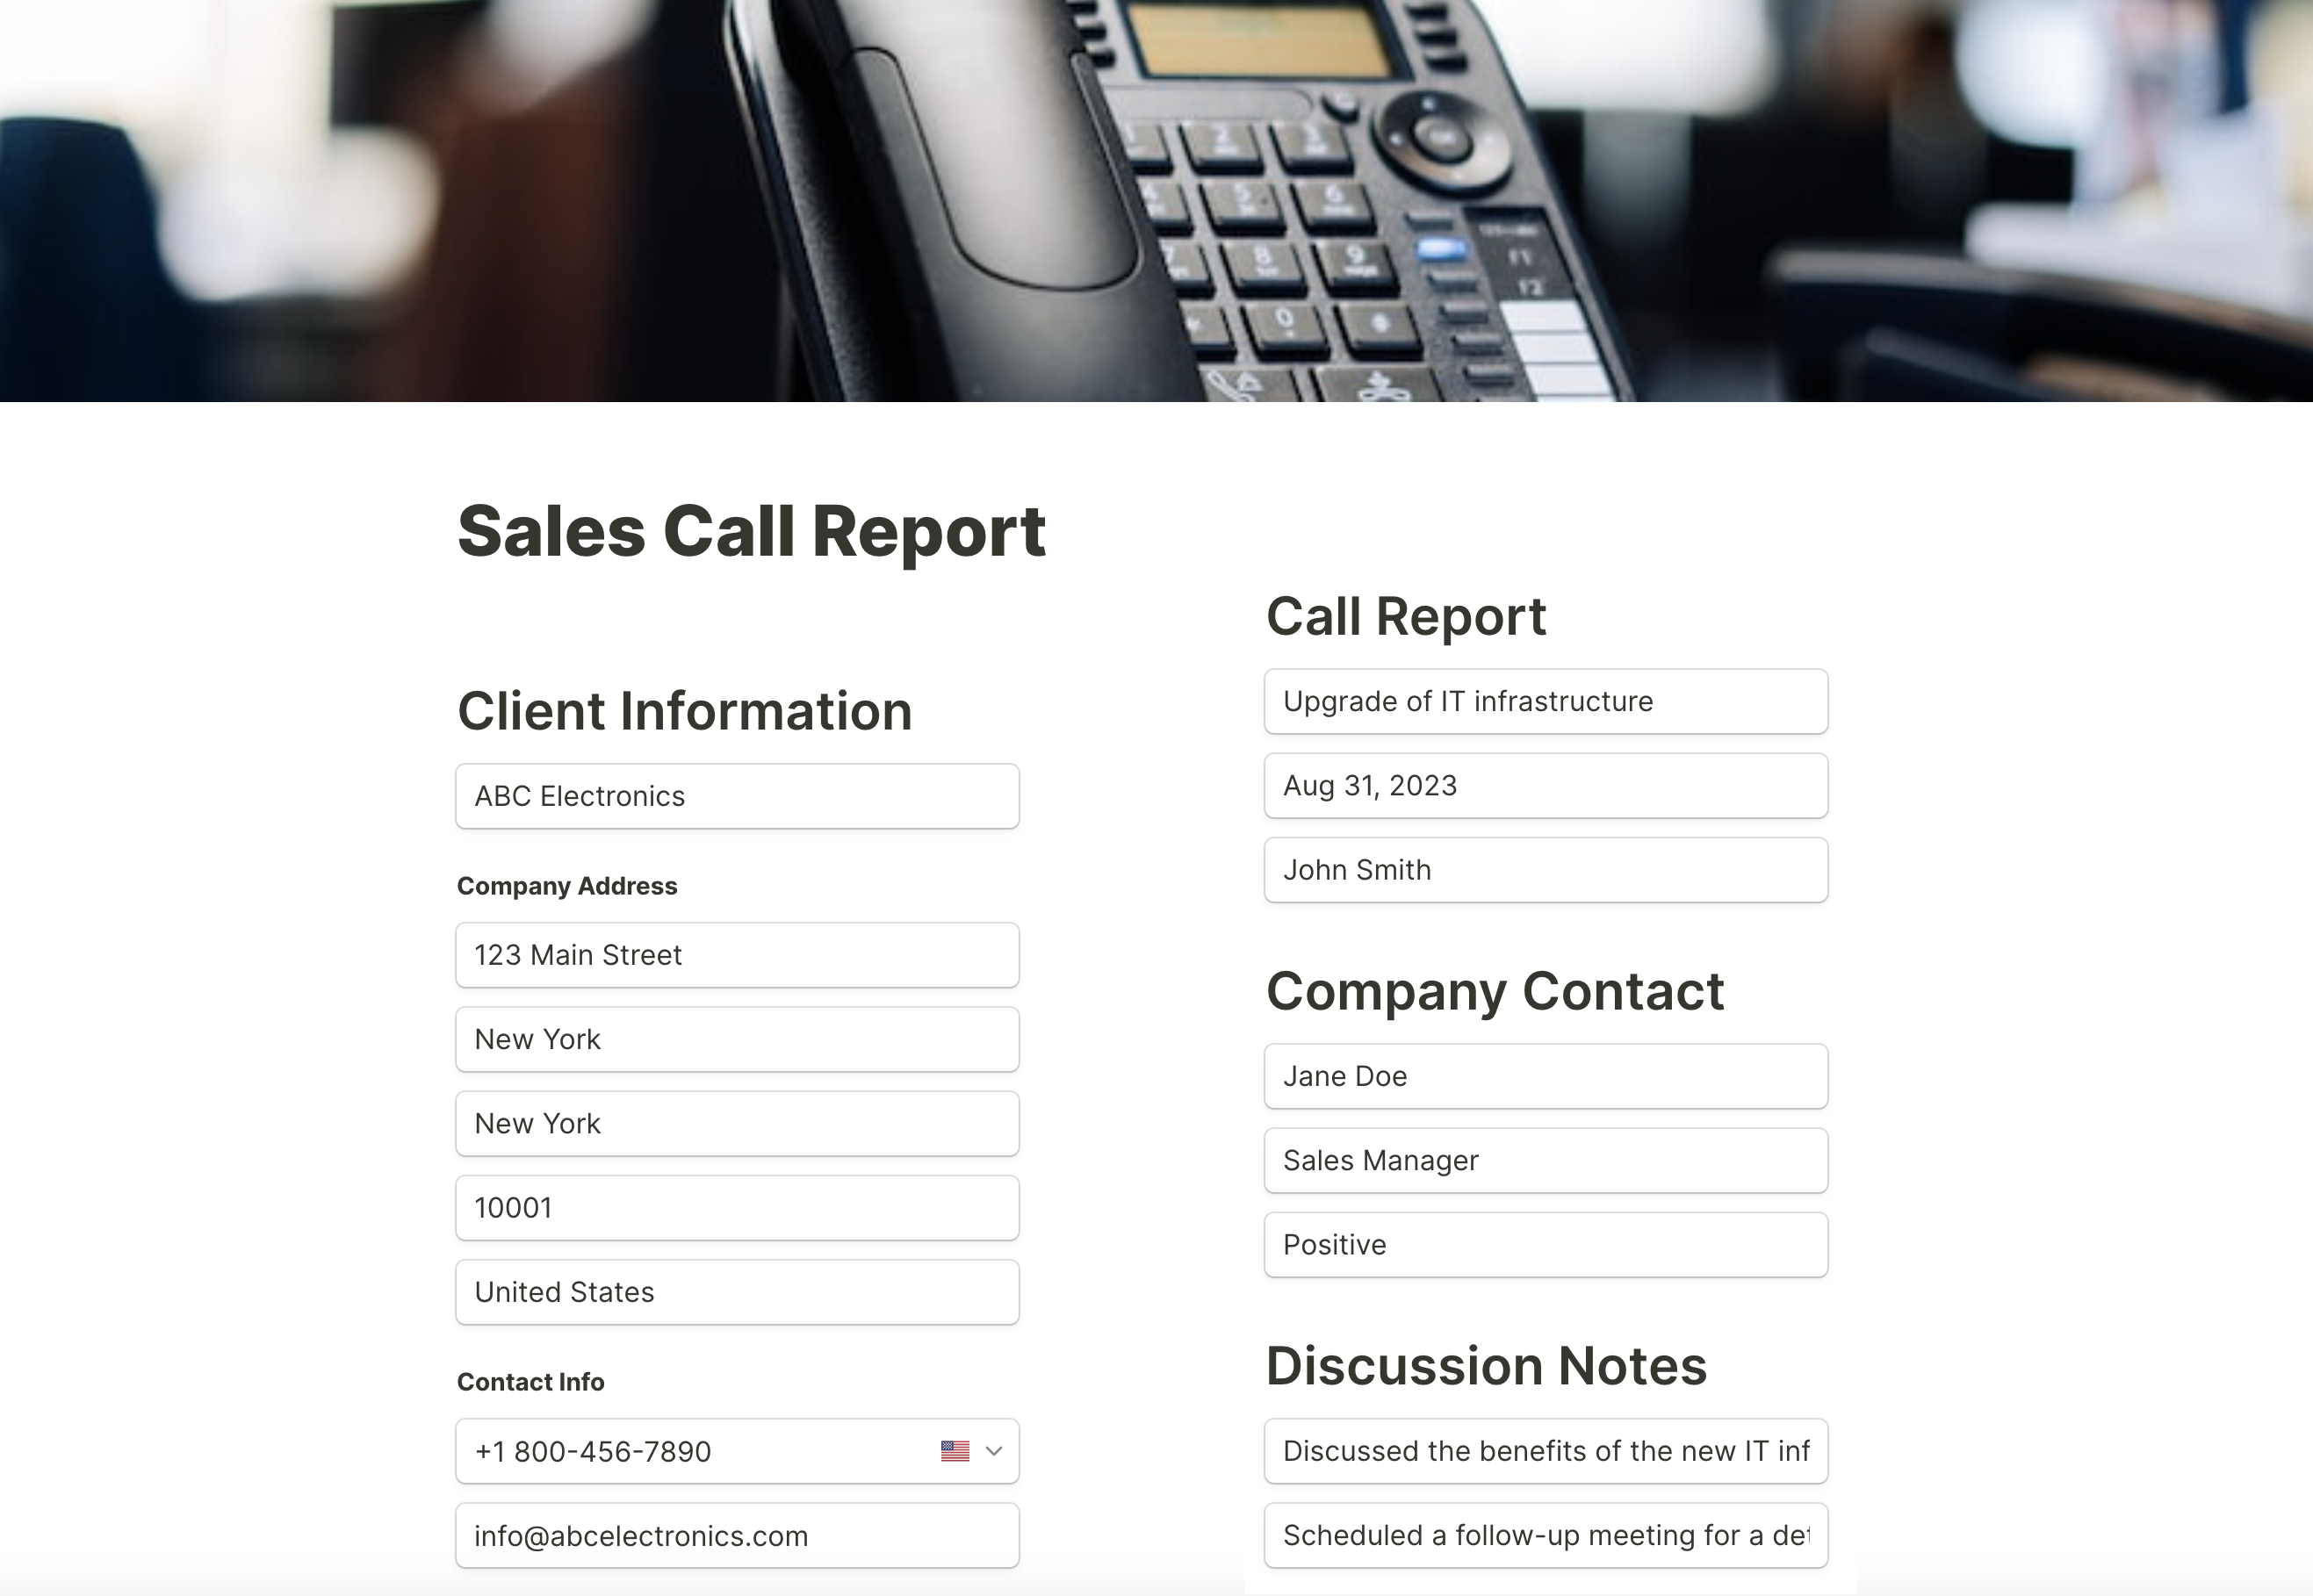
To test the workflow, fill out the Tally form with relevant information. The form has 2 pages that are displayed one after another, but the image below contains both pages together to see more easily the form values.
In the following video you can see how a new document appears automatically in DocuGenerate after the form is submitted. You can click on the View button to display the document and see that it contains the values entered in the form:
After submission, the integration between Tally, Make, and DocuGenerate seamlessly generates the Sales Call Report. This report contains the data you entered in the form, replacing the merge tags in the template, as you can see in the generated PDF.
Conclusion
In this article, we’ve explored a powerful workflow that harnesses the capabilities of Tally, Make, and DocuGenerate. By creating a streamlined process for generating reports based on form submissions, you can save time, reduce errors, and ensure consistent report quality.
The integration of these tools opens up new possibilities for automating various tasks and enhancing your organization’s efficiency. Whether you’re a sales team aiming to streamline your reporting or a business looking to automate repetitive processes, this workflow demonstrates the potential of no-code solutions in today’s technology-driven landscape.
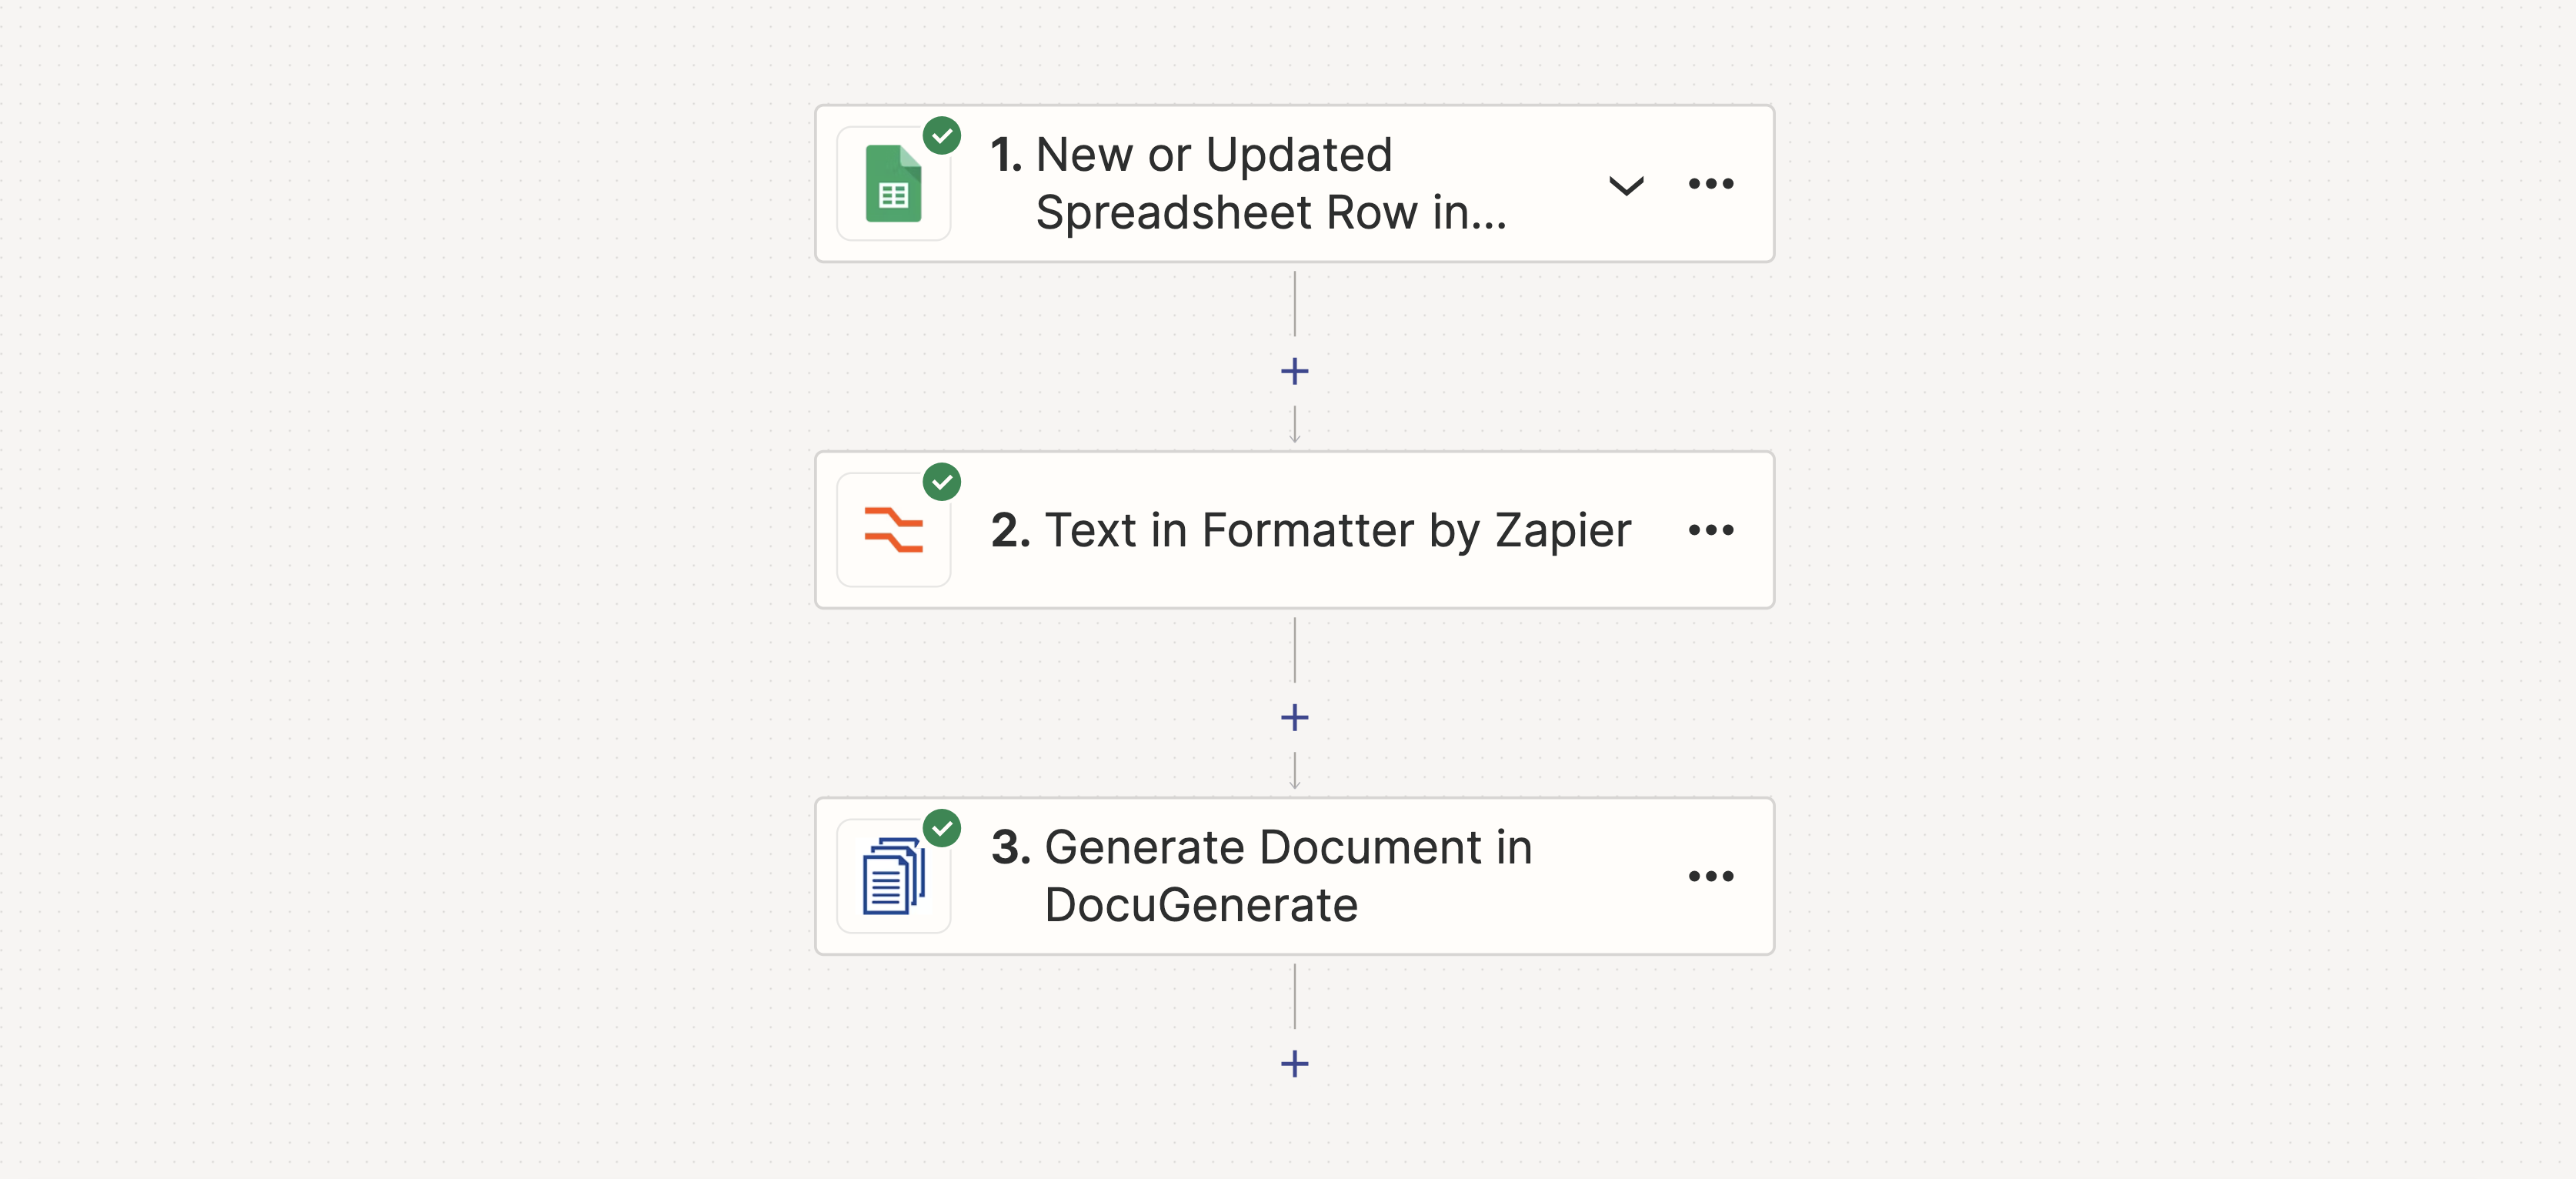
Learn how to automate contract generation using Zapier, Google Sheets, and DocuGenerate. This guide walks you through setting up a workflow to convert spreadsheet rows into formatted documents, with special attention to handling multi-line data values.
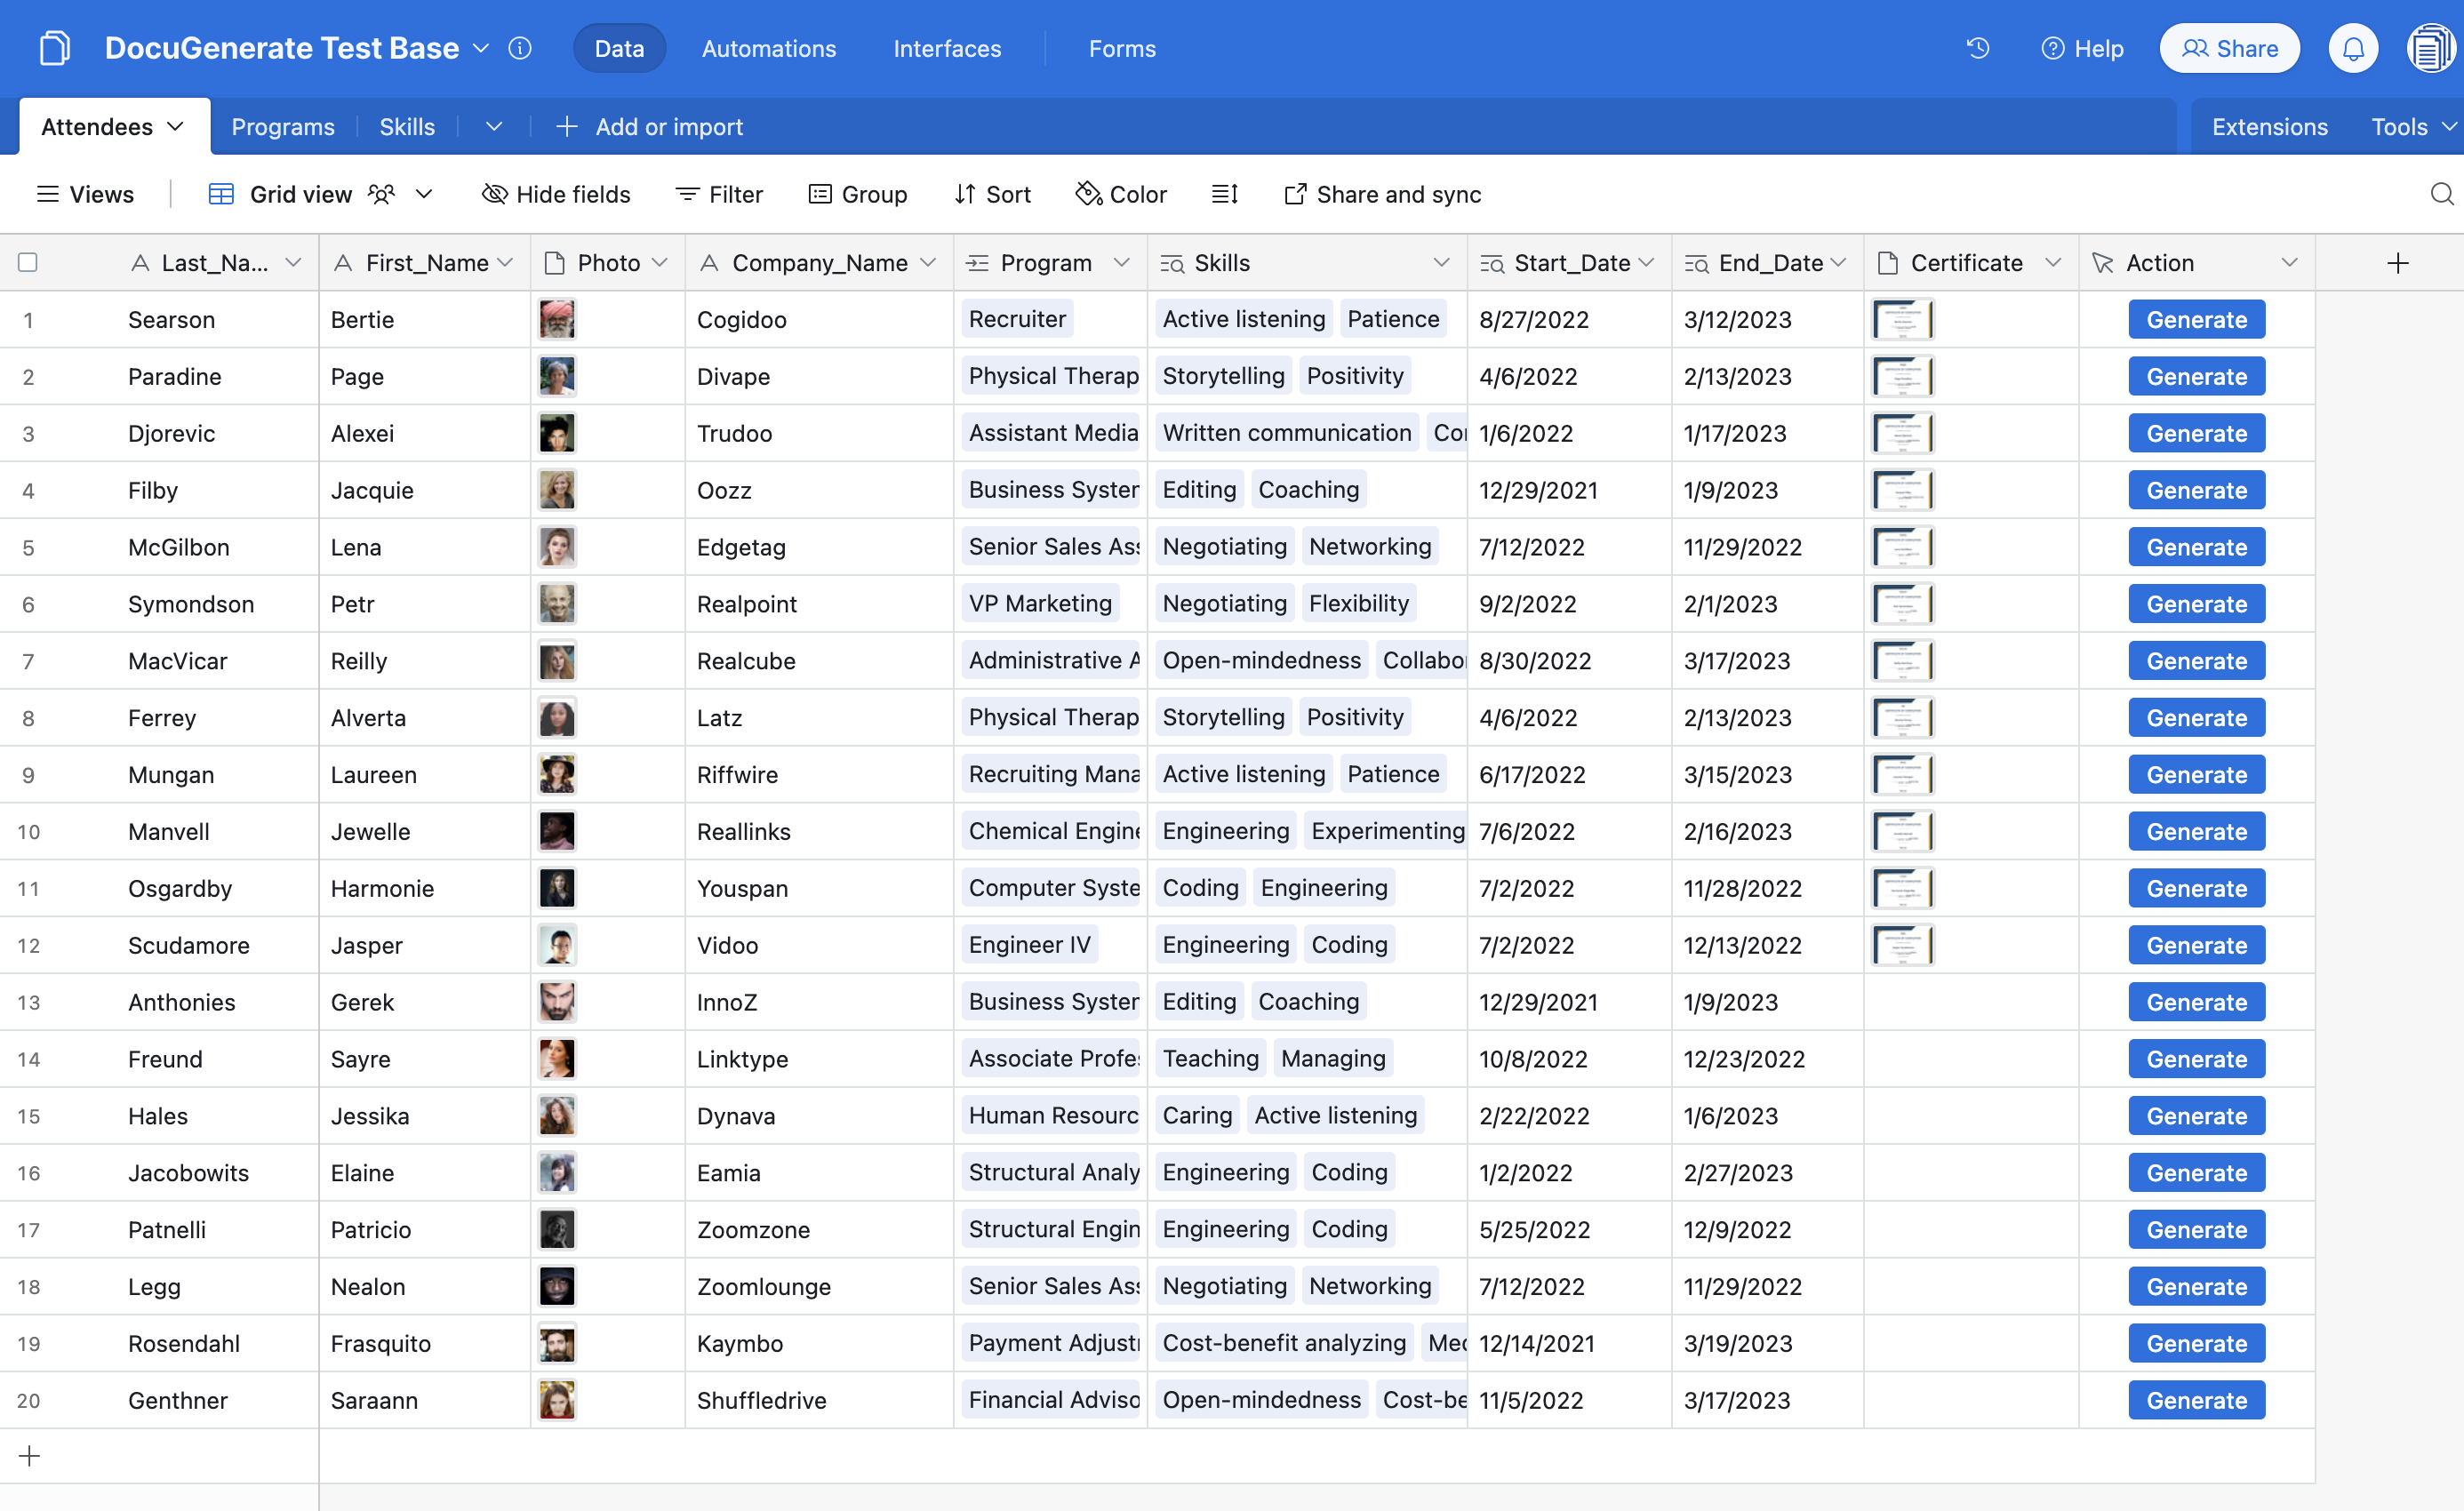
Learn how DocuGenerate can automate document generation based on the data stored in your tables, allowing you to focus on the most valuable steps of your process. Follow our tutorial and create a no-code document generation workflow in Airtable.
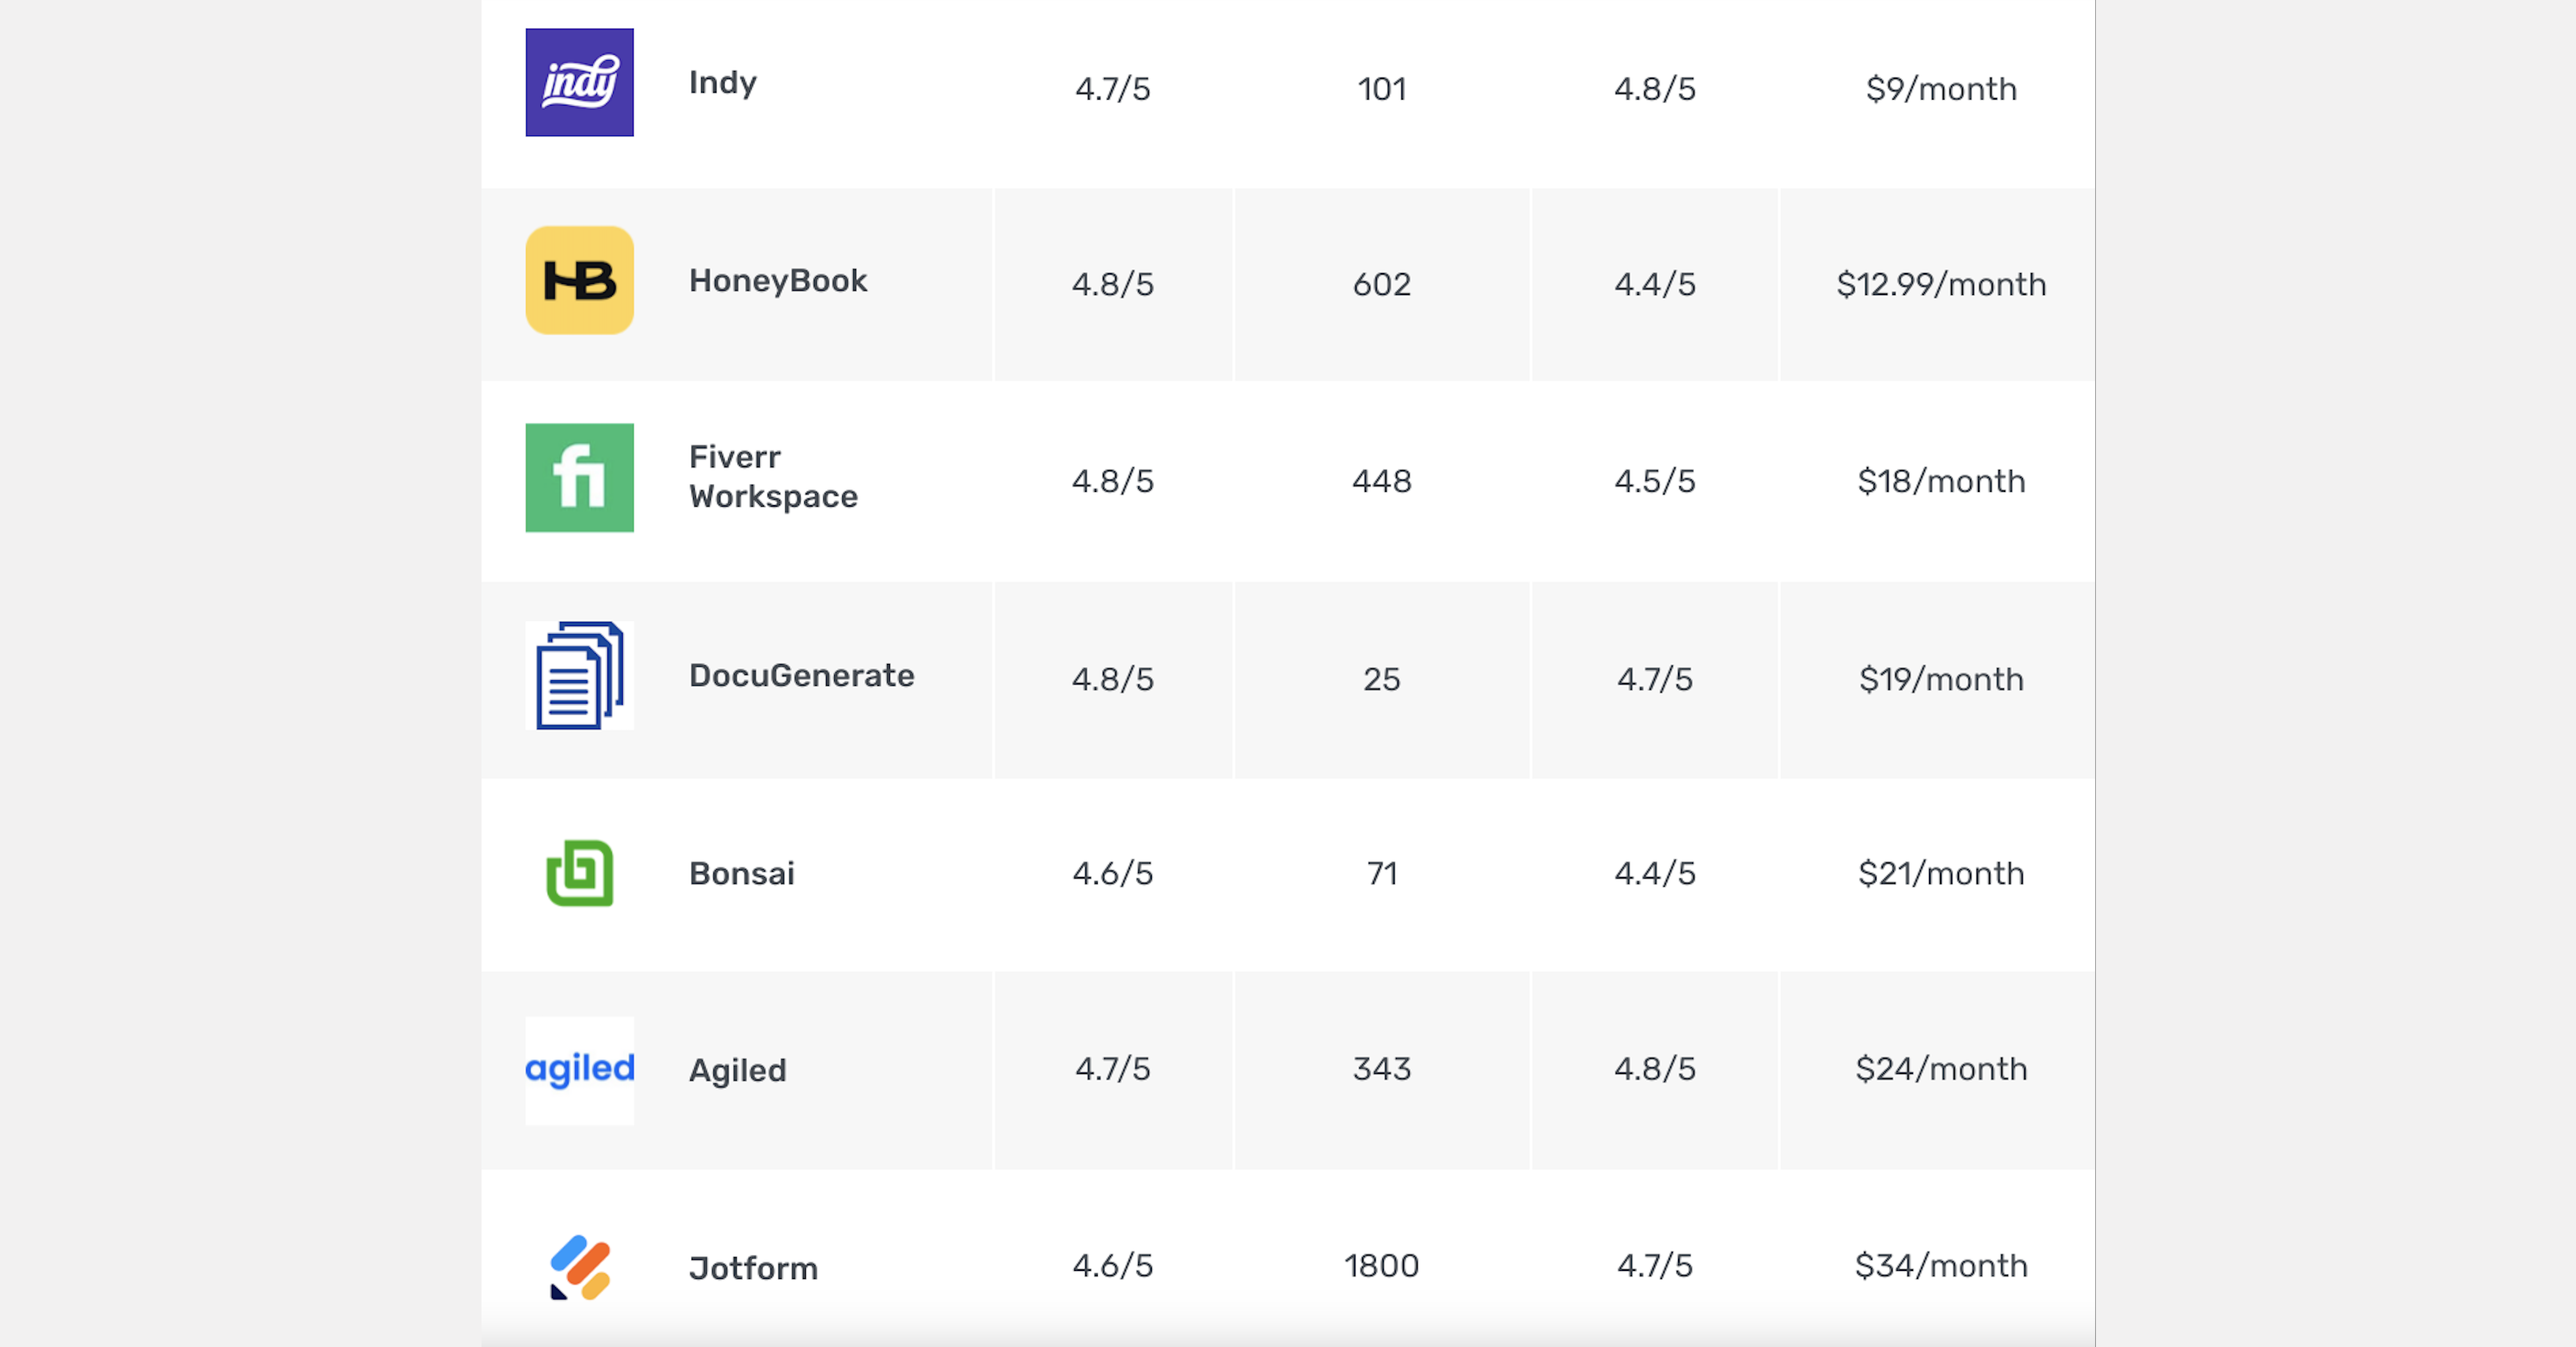
DocuGenerate has been recognized by GetApp as one of the top-rated affordable contract management software. Our rating of 4.8 out of 5 reflects the quality of our product, establishing DocuGenerate as a leader in automated document generation solutions.