Introduction
Building professional client onboarding systems can be complex, especially when you need to generate personalized documents and deliver them automatically via email. Traditional approaches often require extensive development work, custom integrations, and significant technical expertise. However, with modern no-code platforms like Bubble combined with specialized document generation services, you can create sophisticated workflows that handle everything from data collection to document delivery.
In this comprehensive tutorial, we’ll build a complete client onboarding system that collects client information through a web form, generates personalized Non-Disclosure Agreements (NDAs) using that data, and automatically sends the completed documents as email attachments. This approach demonstrates how to leverage Bubble’s visual development platform alongside DocuGenerate’s document generation API to create professional business workflows without writing code.
The system we’ll create showcases several powerful concepts: automated document generation based on form submissions, integration between no-code platforms and external APIs, and professional email delivery with file attachments. This workflow is particularly valuable for businesses that need to process client agreements, contracts, or other personalized documents at scale while maintaining a professional appearance and reliable delivery.
Leveraging Bubble’s AI Page Designer
To accelerate our development process, we’ll use Bubble’s innovative AI page designer feature, which can generate complete application interfaces based on natural language descriptions. This feature, publicly released as a beta in mid-June 2024 and officially announced at the Zero to One With AI + No-Code event, represents a significant advancement in no-code application development.
The AI page designer allows us to describe our requirements in plain English and receive a fully functional application structure, complete with forms, workflows, and data types. This approach significantly reduces development time while ensuring that the generated application follows Bubble’s best practices and design patterns.
For our NDA signing system, we’ll provide the following detailed prompt to the AI designer:
“Help me create a web page that will allow my clients to sign NDAs. The web page needs to be modern and contain a form with the following fields: Name, Address, Email and Country. The form data will be used to generate the NDA using DocuGenerate and send it by email to the client.”
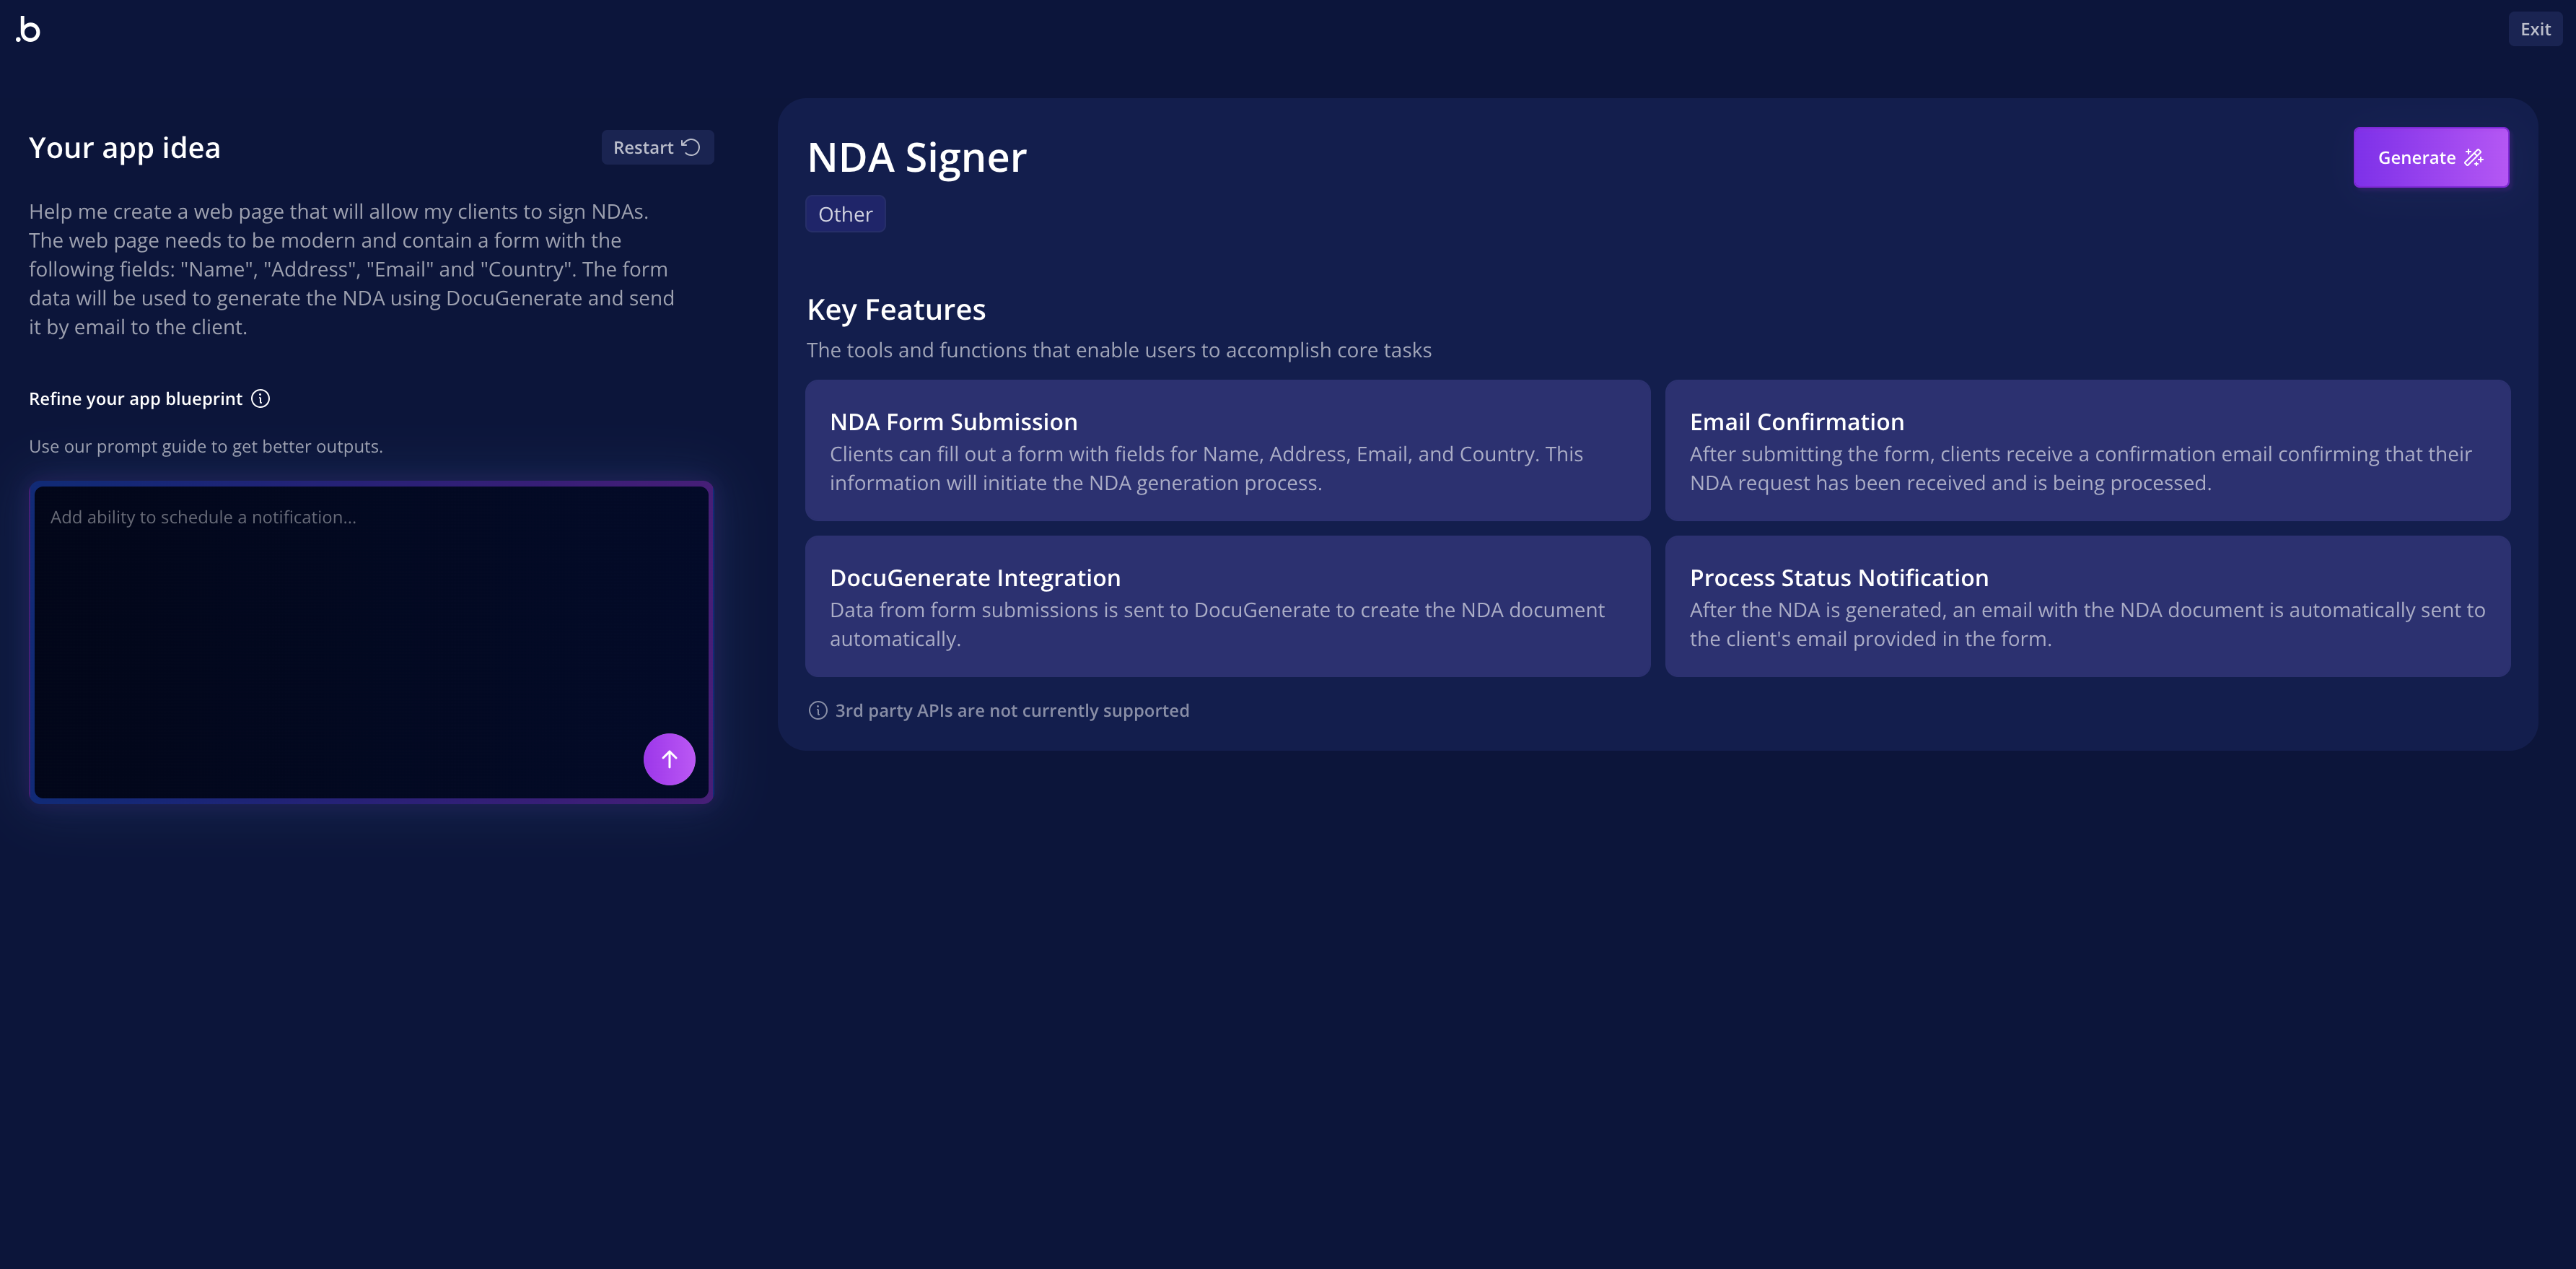
This prompt provides the AI with enough context to understand both the functional requirements (form fields, data processing) and the intended workflow (document generation and email delivery). The AI will use this information to create appropriate data structures, user interface elements, and initial workflow configurations.
The generation process typically takes several minutes, during which Bubble’s AI analyzes the requirements, creates the necessary components, and assembles them into a cohesive application. It’s important to keep the browser tab open during this process, as closing it can interrupt the generation.
Understanding the Generated Application Structure
Once the AI completes the generation process, you’ll have a fully functional application with multiple pages, data structures, and initial workflows. The generated application demonstrates Bubble’s systematic approach to application architecture, with clear separation between different functional areas and logical data organization. The AI-generated application includes two primary pages that work together to create a complete user experience.
Index Page
This serves as the main entry point where clients interact with your system. The page features a clean, modern design with a comprehensive form that collects all necessary information for NDA generation. The form includes fields for Full Name, Address, Email Address, and Country, along with a prominent Submit NDA Request button that initiates the document generation and email delivery workflow.
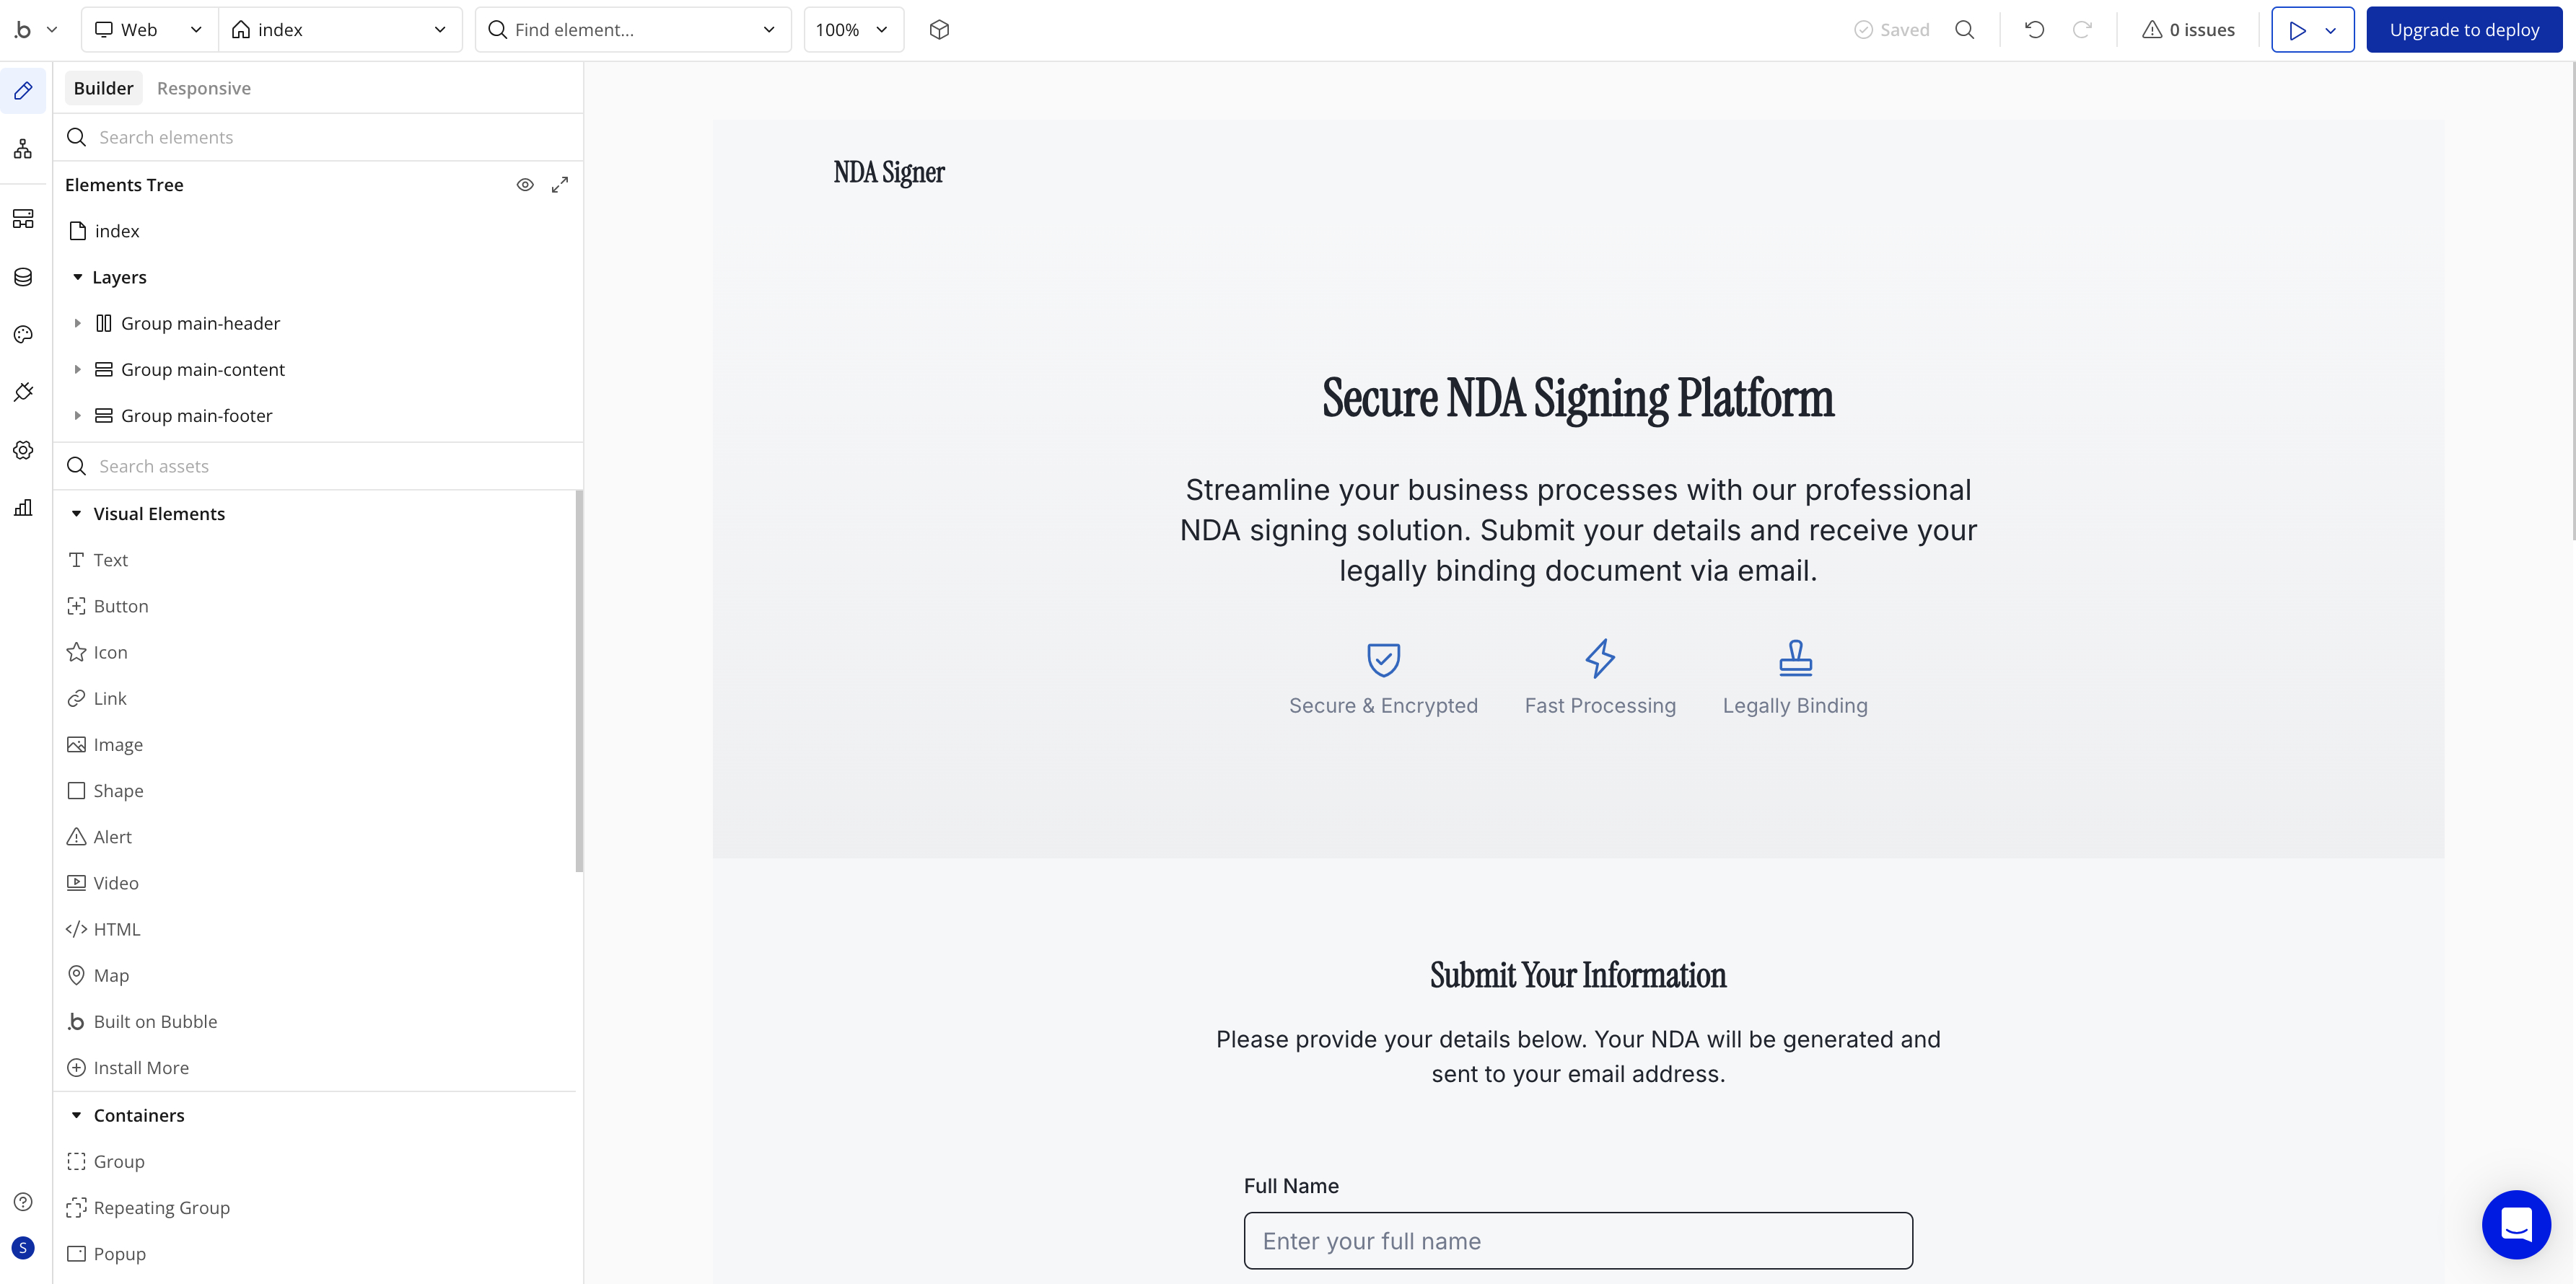
The index page design prioritizes user experience with clear labeling, appropriate form validation, and visual feedback. The layout is responsive and professional, ensuring that clients can easily complete the form regardless of their device or technical expertise.
Confirmation Page
After form submission, users are automatically redirected to this page, which provides immediate feedback about their request status. The confirmation page displays the submitted information and shows the current processing status, creating transparency and building user confidence in the system.
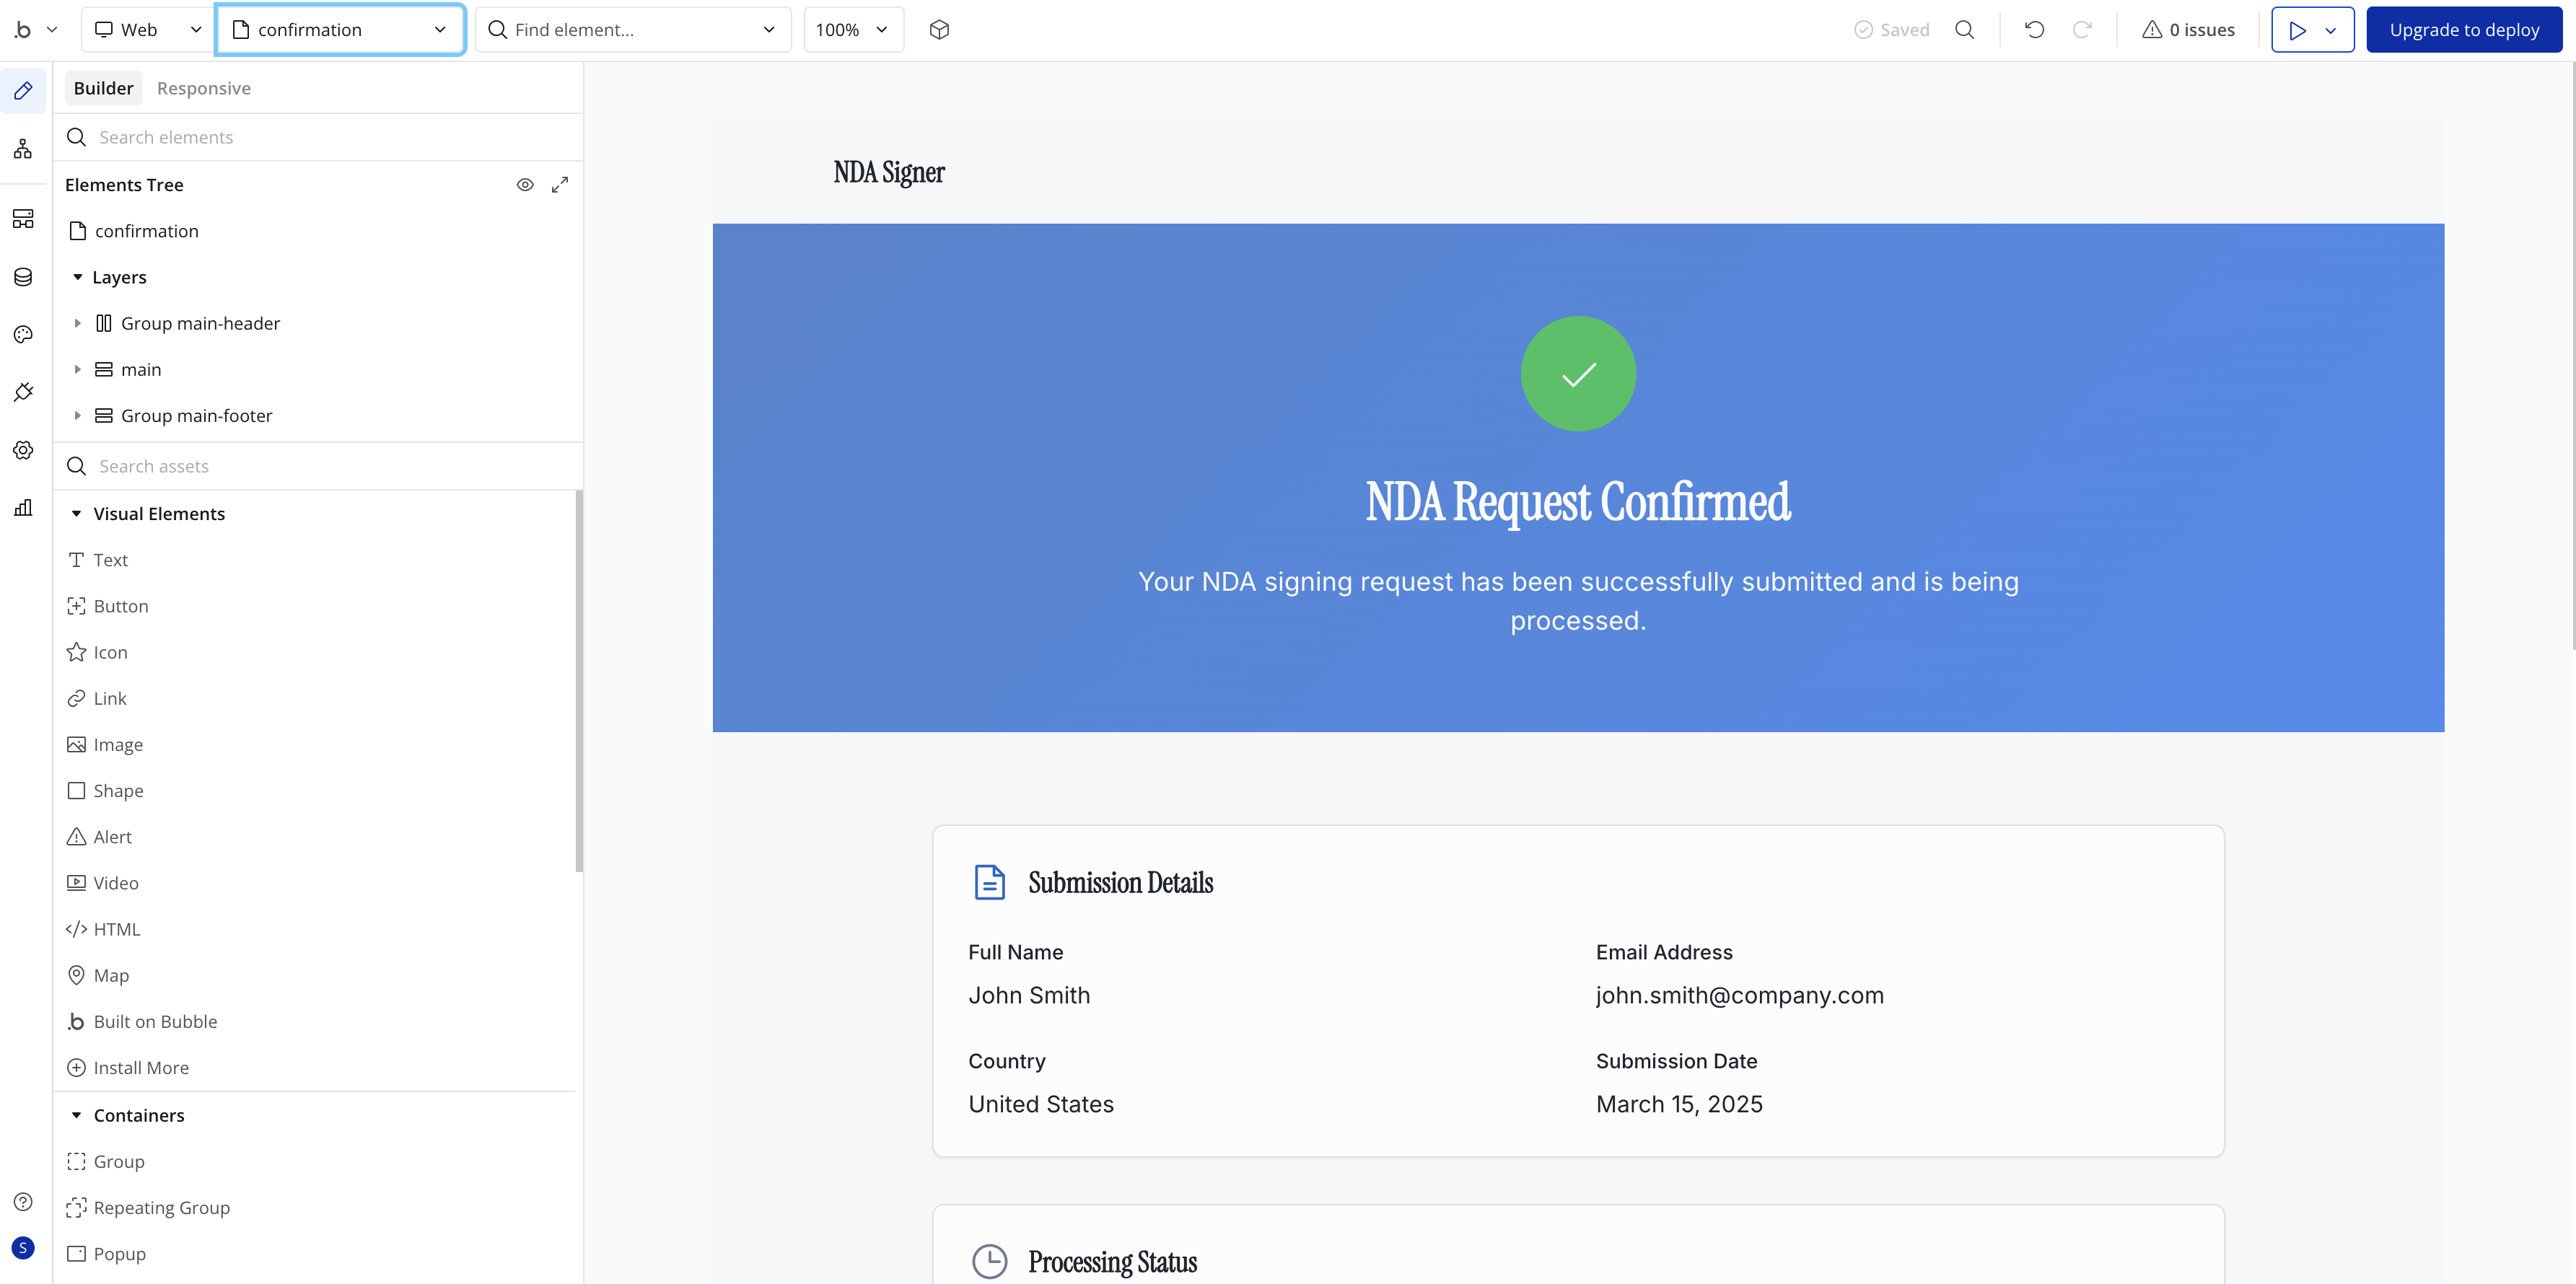
This two-page structure follows established patterns for form-based applications, providing users with clear feedback and maintaining engagement throughout the process.
Data Type Architecture
The AI designer automatically creates the NdaSubmission data type, which serves as the foundation for storing and managing client information throughout the workflow. This data structure is designed to accommodate both the initial form submission and the various status tracking fields needed for document generation and email delivery.
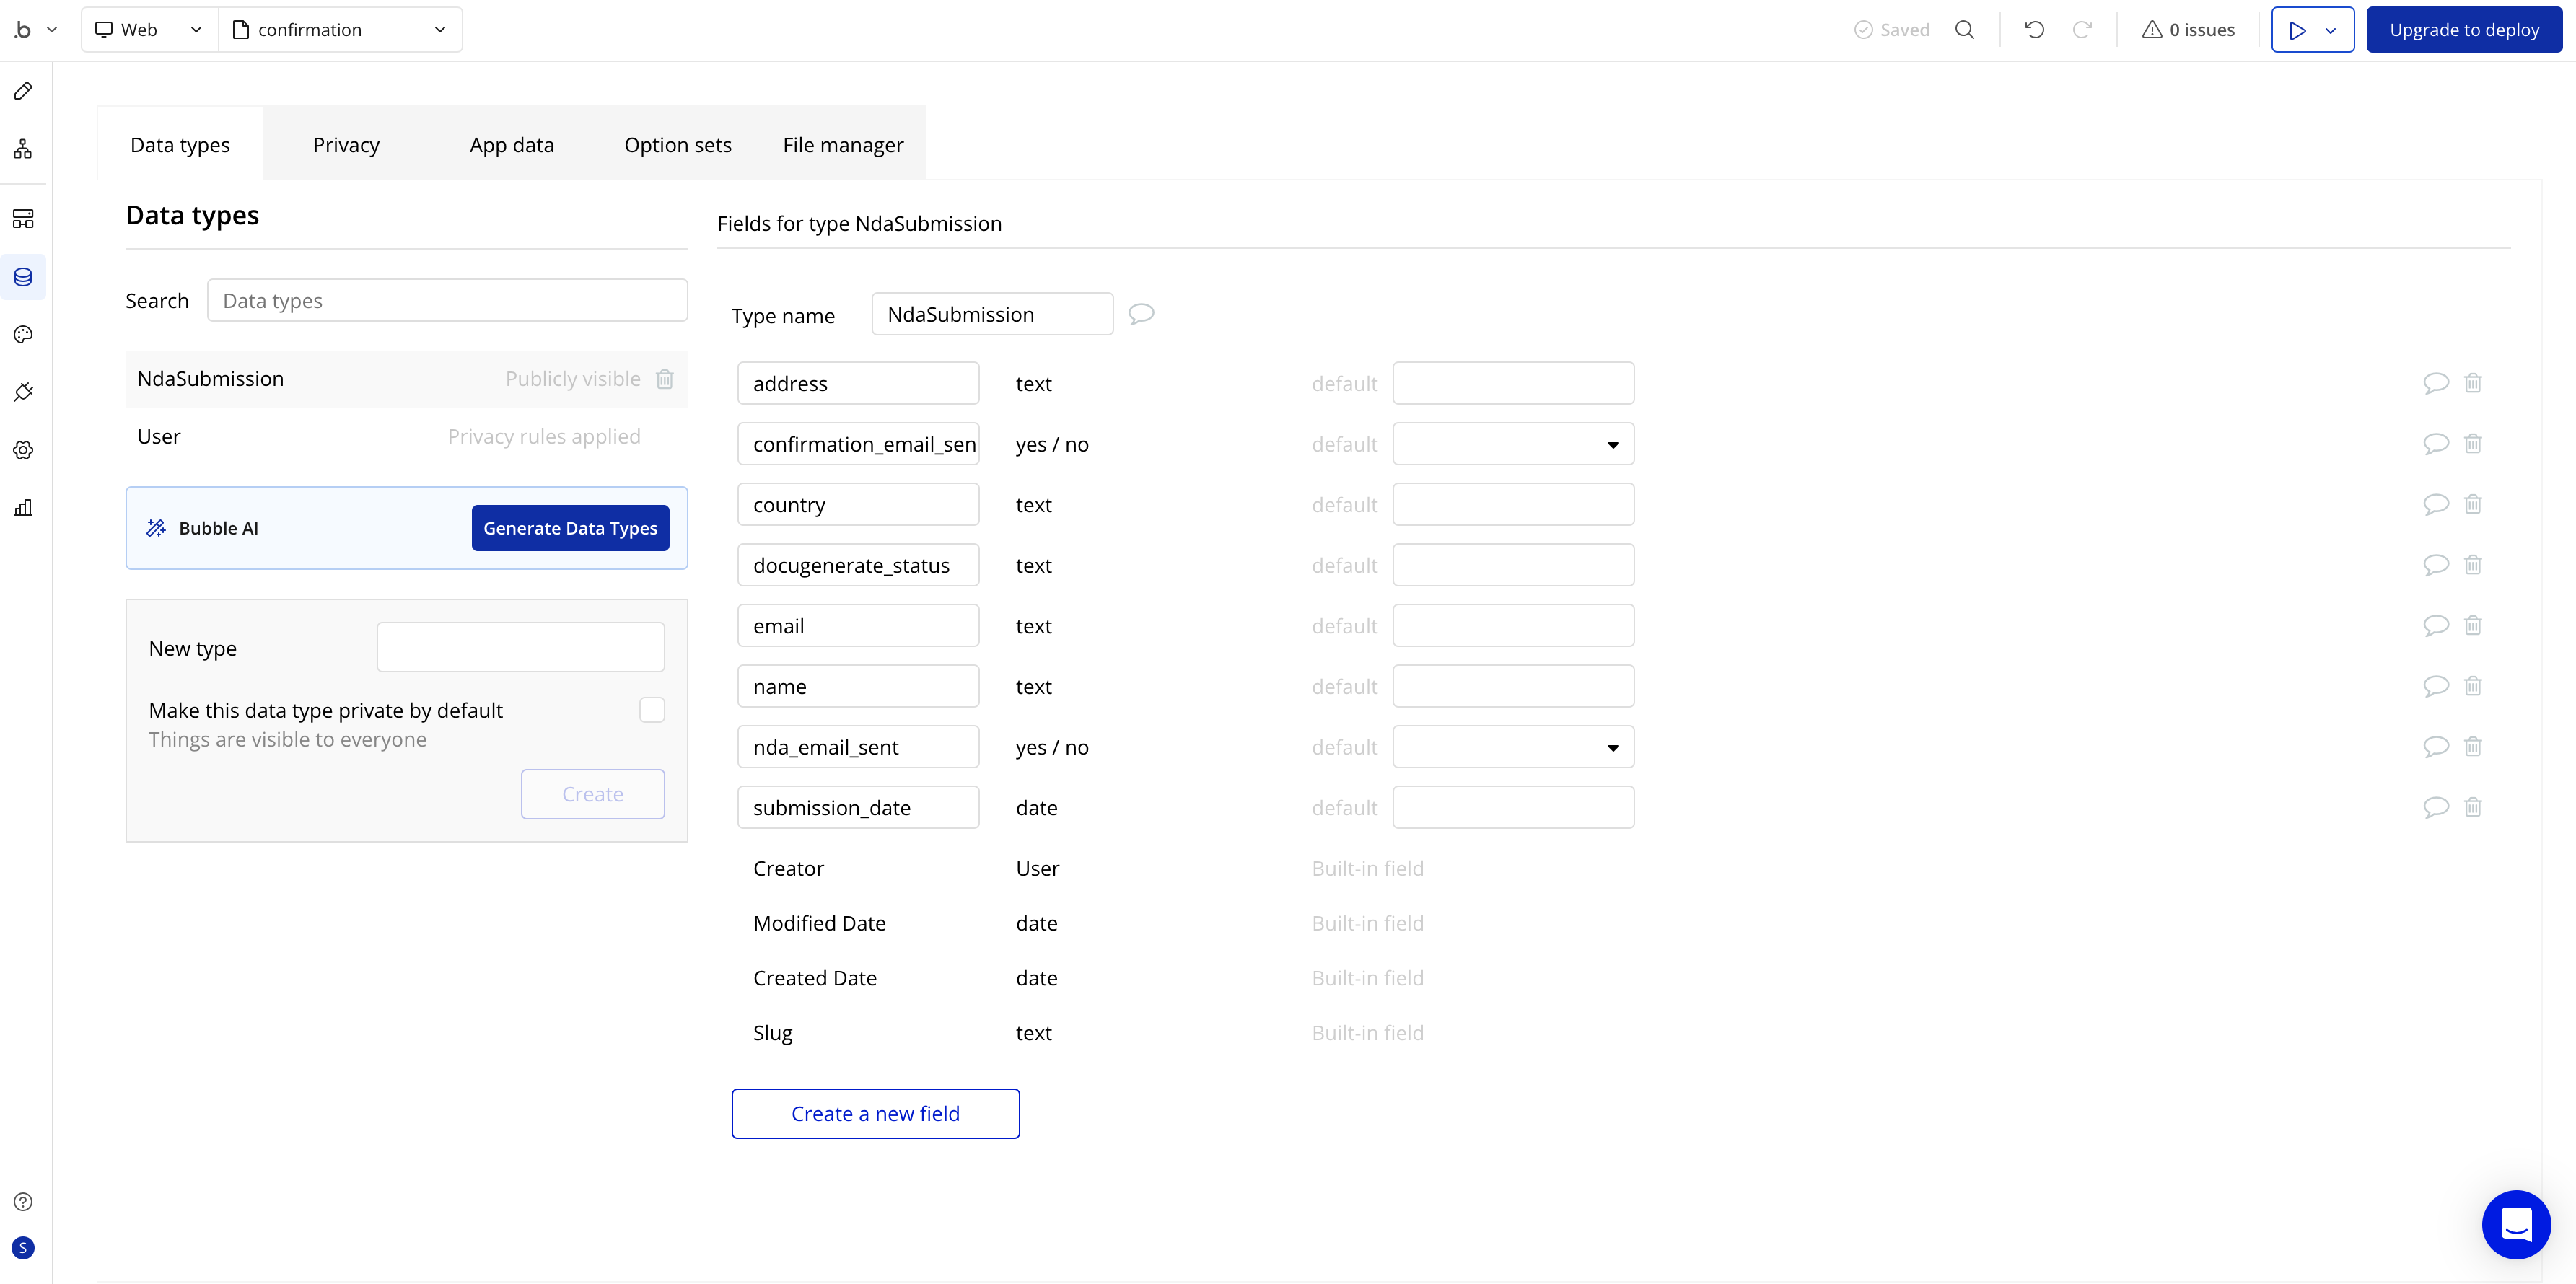
The NdaSubmission data type includes the following fields:
address (text): Stores the client’s full address informationconfirmation_email_sent (yes/no): Tracks whether the initial confirmation email has been sentcountry (text): Records the client’s country informationdocugenerate_status (text): Monitors the document generation process statusemail (text): Contains the client’s email address for document deliveryname (text): Stores the client’s full namenda_email_sent (yes/no): Indicates whether the NDA has been successfully deliveredsubmission_date (date): Records when the form was initially submitted
This comprehensive data structure supports both the immediate workflow requirements and future enhancements, such as reporting, analytics, and advanced status tracking.
Sample Data Population
The generated application includes a thoughtful sample dataset that populates the NdaSubmission table with realistic entries. This sample data serves multiple purposes: it demonstrates the expected data format, provides immediate content for testing workflows, and offers examples of how the system handles various client scenarios.
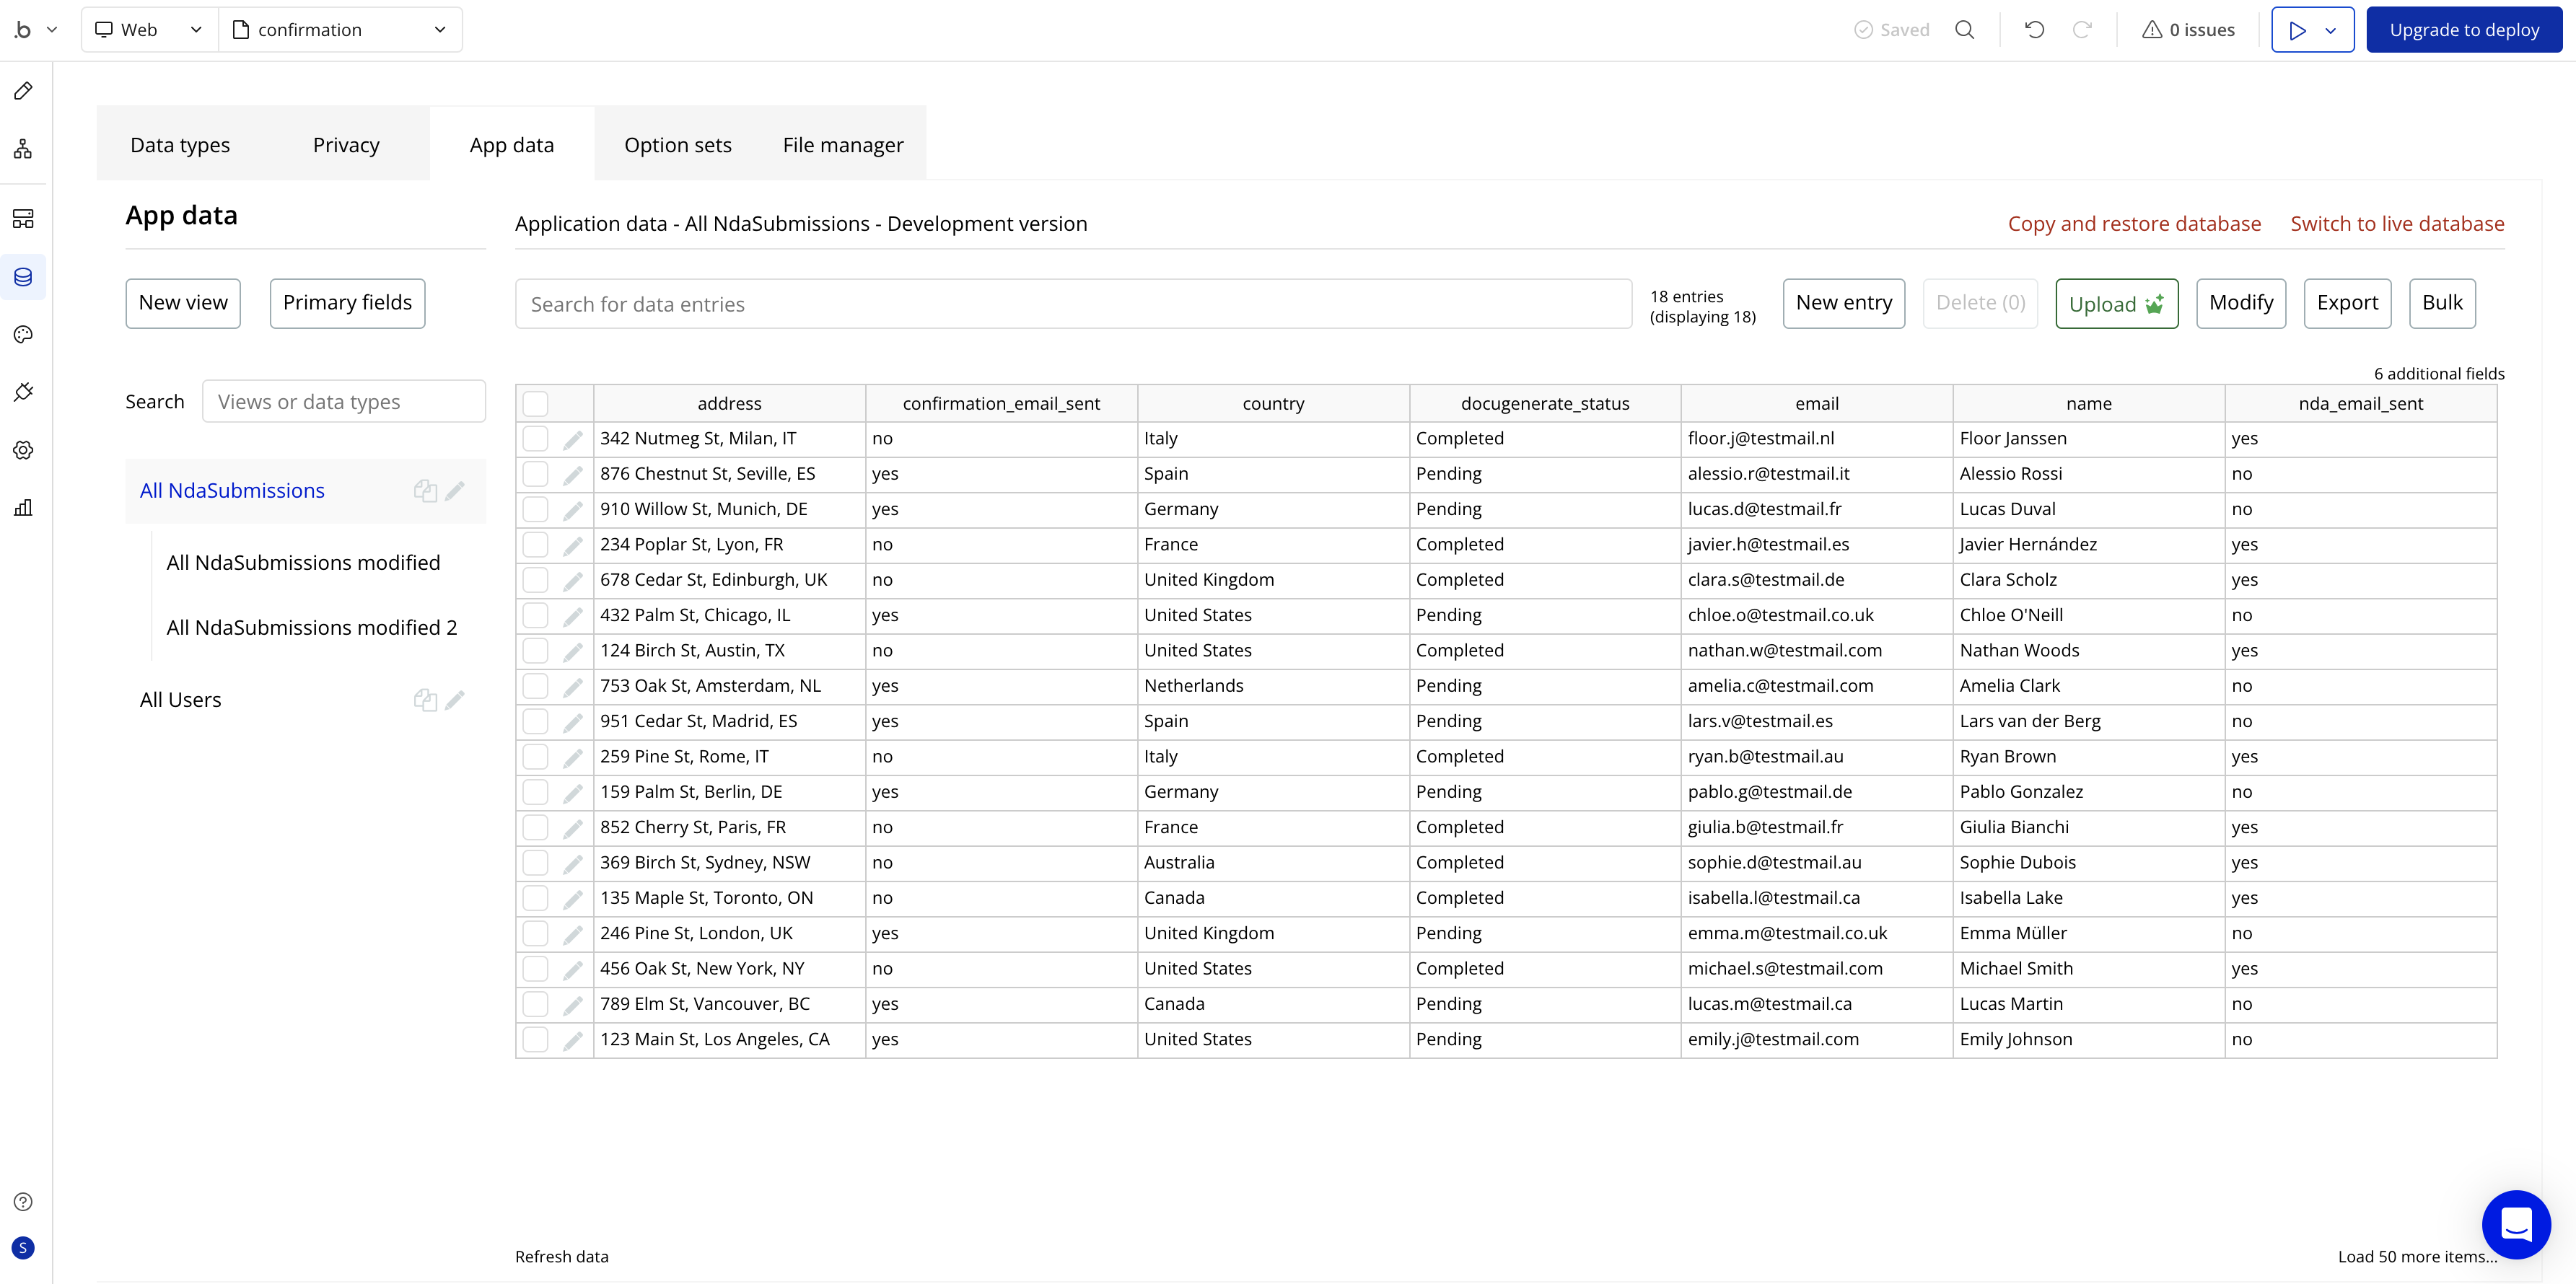
Having sample data immediately available allows you to test the complete workflow without needing to manually create test entries. This approach accelerates development and ensures that you can verify all system components work correctly before deploying to production.
Installing and Configuring the DocuGenerate Plugin
To enable document generation capabilities in our Bubble application, we need to install and configure the DocuGenerate plugin from Bubble’s marketplace. This plugin provides direct access to DocuGenerate’s API functionality through Bubble’s visual workflow system, eliminating the need for custom API integration.
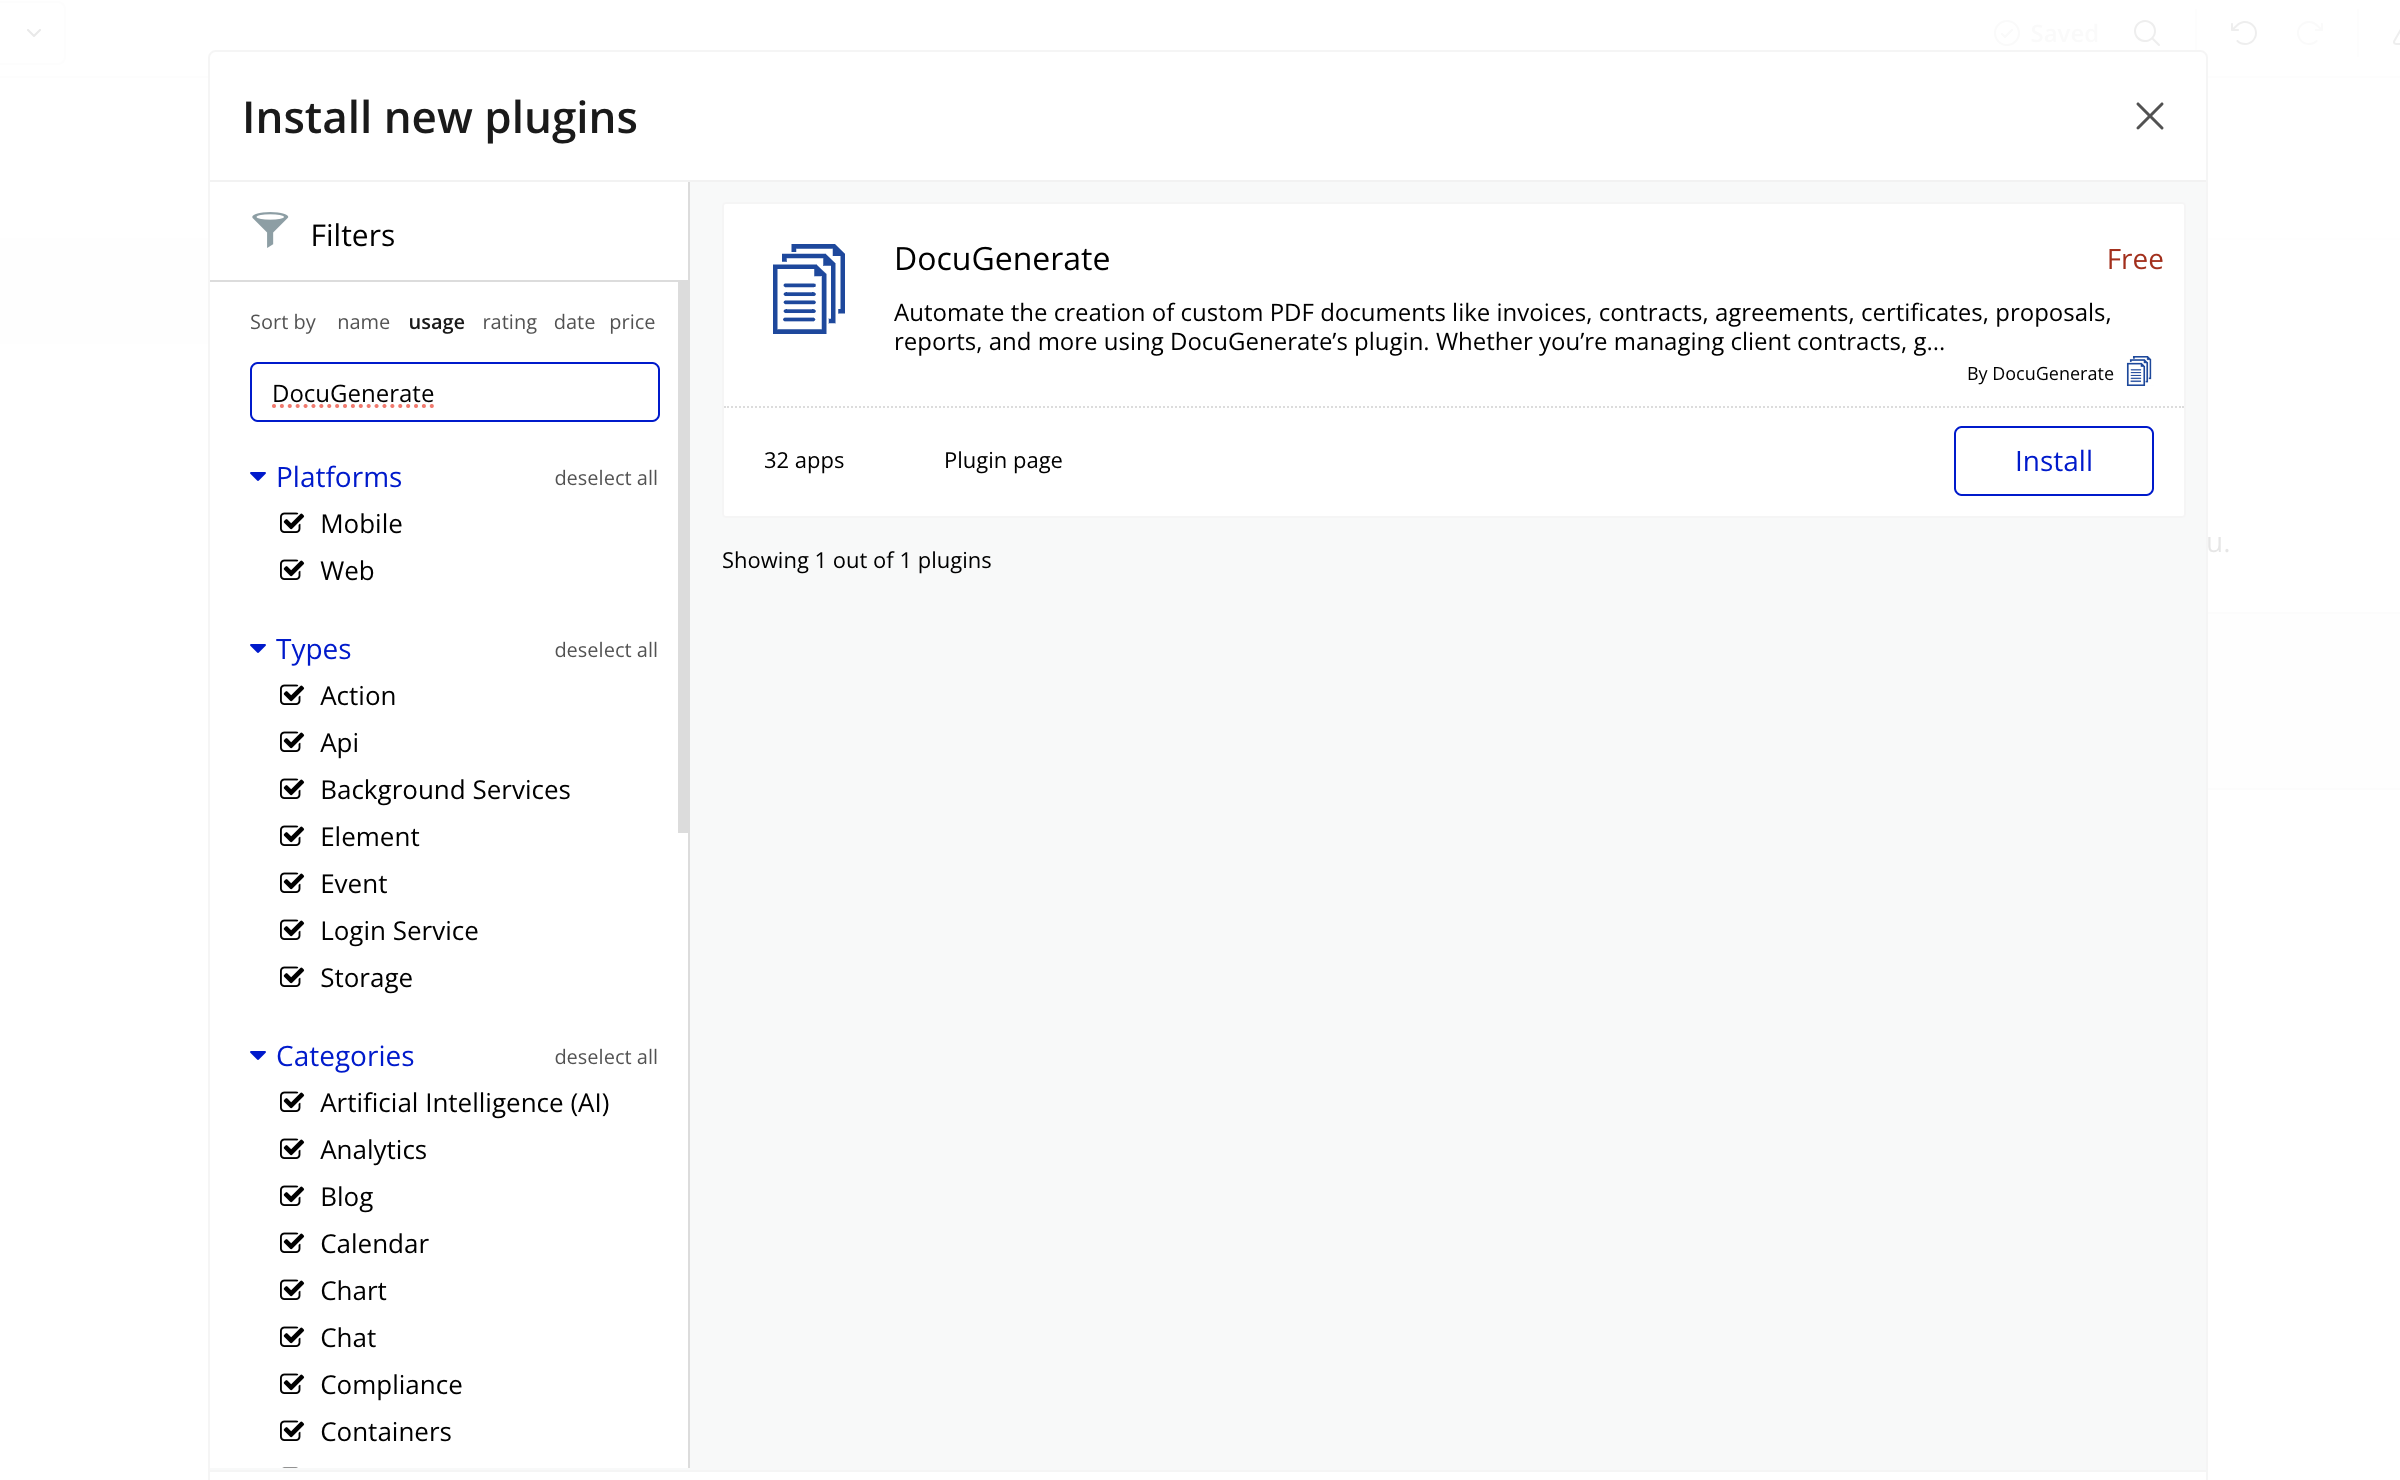
The plugin installation process is straightforward and follows Bubble’s standard plugin management procedures. Navigate to the Plugins section in your Bubble editor and search for “DocuGenerate” in the marketplace then click on Install:
After installing the plugin, you’ll need to configure it with your DocuGenerate API credentials. This configuration establishes the connection between your Bubble application and your DocuGenerate account, enabling secure communication for document generation requests.
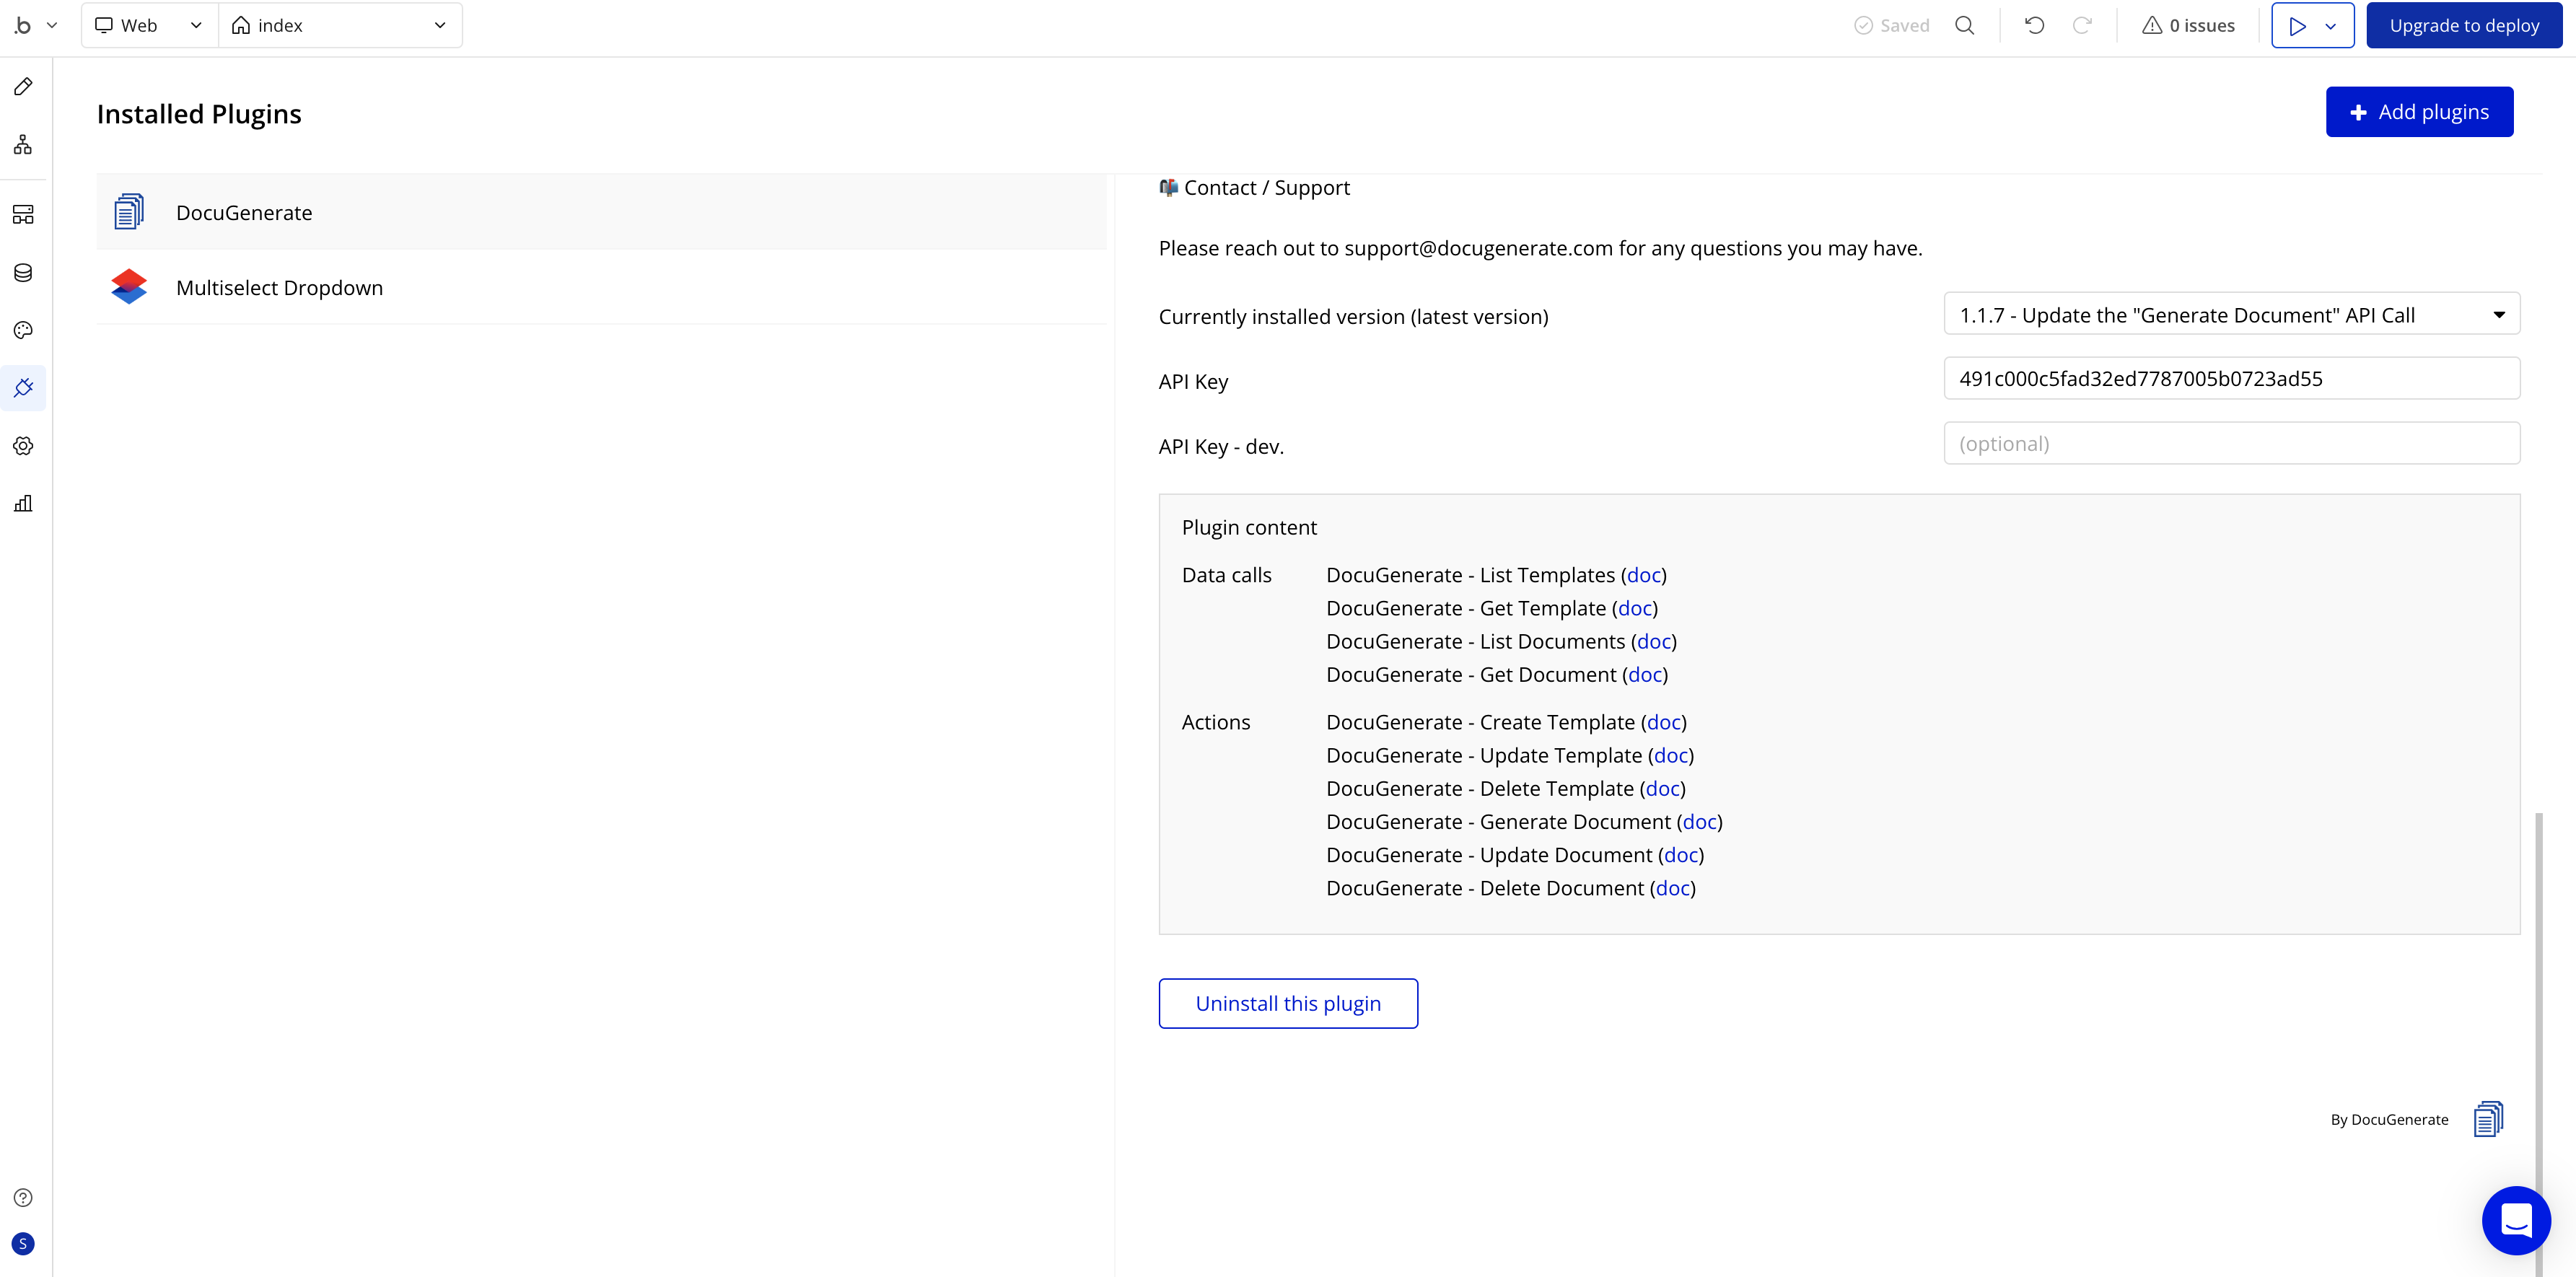
The configuration requires your DocuGenerate API Key, which you can find in your DocuGenerate account settings. This API key authenticates your requests and ensures that generated documents are properly associated with your account and usage limits.
Once configured, the plugin provides access to all DocuGenerate functionality through Bubble’s action system, including document generation, template management, and status monitoring. The plugin handles authentication automatically, request formatting, and response processing, allowing you to focus on building your application logic rather than managing API integration details.
Creating the NDA Template
Before we can generate personalized NDAs, we need to create a template that defines the document structure and identifies where client-specific information should be inserted. For this tutorial, we’ll use the Non Disclosure Agreement template from DocuGenerate’s template library, which provides a professionally formatted legal document with appropriate merge tags.
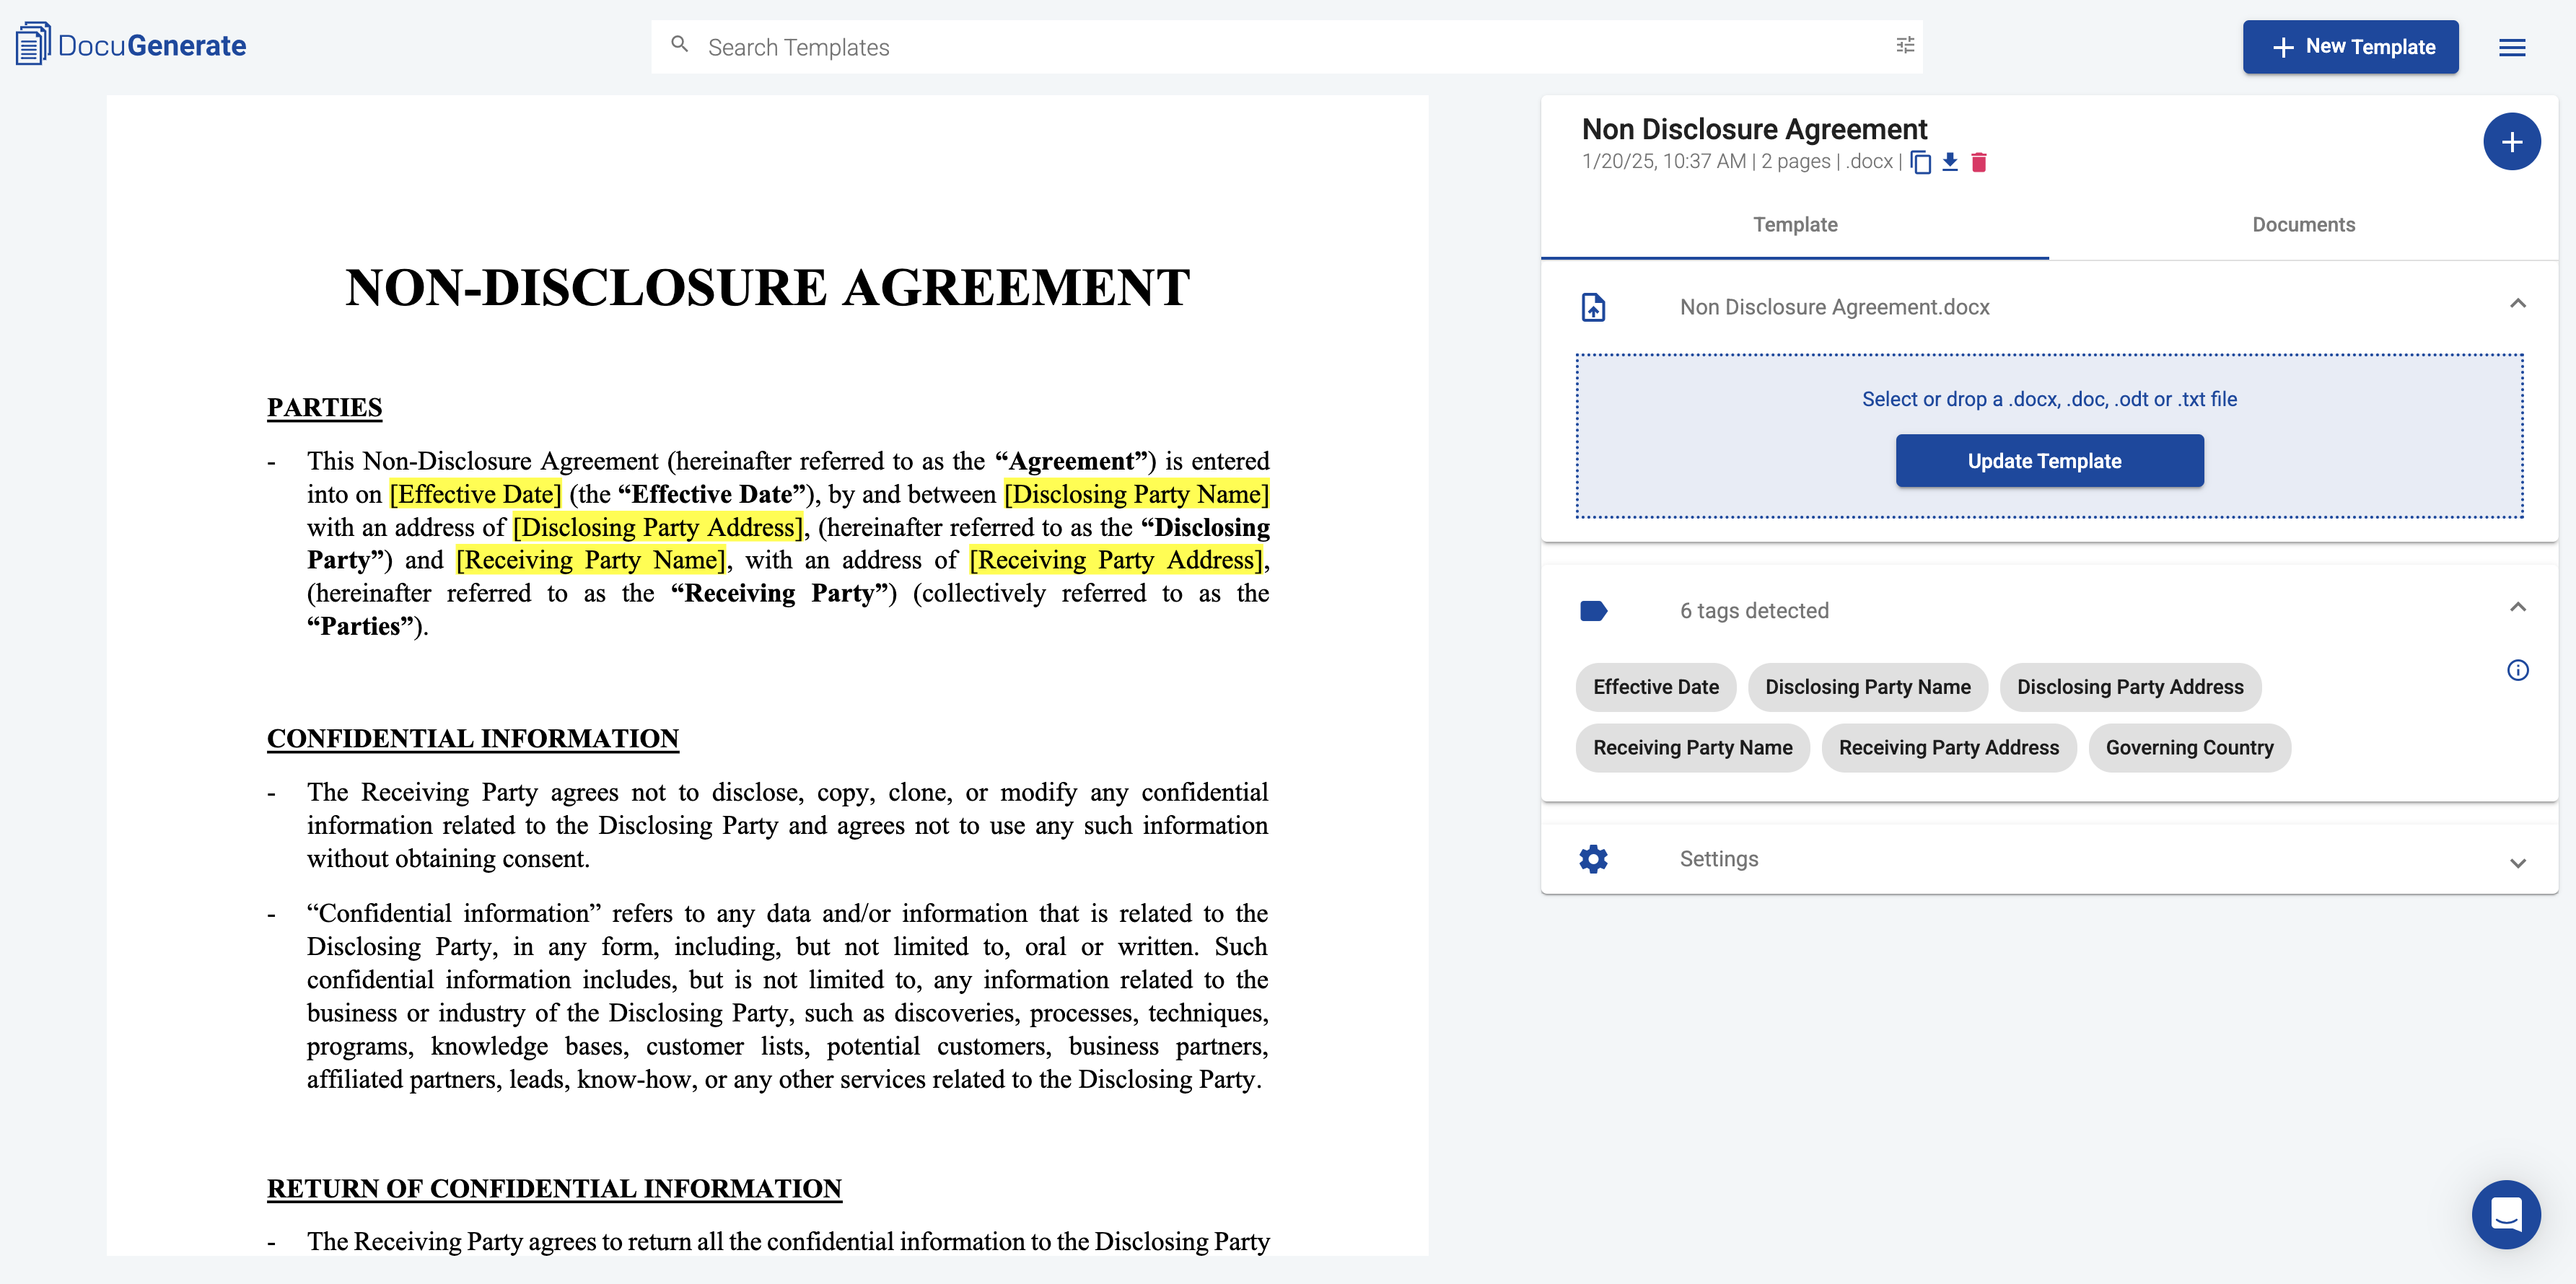
The template includes several key sections that make it suitable for our automated workflow:
-
Party Information: The template includes dedicated sections for both the disclosing party (your company) and the receiving party (the client), with merge tags that will be populated with information from our Bubble form.
-
Legal Framework: All necessary legal language is pre-written and formatted appropriately, ensuring that the generated documents maintain professional legal standards without requiring legal expertise to create.
-
Merge Tag Integration: Strategic placement of merge tags throughout the document allows for dynamic content insertion while maintaining proper formatting and legal structure.
The template uses DocuGenerate’s merge tag syntax to identify where dynamic content should be inserted. These tags correspond to the data we’ll collect in our Bubble form and send through the DocuGenerate API during the generation process.
Building the Document Generation Workflow
The AI-generated application provides a foundation workflow that we need to enhance with document generation and email delivery capabilities. The initial workflow includes basic form processing and page navigation, but we’ll extend it to include the complete document automation process.
Initial Workflow Analysis
The existing workflow on the index page includes three primary steps that handle the basic form submission process:
- Event Trigger: Activates when the Submit NDA Request button is clicked
- Data Creation: Creates a new
NdaSubmission record with form data - Navigation: Redirects the user to the confirmation page
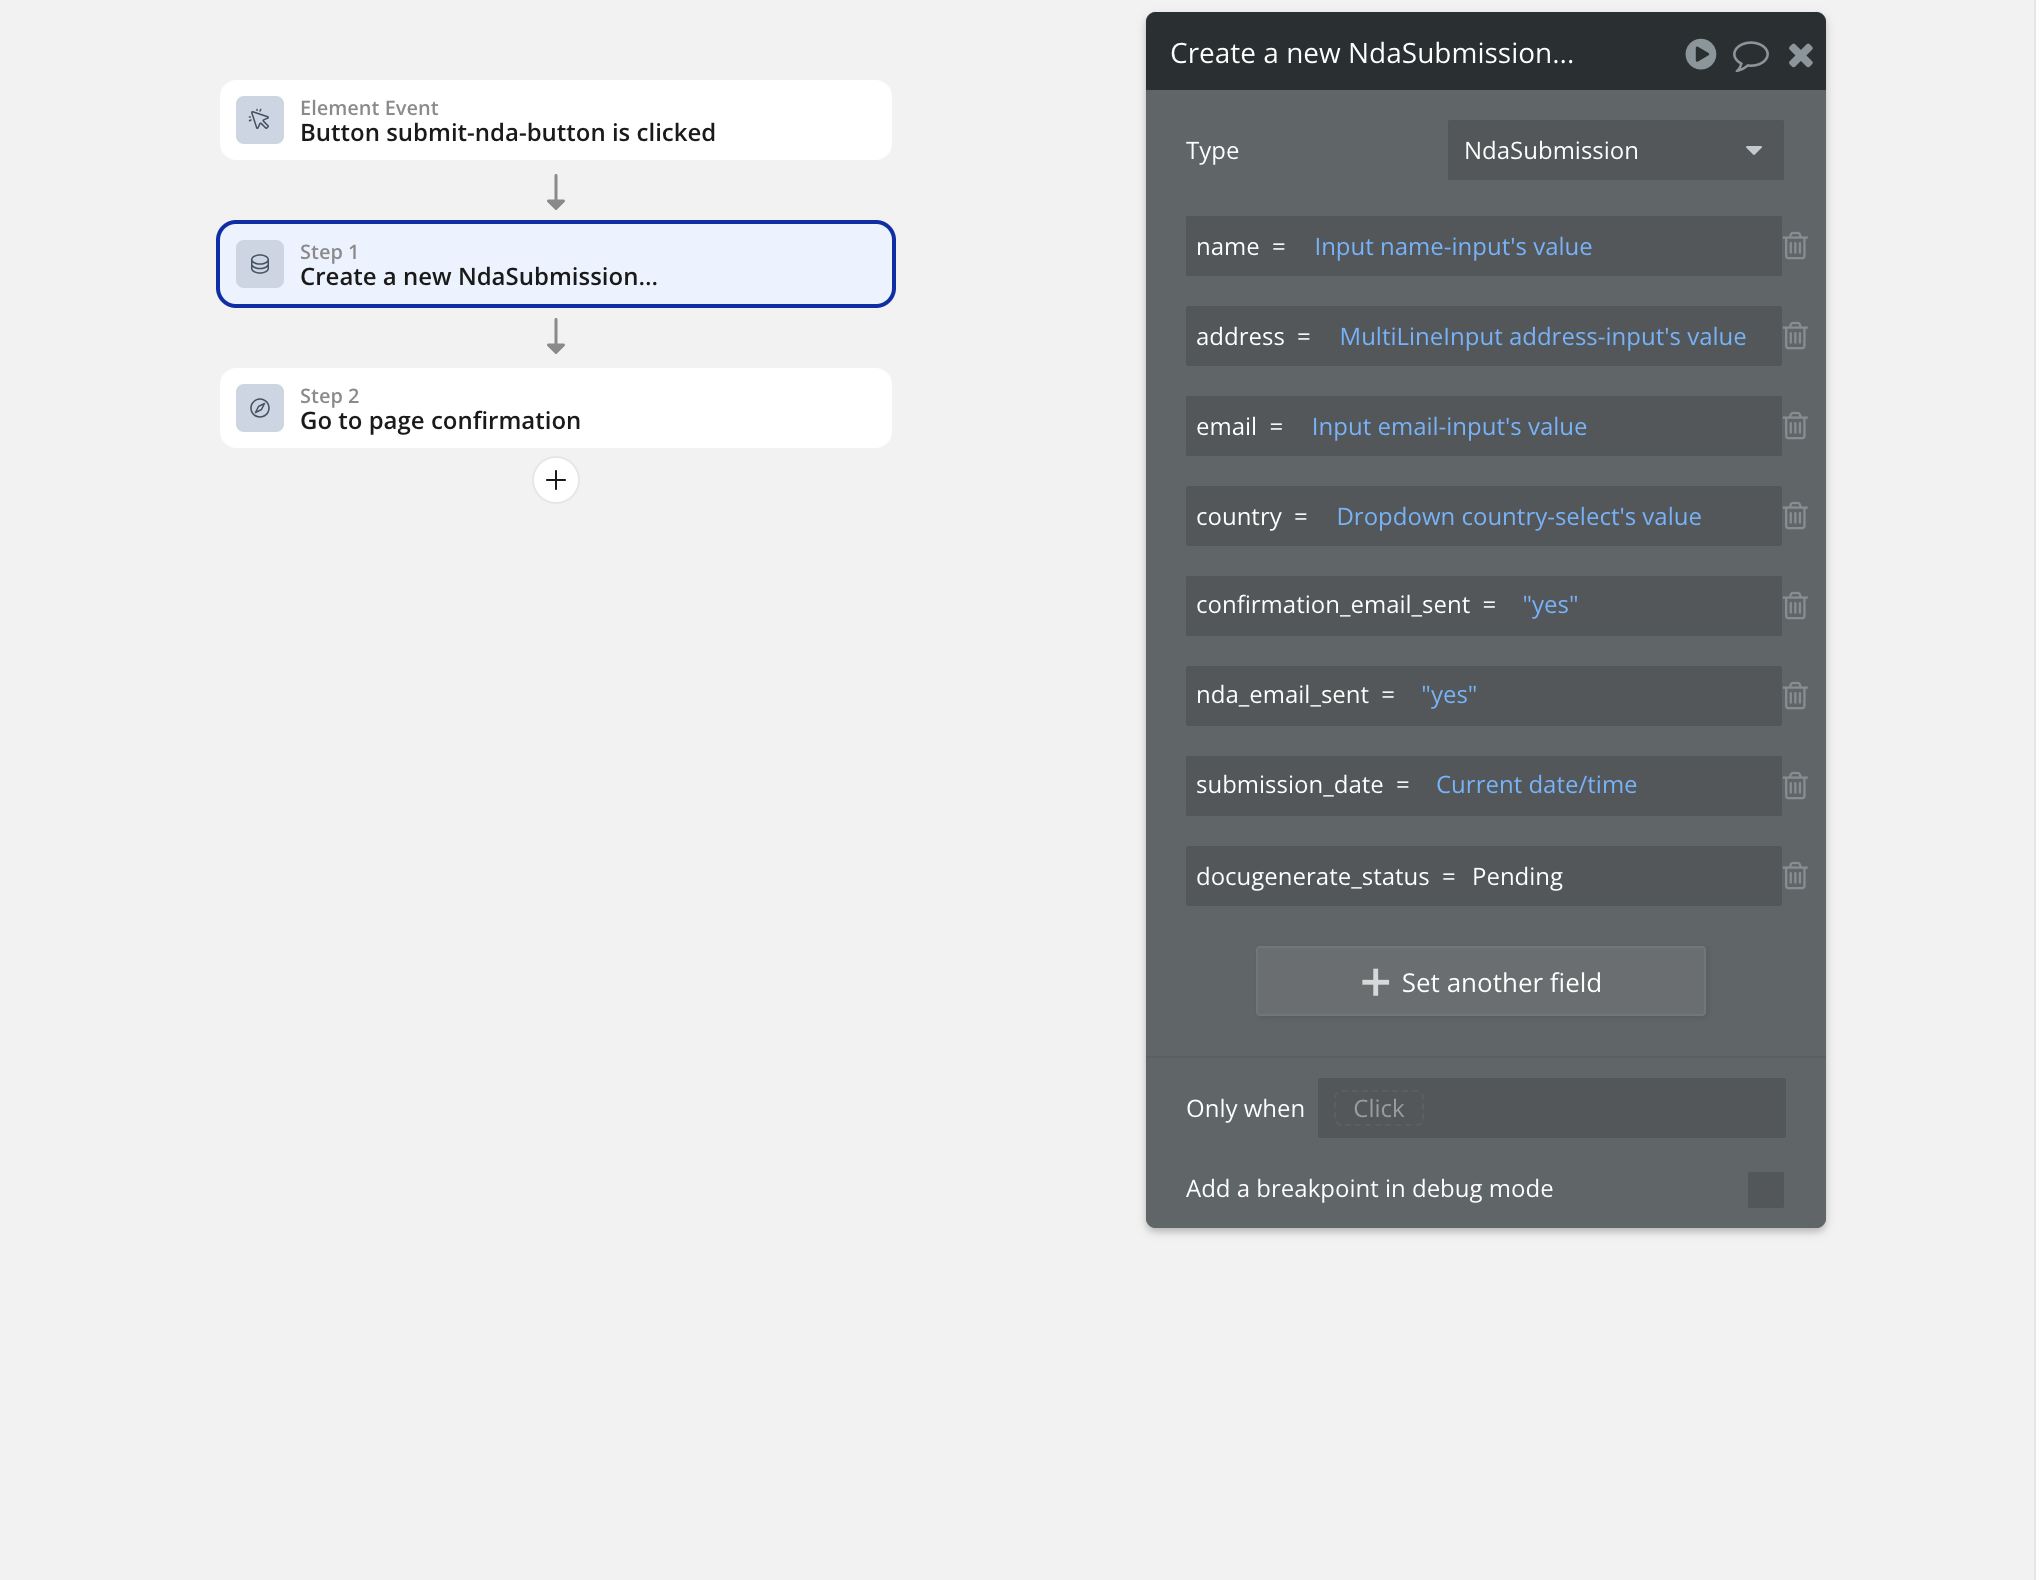
This basic workflow captures the form data and provides user feedback, but it doesn’t yet include the document generation or email delivery functionality we need. We’ll build upon this foundation by adding additional workflow steps that handle these advanced features.
Adding Document Generation
The next step involves adding a document generation action to our workflow. This action will trigger immediately after the form data is saved, ensuring that document generation begins as soon as the client information is available in the system.
To add the document generation step, click the + button after the existing workflow steps, navigate to the Plugins ** section, and select **DocuGenerate - Generate Document.
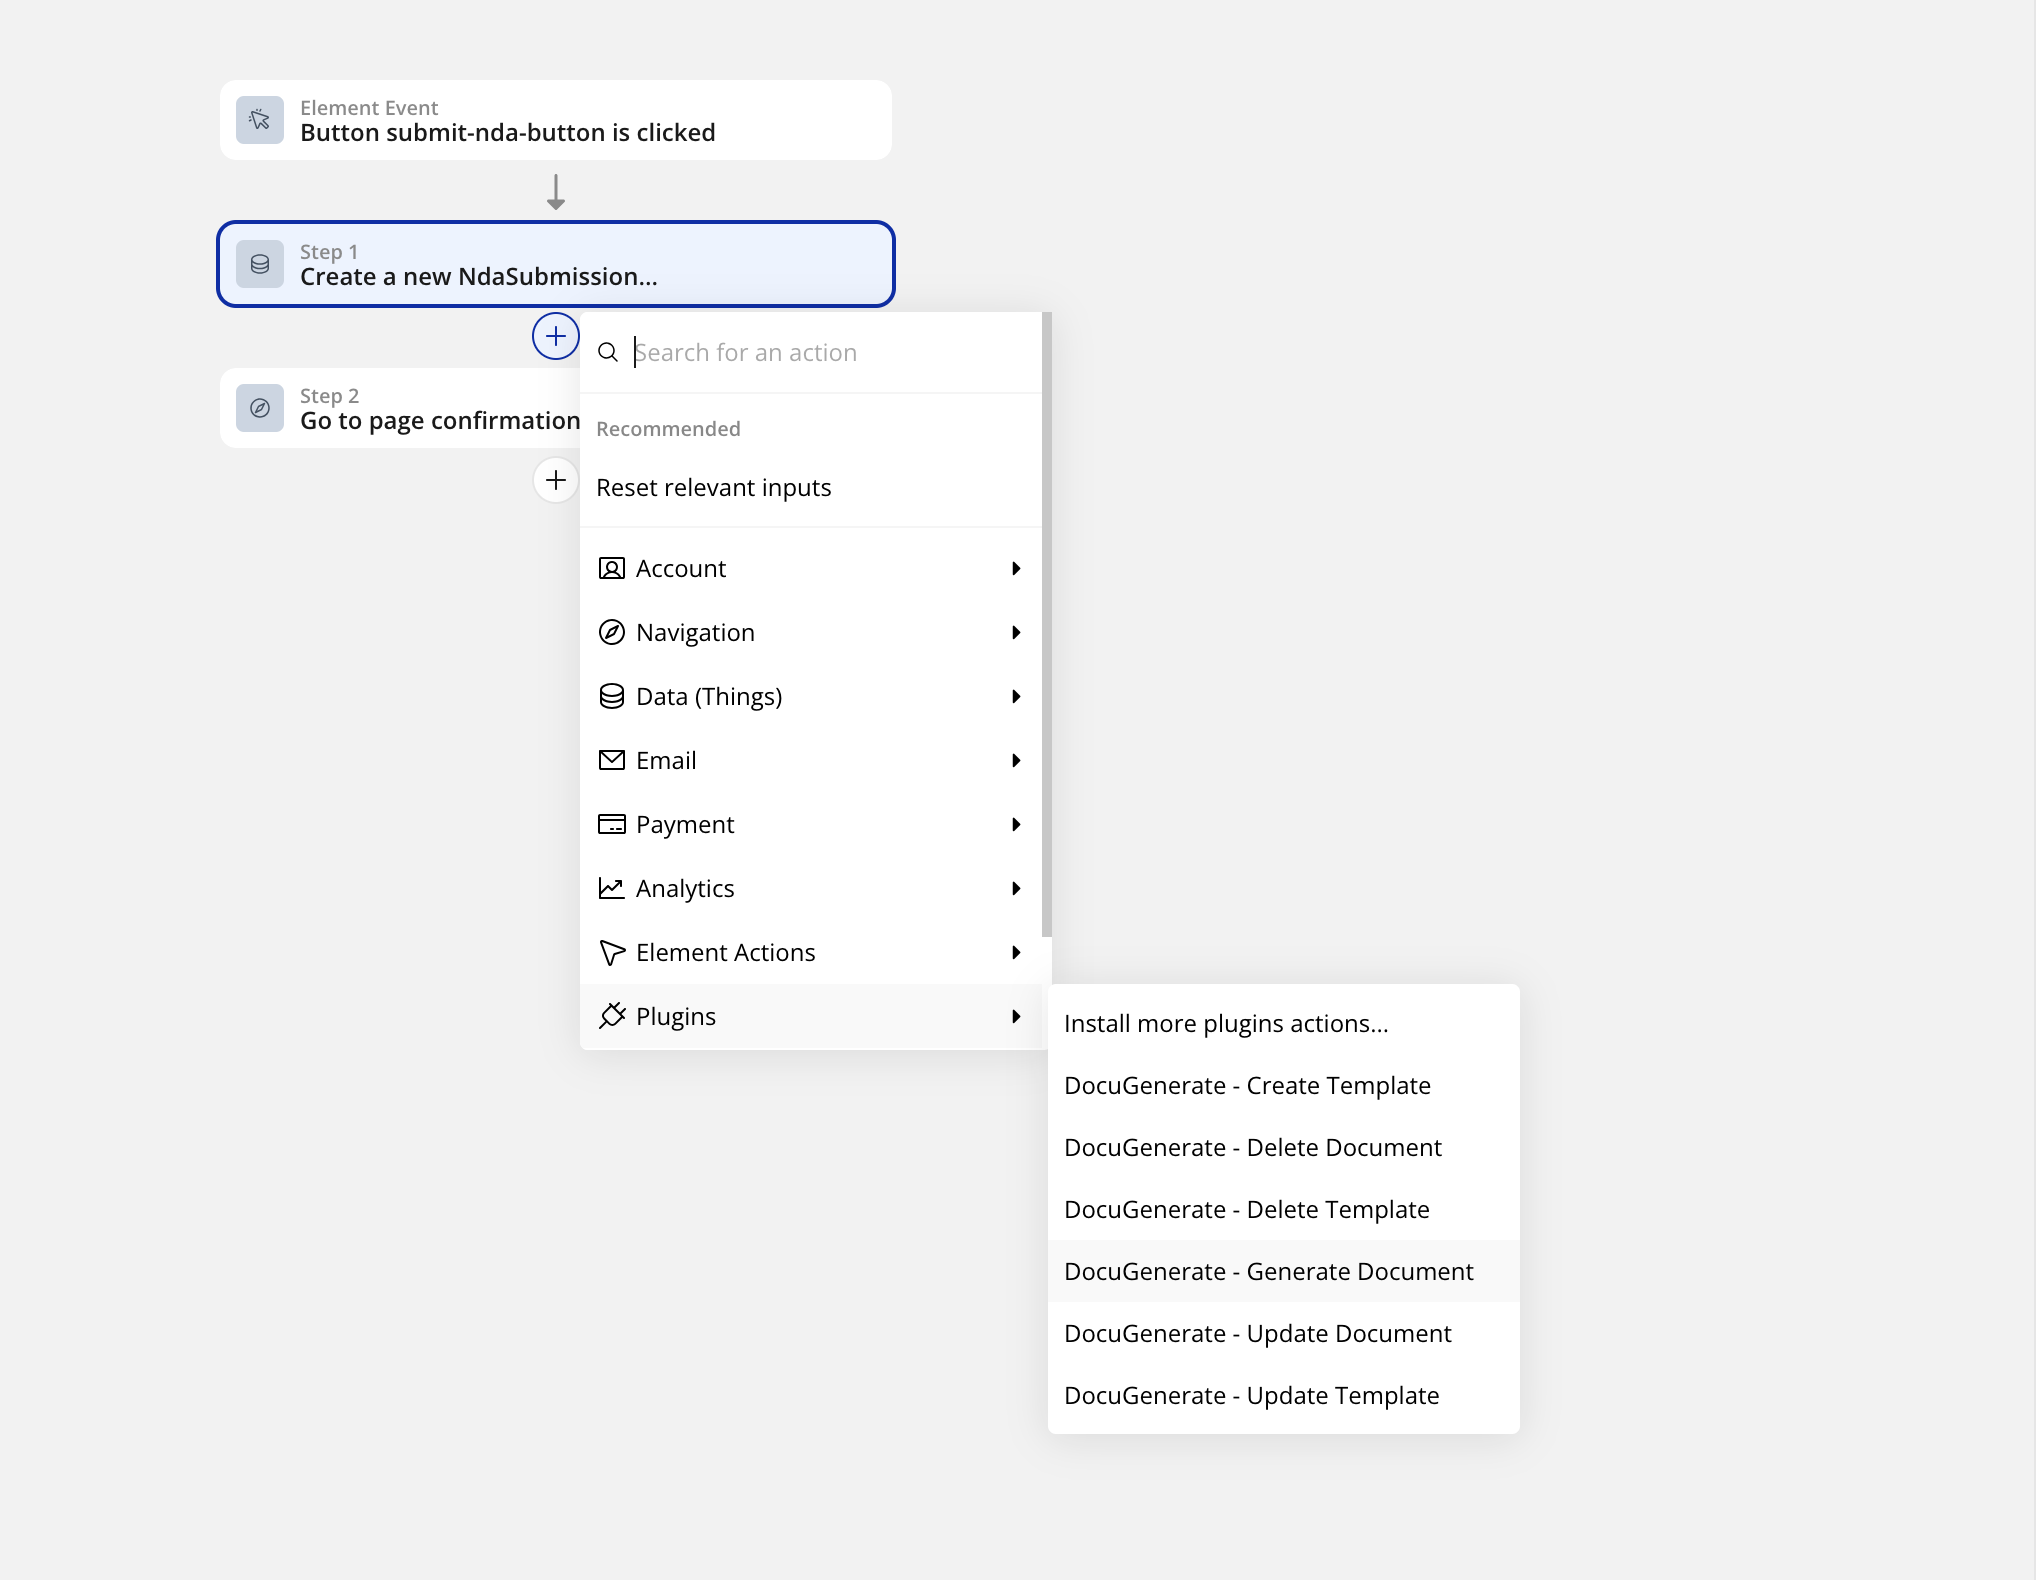
The document generation action requires several configuration parameters that connect our form data with the DocuGenerate template:
-
template_id: This identifies the specific NDA template we created in DocuGenerate. Each template has a unique ID that tells the system which document structure to use for generation.
-
name: We’ll set this to dynamically include the client’s name using. This creates descriptive file names that make it easy to identify generated documents.
-
output_format: Enter .pdf to generate PDF documents, which provide consistent formatting across different devices and platforms while maintaining professional appearance.
-
data: This is the most complex part of the configuration, as it requires mapping our form data to the merge tags in the template. The data should be formatted as a JSON array containing the dynamic values from our form submission.
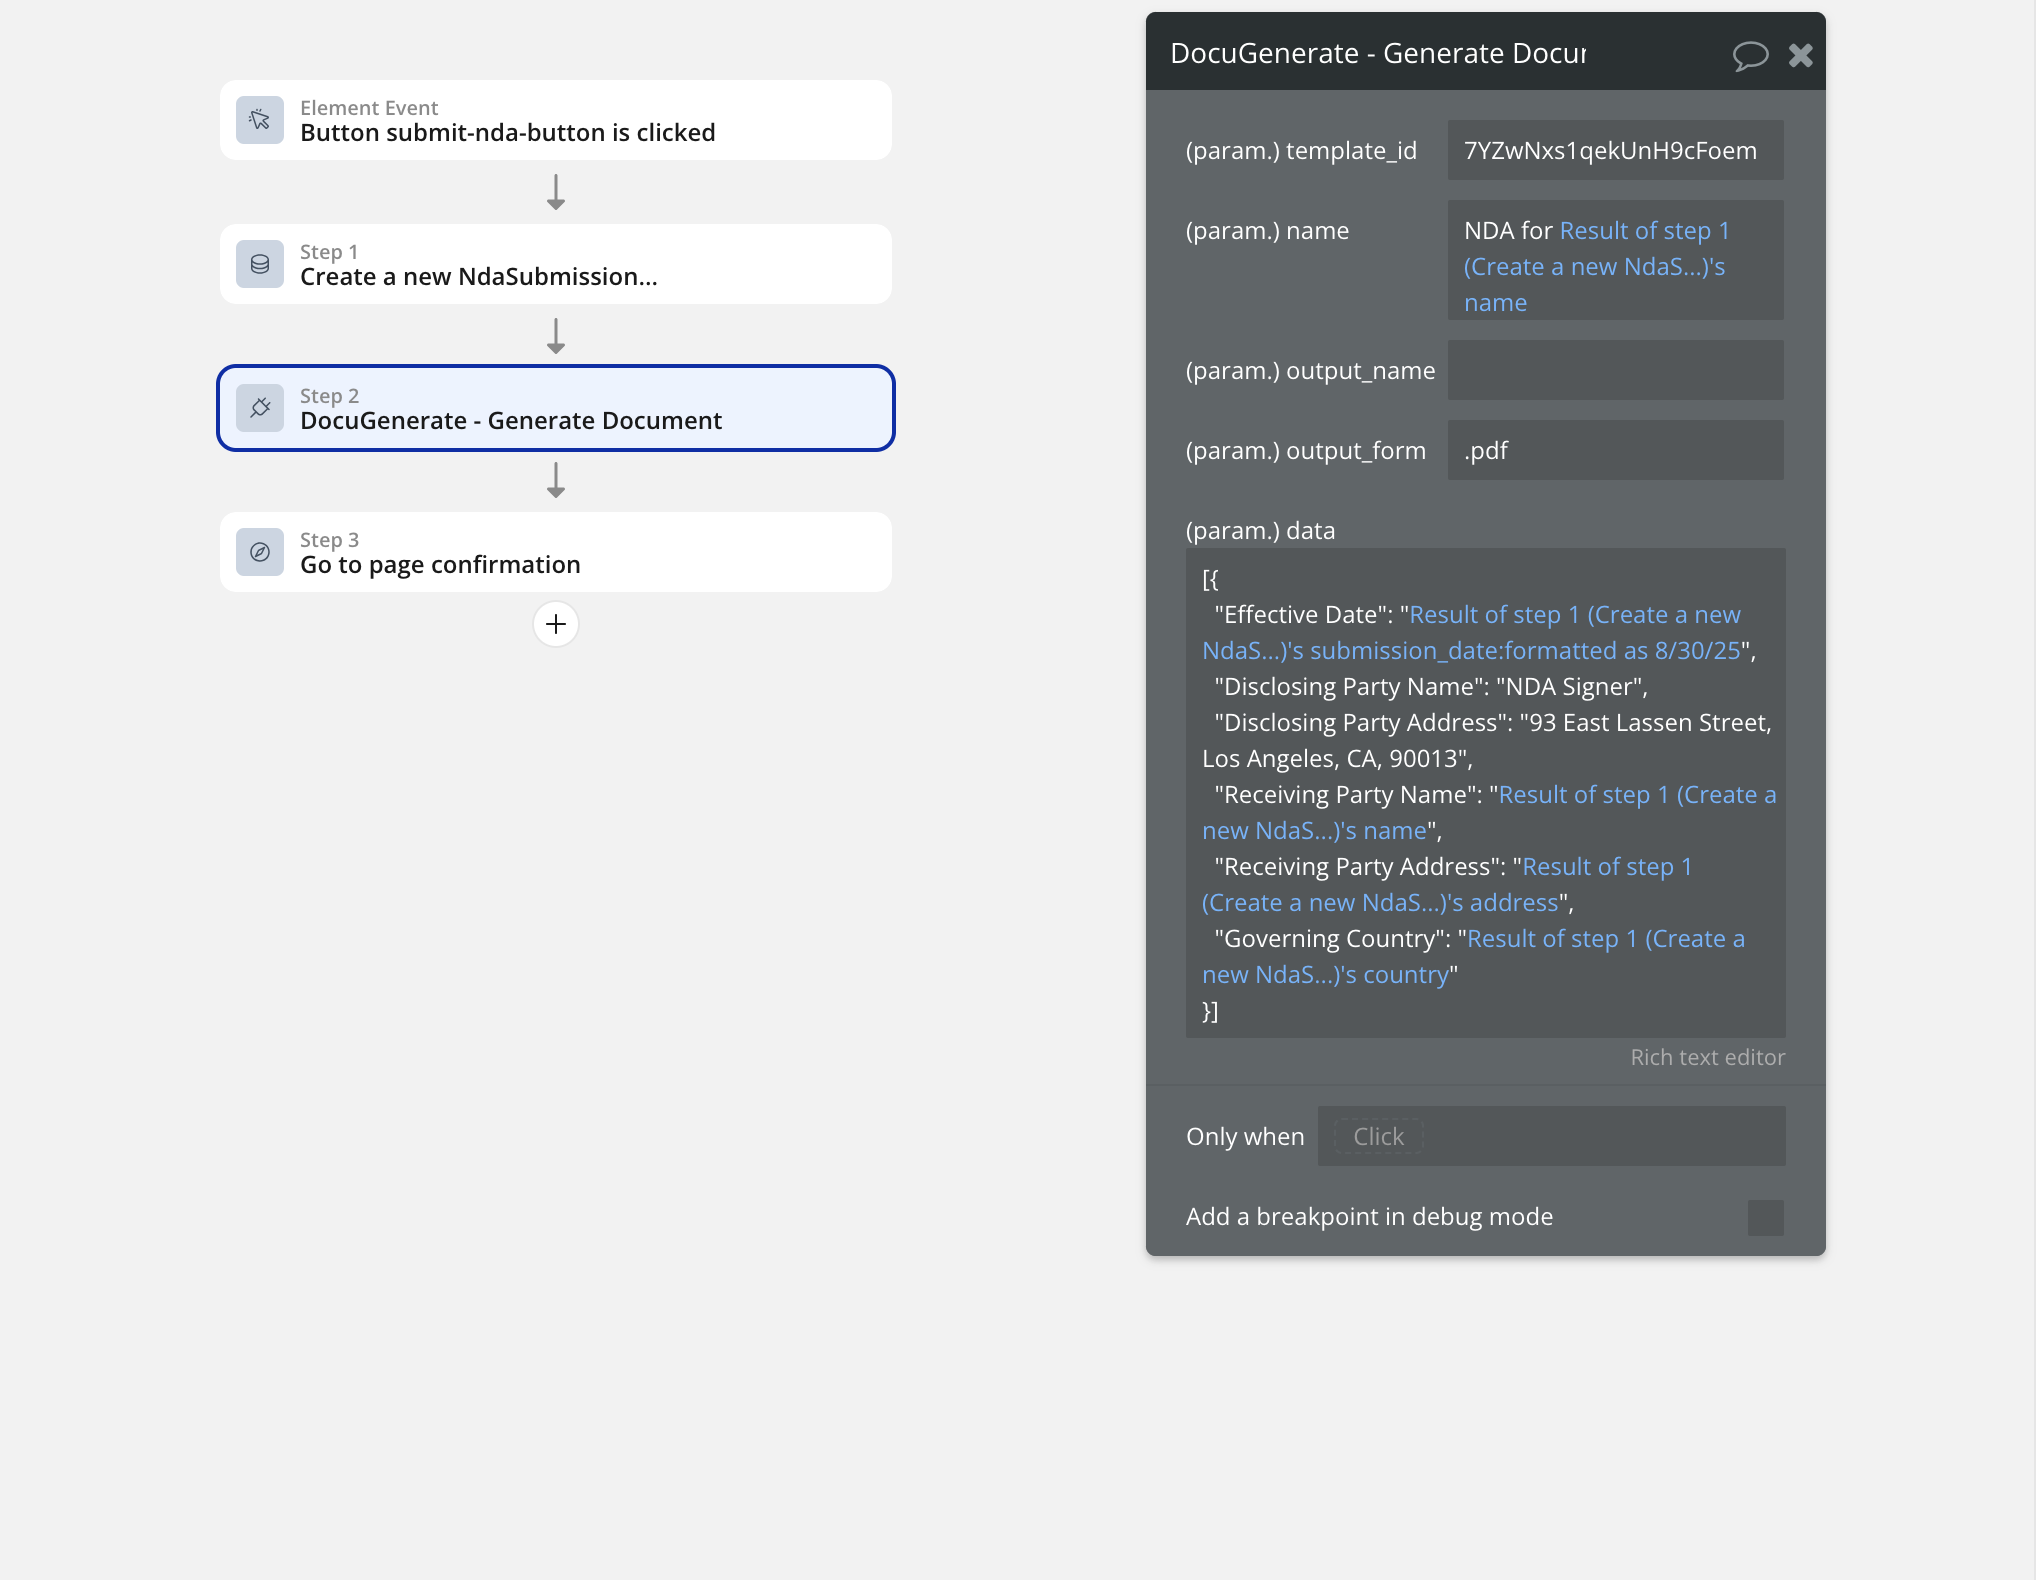
This JSON structure maps each merge tag in the template to either static information (like your company details) or dynamic data from the form submission. The dynamic values use Bubble’s syntax to reference the data created in the first workflow step, ensuring that each generated document contains the correct client information:
[{
  "Effective Date": "Result of step 1 (Create a new NdaSubmission)'s submission_date:formatted as 8/30/25",
  "Disclosing Party Name": "NDA Signer",
  "Disclosing Party Address": "93 East Lassen Street, Los Angeles, CA, 90013",
  "Receiving Party Name": "Result of step 1 (Create a new NdaSubmission)'s name",
  "Receiving Party Address": "Result of step 1 (Create a new NdaSubmission)'s address",
  "Governing Country": "Result of step 1 (Create a new NdaSubmission)'s country"
}]
Implementing Email Delivery
The final workflow step handles email delivery of the generated document. This involves using Bubble’s native email functionality to send the PDF as an attachment to the client’s email address. The email delivery system provides professional communication while ensuring that clients receive their documents promptly and reliably.
To add the email step, click the + sign after the document generation step and select Send email from the Email submenu:
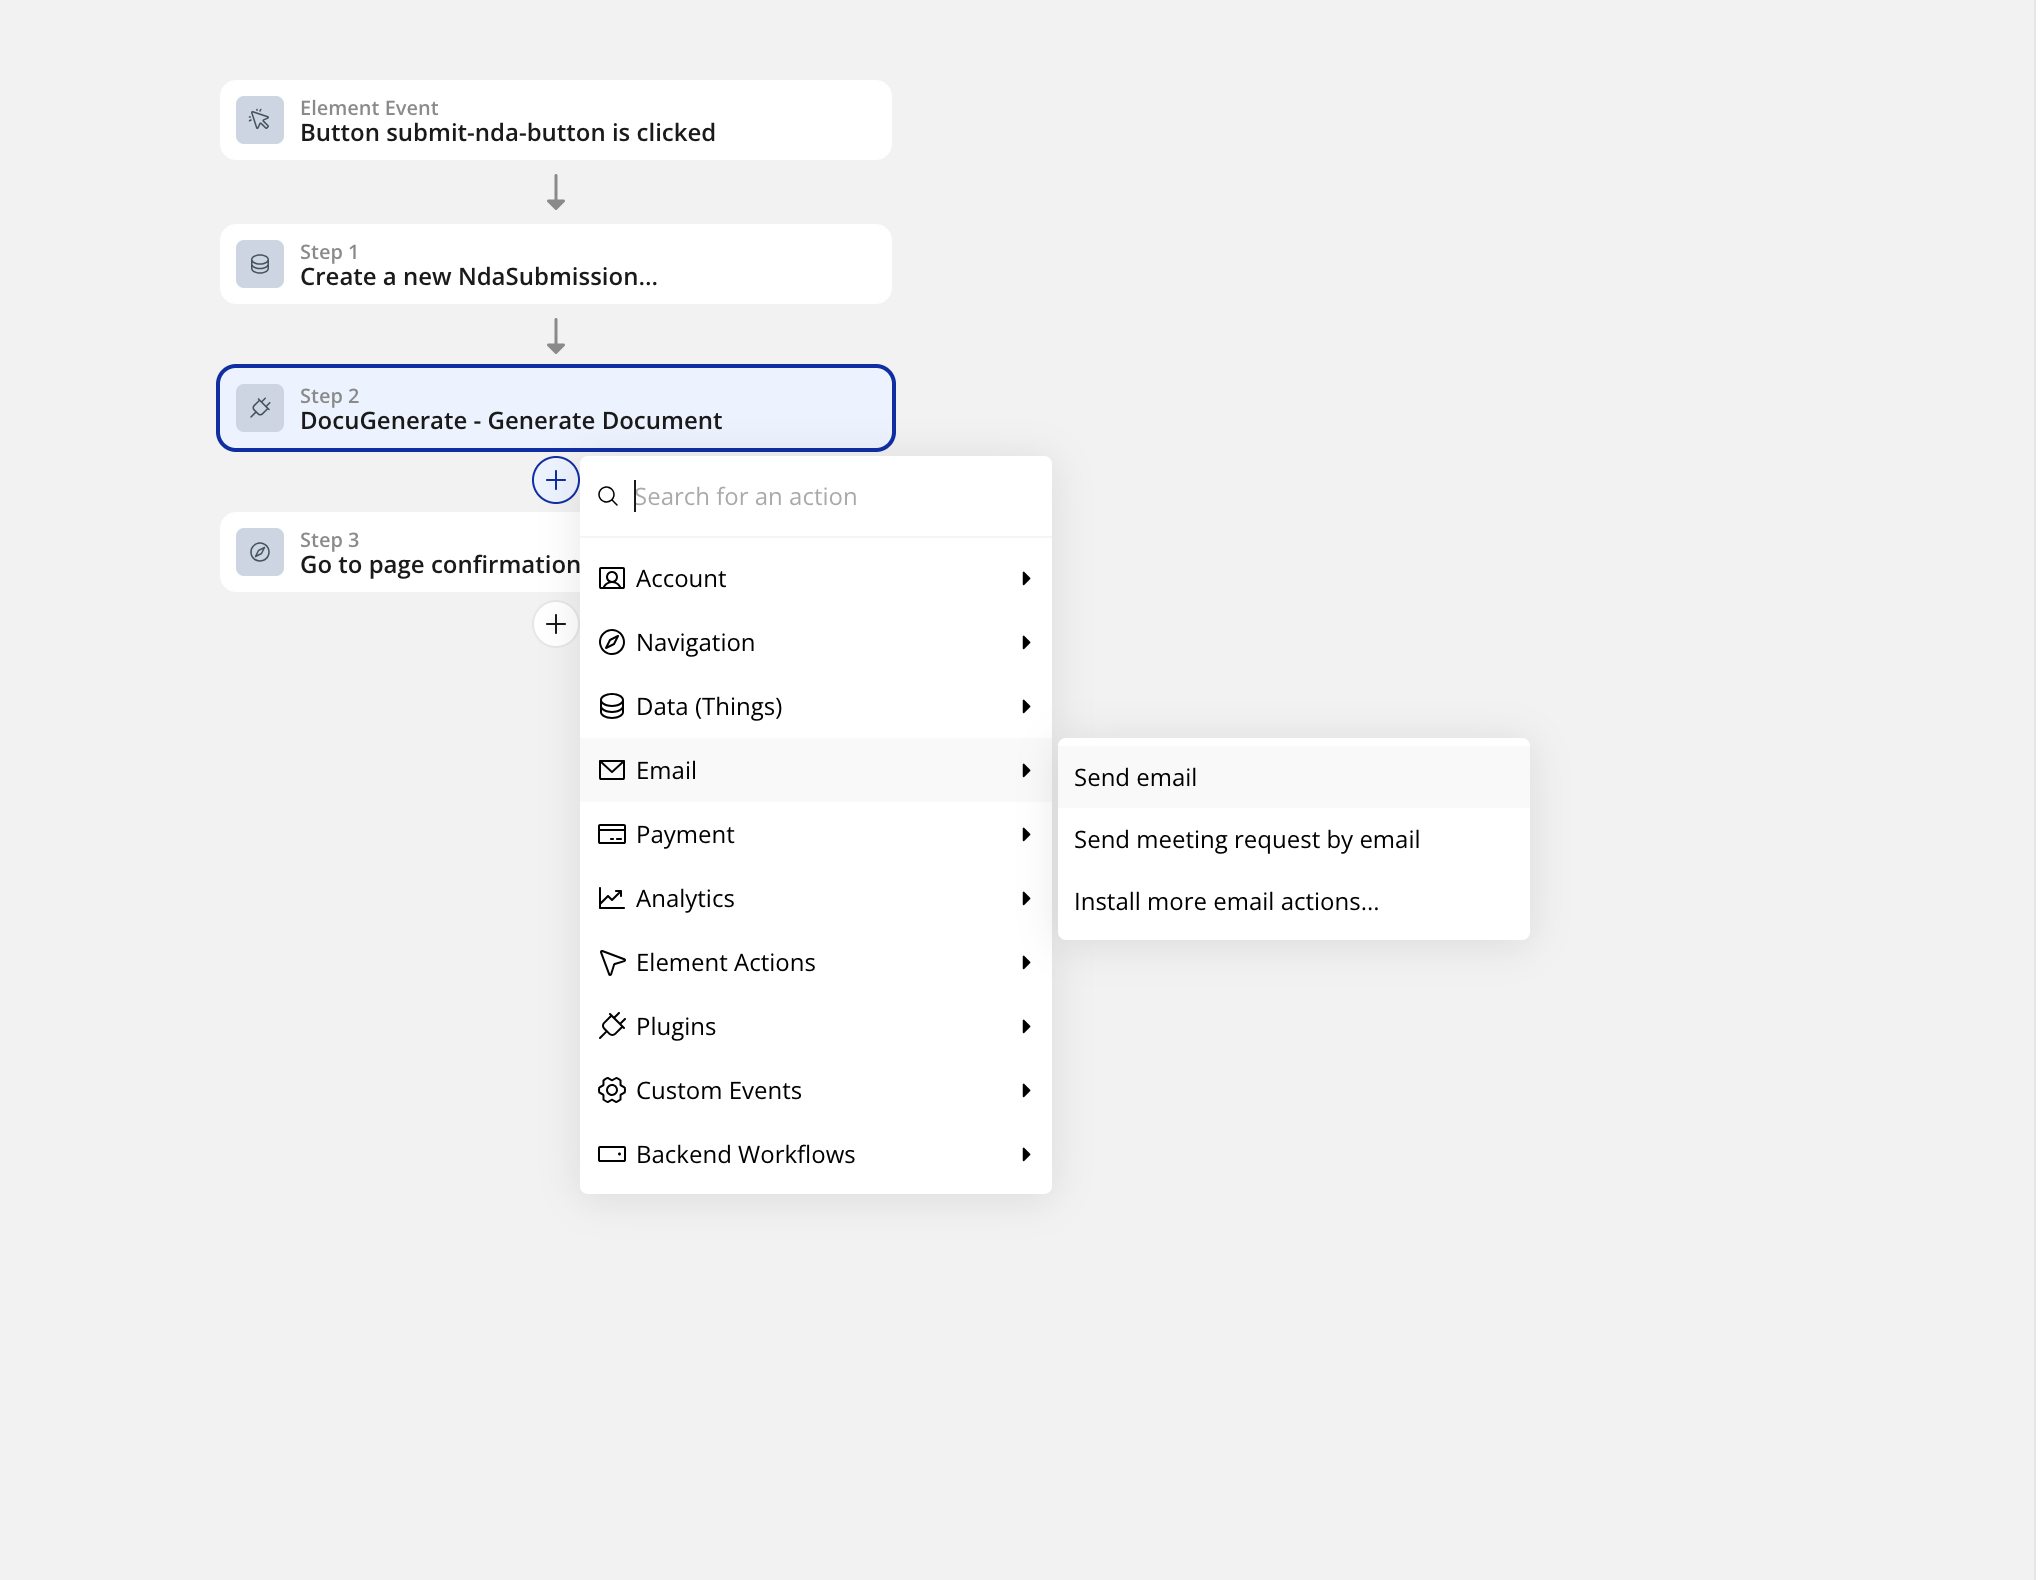
The email configuration requires several parameters that create a professional communication experience:
-
Recipient: Set to Result of step 1 (Create a new NdaSubmission)'s email to automatically send to the client’s submitted email address.
-
Sender Name: Use a professional name like “NDA Signer” or your company name to establish credibility and brand recognition.
-
Subject Line: Create a clear, professional subject like “Your NDA is ready” that immediately communicates the email’s purpose.
-
Email Body: Craft a personalized message that maintains professionalism.
-
File Attachment: This is the most critical configuration point. Set this to Result of step 2 (DocuGenerate - Generate Document)'s document_uri:saved to Bubble Storage.
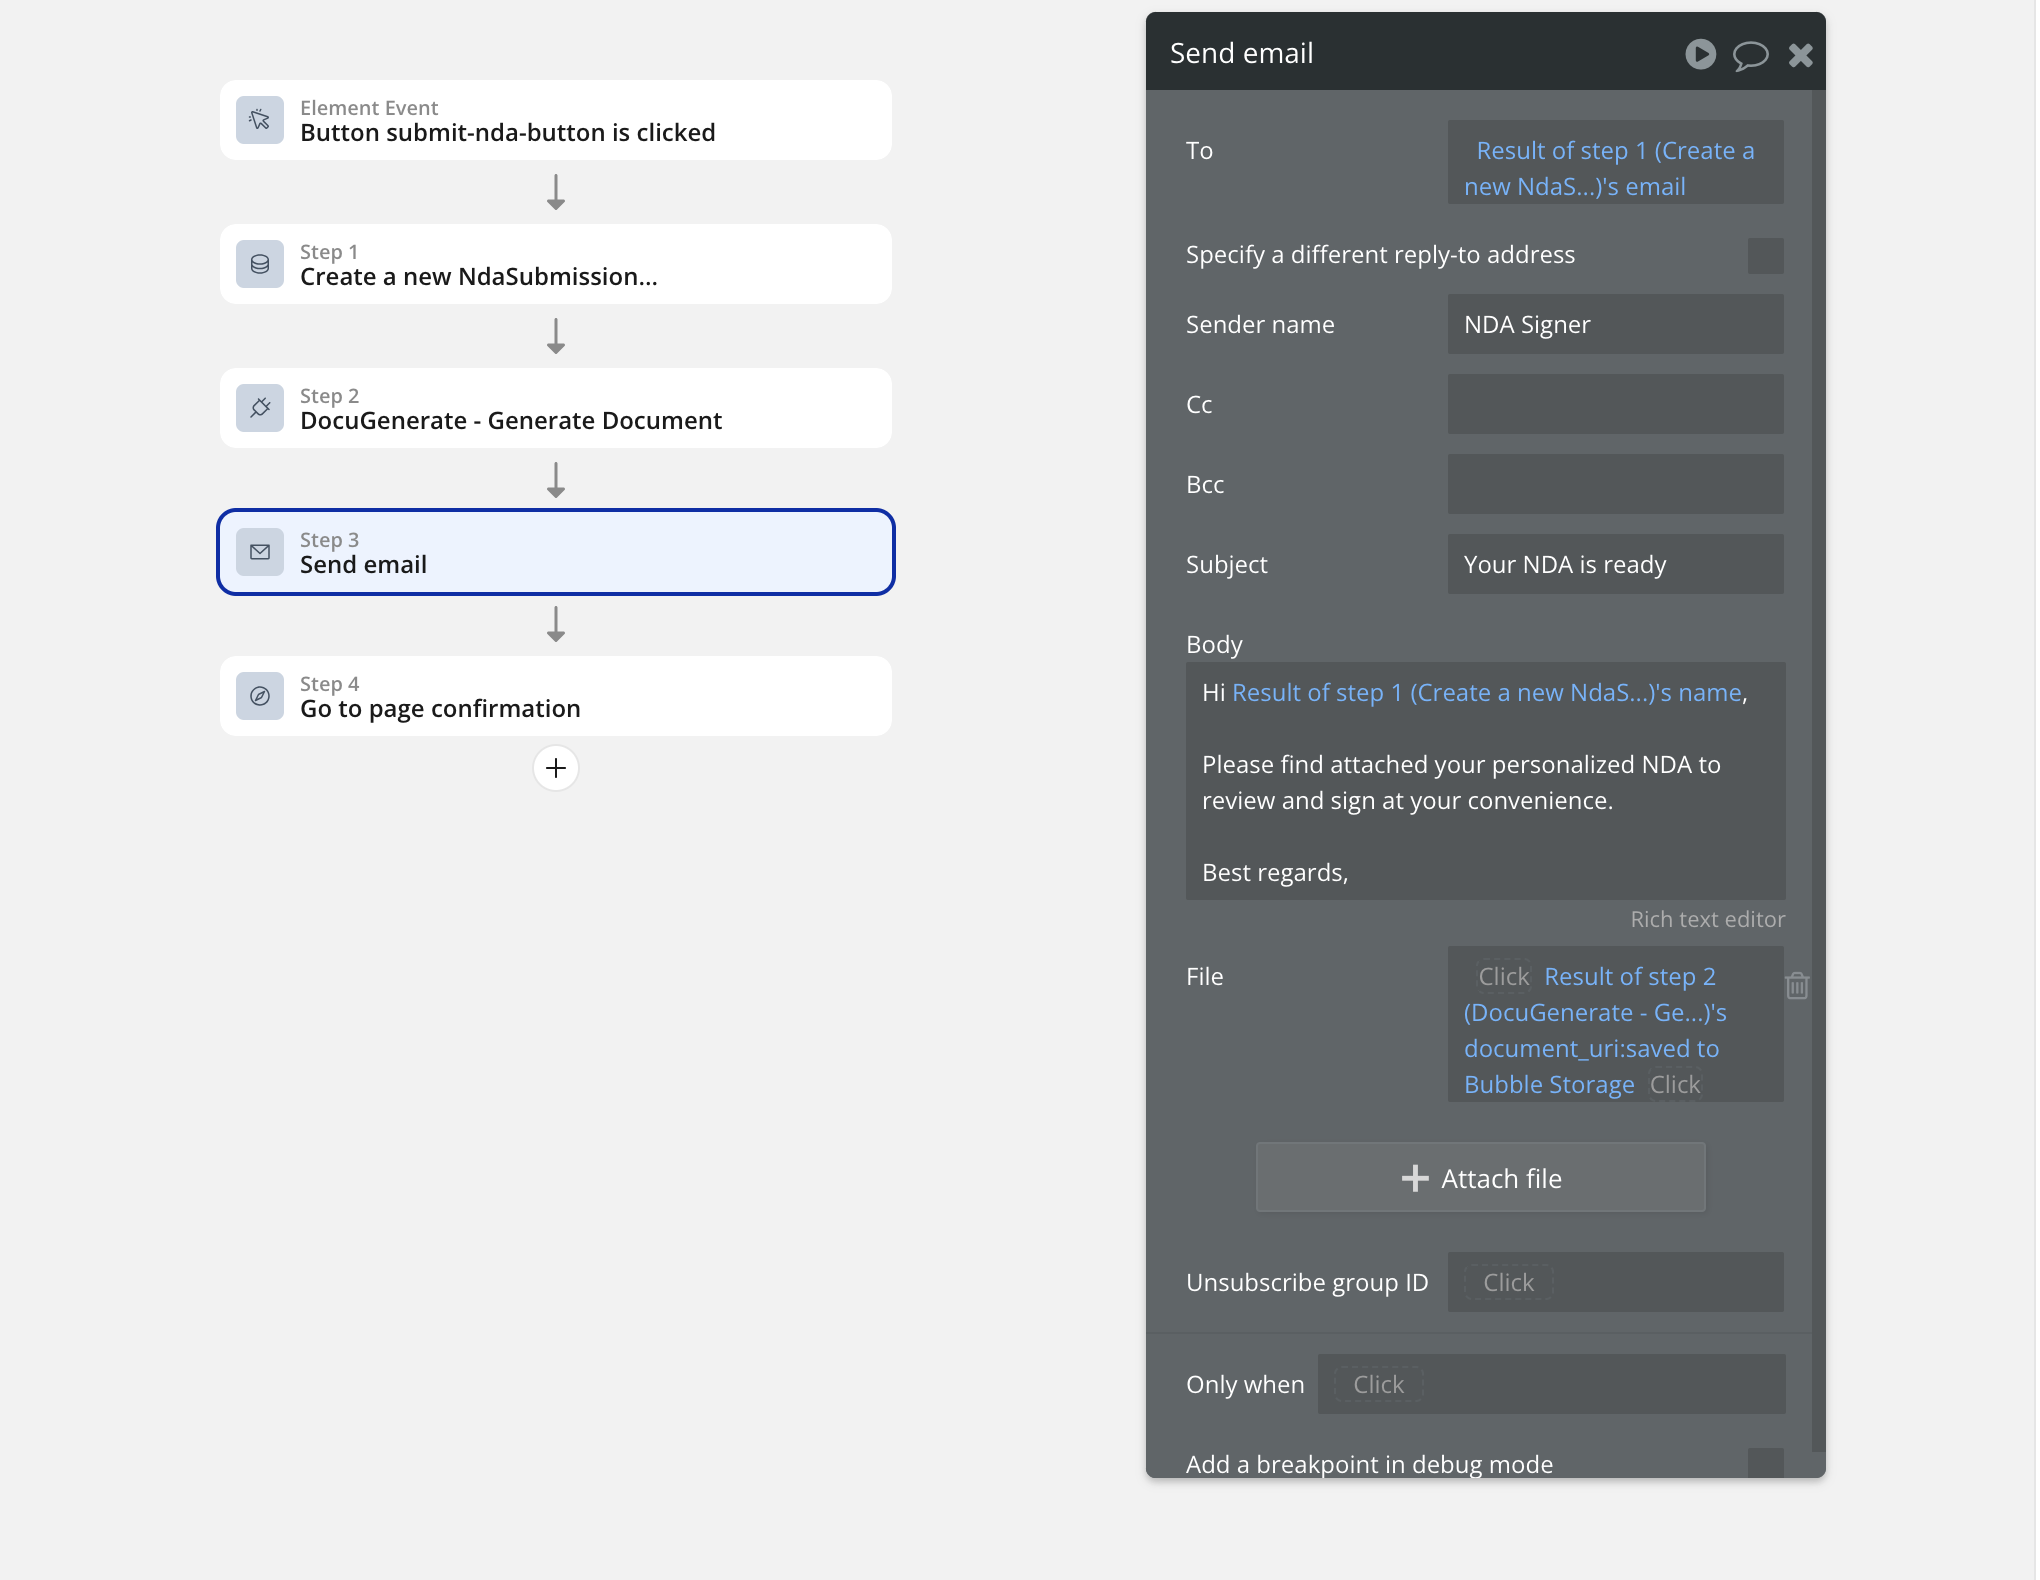
The :saved to Bubble Storage modifier is essential for proper email attachment handling. Without this modifier, Bubble cannot access the generated PDF file for attachment purposes. This tells Bubble to download the generated document from DocuGenerate and store it temporarily in Bubble’s file system, making it available for email attachment.
Testing the Complete Application
With all workflow components configured, we can test the complete application to verify that each step functions correctly and that the integration between Bubble, DocuGenerate, and email delivery works as expected. This testing phase is crucial for identifying any configuration issues before deploying the application to production.
Bubble provides a preview mode that allows you to test your application in a live environment without affecting production users. You can access the test version of our NDA application here. The test environment provides debug mode capabilities, which offer detailed information about workflow execution, data processing, and any errors that might occur during testing.
NDA Generation & Email Delivery
The testing process involves completing the entire user journey from form submission through document receipt. When testing, use realistic information that mirrors your expected client data to ensure the system handles various scenarios correctly. After filling in the form with client information, the system automatically processes the request through all workflow steps:
1. Form Processing: Client information is validated and stored in the database.
2. Document Generation: The NDA is created with personalized information.
3. Email Delivery: The completed document is sent as an attachment.
4. User Feedback: The confirmation page displays the current status.
The generated email demonstrates the professional appearance and functionality of the complete system:
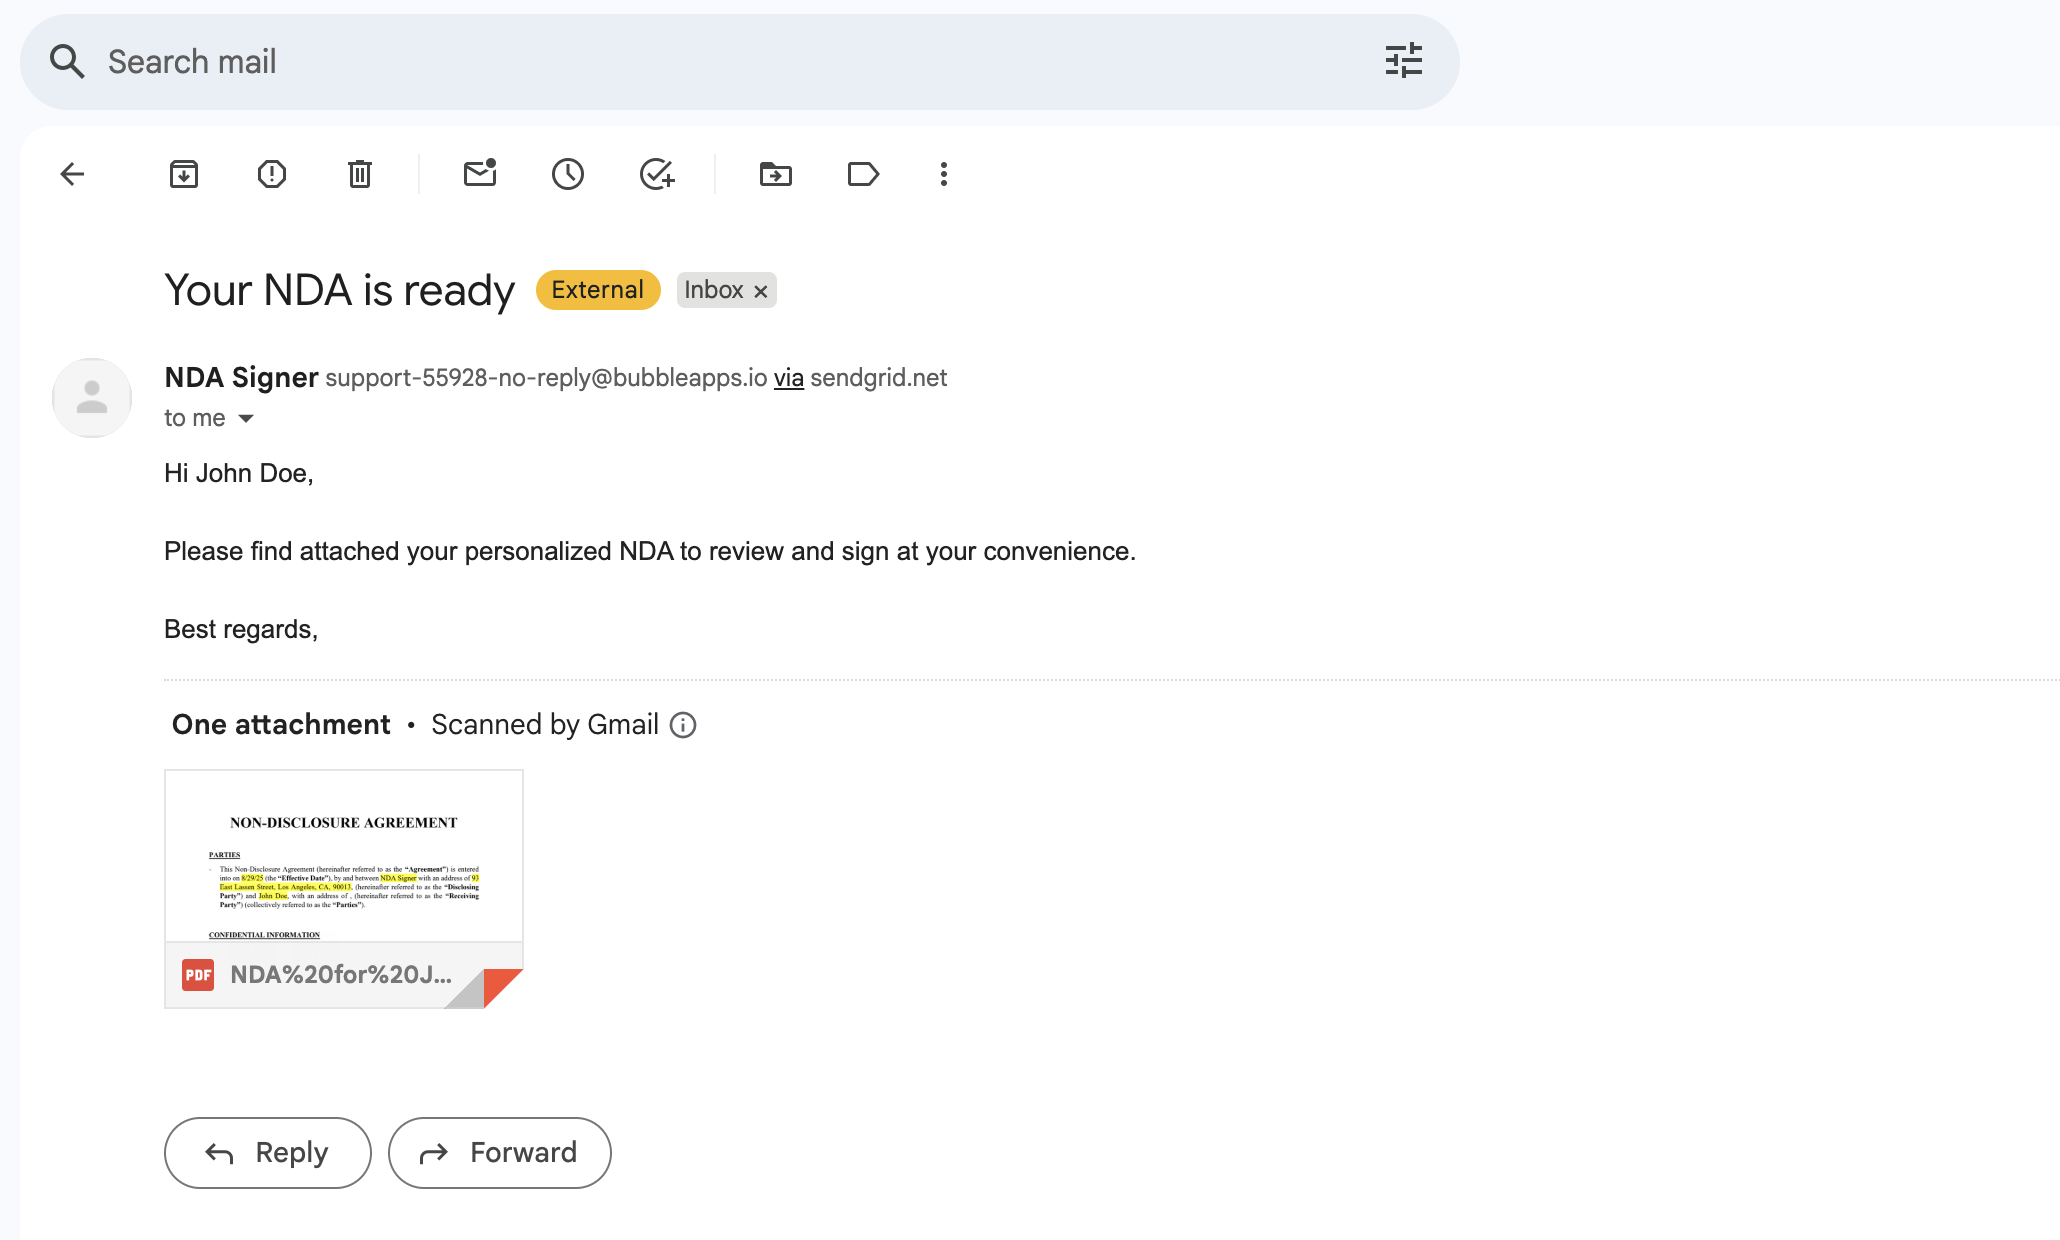
The email includes the personalized message content, professional formatting, and the generated NDA as a PDF attachment. This demonstrates that the entire workflow functions correctly and provides a professional experience for clients.
File Storage Verification
One important aspect of testing involves verifying that generated documents are properly stored in Bubble’s file management system. This storage capability provides backup access to generated documents and supports future enhancements like document history or re-sending capabilities.

The File manager shows that each generated NDA is properly stored with appropriate naming conventions and accessible for future reference. This storage capability ensures that your system maintains records of all generated documents, supporting compliance requirements and customer service needs.
Conclusion
Building an automated document generation and email delivery system with Bubble and DocuGenerate demonstrates the power of modern no-code development platforms when combined with specialized APIs. The system we’ve created handles complex business processes including data collection, document personalization, and professional communication, all without requiring traditional software development skills.
This approach offers significant advantages for businesses that need to process client documents at scale. The automated workflow eliminates manual document creation, reduces errors, ensures consistent formatting, and provides professional client experiences. The integration between Bubble’s visual development platform and DocuGenerate’s document generation capabilities creates a solution that is both powerful and accessible.
Resources


