Introduction
While DocuGenerate primarily works with Word documents, many teams prefer creating and editing their templates in Google Docs due to its superior collaboration features, real-time editing capabilities, and intuitive interface. However, using Google Docs templates in DocuGenerate traditionally requires a manual process: download the Google Doc as a Word file, then upload it to DocuGenerate. While this approach works, it creates friction in your workflow and makes template maintenance cumbersome, especially when templates change frequently.
What if you could eliminate this manual step entirely? What if your Google Docs could automatically sync with DocuGenerate, creating new templates when documents are added and updating existing ones when changes are made? This automation would allow your team to continue working in Google Docs while ensuring your DocuGenerate templates stay current without any manual intervention.
In this comprehensive tutorial, we’ll build a complete synchronization solution using Google Apps Script that monitors a specific Google Drive folder and automatically syncs any changes with your DocuGenerate account. The system handles both initial template creation and ongoing updates, making it perfect for teams that want to maintain their Google Docs workflow while leveraging DocuGenerate’s powerful document generation capabilities.
How the Sync System Works
Our synchronization script monitors a designated Google Drive folder for changes and automatically processes any modified documents, ensuring that your DocuGenerate templates always reflect the latest version of your Google Docs. The sync workflow follows this logical sequence:
-
Document Detection: The system scans your designated Google Drive folder for Google Docs, identifying both new documents that haven’t been synced yet and existing documents that have been modified recently.
-
Template Mapping: For each document, the script checks whether it already corresponds to a DocuGenerate template by examining the document’s custom properties. These properties act as a bridge between the two systems, storing the DocuGenerate template ID directly within the Google Doc’s metadata.
-
Format Conversion: When a document needs to be synced, the script converts it from Google Docs format to Microsoft Word format (.docx), which is the format DocuGenerate expects for template processing.
-
API Communication: Depending on whether the document is new or existing, the automation either creates a new template in DocuGenerate or updates an existing one using the DocuGenerate API.
-
Metadata Storage: After successful synchronization, the script stores the DocuGenerate template ID in the Google Doc’s custom properties, ensuring future updates will modify the correct template rather than creating duplicates.
This design ensures that your team can continue working naturally in Google Docs while the automated sync handles all the technical details of keeping DocuGenerate templates up to date. You can take a look at the complete script that we’ll be building in this tutorial, if you want to get an idea of how it’s all working.
Setting Up the Apps Script Project
Google Apps Script provides a powerful platform for automating workflows between Google Workspace applications and external APIs. For our synchronization solution, we’ll create a new Apps Script project that contains all the functions needed to monitor Google Docs and communicate with DocuGenerate.
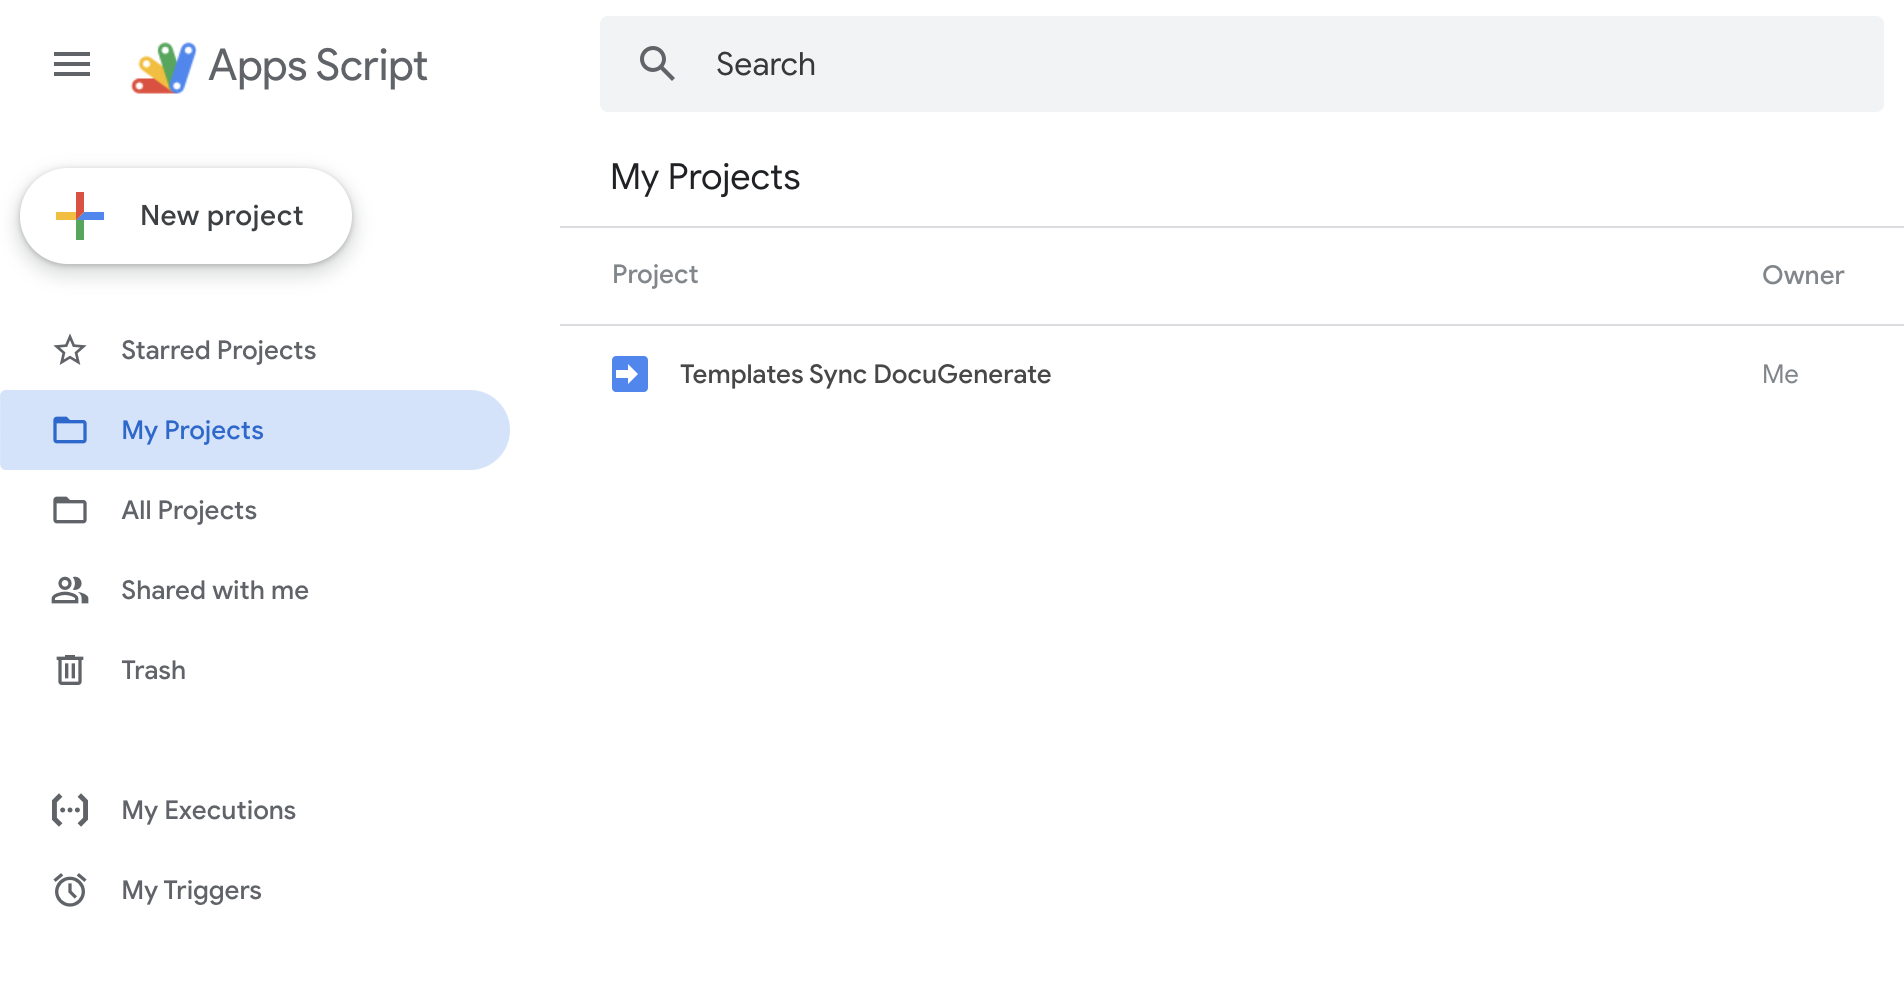
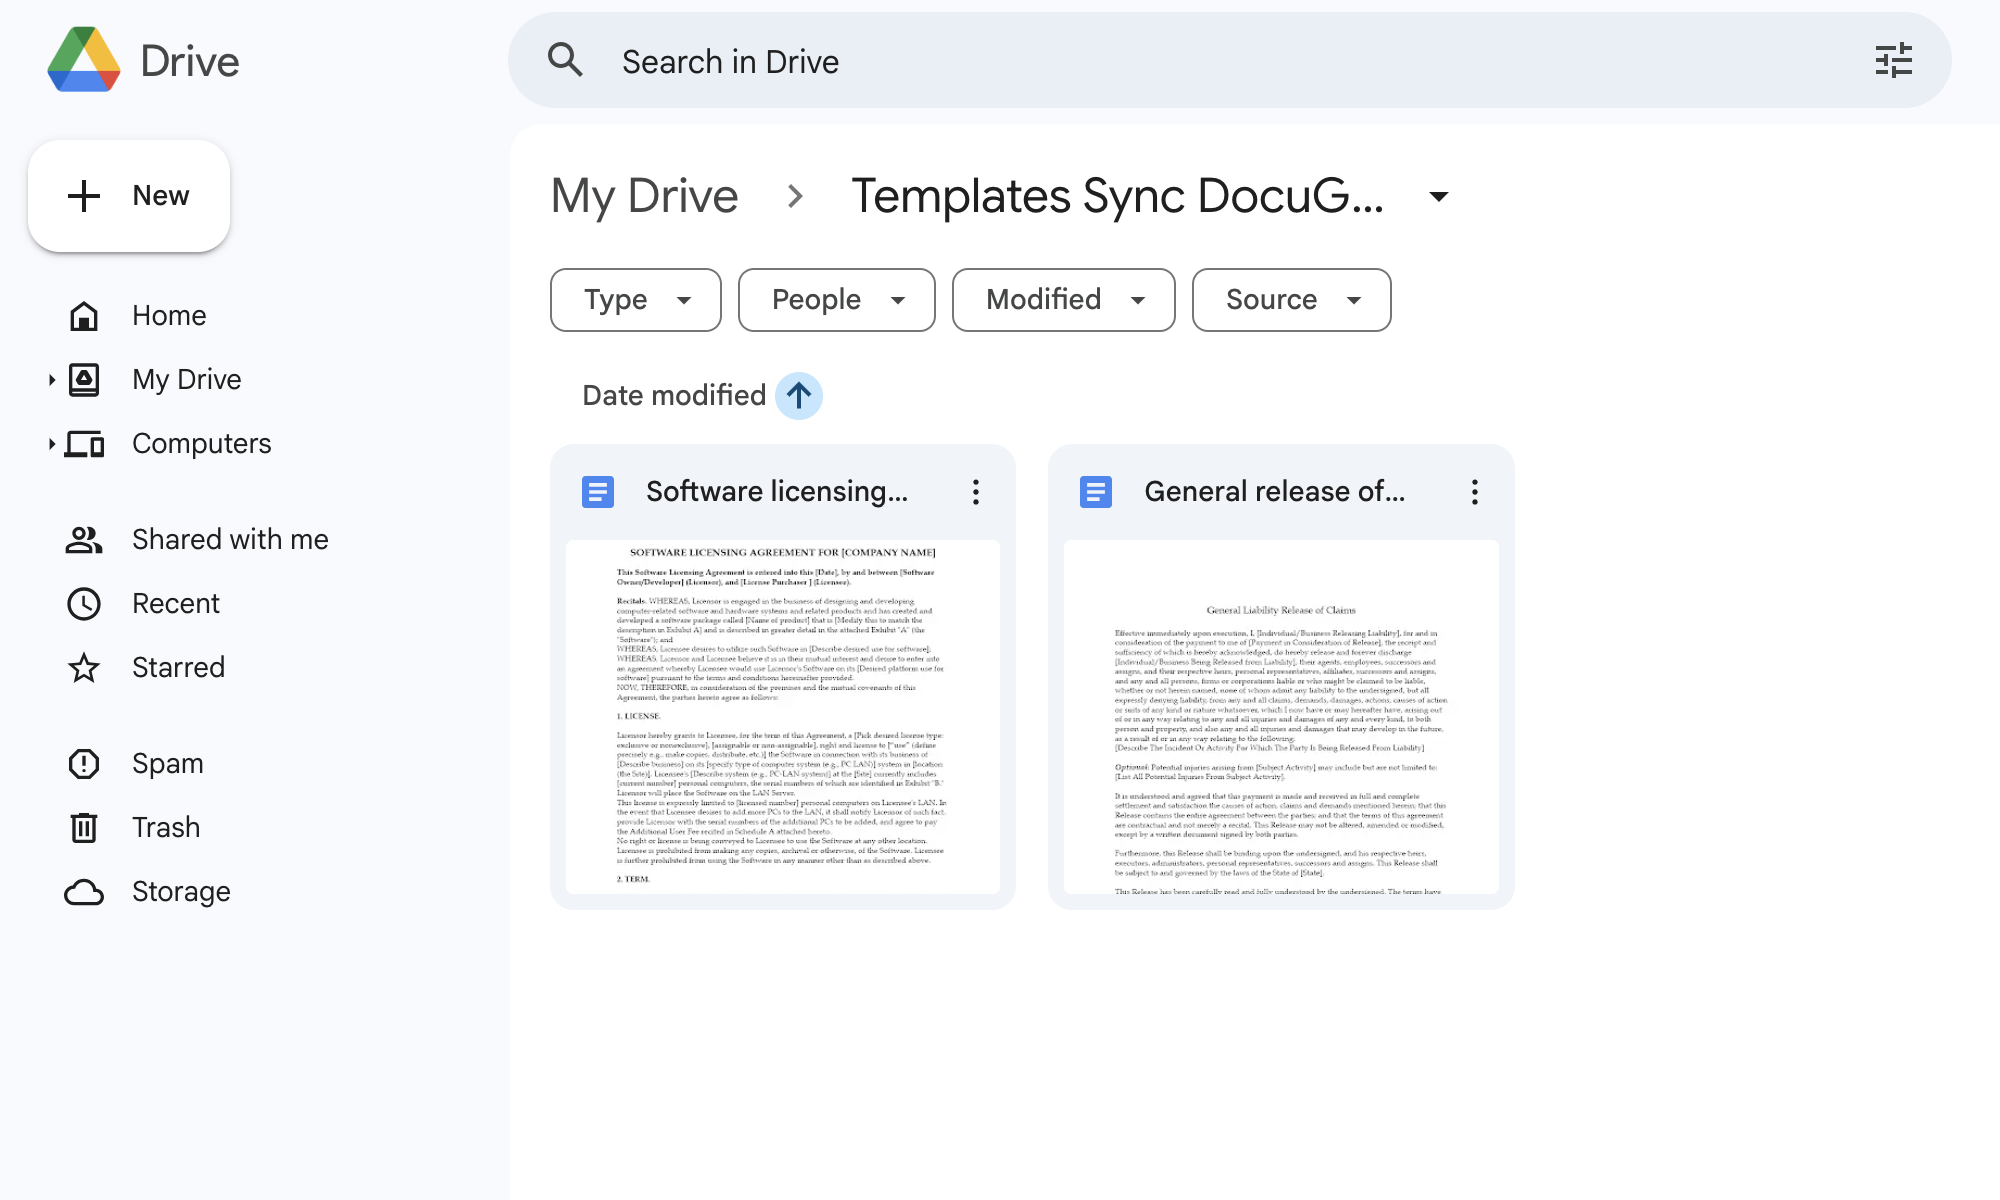
To begin, navigate to Apps Script and create a new project. You’ll start with a blank canvas where we can build our complete synchronization solution. Our project for this tutorial is called Templates Sync DocuGenerate as you can see in the image below.
Enabling the Google Drive API
Our synchronization script needs access to advanced Google Drive functionality that goes beyond the standard DriveApp service. Specifically, we need the Google Drive API v3 to work with custom file properties, which is how we’ll track the relationship between Google Docs and DocuGenerate templates.
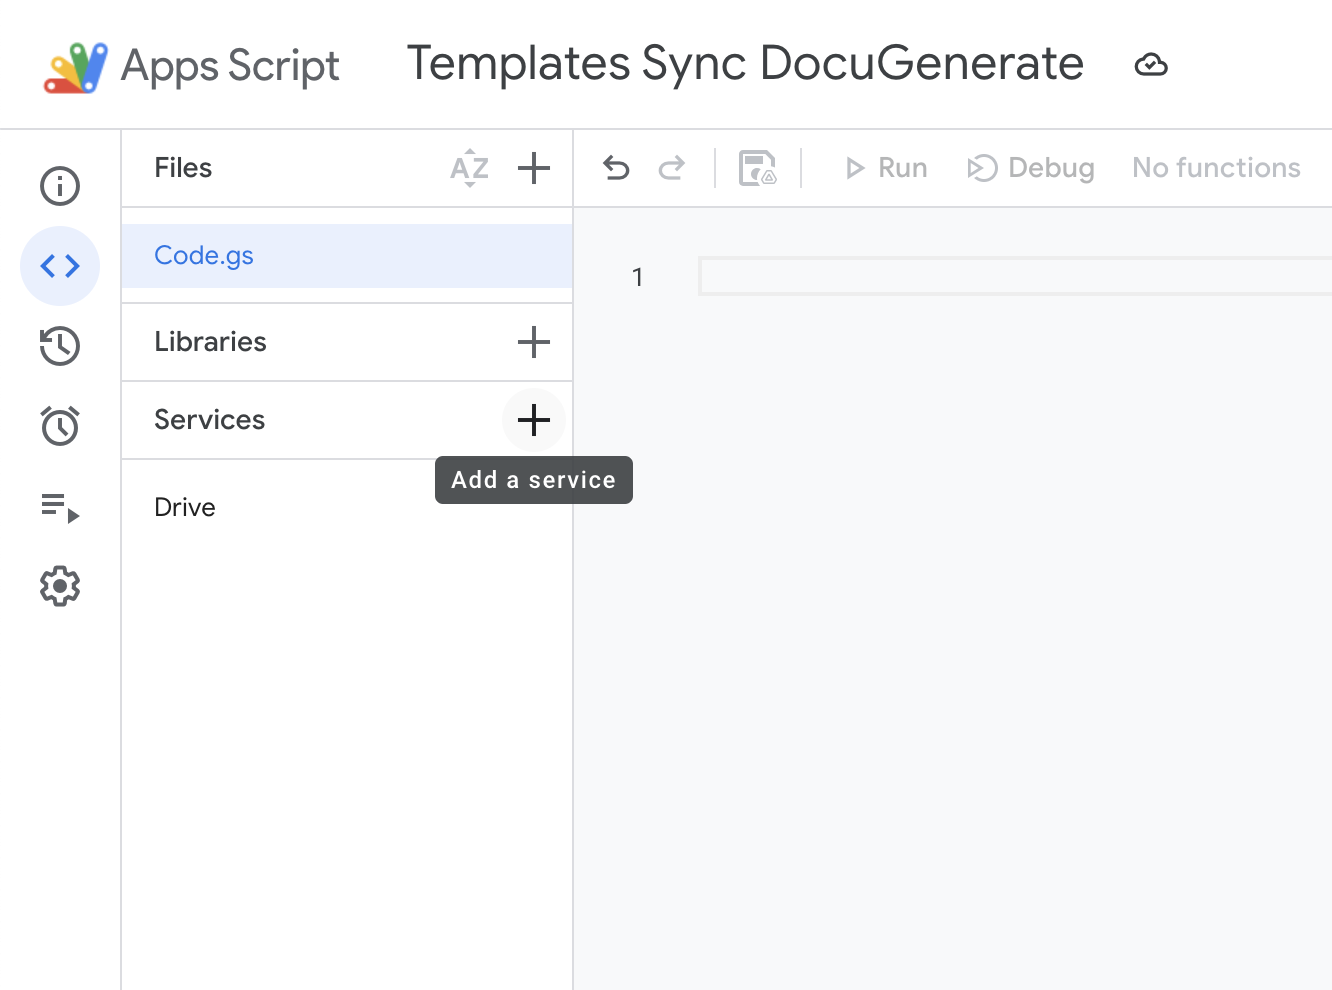
To enable the Google Drive API in your newly created Apps Script project, click Add a service in the left sidebar of the Apps Script editor.
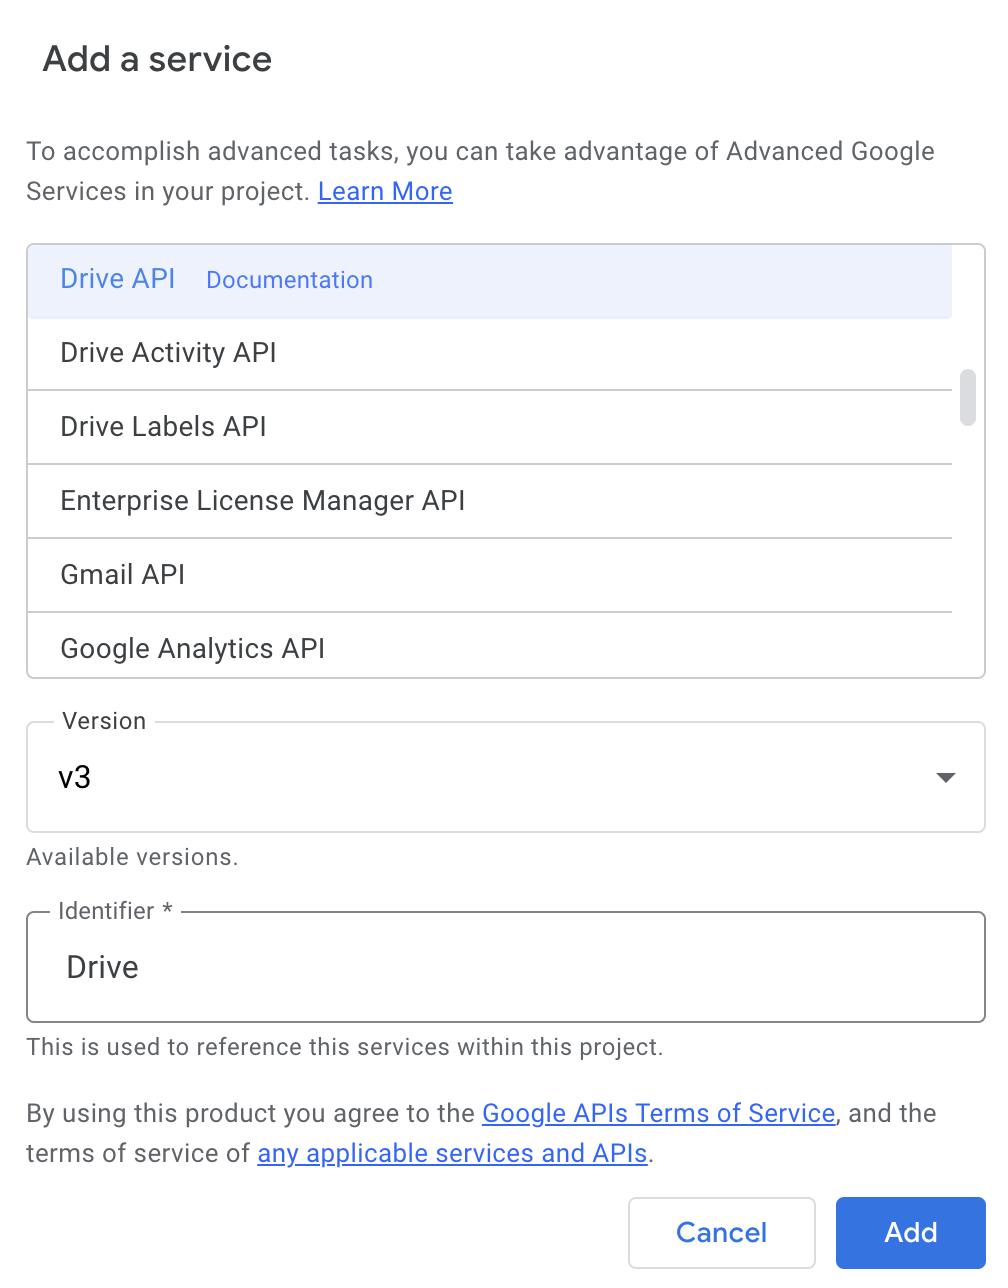
Then search for Drive API, set the identifier to Drive and click the Add button to finish the setup.
This step is crucial because the standard DriveApp service doesn’t provide access to custom file properties, which we use to store the DocuGenerate template ID within each Google Doc’s metadata. Without this API access, our script wouldn’t be able to track which documents have already been synced or determine whether to create new templates or update existing ones.
Configuring Your Credentials
Before implementing the sync functions, you’ll need to configure the system with your specific credentials and settings. Our script uses a configuration object that centralizes all the settings you need to customize:
const CONFIG = {
  DOCUGENERATE_API_KEY: 'YOUR_API_KEY_HERE', // Get from DocuGenerate settings
  DOCUGENERATE_BASE_URL: 'https://api.docugenerate.com/v1', // Change region if needed
  MONITORED_FOLDER_ID: 'YOUR_FOLDER_ID_HERE' // Google Drive folder ID to monitor
};
-
DOCUGENERATE_API_KEY: You can find your API Key in your Developers settings page. This key authenticates all requests to the DocuGenerate API and ensures that generated templates are properly associated with your account.
-
DOCUGENERATE_BASE_URL: The default URL points to DocuGenerate’s primary processing region. If you’re using a regional endpoint for faster processing in your geographic area, update this URL accordingly.
-
MONITORED_FOLDER_ID: This is the unique identifier for the Google Drive folder you want to monitor. You can extract the folder ID from any Google Drive URL: https://drive.google.com/drive/folders/<FOLDER_ID>
Building the Manual Sync Function
The manual sync function serves as the foundation of our synchronization solution and provides the initial setup mechanism for establishing connections between your Google Docs and DocuGenerate templates. This function processes all documents in your monitored folder regardless of when they were last modified, making it perfect for initial setup or bulk synchronization operations.
/**
 * Manual sync function - syncs all documents in the monitored folder
 * Useful for initial setup or bulk sync
 */
function manualSync() {
  try {
    console.log('Starting manual sync of all documents...');

    const folder = DriveApp.getFolderById(CONFIG.MONITORED_FOLDER_ID);
    console.log(`Processing folder: ${folder.getName()}`);

    const files = folder.getFilesByType(MimeType.GOOGLE_DOCS);

    while (files.hasNext()) {
      const file = files.next();
      console.log(`Processing: ${file.getName()}`);
      syncDocument(file);
    }

    console.log('Manual sync completed!');

  } catch (error) {
    console.error('Error in manual sync:', error);
  }
}
This function demonstrates several key concepts that are used throughout our synchronization script:
Folder Access: The function uses DriveApp.getFolderById() to access the specific folder we want to monitor. This approach ensures that only documents in the designated folder are processed, preventing accidental synchronization of unrelated documents.
File Type Filtering: By using getFilesByType(MimeType.GOOGLE_DOCS), the function automatically filters out any non-Google Docs files in the folder. This ensures that only documents that can be converted to Word format are processed.
Iterator Pattern: Google Apps Script uses iterators for file collections to handle potentially large numbers of files efficiently. The while (files.hasNext()) loop processes each file individually, allowing for detailed logging and error handling on a per-document basis.
Delegation to Core Logic: The actual synchronization work is handled by the syncDocument() function, which we’ll examine next. This separation of concerns makes the code more maintainable and allows the same core logic to be used by both manual and automatic sync operations.
Error Handling: The entire operation is wrapped in a try-catch block to ensure that any errors during processing are properly logged and don’t crash the entire sync operation. This is particularly important for automated scripts that need to run reliably over time.
You should run this function first when setting up your sync automation, as it establishes the initial mappings between your existing Google Docs and their corresponding DocuGenerate templates.
Understanding Document Synchronization
The syncDocument() function contains the core logic that handles the synchronization process for individual documents. This function is responsible for determining whether a document needs to create a new template or update an existing one, managing the conversion process, and maintaining the metadata that tracks the relationship between Google Docs and DocuGenerate templates.
/**
 * Syncs a Google Doc to DocuGenerate
 */
function syncDocument(doc) {
  try {
    const docId = doc.getId();
    const docName = doc.getName();

    console.log(`Syncing document: ${docName} (${docId})`);

    // Check if document already has a template ID
    const docMetadata = Drive.Files.get(docId, {
      fields: 'properties'
    });
    const docProperties = docMetadata.properties || {};
    const existingTemplateId = docProperties['docugenerate_template_id'];

    // Convert Google Doc to Word format
    const wordBlob = convertToWordFormat(docId, docName);

    if (existingTemplateId) {
      console.log(`Updating existing template: ${existingTemplateId}`);
      updateTemplate(existingTemplateId, wordBlob, docName);
    } else {
      console.log('Creating new template');
      const templateId = createTemplate(wordBlob, docName);

      if (templateId) {
        // Store the template ID in document properties
        Drive.Files.update({
          properties: {
            'docugenerate_template_id': templateId
          }
        }, docId);
      }
    }

  } catch (error) {
    console.error('Error syncing document:', error);
  }
}
This function illustrates several sophisticated concepts that make the sync solution robust and intelligent:
Metadata Inspection: The function uses the Google Drive API v3 to examine the document’s custom properties. These properties are invisible to users but provide a powerful way to store metadata that persists with the document. The Drive.Files.get() call specifically requests only the properties field to minimize API usage and improve performance.
Decision Logic: Based on whether the document already has a docugenerate_template_id property, the function decides whether to create a new template or update an existing one. This decision logic prevents duplicate templates and ensures that document modifications result in template updates rather than new template creation.
Format Conversion: Every synchronization operation requires converting the Google Doc to Word format, which is handled by the convertToWordFormat() function. This conversion ensures that DocuGenerate receives the template in a format it can process reliably.
Metadata Persistence: When a new template is successfully created in DocuGenerate, the function stores the returned template ID in the document’s properties using Drive.Files.update(). This creates a permanent link between the Google Doc and its corresponding DocuGenerate template.
Graceful Error Handling: Individual document errors don’t stop the overall sync process. If one document fails to sync, the error is logged, but the system continues processing other documents.
This approach ensures that the sync system behaves intelligently and maintains data integrity across both platforms. The metadata storage mechanism is particularly elegant because it’s completely invisible to users while providing the system with the information needed to make smart decisions about template management.
Converting Documents to Word Format
The document conversion process is a critical component of our sync solution because DocuGenerate expects templates to be in Microsoft Word format (.docx). Google Apps Script provides built-in functionality to export Google Docs in various formats, and we leverage this functionality to create properly formatted Word documents that maintain all the formatting, styles, and merge tags from the original Google Doc.
/**
 * Converts a Google Doc to Word format (.docx)
 */
function convertToWordFormat(docId, docName) {
  try {
    // Export as Word document
    const url = `https://docs.google.com/document/d/${docId}/export?format=docx`;
    const response = UrlFetchApp.fetch(url, {
      headers: {
        'Authorization': 'Bearer ' + ScriptApp.getOAuthToken()
      }
    });

    // Return blob with proper name and content type
    return response.getBlob()
      .setName(`${docName}.docx`)
      .setContentType(MimeType.MICROSOFT_WORD);

  } catch (error) {
    console.error('Error converting to Word format:', error);
    throw error;
  }
}
This function demonstrates several important technical concepts:
Google’s Export API: Google provides a direct export URL for each document that can generate the document in various formats. The format=docx parameter specifically requests Microsoft Word format, which ensures compatibility with DocuGenerate’s template processing system.
OAuth Authentication: The conversion process requires authentication to access private Google Docs. The ScriptApp.getOAuthToken() method provides the necessary OAuth token that grants the script access to the document on behalf of the user who authorized the script.
Blob Management: Google Apps Script represents files as “blobs” - binary large objects that contain the file data along with metadata like filename and content type. The function properly sets both the filename (adding the .docx extension) and the MIME type to ensure the resulting file is recognized as a proper Word document.
Error Propagation: Unlike other functions that catch and log errors locally, this function re-throws errors to the calling function. This design ensures that if document conversion fails, the calling function can handle the error appropriately (such as skipping the document or retrying later).
Filename Handling: The function automatically appends the .docx extension to the document name, ensuring that the resulting file has the correct extension regardless of how the original Google Doc was named.
This conversion process preserves all the important aspects of your Google Doc, including text formatting, tables, images, and most importantly, merge tags that DocuGenerate will use during document generation. The resulting Word document is functionally identical to what you would get if you manually exported the Google Doc through the Google Docs interface.
Creating New Templates in DocuGenerate
When a Google Doc doesn’t have an associated DocuGenerate template (indicated by the absence of a docugenerate_template_id property), the system needs to create a new template in DocuGenerate. This function handles the API communication required to upload the converted Word document and establish it as a new template in your DocuGenerate account.
/**
 * Creates a new template in DocuGenerate
 */
function createTemplate(wordBlob, templateName) {
  try {
    const payload = {
      'file': wordBlob,
      'name': templateName
    };

    const options = {
      method: 'POST',
      headers: {
        'Authorization': CONFIG.DOCUGENERATE_API_KEY
        // Don't set Content-Type - Apps Script will handle it automatically
      },
      payload: payload
    };

    const response = UrlFetchApp.fetch(
      `${CONFIG.DOCUGENERATE_BASE_URL}/template`,
      options
    );

    if (response.getResponseCode() === 201) {
      const responseData = JSON.parse(response.getContentText());
      console.log('Template created successfully:', responseData.id);
      return responseData.id;
    } else {
      console.error('Error creating template:', response.getContentText());
      return null;
    }

  } catch (error) {
    console.error('Error creating template:', error);
    return null;
  }
}
This function showcases several important aspects of API integration and multipart form handling:
Multipart Form Data: Creating a template requires uploading both a file (the Word document) and metadata (the template name). This function constructs a multipart form payload that includes both pieces of information in the format expected by the DocuGenerate API.
Automatic Content-Type Handling: One crucial detail is that we deliberately avoid setting the Content-Type header manually. When you include files in the payload, Google Apps Script needs to add boundary parameters to the multipart/form-data content type. By omitting the Content-Type header, we allow Apps Script to handle this automatically, preventing boundary-related errors.
HTTP Status Code Verification: The DocuGenerate API returns a 201 Created status code when a template is successfully created. The function specifically checks for this status code to distinguish between successful operations and errors, ensuring robust error handling.
Response Parsing: When template creation succeeds, the API returns a JSON response containing the new template’s ID. This ID is crucial because it’s what we’ll store in the Google Doc’s properties to link the document with its corresponding template.
Graceful Error Returns: Rather than throwing exceptions, this function returns null when errors occur. This approach allows the calling function to continue processing other documents even if one template creation fails.
Comprehensive Logging: The function provides detailed logging for both successful operations and errors, making it easy to diagnose issues during development and monitor system performance in production.
The template creation process establishes the fundamental link between your Google Doc and DocuGenerate. Once this link is established through the metadata storage mechanism, all future changes to the Google Doc will result in template updates rather than creating additional templates.
Updating Existing Templates
When a Google Doc already has an associated DocuGenerate template (indicated by the presence of a docugenerate_template_id property), the system updates the existing template rather than creating a new one. This function handles the API communication required to replace the template content while preserving the template ID and any associated settings in DocuGenerate.
/**
 * Updates an existing template in DocuGenerate
 */
function updateTemplate(templateId, wordBlob, templateName) {
  try {
    const payload = {
      'file': wordBlob,
      'name': templateName
    };

    const options = {
      method: 'PUT',
      headers: {
        'Authorization': CONFIG.DOCUGENERATE_API_KEY
        // Don't set Content-Type - Apps Script will handle it automatically
      },
      payload: payload
    };

    const response = UrlFetchApp.fetch(
      `${CONFIG.DOCUGENERATE_BASE_URL}/template/${templateId}`,
      options
    );

    if (response.getResponseCode() === 200) {
      const responseData = JSON.parse(response.getContentText());
      console.log('Template updated successfully:', templateId);
      return true;
    } else {
      console.error('Error updating template:', response.getContentText());
      return false;
    }

  } catch (error) {
    console.error('Error updating template:', error);
    return false;
  }
}
This function shares many similarities with the template creation function but includes some important differences:
HTTP Method: Template updates use the PUT method instead of POST, following RESTful API conventions. The PUT method indicates that we’re replacing the existing resource entirely with new content.
URL Structure: The URL includes the specific template ID that we’re updating (/template/${templateId}), ensuring that the update operation targets the correct template in your DocuGenerate account.
Status Code Expectations: Successful updates return a 200 OK status code rather than 201 Created, reflecting the difference between creating new resources and updating existing ones.
Return Value Semantics: The function returns a boolean indicating success or failure rather than returning a resource ID like the creation function. Since the template ID doesn’t change during updates, there’s no need to return it.
Content Replacement: The update operation completely replaces the template content with the new version from the Google Doc. This ensures that all changes, including text modifications, formatting updates, and merge tag adjustments, are reflected in the DocuGenerate template.
Preservation of Settings: While the template content is replaced, other DocuGenerate settings associated with the template remain unchanged. This provides the best of both worlds: current content with preserved configuration.
The update mechanism is crucial for maintaining synchronization over time. As your team collaborates on Google Docs and makes changes to templates, this function ensures that your DocuGenerate templates automatically stay current without any manual intervention.
Implementing Automatic Synchronization
While manual synchronization is useful for initial setup and bulk operations, the real power of our solution comes from automatic synchronization that runs continuously in the background. This automation ensures that your DocuGenerate templates stay current as your team makes changes to Google Docs, without requiring any manual intervention.
Setting Up Time-Based Triggers
Google Apps Script provides a powerful trigger mechanism that can execute functions on a schedule. Our automatic sync solution uses time-based triggers to periodically check for document changes and process them automatically.
/**
 * Sets up automatic sync with time-based triggers
 * Run this function once to initialize the sync
 */
function setupAutoSync() {
  try {
    // Delete existing triggers to avoid duplicates
    const triggers = ScriptApp.getProjectTriggers();
    triggers.forEach(trigger => {
      if (trigger.getHandlerFunction() === 'autoSync') {
        ScriptApp.deleteTrigger(trigger);
      }
    });

    // Create time-based trigger that runs every 5 minutes
    ScriptApp.newTrigger('autoSync')
      .timeBased()
      .everyMinutes(5)
      .create();

    console.log('Auto-sync setup completed successfully!');
    console.log('Monitored folder:', CONFIG.MONITORED_FOLDER_ID);

  } catch (error) {
    console.error('Error setting up auto-sync:', error);
  }
}
This setup function demonstrates several important concepts for robust automation:
Duplicate Prevention: Before creating a new trigger, the function removes any existing triggers that would call the same function. This prevents the creation of multiple overlapping triggers if the setup function is run multiple times.
Trigger Configuration: The trigger is configured to run every 5 minutes, which provides a good balance between responsiveness (changes are detected quickly) and efficiency (the system doesn’t waste resources checking for changes too frequently).
Error Handling: Like all our functions, the setup process includes comprehensive error handling to ensure that trigger creation problems are properly logged and don’t crash the automation.
Confirmation Logging: The function provides clear confirmation when the automatic sync is successfully set up, including details about which folder is being monitored.
You only need to run this function once to establish the automatic synchronization. After running it, the autoSync() function will automatically execute every 5 minutes, checking for document changes and processing them as needed.
Efficient Change Detection
The automatic sync function is designed to be highly efficient by only processing documents that have been modified recently. This approach minimizes API usage and processing time while ensuring that changes are detected and synchronized promptly.
/**
 * Automatically checks for modified documents and syncs them
 * This function is called automatically every 5 minutes
 */
function autoSync() {
  try {
    console.log('Running auto-sync check...');

    const folder = DriveApp.getFolderById(CONFIG.MONITORED_FOLDER_ID);
    const files = folder.getFilesByType(MimeType.GOOGLE_DOCS);

    // Check for files modified in the last 5 minutes
    const lastCheck = new Date(Date.now() - 5 * 60 * 1000);
    let modifiedCount = 0;

    while (files.hasNext()) {
      const file = files.next();

      // Check if file was modified recently
      if (file.getLastUpdated() > lastCheck) {
        console.log(`Auto-syncing recently modified document: ${file.getName()}`);
        syncDocument(file);
        modifiedCount++;
      }
    }

    if (modifiedCount === 0) {
      console.log('No recently modified documents found');
    } else {
      console.log(`Synced ${modifiedCount} modified document(s)`);
    }

  } catch (error) {
    console.error('Error in periodic sync:', error);
  }
}
This function showcases several optimization techniques that make automatic synchronization efficient and reliable:
Timestamp-Based Filtering: The function only processes documents that have been modified within the last 5 minutes (matching the trigger frequency). This dramatically reduces the number of documents that need to be checked on each run.
Minimal Processing: By checking modification timestamps before doing any heavy processing (like format conversion or API calls), the function minimizes resource usage when no changes have occurred.
Performance Monitoring: The function tracks and reports how many documents were actually synchronized, providing visibility and helping identify potential issues.
Non-Disruptive Operation: If no documents have been modified, the function completes quickly without performing any unnecessary operations. This ensures that the automatic sync doesn’t impact performance when there’s no work to be done.
Consistent Error Handling: Even automated functions include comprehensive error handling to ensure that temporary issues don’t break the synchronization system permanently.
The 5-minute synchronization interval strikes an optimal balance between responsiveness and efficiency. Changes made to Google Docs will be reflected in DocuGenerate templates within 5 minutes, which is fast enough for most business workflows while being gentle on system resources.
Initial Setup and Manual Sync Testing
Before deploying your synchronization solution for regular use, it’s important to test all components thoroughly to ensure they work correctly with your specific Google Drive folder and DocuGenerate account configuration. Proper testing helps identify any configuration issues and confirms that the sync logic handles various scenarios correctly.
Start by testing the manual sync function, which provides immediate feedback and helps establish the initial connections between your Google Docs and DocuGenerate templates.
Prepare Test Documents
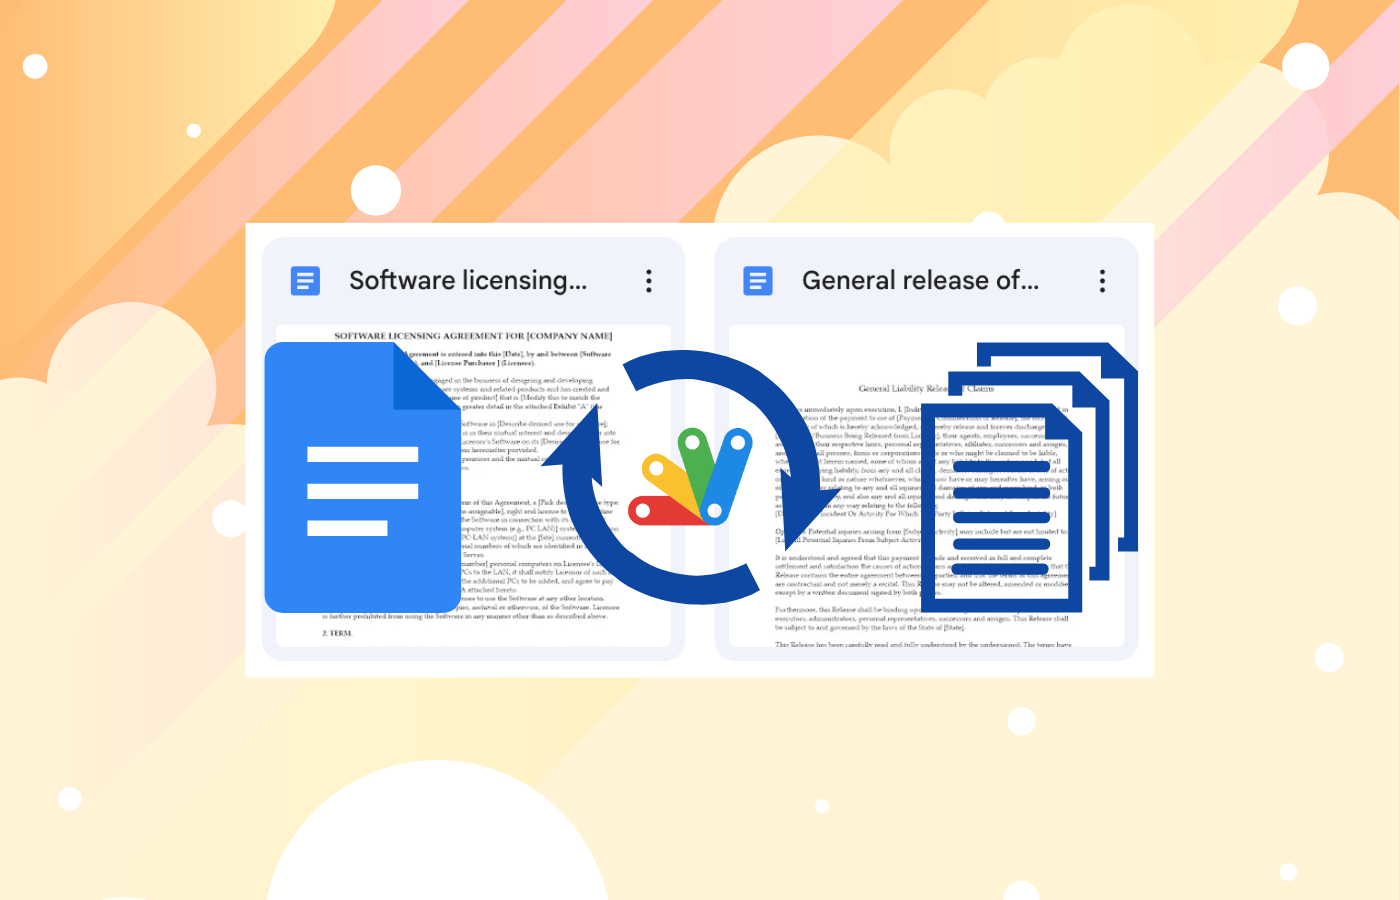
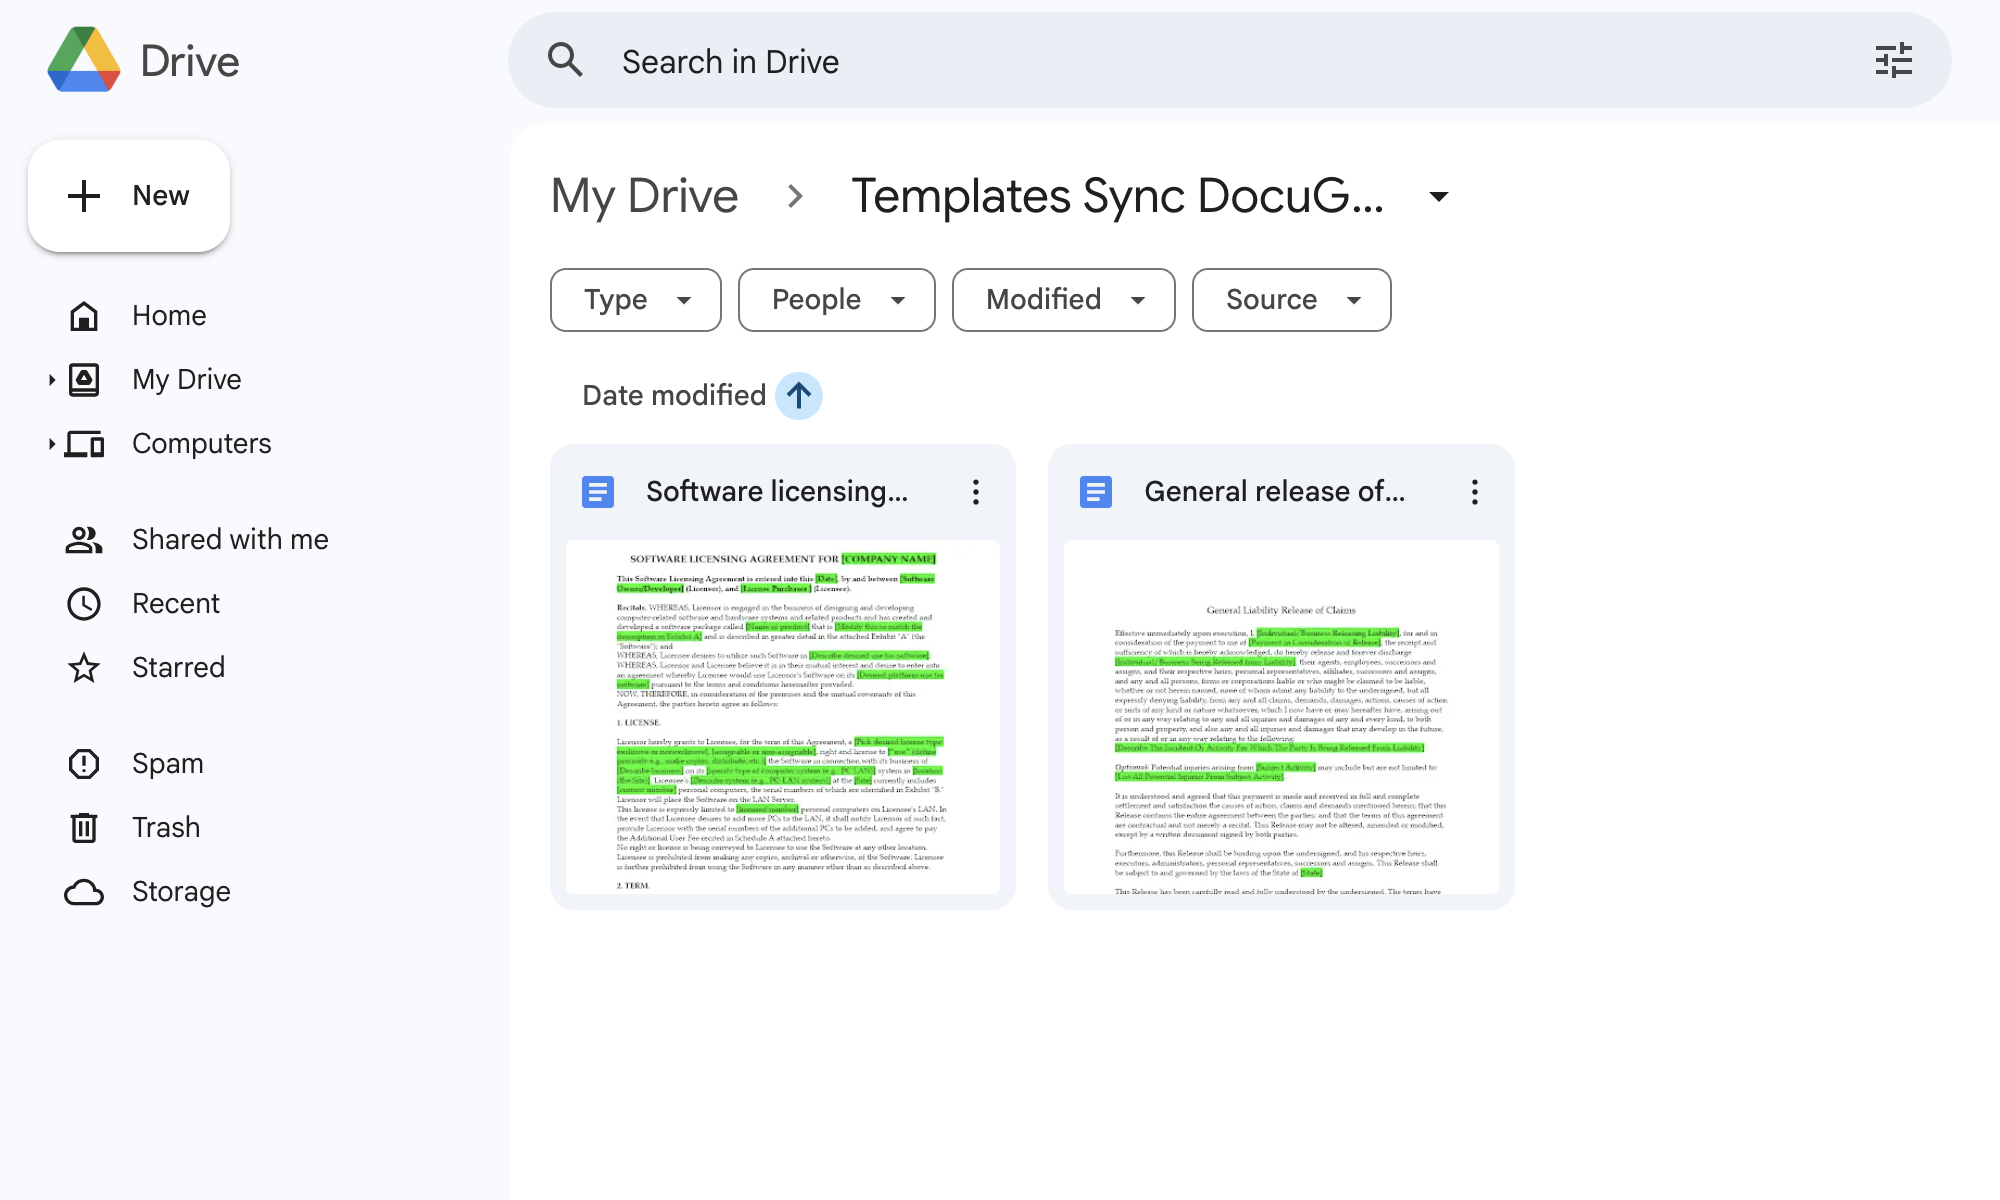
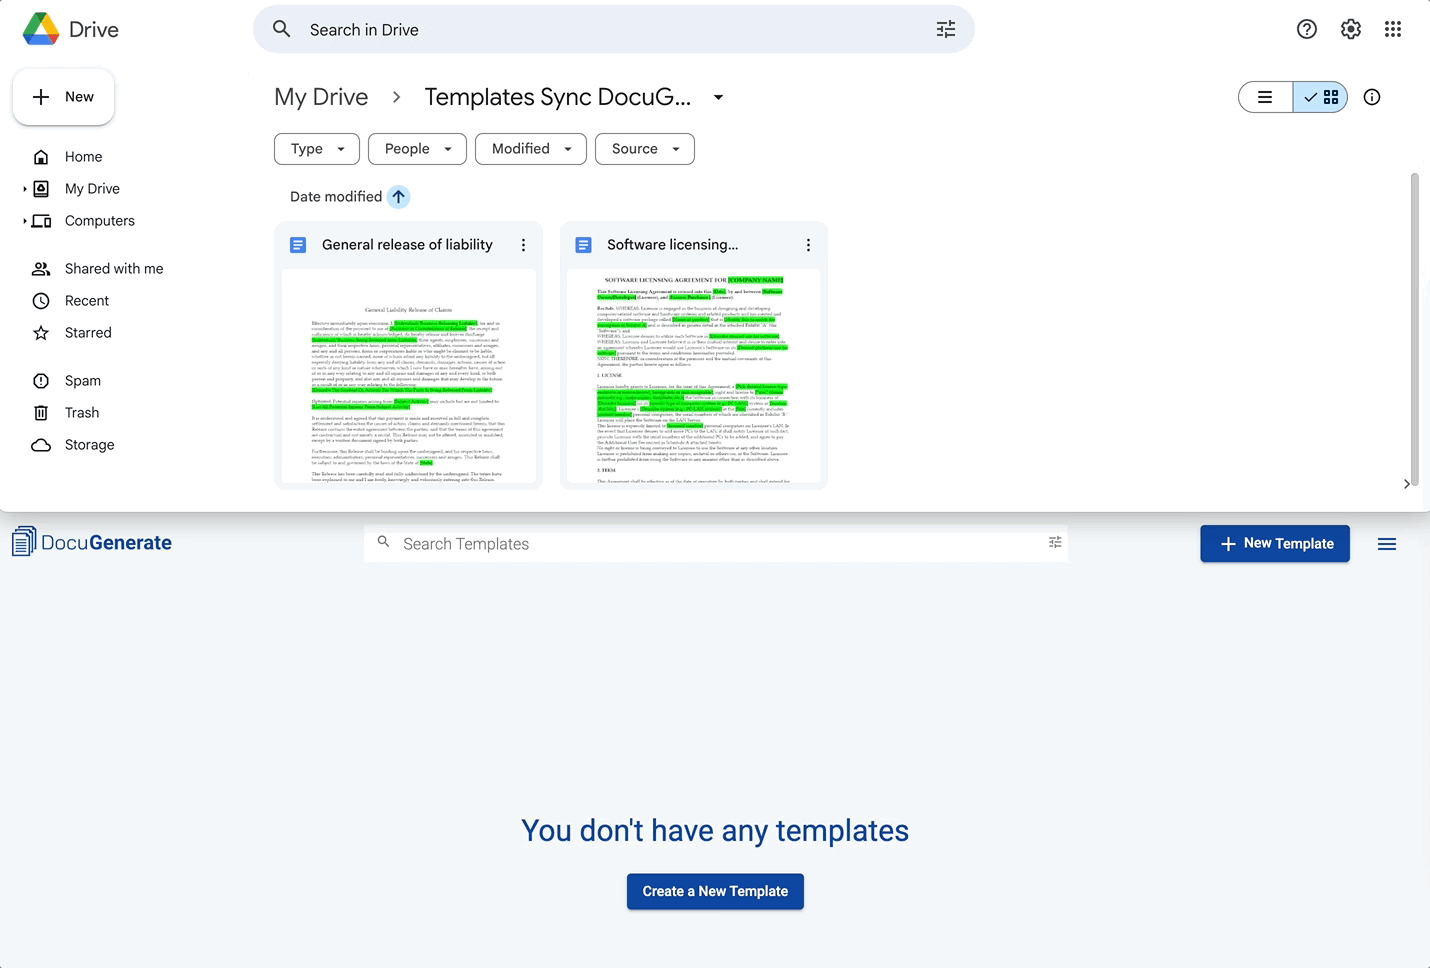
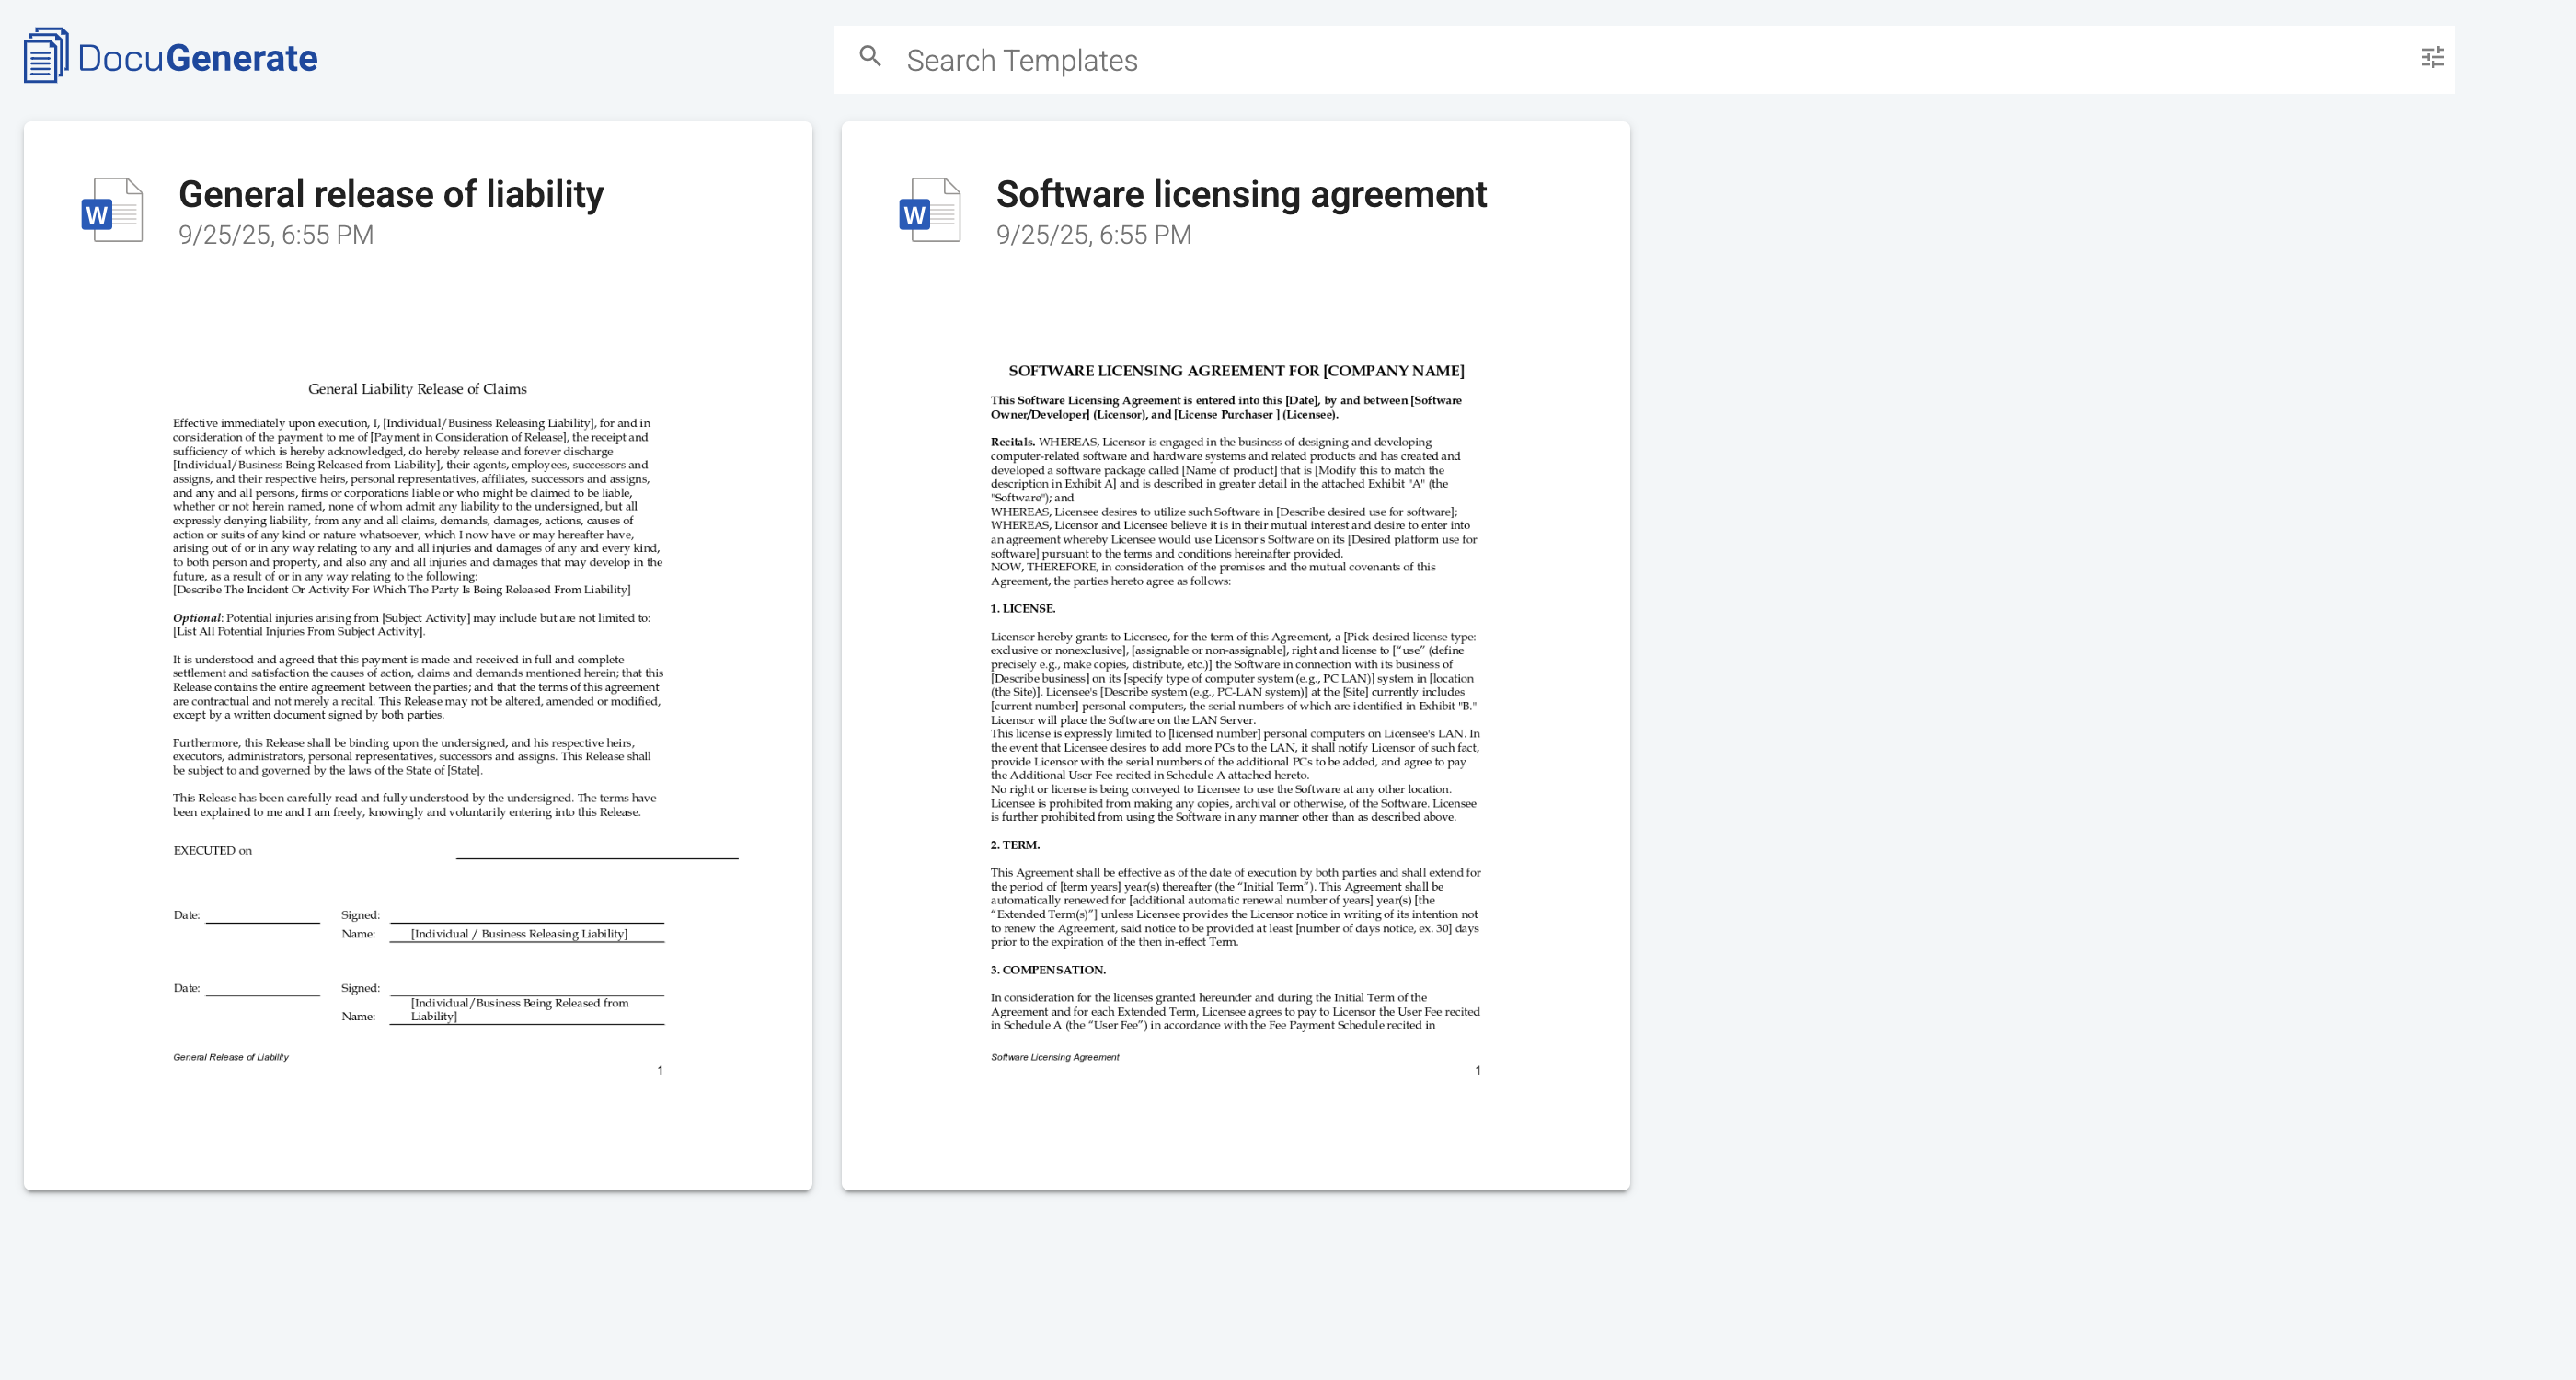
Create a few test Google Docs in your monitored folder with different types of content (simple text, formatted text, tables, images) to ensure the conversion process handles various document types correctly. For the purpose of this tutorial we’ll use the Software licensing agreement and General release of liability templates from Google Docs.
Run Manual Sync
Execute the manualSync() function from the Apps Script editor and monitor the execution log. You should see detailed output showing which documents are being processed and whether templates are being created successfully.
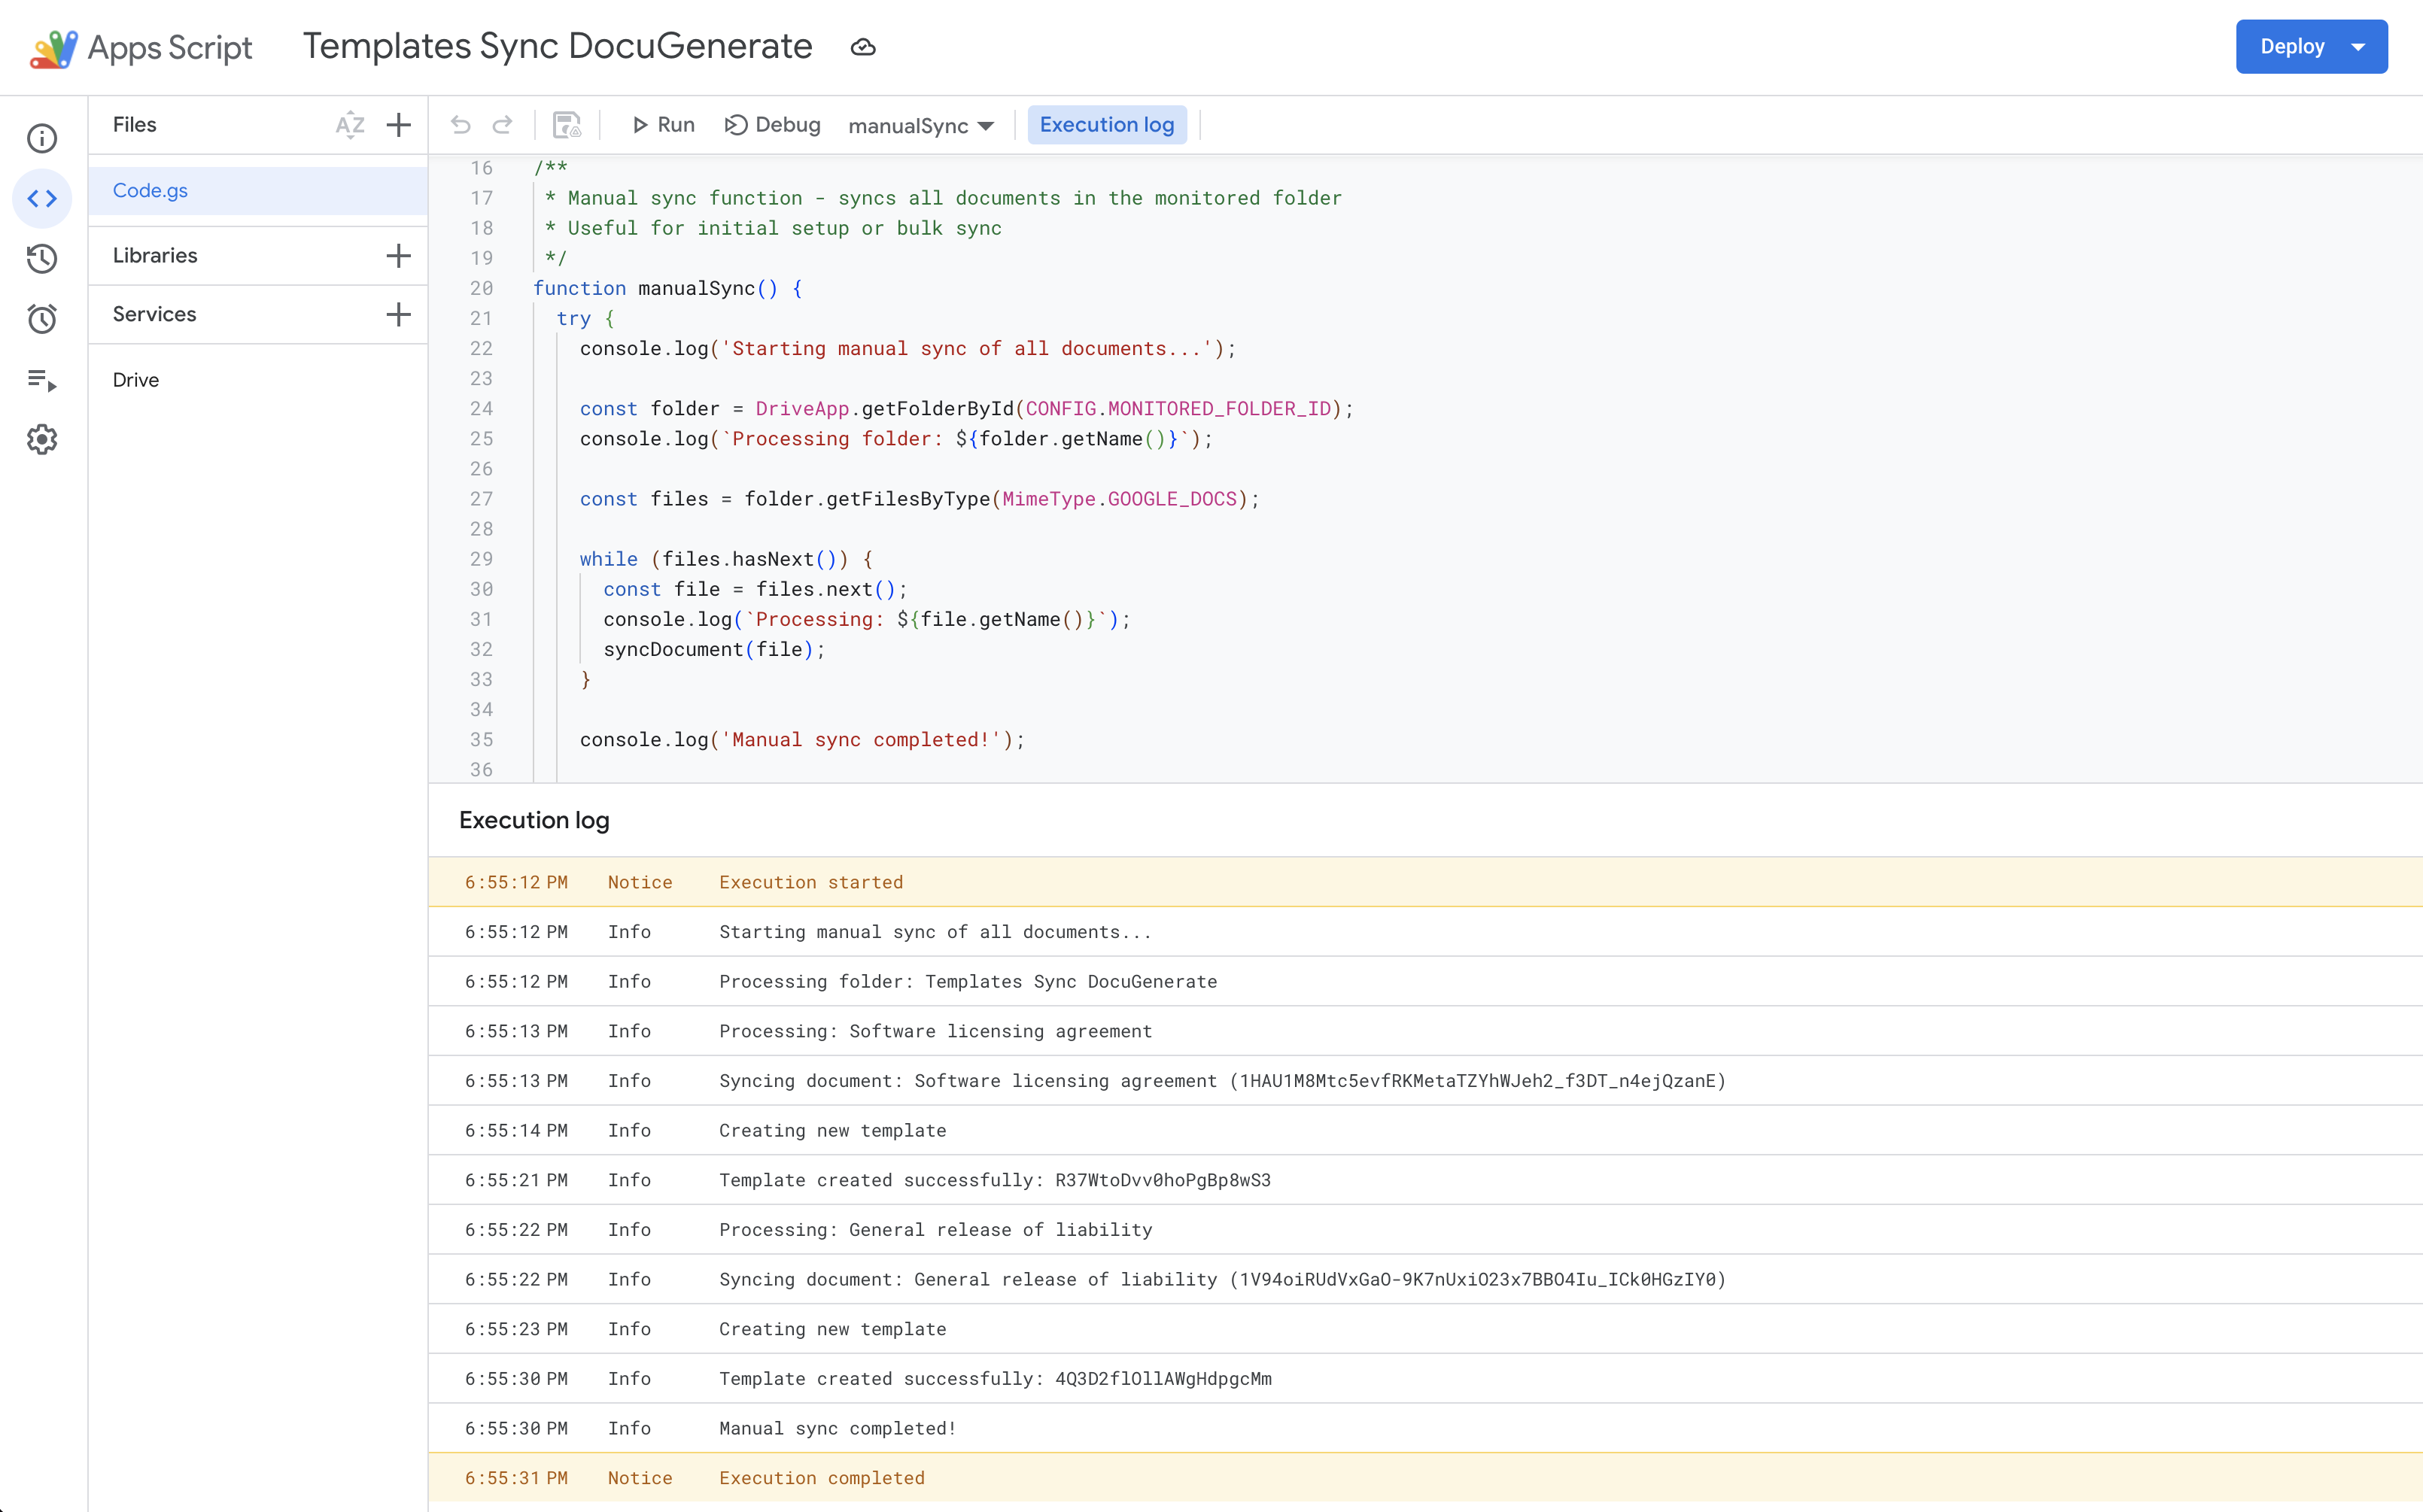
Verify Template Creation
Check your DocuGenerate account to confirm that new templates were created with the correct names and content. The templates should maintain all the formatting from the original Google Docs.
This initial testing confirms that your sync automation is properly configured and can successfully create new templates from your Google Docs. With manual sync working correctly, you’re ready to set up automatic synchronization.
Automatic Sync Testing
Once manual synchronization is working correctly, it’s time to test the automatic sync system that forms the core of your ongoing synchronization workflow. This process is more complex because it relies on time-based triggers and change detection algorithms to identify which documents need updating.
Set Up Triggers
Run the setupAutoSync() function to create the time-based trigger. You should see detailed output logs to make sure the auto-sync setup completed successfully.
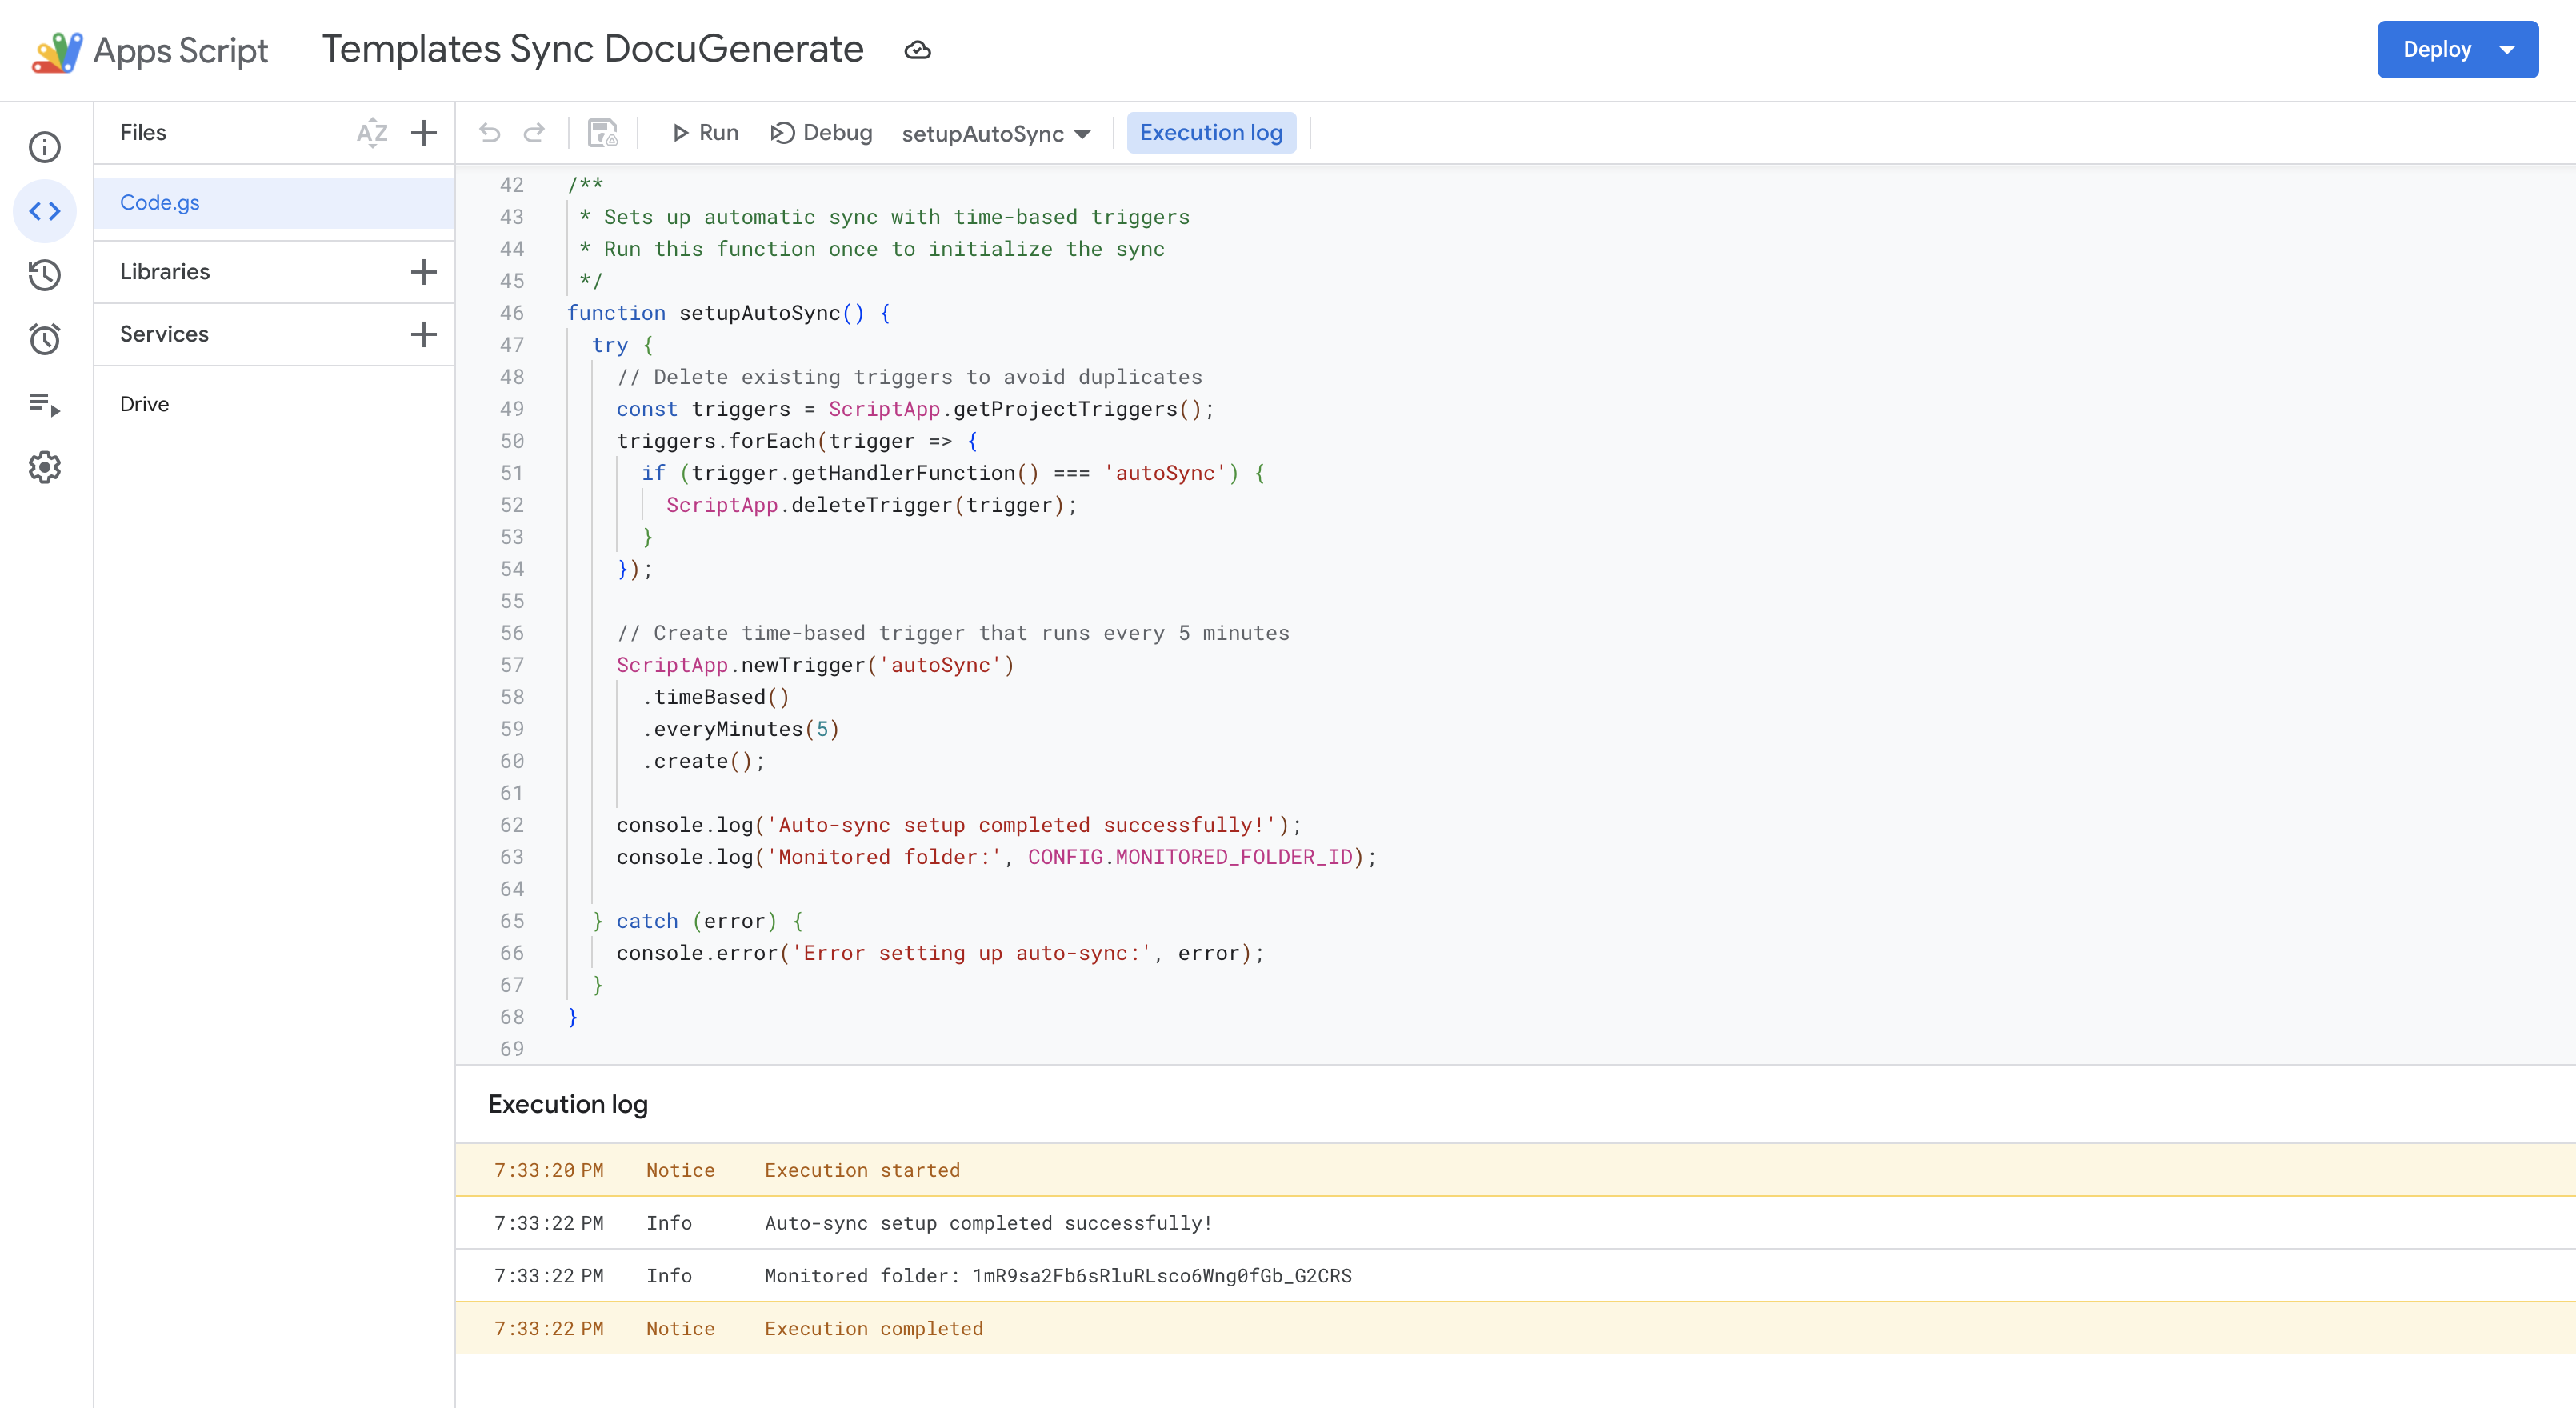
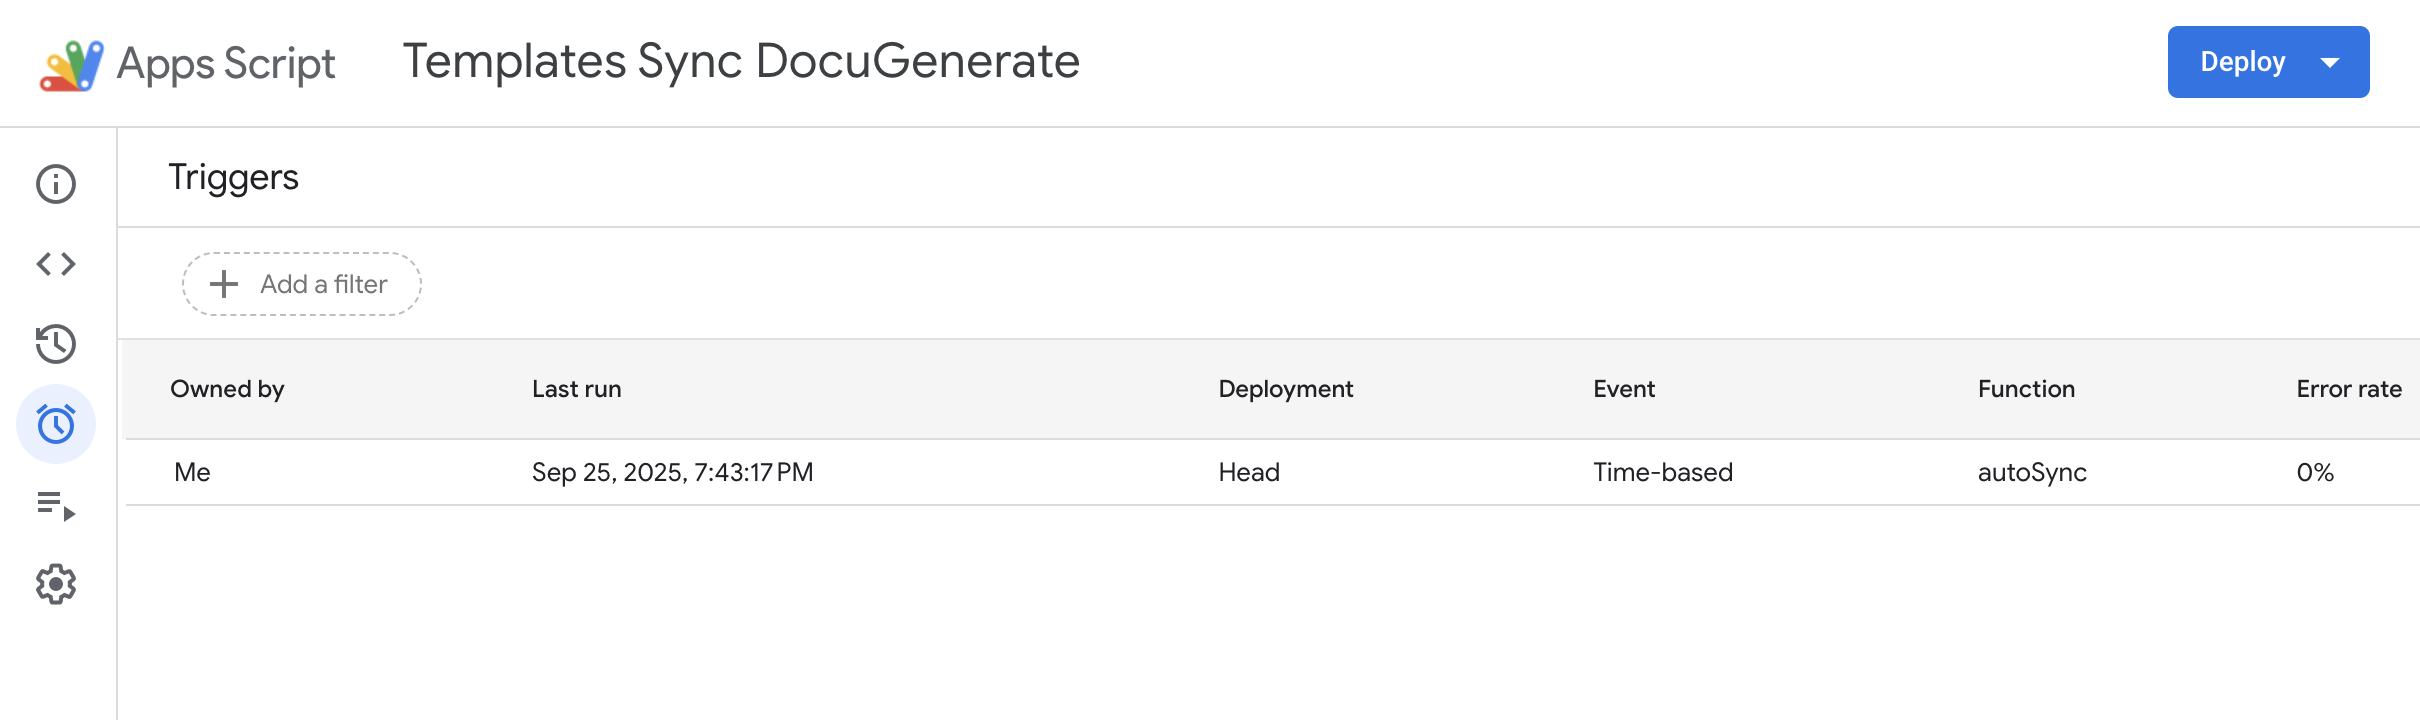
After running the setup function, it’s important to verify that the trigger was created successfully and is configured with the correct parameters. Navigate to the Triggers section in the left sidebar of the Apps Script editor to view all triggers associated with your project. You should see a new time-based trigger that calls the autoSync function every 5 minutes.
Make Test Changes
Modify your test documents and wait for the next automatic sync cycle (up to 5 minutes). The automation should detect the change and update the corresponding DocuGenerate template. In our case we removed the green highlighting of the merge tags to trigger the document update, which represents a typical formatting change that teams might make during collaborative editing sessions.
Verify Updates
Monitor the Apps Script execution logs to confirm that the automatic sync function detected your changes and processed them correctly. The execution logs shown below demonstrate the system identifying recently modified documents and successfully updating the corresponding DocuGenerate templates.

Finally, log into your DocuGenerate account and verify that the changes made to your Google Docs have been properly synchronized to the corresponding templates. Check that formatting changes, text modifications, and any structural updates are accurately reflected in the template content. This verification step completes the testing cycle and confirms that your automatic sync solution is functioning correctly.
With automatic sync testing complete, your synchronization system is now fully operational and will continue monitoring your Google Drive folder for changes every 5 minutes, ensuring your DocuGenerate templates stay current without any manual effort.
Future Enhancements and Customizations
The synchronization workflow we’ve built provides a solid foundation that can be extended with additional features based on your specific needs. These enhancements would transform the basic sync automation into a complete template management solution.
Advanced Monitoring Capabilities
-
Multiple Folder Support: Modify the script to monitor multiple Google Drive folders simultaneously, each potentially syncing to different DocuGenerate accounts or with different processing rules.
-
Selective Synchronization: Implement document filtering based on naming patterns, document properties, or metadata tags to give you fine-grained control over which documents get synchronized.
Integration Enhancements
-
Regional Endpoint Support: Automatically select optimal DocuGenerate regional endpoints based on your geographic location or team distribution.
-
Extended Format Support: Extend the solution to handle Microsoft Word documents stored in Google Drive, providing sync capabilities for teams that work with mixed document formats.
Deletion Handling
-
Document Deletion Sync: Implement logic to handle document deletions in Google Drive by removing corresponding templates from DocuGenerate.
-
Template Cleanup: Create functions to identify and clean up orphaned templates in DocuGenerate that no longer have corresponding Google Docs.
Conclusion
Synchronizing Google Docs with DocuGenerate eliminates the manual friction that often prevents teams from maintaining current templates while leveraging powerful document generation capabilities. The automated system we’ve built bridges the gap between collaborative document editing and professional document generation, allowing your team to work naturally in Google Docs while ensuring that your DocuGenerate templates always reflect the latest changes.
By implementing this solution, your team can continue using Google Docs for collaborative template development while gaining the advanced document generation capabilities that DocuGenerate provides. The automatic synchronization ensures that changes made during collaborative editing sessions are immediately available for document generation workflows, creating a powerful combination of tools that enhances both productivity and document quality.
The modular design of our synchronization solution makes it easy to customize and extend based on your specific requirements. Whether you need to monitor multiple folders, implement custom filtering rules, or integrate with additional systems, the foundation we’ve established provides a robust platform for future enhancements.
Resources